| CATEGORII DOCUMENTE |
| Bulgara | Ceha slovaca | Croata | Engleza | Estona | Finlandeza | Franceza |
| Germana | Italiana | Letona | Lituaniana | Maghiara | Olandeza | Poloneza |
| Sarba | Slovena | Spaniola | Suedeza | Turca | Ucraineana |
![]()

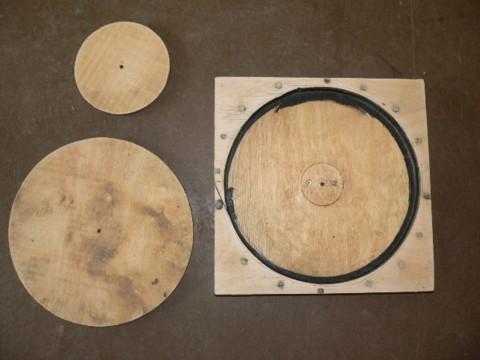
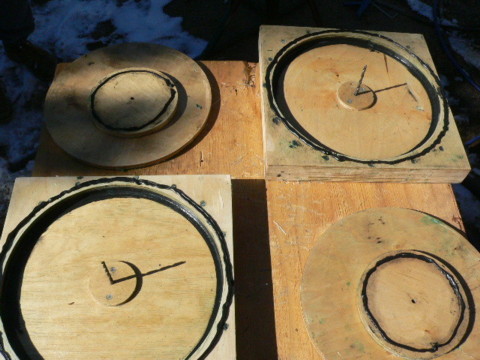
The Mold
The alternator requires two rotors to be built. The first step is to build a wooden mold. Each rotor will be made from 12' diameter steel disks each with 12 magnets on it. Once we've built the rotors we'll cast polyester resin around them to keep the magnets in place and prevent corrosion. In order to make a neat casting we need to build a mold out of plywood. Like many other things in these plans, there are alternative ways of doing things. Here we'll detail exactly what we've done. Some of the pictures show two molds in use, but you only need one. See the picture above for dimensions of all the parts Materials list- 3/4' thick plywood, 2 squares 14' x 14' - 1/2' thick plywood disk, 6.5' diameter - 1/4' plywood, 1 disk 2.75' diameter - about 20 1' long wood screws
The mold is 14' square. The hole in the center is 12.5' in diameter and 3/4' deep. In the center is an island 2.75' diameter and 1/4' thick. The lid is the scrap which we cut from the center of the mold (a 12.5' diameter disk). The center of every part has a 1/4' hole drilled through the center that we use to align everything during assembly. All the disks are easy to cut out with a bandsaw, or a jig saw. With some patience a coping saw would do fine as well. All the disks and the inside of the top that we cut out should be sanded smooth, and preferably slightly tapered so that the top of hte hole is slightly larger diameter than the bottom. Once all the parts are cut out, screw the 3 square pieces together so that the one with the 12.5' diameter hole is on top. The screw the small 2.75' dia disk down in the center - using the 1/4' drill bit as a pin to center it perfectly. Caulk all the seams inside the mold so that resin can't run into cracks. This, the sanded surfaces, and the tapered hole in the mold will make the molded pieces easy to remove. The magnet template
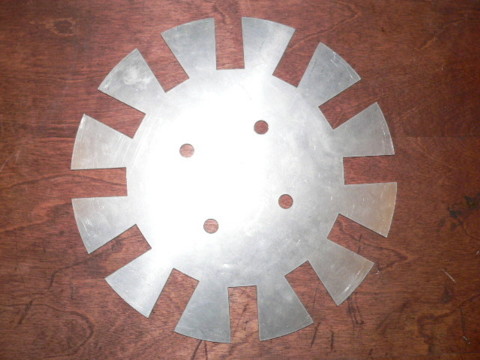
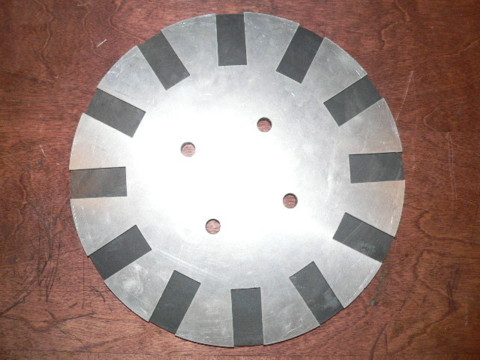
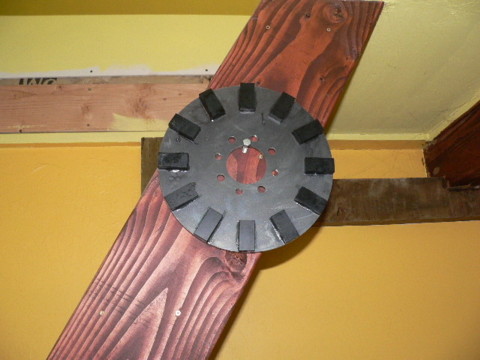
The next tool you need to make is a template for placing the magnets. The one pictured was made at a local machine shop with a CNC water jet cutter out of 1/8' thick aluminum and the cost was quite reasonable (about $25 USD). But you can just as well build it from thin plywood or plastic. It's a 12' diameter disk, with 4 1/2' holes on a 4' diameter (just like our magnet rotors) and 12 equally spaced cutouts the size of our magnets (1' x 2' x 1/2' in this case). In the appendix you'll find a page with the layout of half a disk you can copy, glue down - and use as a paper template to build your wooden template! Building the magnet rotors
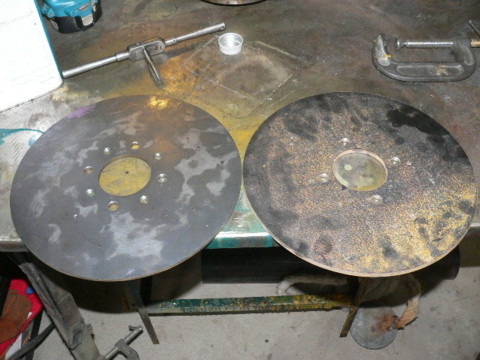
Materials- 12' diameter mild steel disk, 1/4' thick, qty 2 - 1' x 2' x 1/2' N35 grade NdFeB magnets, qty 24 - cyanocrylate glue with accelerator - fiberglass cloth or mat, 2 square feet - 1/2 gallon polyester resin Start with two steel disks, 12' diameter. Each disk should have 4 1/2' holes on a 4' diameter circle(a touch larger to provide some clearance is nice) and a 2.75' hole in the center. You can build a rotating table and do a pretty neat job cutting these out with an oxy-acetaline cutting torch, but we usually have ours cut out by a fabrication shop. A CNC laser cutter, plasma cutter, or water jet cutter will do a very nice job. If you have it done, you might have them cut all the holes for you - it saves a lot of time and assures that things are accurate. Otherwise, if you decide to machine your own rotors, the first step is to cut a 2.75' hole in the center of both rotors. Use a high quality bi-metal hole saw and a drill press for this. The drill press needs to be run very slowly and you need to use lots of oil. Easiest is to clamp both rotors together and cut both at the same time. Save the scraps from the center, we can use one of those later. Next, keeping both disks clamped together, drill out the 4 .5' diameter holes equally spaced around a 4' diameter circle. The easiest way to do this is to put the wheel hub on the rotors and clamp it there, and drill right through the holes on the wheel hub. This saves a lot of layout and assures accuracy. One of the disks needs 4 more holes 7/16' dia (also spaced around the same 4' diameter and located between the .5' diameter holes we just finished) which we'll tap 1/2' - 13 for jacking screws to aid in the assembly/disassembly of the alternator. Again - we usually have this done at a fabrication shop - when they cutout the disks for us it's easy for them to use the same CNC machine to make all the holes.
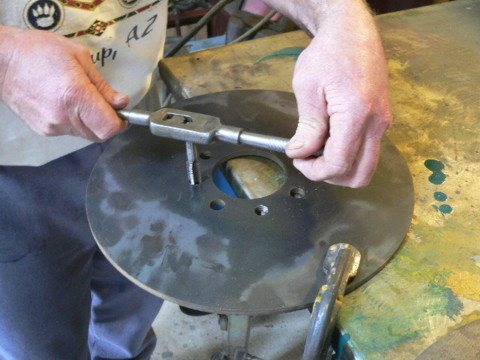
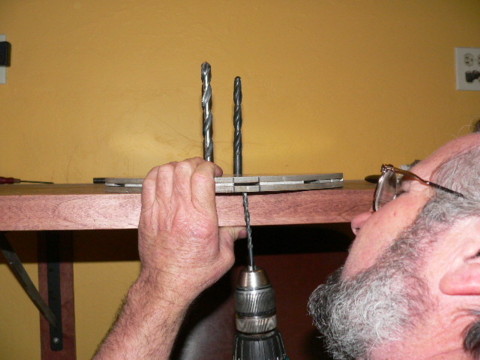
Pictured above we're tapping the 4 smaller holes 1/2' - 13. It's important to use lots of oil (or tapping fluid) when running the tap in. Try to keep the tap as straight as possible. Once it starts to cut threads, turn it just till things start getting tight, then back up a bit and 'break the chip'. Continue this untill the tap goes all the way in and spins freely. Never force the tap in if things get too tight - always back it up, break the chip and then go foward again.
Use a countersink to chamfer the edges of the 1/2' diameter holes. This makes things assemble more easily and helps protect the threads on the studs that hold the alternator together. Once this is done, all the 'metal work' is finished for our rotors. Both rotors are oily (finger prints and oil from drilling and tapping) so we need to clean the carefully with some kind of solvent. We usually use laquer thinner. After that - try to keep grease off them, handle them with clean hands. You're about to start putting magnets on them, so this is a good time to clean the work area. Metal chips from the drill press and grinder shoudl be cleaned up, or you should move the work to a new cleaner environment.
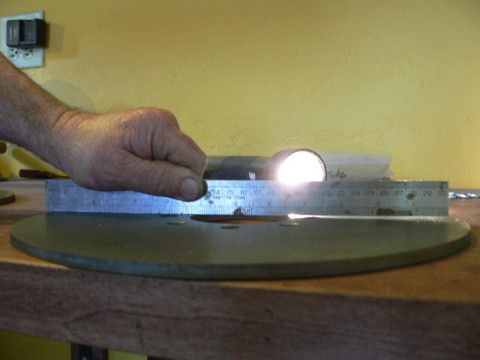
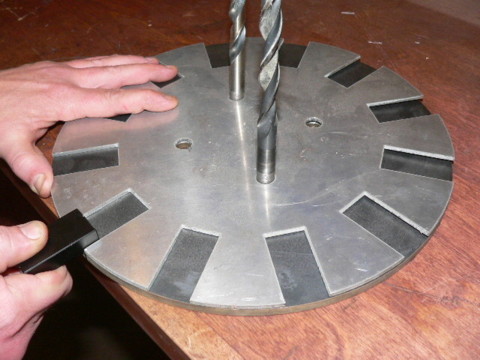
The steel disks don't always come out perfectly flat. I expect some sheets of steel get bent in handling by forklifts and such and when the disks get cutout sometimes we find them slightly warped. Check for this with a straight edge. Flatening them can be done but it's tricky. We usually locate the dimension in which it's warped and we put our magnets on the most convex surface. (the surface facing up towards the straight edge in the picture is the surface we'd put the magnets on)
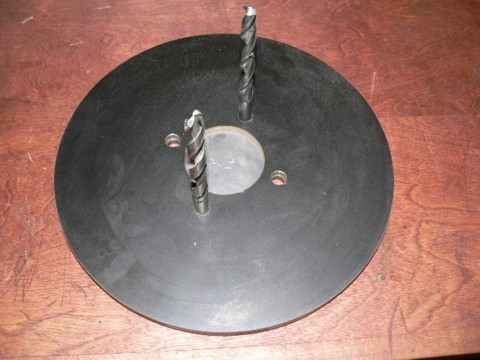
Put the magnet template down on one of the steel disks and line the holes up.
Place the other steel disk down on top of that, with the holes line up and pin the sandwich together with two 1/2' drill bits (or wooden dowels or bolts or whatever).
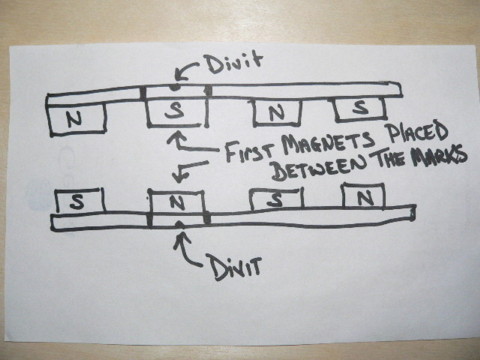
Looking from the side you can see the 'gaps' in the template where the magnets will fit. Pick one gap and use a permanant marker to mark both sides of the gap. This is where we'll place the first magnet on each disk.
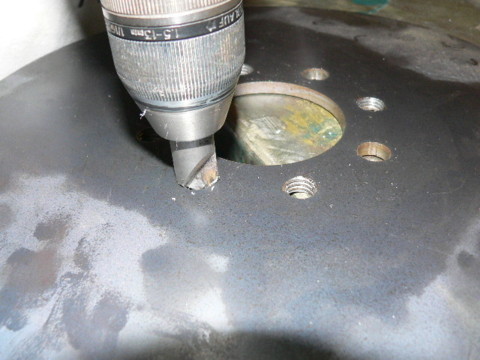
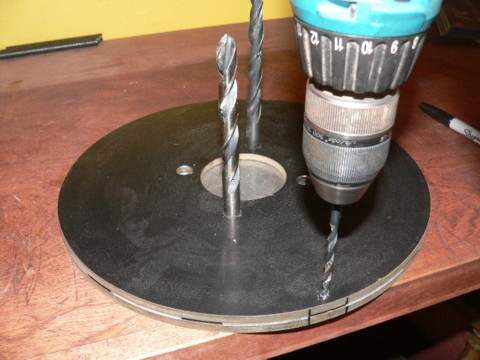
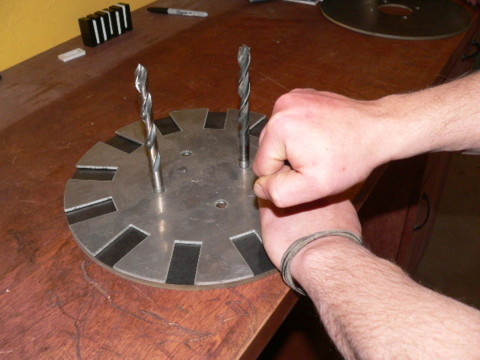
(drilling into the top magnet rotor)
(drilling into the bottom magnet rotor) Use a small drill bit (3/16' is a nice size) and drill a divit (a dent - not a hole, don't drill through) into both disks between the marks we made. These will be on the outsides of the magnet rotors and will serve as 'indexing marks' so that when we assemble the machine we'll know how to line up the two rotors. Alignment of the rotors is critical in the operation of this alternator, they must always go together the same way with alternating magnetic poles facing one another. Once we've done all this we can take the top rotor back off the stack and put it aside in a safe place (away from the bottom rotor because were about to play with magnets).
For this alternator we require qty 24 Grade 35 NdFeB magnets 1' x 2' x 1/2' thick. These are available from many vendors, they usually come either epoxy coated or Nickel plated, either way is fine. These are very powerful magnets and need to be treated with extreme focus and caution! Two coming together on your finger could hurt very badly and leave blisters easily. Once we assemble these on the rotors we have some very powerful/dangerous magnetic assemblies. Two finished magnet rotors coming together on your fingers could easily break them! Build one magnet rotor at a time. When it's finished- put it in a safe place. When building these be sure that all ferrous (anything containing iron which includes steel tools, wrenches, knives scissors etc) are away from the work area. Only handle one magnet at a time and always grip them firmly. If a magent flys onto a piece of steel or into another magnet at high velocity, it may break and send shards flying! Handle one at a time, handle them with a firm grip. Store them in a safe place away from kids and folks who don't realize what they might be getting into. Keep them away from electronics/video tapes and other forms of magnetic storage medium. These magnets are perfectly safe when handled properly, but most folks are not familiar with the dangers and there can be surprises.
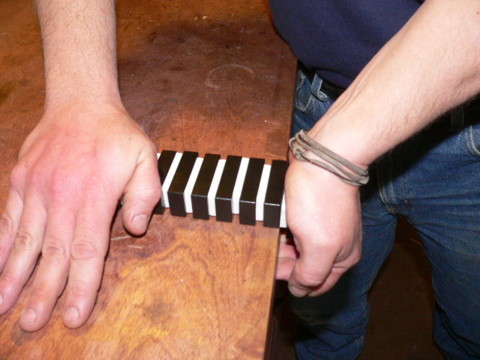
The magnets are so strong they can be tricky to seperate off the stack. The best way is to place the stack on a wooden workbench and hold the stack firmly. Then grasp one magnet firmly with the other hand and slide it off. (you'll not be able to just pull them apart, you have to 'shear' them apart)
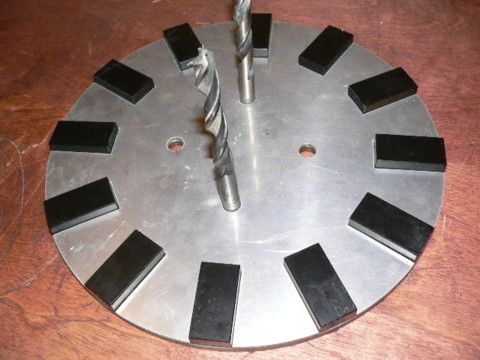
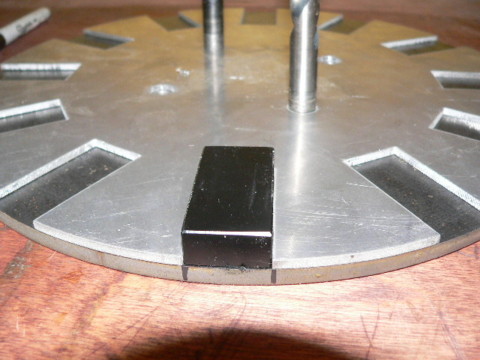
Now we can place the first magnet on the bottom magnet rotor. The template is pinned to it and made of wood or Aluminum so it won't move. But the magnet is strongly attracted to the steel disk so we need to hold that down with one hand. While firmly gripping the magnet in the other hand, bring it towards the edge of the rotor and 'slide' it into the slot. (don't just try to put it down on - it will pull out of your hand and hit the rotor hard - possibly breaking the magnet!)
The magnets need to be spaced around the disk with alternating poles facing up. All magnets have two poles, a North and a South. Opposite poles (North and South) attract one another, like poles repel. It doesn't matter how we put the first magnet down so long as things alternate from there. The safe way to place the rest of the magnets is as follows: Hold the magnet rotor down firmly to the work bench with one hand which should be placed over the magnet that's next to the one you're about to place. Then, holding the next magnet firmly, bring it over your hand which is holding down the rotor. If the bottom of the magnet in your hand is repelling the one on the rotor, then slide it into the slot carefully in it's current position. (Because we know that if the bottom of the one in your hand is repelling the top of the one on the rotor then we have like poles facing each other, so the one in your hand has the opposite pole facing up as the one on the magnet rotor)
Once all the magnets are placed on the first rotor you can remove the pins and pry the template off. Do this carefully so the magnets don't slide around.
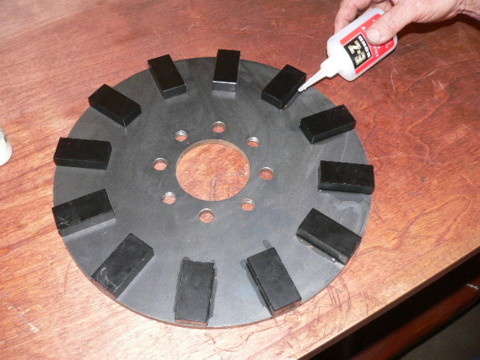
Run a bead of thin viscosity cyanocrylate glue (Super Glue) down both sides of each magnet. Large bottles (2oz usually) are available at most hobby stores. It's also handy to have 'accelerator' which will force the glue to harden immediately. The accelerator usually comes in a small spray bottle. We don't rely on this glue to hold the magnets down forever, it's a temporary means to keep things in place till we finish the casting. If cyanocrylate glue is not available then other glues should also work fine. Epoxy would probably be fine it just takes longer to dry.
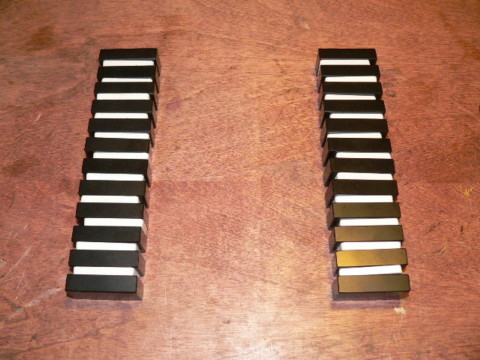
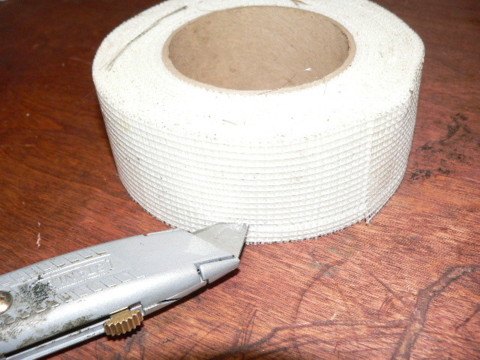
I expect you could skip this part all together, but I believe it offers some insurance that our magnets will never fly out. Also - if the resin cracks this will keep things together for us. Take a roll of fiberglass drywall tape (this stuff is sticky on one side) and cut the roll with a razor knife so that you can peel off a strip of the tape about 1/2' wide.
Wrap the tape around the magnets several times. Be sure that none of the tape sticks up above the top of the magnets.
Now that the first magnet rotor is finished, drive a nail somewhere in a wall in a high/safe place and hang it there. It's a somewhat dangerous thing and should be kept in a safe place.
Now to begin the second magnet rotor. Put the template on it so that the 4 holes line up and one of the slots lines up with the marks we made earlier. This assures us that the magnets we place will be facing each other when the rotors are assembled. The top of the first magnet on this rotor must be the opposite pole as the top of the first magnet we placed on the first rotor. In other words, the two surfaces facing one another must attract one another. Once you get the first magnet down, follow the same proceedure as you did with the first magnet rotor.
Check your work!You can easily double check your work now. Find a small magnet and hold it in your hand (dont turn it over - hold it in the same position always for the testing). Each magnet rotor has one magnet (the 1st one we placed) between the marks we made. The test magnet should attract this magnet on one magnet rotor, and repel it on the other. Then we can go around each magnet rotor and the test magnet should attract one magnet, repel the next one, attract the next one etc. If you made a mistake, you need to knock loose the offending magnets, put the template back on and get them right. Once all the magnets are placed and the tape is wrapped around them it's a good idea to clean the magnets and the rotors one more time with laquer thinner to make sure there's no grease. This will help the resin stick to the magnets.
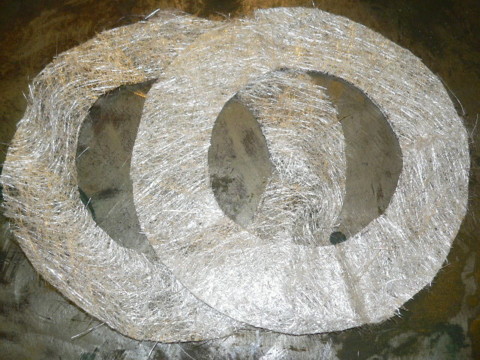
Cut out two rings from fiberglass mat, or fabric. They should be 12' in diameter, with a 6.5' diameter hole in the center.
Grease the mold everywhere (Except on the bottom - that's not necessary). A good mold release is car wax, or Johnsons wood wax. We've also used shortening from the kitchen and axel grease (axel grease is kind of gross and messy but it works). Grease it really well especially the first time you use the mold. The first coat tends to soak into the wood but after several applications it gets better. The point here is to make the mold greasy so the resin won't stick to it. Once all the parts are greased well then run a bead of caulk around the outside of the 12.5' hole in the mold. Also run a thin bead around the outside of the 1/2' thick 6.5' diameter disk. If it's not still there, stick the 1/4' drill bit in the center hole, we'll need this for alignment.
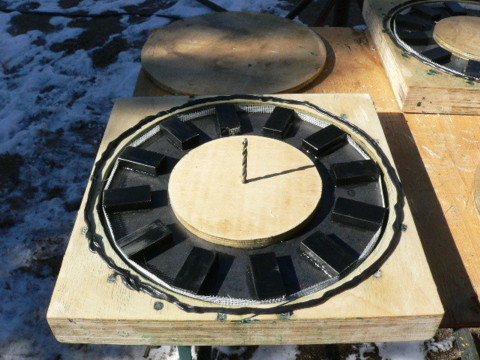
Drop one of the magnet rotors into the mold carefully. It fit nicely on the smaller 2.75' disk in the center of the mold so that the magnet rotor is a good fit and about pefectly centered.
Put the 6.5' diameter disk down. The drill bit will serve to center it on the disk. The side that we've run caulk around should face down and we need to press it down onto the magnet rotor. The caulk will assure that no resin can run under it.
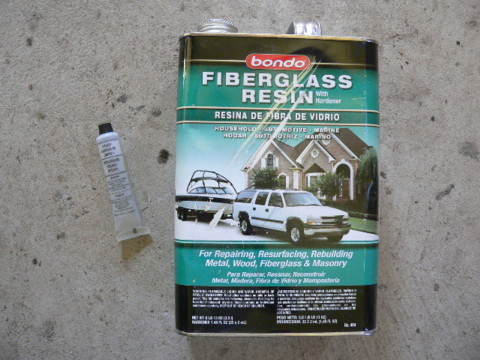
We use polyester resin to cast the rotors. We get this stuff from almost any autoparts store. It's best to buy it by the gallon (it takes about exactly one gallon to build this whole machine). It comes with hardener in small plastic tubes.
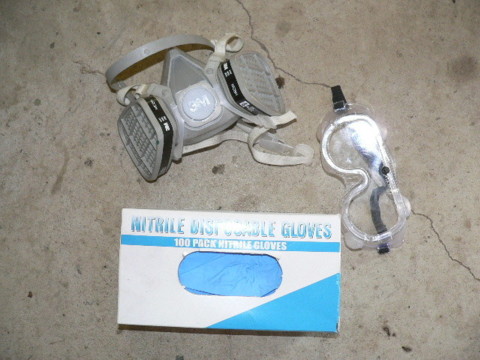
It's nasty stuff. It smells bad, the fumes are toxic. Best to work outside or in a very well ventelated area. Use safety glasses (the hardener is especially dangerous if you get it in your eyes), rubber gloves, and a respirator.
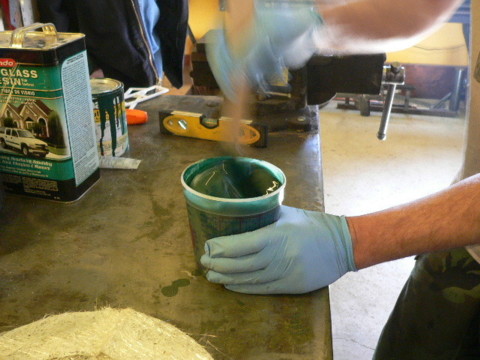
It takes almost exactly 1 quart of resin to make 1 magnet rotor. (maybe a touch less) Usually a gallon of the resin comes with two tubes of hardener, each containing .77oz (22ml). When casting this stuff the resin tends to warm up and get hard much faster than it would in normal applications - especially if its warm outside and if the resin is warm to start with. We usually use about half the hardener that the instructions call for. This lets it harden more slowly - I believe it helps it to be stronger, shrink less and make things less likely to crack. There have been times when we've used half the tube for 1 quart (what the instructions call for) on warm days and the resin has become hard in 15 min or less! (it was hard before we could even pour it!) If it goes off too fast, there is also the risk of it catching fire. So be careful If you like, there are powders available to color the resin, or you can just use a little bit of acrylic enamel to give the resin a color. If you use enamel, I would use about 1 part paint to 50 parts resin.
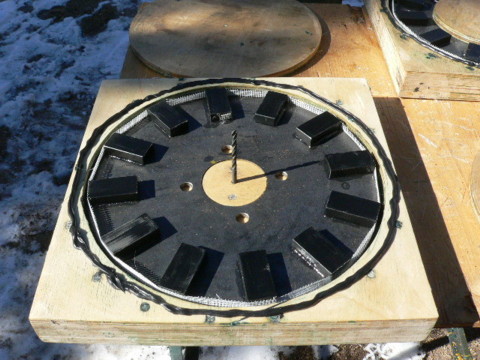
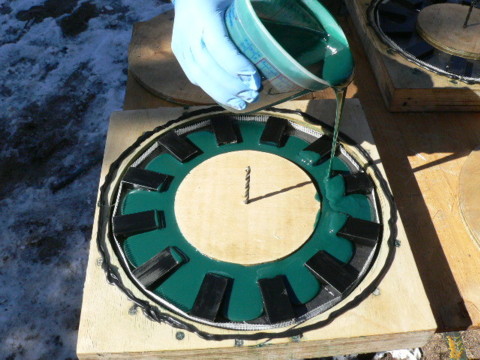
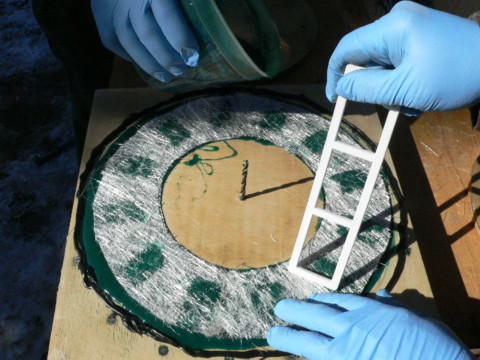
Pour resin into the mold and over the tops of all the magnets. The mold needs to be level and it should be completely filled with resin.
Place the fiberglass ring over the top and work it in with a stick so it becomes saturated with resin. Work the air bubbles out as best you can.
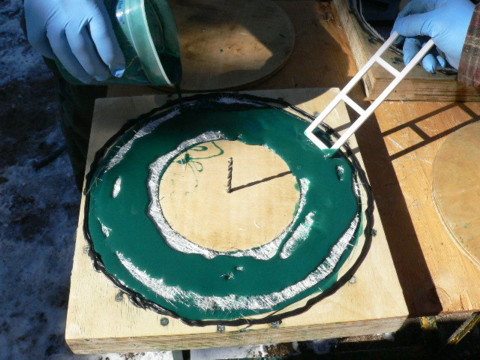
Pour a bit more resin over the top and work that in. At this point it doesnt hurt to beat on the mold or vibrate it (with a vibrating sander or something) to work air bubbles out. Air bubbles won't really hurt it, but they don't look nice. We always get a few.
The lid also has a 1/4' hole in the center. Place it down over the drill bit and on top of the magnet rotor. You can clamp it down with magnets, or bits of steel (wrenches etc because they'll all stick to the magnets. C clamps are fine too but more work than necessary. Keep an eye on the resin that spills out of the mold. When it starts setting up clean the outside of the mold. Don't take the lid off though untill you feel the resin is good and hard. In practice, depending on the tempurature and the amount of hardener we used I find this takes anywhere from 1/2 hour (which is scary fast - I expect cracks and shrinkage when it goes that fast) to 24 hours. It seems the slower the better with regard to shrinkage and cracking.
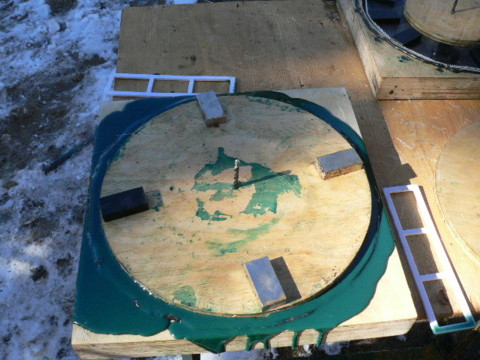
Once the resin is completely setup we can remove the lid from the mold. Usually (if we made the mold well and greased it well) the rotor will just fall out of the mold when we turn it over. If it doesn't, tap it on the back with a hammer and it should. Sometimes things get tricky and we have to pry it out, or even take the mold apart but this shouldn't happen if we did everything correctly. The wooden disk on the inside of the rotor should knock out easily with a hammer through the hole on the back side of the magnet rotor. The edges of the rotor will be rough. We can cut the excess resin off with side cutters - or remove it with a sander. A belt sander works real well, but be sure to wear a dust mask. Clean up all the burrs so that nothing sticks up beyond the surface of the magnets.
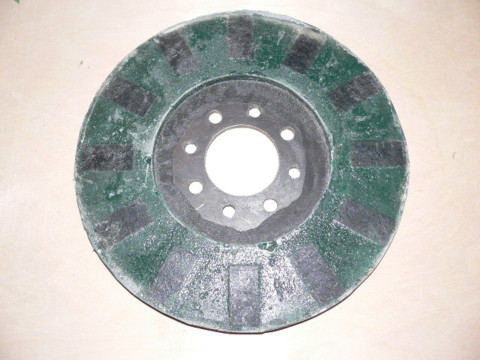
There we have a finished magnet rotor! Once one is finished - then repeat the process with the second one in the same mold. We actually use two molds (molds are easy to make) so that we can get all this done in one shot but if you're not in a rush one at a time works fine.
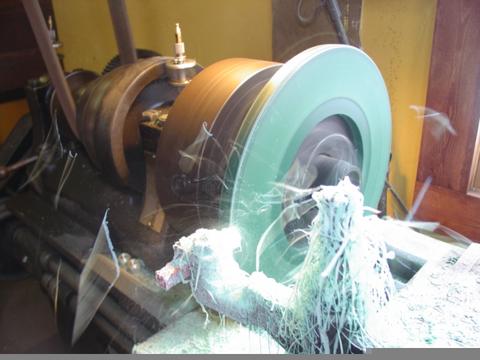
It's only for cosmetic reasons and not important at all but if you have a lathe available that's large enough it's fun to clean up all the edges that way. If you do, be careful and remember how feircely these rotors are attracted to steel. When cleaning up edges or deburring on the lathe, *DO NOT* use a steel file. Use sandpaper. A small flat sanding block is a handy tool on the lathe. A file, or any other steel tools that are not 'part' of the lathe should be kept away because of the magnets. I've seen magnets yank steel tools out of peoples hands on the lathe, it can be very dangerous. Again, this step is not needed - one does not require a lathe to build this wind turbine, it just makes things look nice. to return to the front page of this project. |
|
Politica de confidentialitate | Termeni si conditii de utilizare |

Vizualizari: 1670
Importanta: ![]()
Termeni si conditii de utilizare | Contact
© SCRIGROUP 2024 . All rights reserved