| CATEGORII DOCUMENTE | ||
|
||
| Bulgara | Ceha slovaca | Croata | Engleza | Estona | Finlandeza | Franceza |
| Germana | Italiana | Letona | Lituaniana | Maghiara | Olandeza | Poloneza |
| Sarba | Slovena | Spaniola | Suedeza | Turca | Ucraineana |
DOCUMENTE SIMILARE |
|||
|
|||
TERMENI importanti pentru acest document |
|||
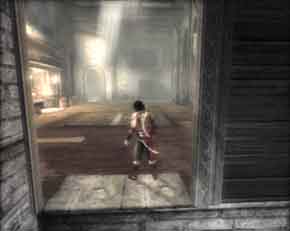
Introduction
 The young Prince of the
The Prince now knows true fear as an unstoppable demon, a temporal enforcer called a 'Dahaka' chases him ceaselessly from one corner of the earth to the other. Tired, beaten, and desperate, the Prince seeks out an old man who knows of one possible solution to the Prince's problem, and that is to unmake the Sands of Time so it never existed in the first place.
IGN is here to help you on the ultimate action-adventure. Whether the Prince lives or dies, it will be in the Warrior Within. Are you valorous enough to challenge the deadly secrets of the Isle of Time to see the Prince safe? Or are you simply a coward? Our guide features:
The Princely Basics
Controls
Please consult your in-game moves list for a mostly (it is not 100%) full list of moves the Prince can do in Warrior Within. For those of you who have played the equally excellent Sands of Time, only the vault attack and sheathe weapon moves have been altered or completely removed. Almost all the other moves from the first installment have been carried over to Warrior Within.
Left Joystick (STICK)
Gauges the Prince's movement. Moves the Prince
accordingly across ledges, ladders, floors, walls, and the environment in
general. The stick is sometimes not held to do an action (such as
jumping) but rather tilted momentarily (and simultaneously) with the key
involved. Make a note of that, or the Prince may wind up decorating the
concrete with his bloody viscera.
Right Joystick (CAMSTICK)
Gauges the movement of the camera around the Prince when normal view is used.
May be used to cause the landscape view to be zoomed in or out and is the
primary view adjudicator of the first-person camera.
Right Hand Attack (RH ATTACK)
Engages the sword attack with the Prince's right hand.
The Prince will always have a weapon in his right hand and is the basis of his
attack combos. The Prince may attack while doing almost anything else - while
wall-running, hanging on a precipice, or clinging to a rope or ladder; however,
he cannot move while doing so. Actions which require both of his hands (such as
climbing or siddling) will prevent him from attacking.
Left Hand Attack (LH ATTACK)
Left (or 'Off') hand; allows a secondary weapon or move using the Prince's left
hand. Double weapon combat is not terribly complicated, but it is not terribly
effective either. The best use of the LH ATTACK key is to throw humanoid
enemies into chasms to minimize the Prince's wounds. In combat, the off-hand
key can be held when next to some small enemies to catch it in a choke hold,
preventing it from attacking.
Jump key (JUMP)
Does jump/ascend/evade/acrobatics. Makes the Prince jump off floors, walls, or
other elements; he ascends in contact with other objects like beams/ledges.
While standing, the Prince may make a standing jump of some distance to cover
small gaps he could not simply run across. Jumping is used
more often in Warrior Within (unlike Sands of Time, which was only once in the
game), so don't overlook it. When in doubt (and you have sand to spare), try a
jump. When used in combat, the JUMP key allows the Prince to evade all manner
of melee attacks through his agility. Don't play the Prince like he was Enric
the filthy Vandal in Die By The Sword -- the Prince is
an acrobat and nimble swordsman.
Action
key (ACTION)
Does action/throw/descend/drop motions.
Makes the Prince pick up weapons, throw weapons, and descend or drop off
certain architectural elements such as beams/ledges, bars, ropes, columns, and
ladders. The Prince cannot throw or pick up weapons while navigating such
construction elements; however, the Prince may throw weapons or pick up weapons
while moving about normally on any sort of floor (even non-lethal trapped
floors). In combat, the ACTION key is used to strangulate enemies in a hold, and
not much else.
Block key (BLOCK)
Manages defend/wall-run/swinging. This allows the Prince to defend incoming
normal attacks, whether they are melee or ranged. Powerful or magical attacks
(i.e., a lorry at 80 kph) will not be defended; that's what the Prince's
acrobatics are for. Be aware that some bosses in the game have powerful attacks
that cannot be blocked, or once they are, will remove the Prince's blocking
animation until the player releases and holds BLOCK once more. This key also
determines the Prince's ability to wall-run (he does it as long as the key is
held). On bars and ropes, this key allows the Prince to swing on the object,
gaining momentum with each cycle.
Time
key (TIME)
Operates time powers. This key allows
the Prince to use his (I guess) innate time powers. Interesting since the
Dagger of Time was needed in the first game (You buy it! You play it!) but since the item is not with the Prince, the powers were
'renamed' so he can use them. In any case, the time powers are
triggered when this key is tapped or held, and some powers require certain
other buttons to be used simultaneously as well.
Basic Movement Commands
IGN will be referring to a lot of these basic commands as much of the game is simply geared towards the Prince moving through an area using his basic movement skills. When the guide says, 'descend the ladder, jump over, then ledge across the room', it pretty much sums up what needs to be done. Hesitating because you are uncomfortable or unsure of the Prince's moves will simply get you killed when the obstacle courses get timed, and then get even more lethal (than usual).
Standing Jump (also:
The standing jump is simply direction of the joystick
(always forwards) and the JUMP key. This lets the Prince cover a short gap and
leaves him usually standing on the other side or if the jump is slightly short,
the Prince will cling to the ledge allowing himself to
mantle. When there is no option to wall run, try a jump, as the Prince will be
doing much of that in Warrior Within. Jumps (of varying positions) may usually
be done at the end of one of the following actions described below.
Rolling (also: Roll Under, Roll Through)
The Prince can roll by moving forward and pressing JUMP. The roll occurs only
when the floor is continuous and there is no gap or break (otherwise, the
Prince jumps). Rolling places the Prince at half his normal height, allowing
him to roll under blade traps and certain log traps. Rolling does not make the
Prince invincible, but makes him harder to hit. Rolling is used also to go past
small openings. Note that the Prince may not be able to roll forwards or
backwards if enemies are nearby since he will automatically draw his sword,
which changes his rolling animations to combat evasion animations. Kill all
nearby enemies to attempt normal rolling once more.
Wall Bounce (also: Rebound Jump,
Kick-off Jump, Triangle Jump)
Usually shortened to 'bounce', this is
basically the Prince chaining successive kicks-off-the-wall so he can ascend a
narrow shaft. Bounce up using the JUMP key when the Prince impacts the wall and
he will kick off, hopefully to the opposite wall. A version of this, called the
'delayed' or 'long' wall bounce, has the Prince do the same
move while in between a wide shaft so he may descend heights safely. The Prince
may only do one type of bounce in each shaft in the game.
Wall Run (also: Wallrun, Wall Ride)
Sometimes 'wallrun'. This is the crucial move of the Prince which
allows him to make jumps to areas he may not otherwise have access to by
regular means. The Prince may do one of two wall runs (both which require
smooth, uncluttered walls), the horizontal wall run and the vertical wall run.
The horizontal wall run is used by the Prince to cross over seemingly large
gaps to far for the Prince to jump across. A wall jump or wall bounce may be
done at the end of a horizontal wall run. A vertical wall run allows the Prince
to reach ledges and other architectural elements that are too high for the
Prince's jump. Again, a wall jump or wall bounce may be done at the end of the
vertical wall run.
Climbing (also: Ascend/Descend, Go
Up/Down)
The Prince may climb ropes, ladders, and columns. he
may change his facing on ladders and columns, giving him a new direction to go
once he is on one. The Prince may climb and descend each element and allow him
various jumping off points to platforms of varying heights.
Swinging (also: Swing-off, Vaulting
off, Swing off)
The Prince may swing on ropes and bars. On ropes, the Prince basically does a
wall run; the length of the rope merely extends his wall run so he may reach
even further. The Prince may release the rope by pressing JUMP -- this
continues his wall run to another rope, platform, or element. On bars, the
Prince may siddle to get into position, but this is usually unnecessary to
swing to a new element. A jump while bar swinging will result in the Prince
moving upwards in the direction of the swing; a new bar, ledge/beam, or other
architectural element should be the target, or the Prince will fall.
Siddling/Balancing (also:
Hand-Over-Hand)
While on a ledge or bar, the Prince may siddle across using hand over hand
travelling. This allows the Prince to go around an angled bend in the bar or
ledge to face another direction for a jump. While on a beam (functionally a
ledge without walls), the Prince may pretty much balance or siddle across the
beam/ledge to new areas. Pressing ACTION or being hit while balancing on a
ledge/beam will cause the Prince to drop to siddling. Pressing ACTION or being
struck by an enemy while siddling on a ledge/beam or bar will cause the Prince
to fall. Pressing JUMP while on a ledge/beam will cause the Prince to mantle
up. Jumps may only occur off a bar when the Prince swings on one.
Manipulate Object (also:
Pulling/Pushing, Operating)
Some objects are operated when the Prince lands on
them (i.e., step switches) while some require the Prince to hold BLOCK while in
conjunction with the joystick to operate. Boxes and crates may be pushed using
this method, as can turnstile switches. Naturally, the Prince will not be able
to do this action when enemies are around, as he will attempt to defend blows.
Basic Architecural Elements
Vitruvious gave us The Ten Books of Architecture, IGN now gives you Nine Architectural Elements Of Prince of Persia. You would do wise to learn from both, but for now, let's focus on the latter.
There are eight elements in Prince
of Persia Warrior Within - the floor, the wall, the ledge/beam, the rope, the
ladder, the column, the bar and the switch. Each of these elements makes up the
environment the Prince exists in, and it is supremely important for novice
players or those new to Prince of Persia (the new one, not the 8-bit ones) to
accustom themselves to what each element does or they won't know what to do
when the Dahaka is 10 inches behind the Prince. Thanks to the simalcrum
for the terrain write-up.
|
|
|
|
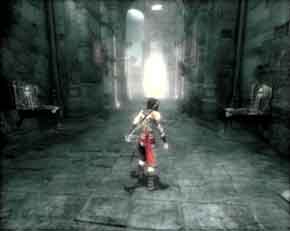
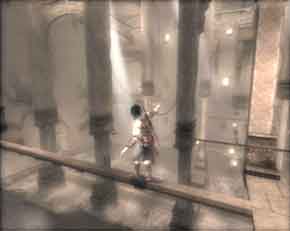
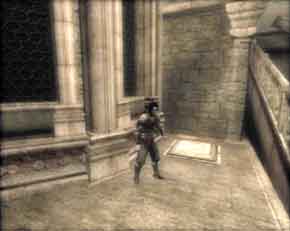
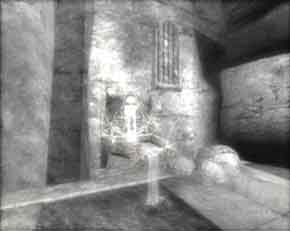
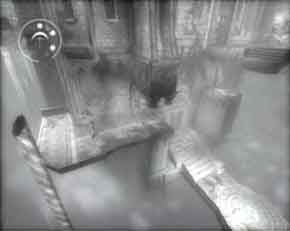
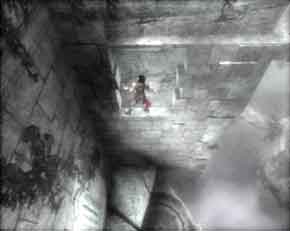
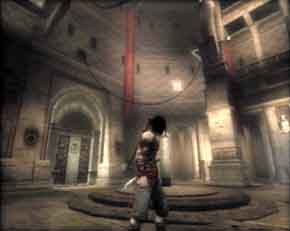
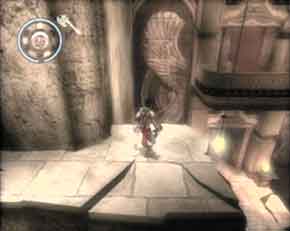
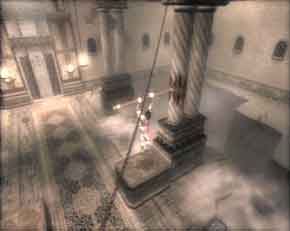
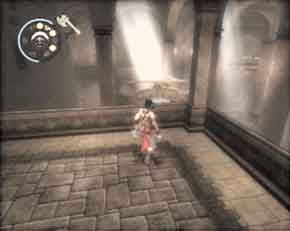
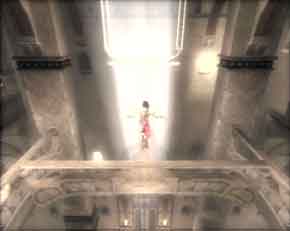
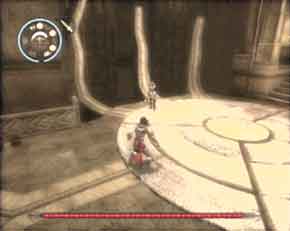
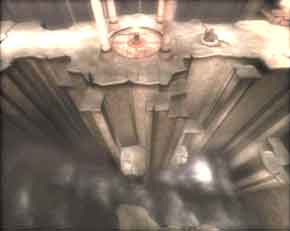
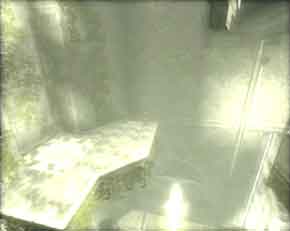
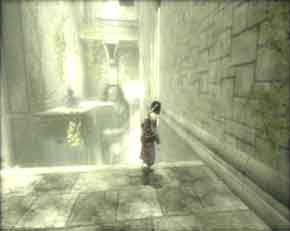
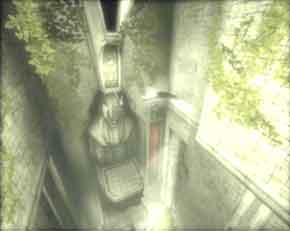
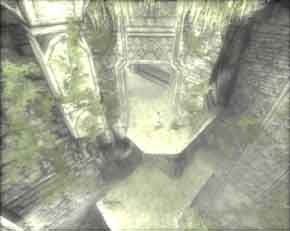
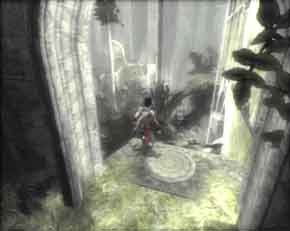
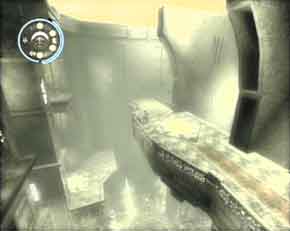
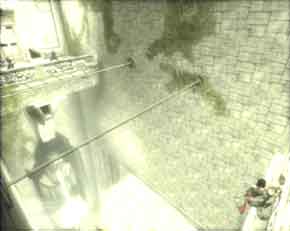
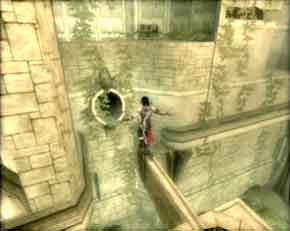
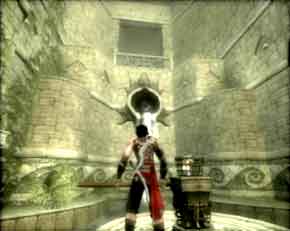
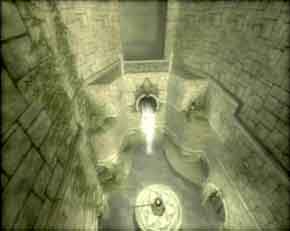
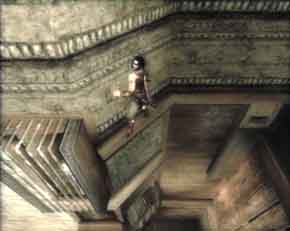
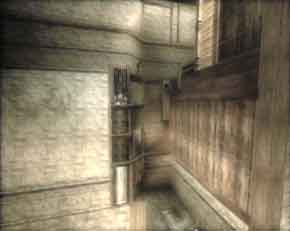
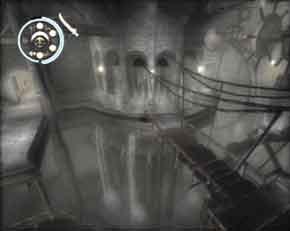
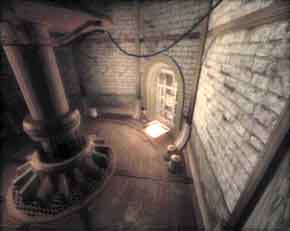
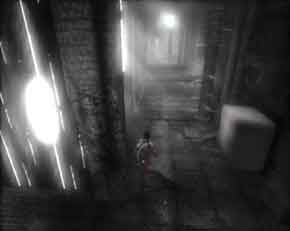
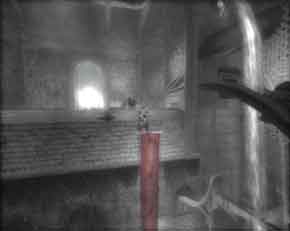
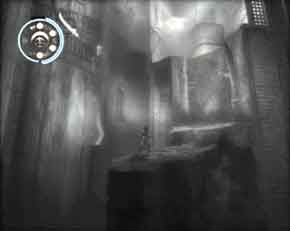
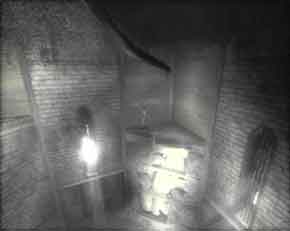
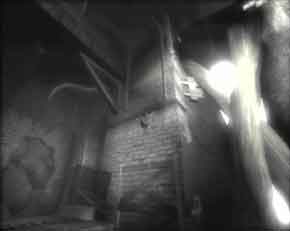
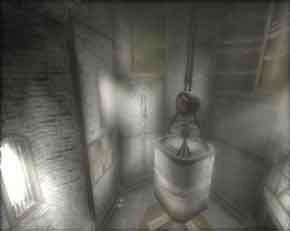
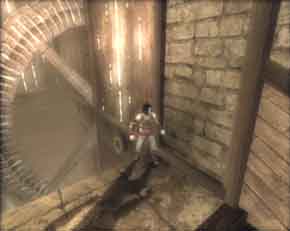
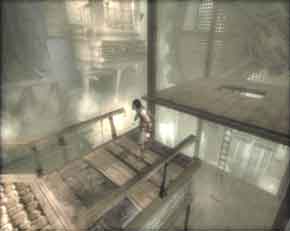
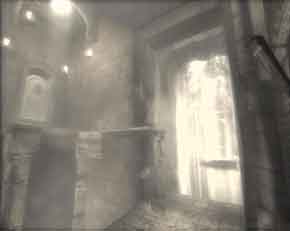
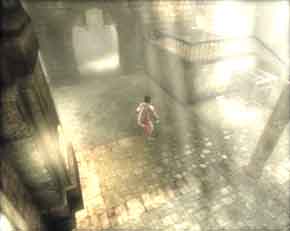
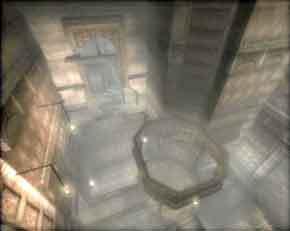
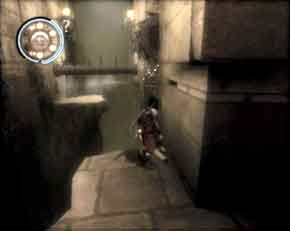
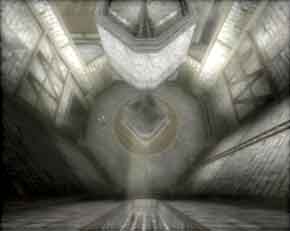
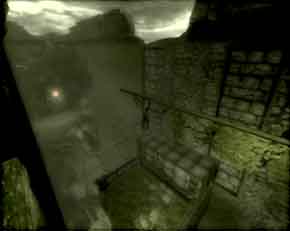
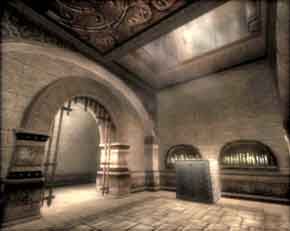
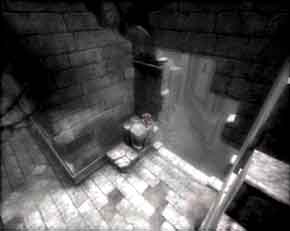
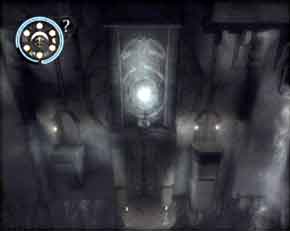
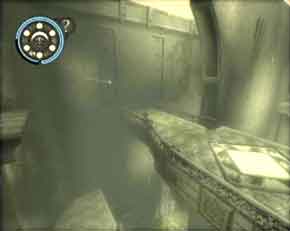
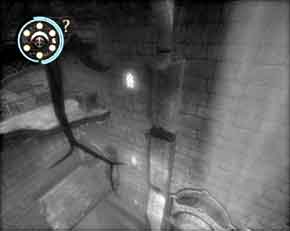
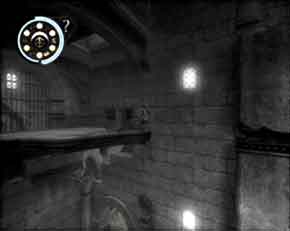
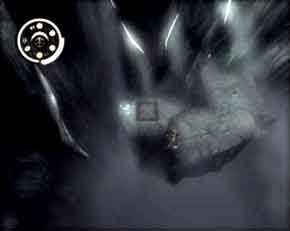
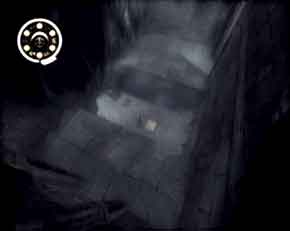
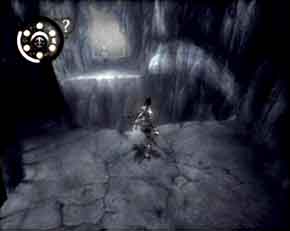
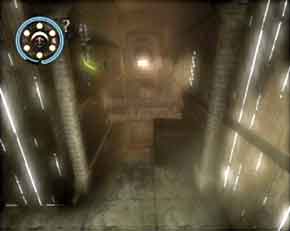
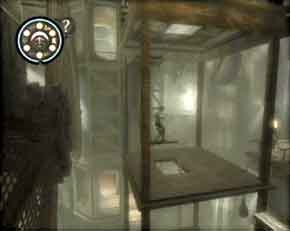
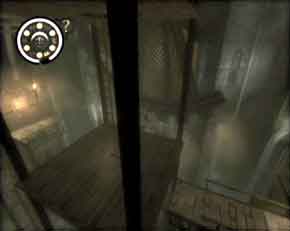
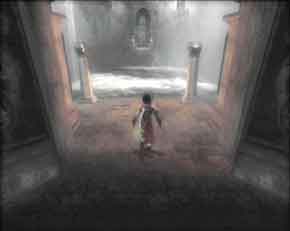
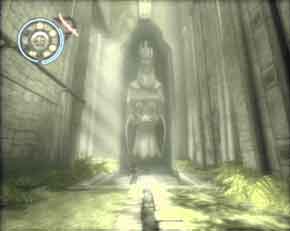
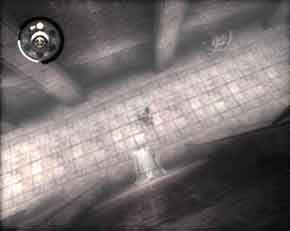
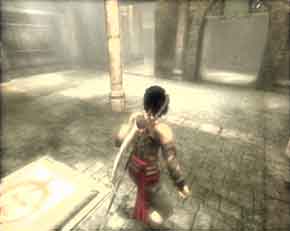
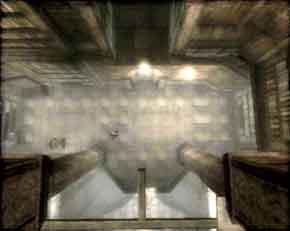
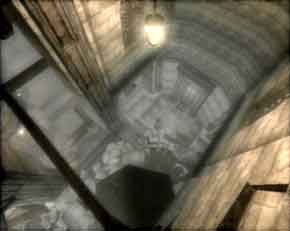
(ABOVE LEFT) Solid ground is the best place to be in Prince of Persia. (ABOVE RIGHT) Time portals in Prince of Persia are a welcome sight since they always have a save fountain. |
|
Floor and Ground
Whatever can be run across on is considered floor. Most of the fighting is done
on floors and is the default element in the game. Some floors are considered
'water' while others are considered 'trapped'. Water or
flooded floors are places where the Prince may rejuvenate his life. Trapped
floors usually sport retracting spikes, but occasionally may be on fire or
simply be bottomless pits. The collapsing type of floor is a hold over from Sands
of Time.
|
|
|
|
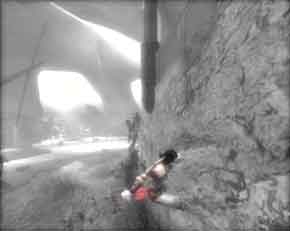
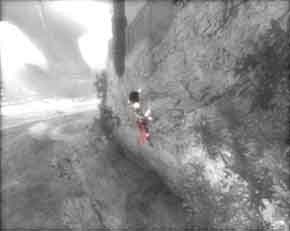
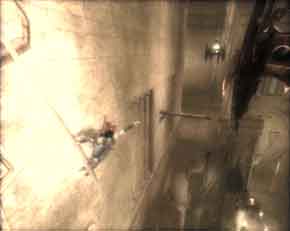
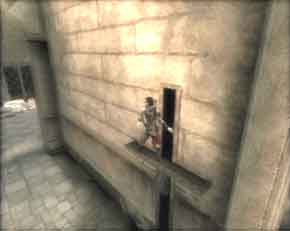
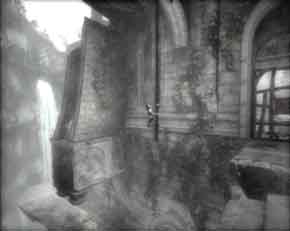
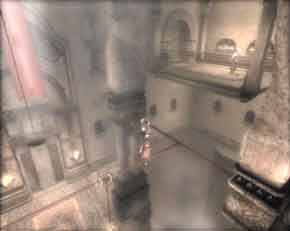
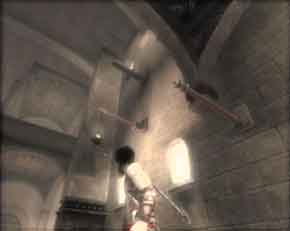
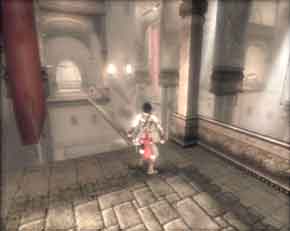
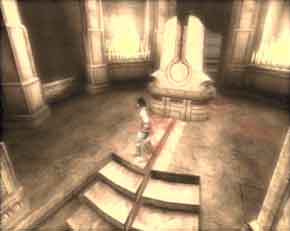
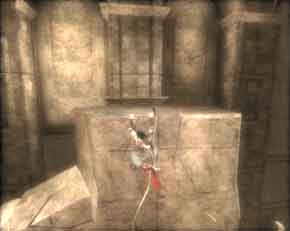
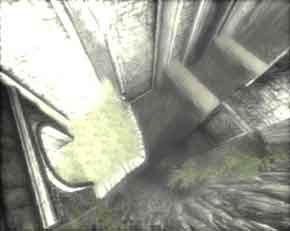
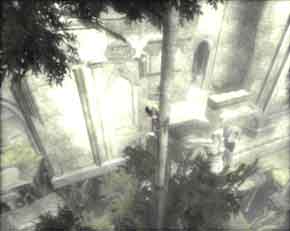
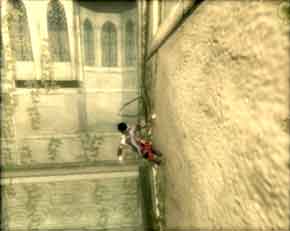
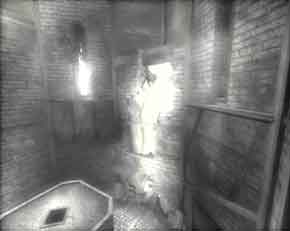
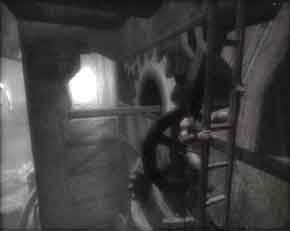
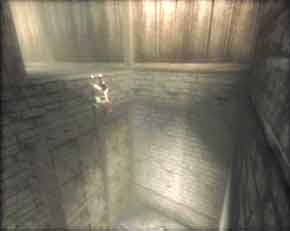
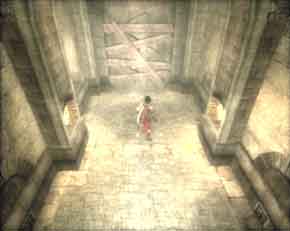
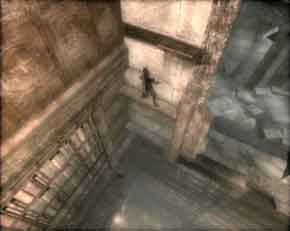
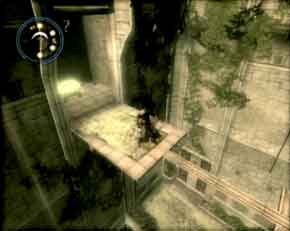
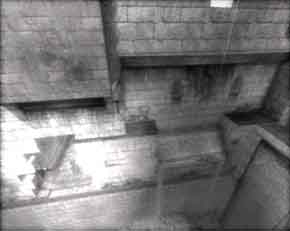
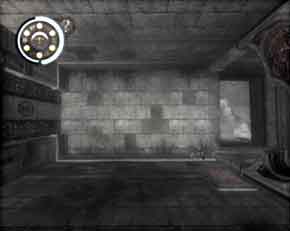
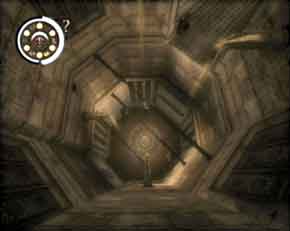
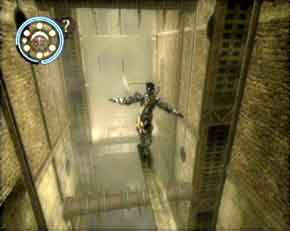
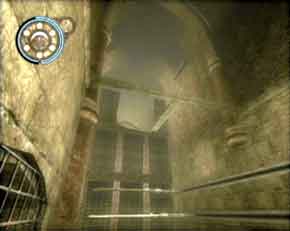
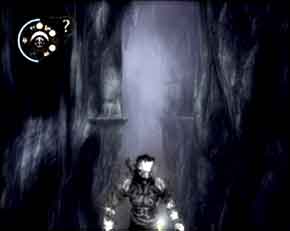
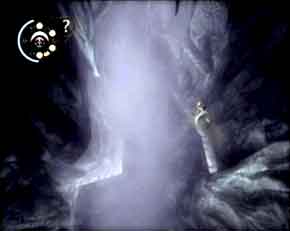
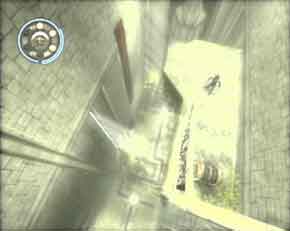
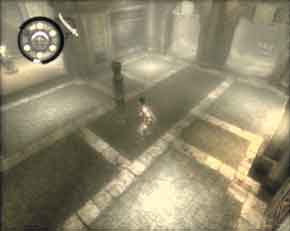
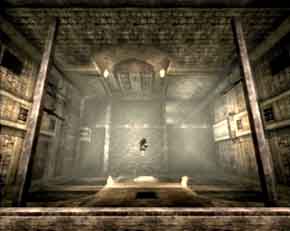
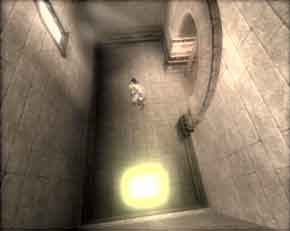
(ABOVE LEFT) The horizontal wall run. (ABOVE RIGHT) The vertical wall run. |
|
Wall
Consider it a vertical floor, navigated using wall run and wall bounce. Some
fighting is occasionally done on the wall, but one hit will send the Prince
flying off (usually into a pit). Some walls have traps on them, just as floors.
Walls may also be 'bounced' by pressing JUMP at the precise moment
when the Prince impacts the wall. Wall bouncing may be used to ascend or
descend certain areas, determined by the width of the wall shaft.
|
|
|
|
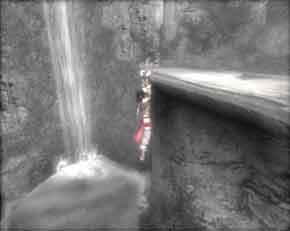
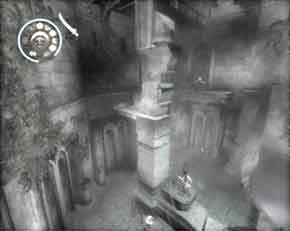
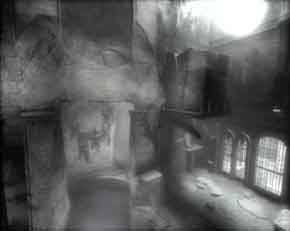
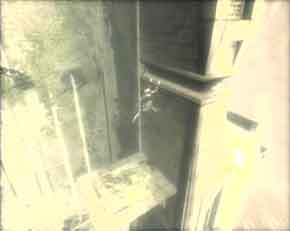
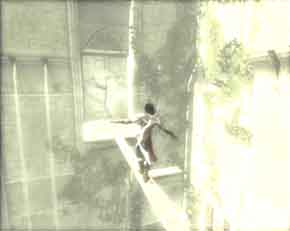
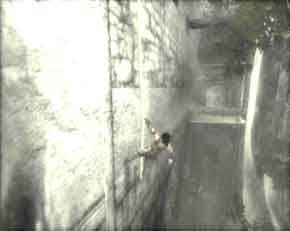
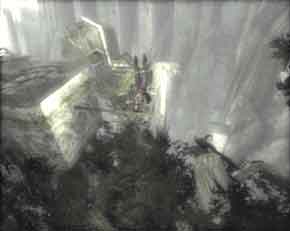
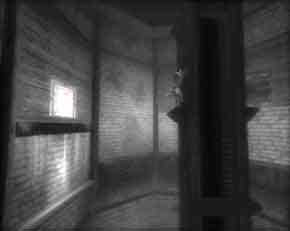
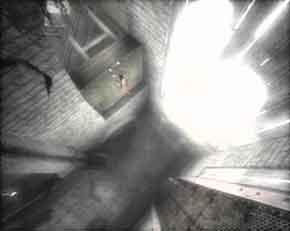
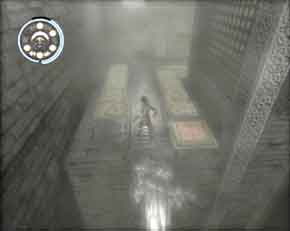
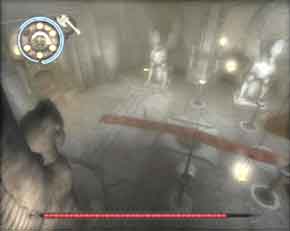
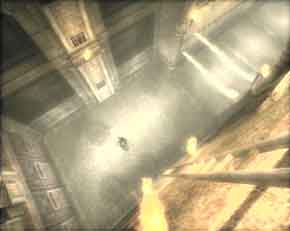
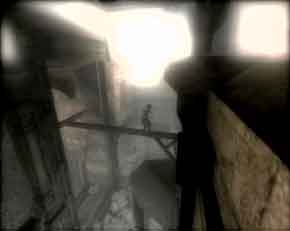
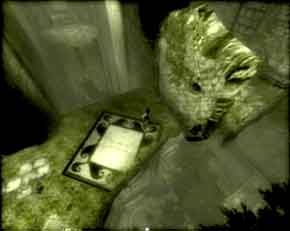
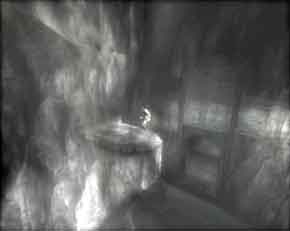
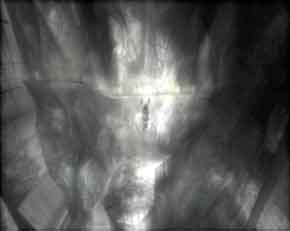
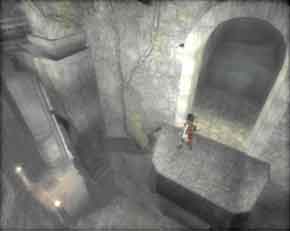
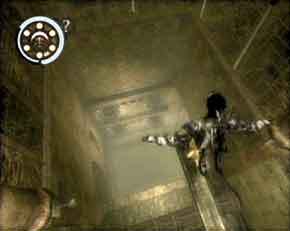
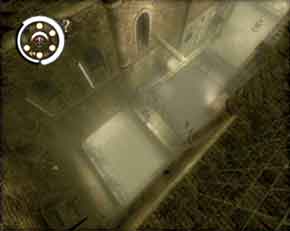
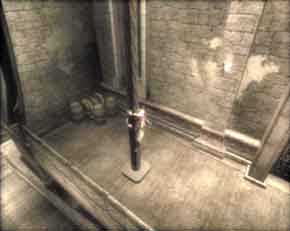
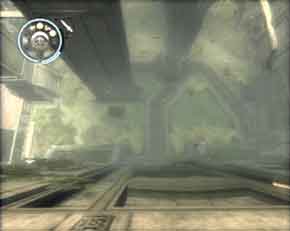
(ABOVE LEFT) Balancing on a ledge/beam. (ABOVE RIGHT) Hanging (no jump available) on a ledge. |
|
Ledge/Beam
A thin section of floor that can only be navigated by siddling or balancing.
Ledges often serve as ways to negotiate large vertical distances in Prince of
Persia. Ninty degree turns in ledges can be negotiated using siddling or
balancing on a ledge. Note that ledges with the Prince's feet supported may be
jumped off from; ledges with no support for the Prince's feet may only be
climbed, descended or crossed over. Ledges may traverse pits in obstructed
areas. Ledges that are in mid-air are referred to as beams, but are
functionally the same as ledges, but the Prince may only jump off the top of
beams.
|
|
|
|
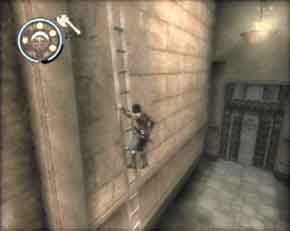
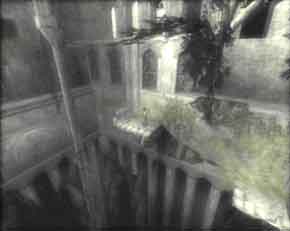
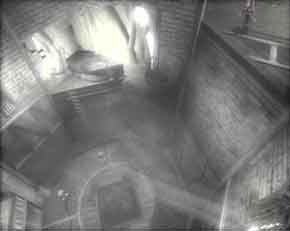
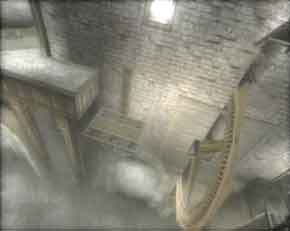
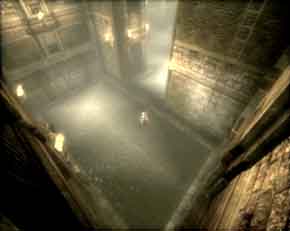
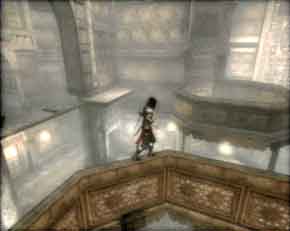
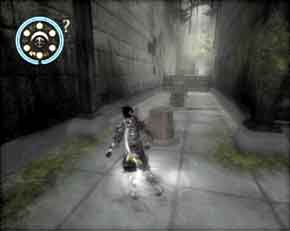
(ABOVE LEFT) Ladders can be found against walls or in mid-air. (ABOVE RIGHT) Ropes may be swung on or climbed. |
|
Ladder
Allows the Prince to ascend/descend safely in large vertical spaces. The Prince
can drop from a higher height than in Prince of Persia 1, but don't under-estimate
the height, unless a sand tank is handy. Ladders are often used as permanent
structures - very rarely will a ladder be removed or destroyed when it is
expected that the Prince will need to use it once more. The Prince may turn
about the ladder by pressing left or right on the joystick. This allows the
Prince to flip from one side of the ladder to the other.
Rope
Ropes are simplified in Prince of Persia 2. They are only used to extend the
distance of the wall run (usually) or in some rare cases, to serve as a spot to
jump off the middle of a wall. Hold BLOCK to swing on a rope; it may otherwise
be climbed like a ladder (without the about face). Press JUMP while swinging on
a rope to continue the wall run at the end of the rope swing.
|
|
|
|
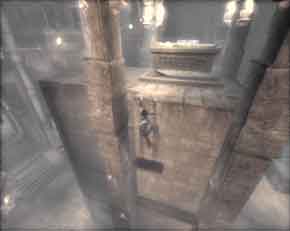
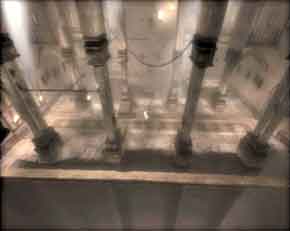
(ABOVE LEFT) Columns may be climbed and rotated around on. (ABOVE RIGHT) Bars may be siddled across on, or swung from bar to another area. |
|
Column
May be used for attack if the stick and a weapon button is pressed together
(towards the column) and if the column surface area touches the floor. Columns
are usually used only to traverse large spaces in the middle of the air when
beams are available. The Prince can only face one of four cardinal directions,
so it is not difficult to gauge which way he is pointed. Warrior Within
introduces collapsing columns late in the game (these are not like the
stalagtites in Sands of Time, which only fell when the Prince jumped off them).
Bar or Pipe
Bars and pipes are common when there are obstructions over pits. Swinging one
direction is the only recourse for bar/pipe puzzles and they are often used in
conjunction with ledge and wall puzzles. Bars, like ledges, may be siddled when
they make ninety degree turns, so be sure to look in other directions when
there seems to be no way to move on while hanging on a bar. Warrior Within
introduces collapsing bars late in the game.
|
|
|
|
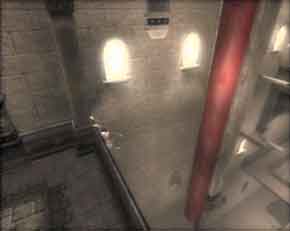
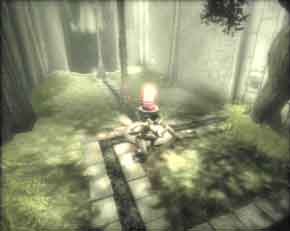
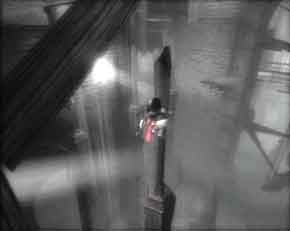
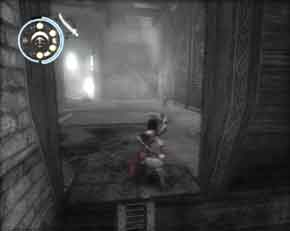
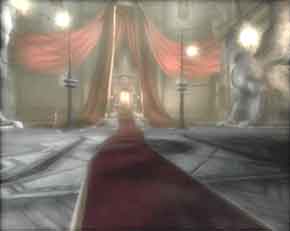
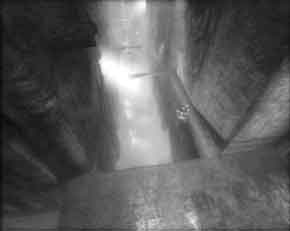
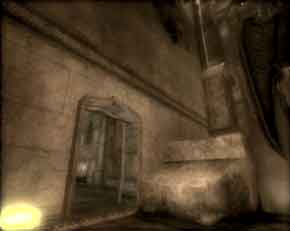
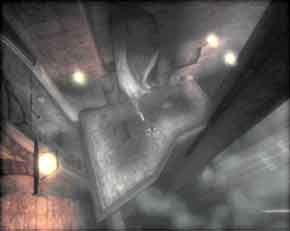
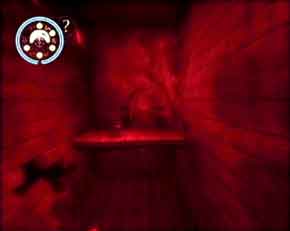
(ABOVE LEFT) Curtains (alwasy red) are one-way routes straight down. (ABOVE RIGHT) A wall switch. Use a wall run to reach it. |
|
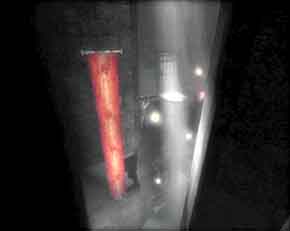
Curtain
The red curtains in the island palace basically serve as a retarder for the
Prince when he drops from high heights. Once the Prince touches a curtain, he
slides down on it; it is a one way trip - do not pass Go,
do not collect 200 rupees. Curtains may be jumped off from to hitch to another
architectural element, such as a bar, or another curtain. Since curtain
dropping is one way, be sure that the Prince is meant to head there, or you may
have to rewind time to undo your mistake.
|
|
|
|
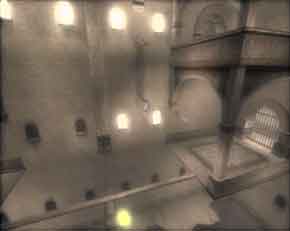
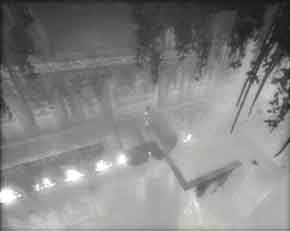
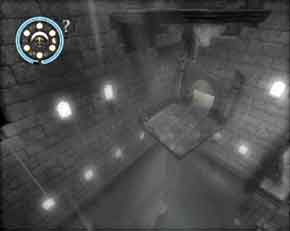
(ABOVE LEFT) Floor switches are pressure sensitive. (ABOVE RIGHT) Ledge switches are also pressure sensitive, but always timed. |
|
Switch
There are five types of switches - floor, wall, bar, ledge and turnstile. The
first four switches are basically a section of the element made into a switch.
For example, wall and floor switches will be square pieces of floor or wall
with a rune on it. Bar switches are fancy-looking bars with obvious connections
to the unseen ceiling; ledge switches (new for Prince of Persia 2) are ledges
that descend with the weight of the Prince - these are always timed. Turnstile switches must be grabbed and turned manually by
the Prince to get varying effects and are often used for the multiple/returning
pathing in the game.
Combat Guide & Time Powers
Combat Guide
Fighting in Prince of Persia is slightly different than some other games. Unlike Sands of Time, these creatures on the Isle of Time are not true sand creatures, but creatures created by the Empress Of Time. Since the Hourglass was never opened, these creatures are significantly weaker than 'actual' sand creatures and turn to sand when they are dead. Aside from humanoid enemies, animorphic enemies make an appearance in Warrior Within, necessitating the Prince to adapt his fighting style or wind up as finger food.
 Right Hand Attack
The Prince's default (unbreakable) weapon serves as the basis for his primary
attack. As the Prince's weapons are upgraded, he may perform more devastating
attacks using his single weapon attack. In conjunction with an off-hand weapon,
he can theoretically land upwards of six blows. Consult the in-game moves lits
for all the Prince's combat moves.
Left Hand Attack
Attacks with the Prince's off-hand weapon, when equipped. It may be used alone
or in conjunction with the right hadn weapon for a variety of blows. Consult
your in-game moves list for a complete list of moves for single and double
handed attacks.
Finisher/Fatality
Pressing RH ATTACK will allow the Prince to stake a prone enemy with his
primary weapon, and does 50% more damage than a normal blow. While not as
effective as staking a British officer with a flagpole holding the flag of the
Continental Congress, it is fairly damaging.
 Charged Blow/Wall Breaker
This move involves holding the RH ATTACK button to do a blow with 50% more
hitting power. It requires the Lion, Scorpion or Water Sword, and enemies
usually attack the Prince when he attempts to do it. IGN recommends not doing
this move unless you have the Prince attacking an unaware enemy. This same move
allows the Prince to break certain walls late in the game for secrets and such.
Throw Weapon/Charged Throw
This move throws the secondary weapon at an enemy. Holding the ACTION key will
let the Prince throw the weapon at full force after three seconds and can kill
most peon enemies if a good secondary weapon is found. A highly recommended
move, as this is the fastest way to add new secondary weapons to the art
gallery.
Vault Set-Up
This is basically stick towards the enemy and JUMP
while the Prince has his weapons drawn. The Prince vaults at the enemy and may
elect to follow with a vareity of attacks: vault attack, vault evade, or vault
to off-the-wall attack.
Vault Attack
This is the easiest attack to use. Simply vault an enemy (be sure only to press
JUMP once, or the vault evade is performed instead), then press RH ATTACK or LH
ATTACK. One of the easier combinations to do, but it does not work against all
enemies.
Vault Evade
Chances are if you've played the equally excellent Sands of Time, you
pressed JUMP, JUMP only to find that the Prince's vault attack has changed into
vault evade. The Prince vaults on an enemy but promptly kicks off into the
direction of the Prince to escape. Useful if you need to put distance between
the enemy and the Prince, but more frustrating if the evasion lands the Prince
into a pit.
Vault to Off-The-Wall Attack
When fighting near walls or in close spaces, the Prince if doing a vault evade
or vault attack may be near a wall and instead do an off-the-wall attack
instead. Beware of using this by accident or design on small platforms.
Take Hostage
This is the starting move of the Prince when he is without a secondary weapon.
Press the LH ATTACK key to vault over the enemy; hold it to take it hostage.
This can lead to the following moves: throw enemy, strangulate, or disembowel.
All of these moves will free the hostage enemy. Note other enemies will attack
the Prince if he is in their sites while holding a hostage. Only regular
humanoid enemies can be taken hostage; quadrupedal enemies and big ass enemies
(i.e., the golems and bosses) cannot be taken hostage, although it'd be funny
if they could. Snap! Game Over. Man, that was easy.
Throw Enemy
The most effective combat move in the whole game is to simply toss the enemy
off a cliff or precipice by pressing LH ATTACK once more after taking a hostage
(or LH, LH quickly). You do not gain the secondary weapon in the art gallery,
nor do you gain any sand, but the savings in life and time is tremendous. Work
the joystick to figure out where best to throw the enemy.
Strangulate
Strange that this works on sand creatures. Press ACTION repeatedly while taking
a hostage to strangulate it. When it dies, the Prince will take the secondary
weapon as well. Best used against lone enemies so it cannot attack the Prince.
Disembowel
Press the RH ATTACK after taking a hostage to do a 50% more damaging attack.
This is equivalent to the fatality/finisher attack the Prince has. Since this
move leaves an enemy prone, a fatality/finisher may be used to follow-up this
attack.
Counter-Attack
While defending (hold BLOCK), the Prince may press RH ATTACK or LH ATTACK just
after an enemy attack is defended against (the tell-tale 'clank' is the cue).
The move will let the Prince do a counter-move that damages the enemy. However,
the counterattack can be blocked by enemies; against bosses, this move is
highly risky, since it forces the Prince to guard and await an attack before
attacking. Still, it is part of the man's move repertoire and can be done if the
player is quick enough to do the counter-attack and then quickly retreat using
a back-flip or similar evasion move.
Weapon Clashing/Deadlock
Why we bother with this move is unknown, since about half the gamers out there
already know about weapon clashing, ala Samurai Shodown. When the Prince
engages in a deadlock with an enemy boss, and they are vying for dominance,
press the RH ATTACK button quickly and repeatedly to beat down
the enemy and shove them away from the Prince. This happens rarely and evasion
afterwards is always a good idea.
Enemies
 Sand Warrior (also: Enemy)
Numerous versions, but basically a guy with a weapon.
This is the easiest enemy to dispatch; just use the off-hand button to grab and
throw the enemy off a ledge, cliff or other area so the Prince can continue
unmolested.
The turban wearing sand warriors are tougher than the guys wearing the Woolworth rubber Halloween masks, but all in all they are easily dispatched. The key to fighting them is not to let them surround the Prince. Use all the moves you have to avoid being swarmed and you can cheese these guys right off the cliff.
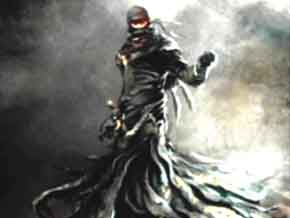
Shadow Assassin (also: Silhouette,
Shadow, Black Liquid Guy Who Yells)
An enemy with a very annoying attacking sound bit.
Chances are your parents, girlfriend, or sibling will ask you to turn down the
sound if you engage this guy for more than two minutes. It will teleport around
a room and throw knives at the Prince.
The teleportation will knock over the Prince, but will not do much damage. Luckily, these enemies are weak; one or two hits will kill one, and using Haste to chase down these guys is overkill. Shadow Assassings cannot be grabbed but may be vaulted off of.
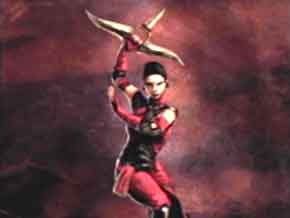 Ninja (also: Ninja Girl)
Some kinda ninja woman with fast reflexes and hard to
hit evasive moves. The best way to deal with them is to throw them off ledges
and cliffs since they attack in groups and have a neck-stabbing attack that
takes off a load of life. Attacking them is difficult since they are more
acrobatic than the Prince. Try to throw them instead of playing around.
Ninjas can be found guarding ledges and may also wall run attack, so it is best to always carry a secondary weapon handy to kill them before the Prince ventures onto dangerous ground. Avoiding them is the best option when the Prince does not need to fight them. However, these enemies always mandate that the Prince have a handy secondary weapon to throw at them when necessary.
Ghost (also: Ninja Ghost Girl)
A version of the ninja who is completely transluscent and barely visible. Find
them by their visible 'natural gas leak' refraction of the ground,
and they are as easily killed as regular ninjas. Close inpsection will reveal
that the ghost actually resembles the girl in black.
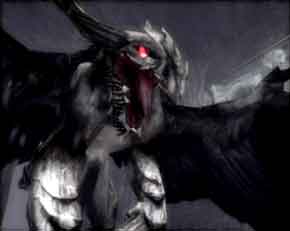
 Raven Swordsman (also: Karasuman)
An enemy created from ravens, looks like Karasuman
from Symphony of the Night, but does not suck. A cut-scene for this enemy
occurs early in the game. Although tough to attack from the front, defeat this
enemy easily by using wall rebound attacks or just vault and attack it.
Avoiding it is always another option, unless the floor the Prince is on is too
small to allow any stupid combat tricks.
The Karasuman is rather tough, but if you kill one, be sure to take its sword, which does some decent damage when used just to swing at foes. When it is about to break, throw it and watch those heads fly.
Crows (also: Birds, Ravens, Bats,
Some Kinda Flying Crap)
Smnall birds found in the beginning (on the beach). They reappear in different
areas of the island and only serve to knock off the Prince if their presence
was made unaware of them. One hit from any weapon is good enough to kill them,
so get rid of them first before continuing to move around (esp. on cliffs).
 Fire Beast (also: Hot Dog, Fire Warg, Wiener Bomb)
An animorphic enemy that looks like an oversized wolf.
It is nasty with its charge attacks and explodes when it dies. An infinite
number of fire beasts will show in some areas since they are the only method by
which the Prince can destroy walls before finding the Scorpion Sword.
Fire beasts are found on walls in some instances, so always have a second weapon ready to throw so the Prince can avoid being pushed to his death. Of all the enemies in Warrior Within, this enemy is one of the most cheap and cheesiest the game can throw at you; avoid them unless you absolutely have to fight them.
Fog Beast (also: White Wolf, Snow
Warg, Cave Dog)
These are albino versions of the fire beasts which
don't explode but are somewhat tougher. They attack in packs, but are tough
only because they can withstand a lot of hits. Fog beasts only have melee
attacks, so avoiding them using slow-time may be a
better idea when faced with group of them rather than attacking them.
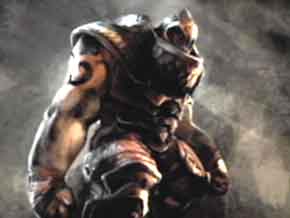 Golems (also: Giant, Big Statue, That Tough S.O.B.)
The big enemies you may or may not have seen in the E3 2004 videos for Prince
of Persia. Roll between their legs, then slash the
backs of their calves to force them to submit. Once they are kneeling, press
stick towards and JUMP to climb on and attack the head. After three or four
hits, press JUMP to dislodge the Prince or the golem does it for you (doing
damage).
Repeat and the Prince will be able to hack away at the soft spot on the golem's neck after a while. Golems are tough (there are only four in the whole game) so be prepared for them by reading our guide!
Dominatrix (also: S&M Chick)
A version of the ninja who wears leather outfits as sold on various adult
sites. Otherwise, nothing different from the ninja, but do watch for them on
ledges and if they are ready to wallrun to attack the Prince while he is wall
running -- one swipe will knock the Prince out of the wall run.
Nekkid Muscled Warrior (also:
S&M Guy/Dude)
A bigger, buffer version of the sand warrior. They have similar leather outfits
as the Dominatrix and are placed in groups where many attack the Prince. The
best thing to do again is to throw them over cliffs, but lacking that, only
skilled attack and defence lets the Prince survive encounters with the nekkid
muscled warrior.
Time Powers
 As the Prince journeys back and forth through time, his
association with the the sands of time will give him innate abilities to
control time. Perhaps it has something with the amulet that he now carries? Or
is it something more than a mere amulet? You must finish the game in order to
find out the reason behind it all.
As the Prince journeys back and forth through time, his
association with the the sands of time will give him innate abilities to
control time. Perhaps it has something with the amulet that he now carries? Or
is it something more than a mere amulet? You must finish the game in order to
find out the reason behind it all.
Each use of a time power drains at least one sand tank. Sand is regained by smashing breakable objects or from killing enemies. The harder the difficulty, the more rare sand will be from enemies, so make a note of that. On normal, about one in five enemies will drop sand when slain; this increases to one in two enemies on easy and drops to about one in eight on hard. Difficulty does not affect sand in breakable objects. A good strategy is not to break items and junk for sand unless the Prince really is running empty, or you might wind up stuck and with a dead game.
 Rewind (also: Recall)
Uses one sand tank. Hold the TIME key to use this power. The
most notable first power of the Prince. Allows up to
ten seconds of real time gameplay to be replayed. This means players can
stake the Prince on some spikes and rewind time to when they were standing on
terra firma.
Rewind is useful when you want to keep your progress of secret chests and to undo a boss' cheap massively life draining attacks. Rewind takes into account for all the buttons pressed between the instant the TIME button is pressed until the effect meter expires, including camera view changes.
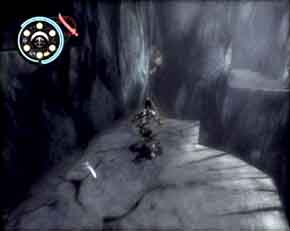
All time powers have a 'effectiveness meter' in the upside down crescent moon in the HUD dial. Full effect of the time power in question can only be accomplished if the white crescent meter is fully charged, meaning time powers cannot be 'stacked' for any potentially game-breaking usage.
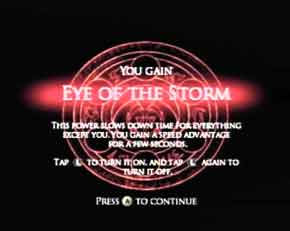 Slow Time (also: Eye of the Storm)
Uses one sand tank. Tap the TIME key to use this power. A
radically modified power from Sands of Time. More
often than not used to negotiate traps than to fight enemies. This power
slows down the environment and other enemies while the Prince moves at
semi-normal speed.
The Prince may then move around obstacles that move too fast for him to negotiate safely (i.e., traps that move as fast as your wife's 'fun toy') or collapsing elements that break in half a second upon the Prince's arrival (i.e., breaking bars, breaking columns). Note that Slow Time's effects are not counted when a Rewind occurs, since both are time powers and are not effected by one another.
All time powers have a 'effectiveness meter' in the upside down crescent moon in the HUD dial. Full effect of the time power in question can only be accomplished if the white crescent meter is fully charged, meaning time powers cannot be 'stacked' for any potentially game-breaking usage.
 Shockwave of Fate (also: Breath, Wind, Cyclone)
Uses one to three sand tanks. Hold BLOCK and hold the TIME key to use this
power; the Prince must have his weapon drawn. The longer the TIME key is held,
the more sand is used by the successively more powerful attacks.
A 'replacement power' for Freeze (Freeze is better), this allows the Prince to generate a shockwave that pushes enemies away from him at the cost of sand. Not a very cost-effective use of sand but is it there if you wish to use it. On the flip side, it pretty much delivers what it promises - a devastating knock-down attack.
All time powers have a 'effectiveness meter' in the upside down crescent moon in the HUD dial. Full effect of the time power in question can only be accomplished if the white crescent meter is fully charged, meaning time powers cannot be 'stacked' for any potentially game-breaking usage.
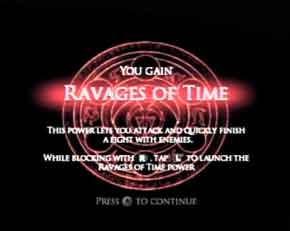 Haste (also: Ravages of Time)
Uses two sand tanks. Hold BLOCK and tap the TIME key to use this power; the
Prince must have his weapon drawn. This is the very much like the old Haste
spell, where by the Prince moves at insane speed to attack enemies. The power
effectively makes the Prince invincible to some enemies, but the attacks he
makes are weak.
Haste is best used against a group of numerous but weak enemies, or if you need to damage a few tougher enemies so they can be finished off. Slow-time and rewind are always more cost-effective than Haste. Then again, if you know you'll be able to recoup the lost sand from junk lying around the map, go ahead and use Haste.
All time powers have a 'effectiveness meter' in the upside down crescent moon in the HUD dial. Full effect of the time power in question can only be accomplished if the white crescent meter is fully charged, meaning time powers cannot be 'stacked' for any potentially game-breaking usage.
Walkthrough
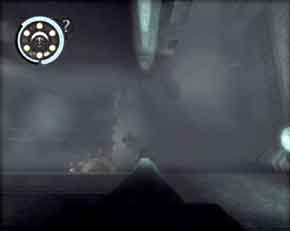
|
Sinking Ship |
Shipwrecked |
Chasing Shadee |
The Central Hall |
The Garden Tower |
|
The Clock Tower |
The Empress |
The Catacombs |
The Library |
The Wraith Cave |
|
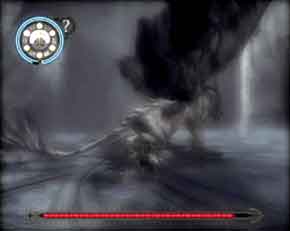
The Griffon |
More Sand Wraith |
Bad Ending Boss Fight |
Good Ending Boss Fight |
Item Appendix |
The Prince of
What's Happened So Far
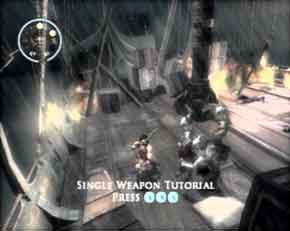
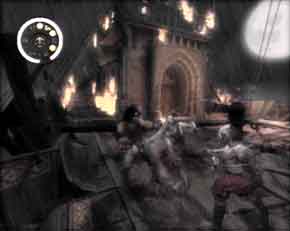
Kill the enemies using the tutorial
moves, or better yet, use the off-hand key and throw enemies off the side of
the ship. Even if they are not tossed overboard, enemies who are thrown need
time to stand back up; during this time, the Prince can be attacking someone
else or fleeing to more open ground to trigger various cut-scenes (this builds
towards progress on the ship, strangely enough).
|
|
|
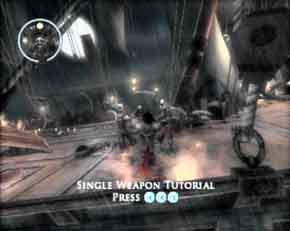
Throwing enemies also minimises the number of enemies that are active at any one moment. Move through the open areas of the ship and various cut-scenes will occur when eight enemies have been killed. When the one of the crewman falling from the mizzenmast occurs, the Prince is warped to the lower hold of the ship.
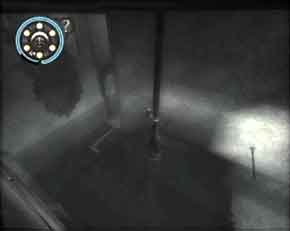
Notice the water (or as this
freelancer calls it, 'Blue Pee'). When the Prince is in knee deep water, he may
drink to restore health. It doesn't matter if it is fresh or sea water, since
this is just a game. Haven't you heard the expression? Water, water
everywhere, so why not have a drink? Water is
consequentially scarce in Prince of Persia, so when you discover some water,
expect some puzzle involving a lot of lost life.
|
|
|
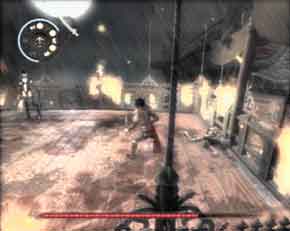
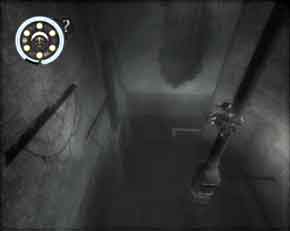
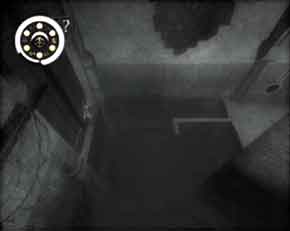
Fight through the hold of the ship
by alternately throwing and strangulating enemies; enemies that touch water are
usually killed instantly, but not always. Follow the tutorial moves if desired;
they are designed to introduce players who are unfamiliar with the fighting in Prince
of Persia. Veteran players may want to turn-off the tutorials, as they simply
state the obvious move required to progress in the game. A cut-scene will carry
the Prince to the deck of the enemy ship. Simply fight or evade enemies up to
the enemy ship's poop deck to fight the boss. If you do not know what the poop
deck is, then look for some stairs that go up and head there. That's the poop
deck of a pre-steam sailing ship.
|
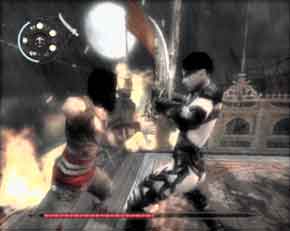
Boss - Shadee (also: Miss Sexy Butts) 'Miss Sexy Butts' (or the girl in black) will be the first boss in the game. Attack the boss by using a mixture of guarding, vault attacking, then evasion. Press JUMP once (not twice, as the old game) while moving towards the boss to vault, then press RH ATTACK to land a hit or two on the boss. After hitting the boss once or twice, press JUMP when the Prince lands on the floor while directing the stick away from the boss to evade Fighting bosses with the Prince of
Persia requires that you adopt the hit and evade mentality of the Prince. Don't
forget that he is an elegant Persian swordsman, not a buff Cimmerian who
chews star-metal bits for fun. |
|
|
|
|
|
Repeat the pattern of vault attacking, evading and blocking until the boss is defeated in a cut-scene. In the event the Prince and the boss lock swords, press the RH ATTACK button quickly to win the clash. It is easier to win weapon clashes on easier settings than harder settings. |
|
The final blow on some versions of Warrior Within requires the Prince land a normal (just RH ATTACK) blow to trigger the cut-scene; in such an event, simply evade by rolling to the side and attack once the Prince stands up (or a rolling attack will be done instead).
Fortress Entrance
What's Happened So Far
After the cut-scene, the Prince will
equip a stick with a nail through it, just like Moe Syzlack. This will be the
Prince's weapon until he finds something better. Ward off the crows and ravens
pecking at the Prince's sweet, sweet eye juices and wander around the beach
doing tutorials if desired.
|
|
|
|
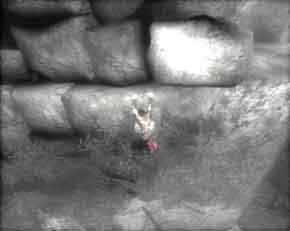
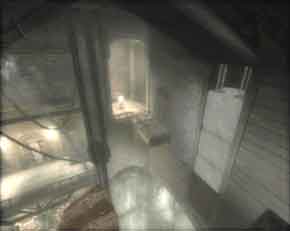
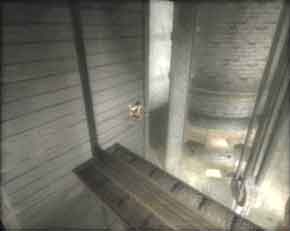
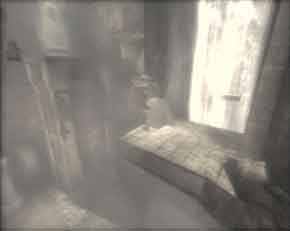
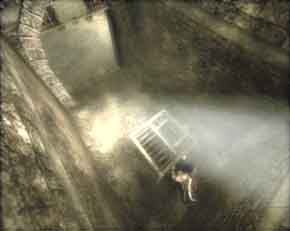
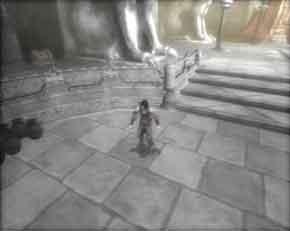
(ABOVE LEFT) A save fountain. It restores life and saves your game. (ABOVE RIGHT) The gallery chest is at the bottom of the stairs. |
|
There is a gallery chest (#001) at
the end of the beach, near the bottom of the stairs. Crack it open and try not
to die. Gallery chests will reset, if players retry a section of the game, so
try never to die (yeah right). Netting every gallery chest is somewhat
difficult, but possible, for players to unlock the rather neat art gallery. And
yes, almost all weapons in the gallery are Saracen and Middle-Eastern swords.
|
|
|
|
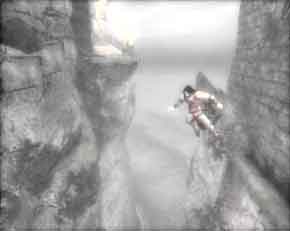
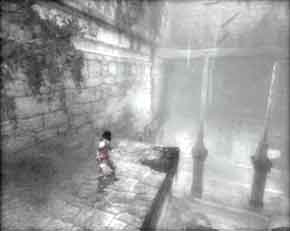
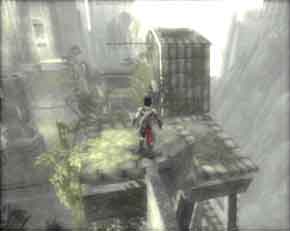
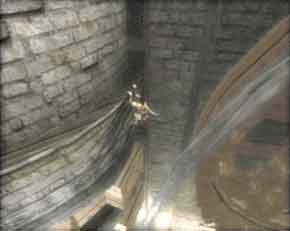
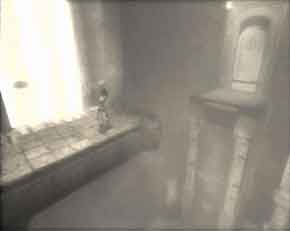
(ABOVE LEFT) Siddling can get the Prince past some obstacles. (ABOVE RIGHT) Jumping from one side to the other in a set-up like this is elementary. |
|
Jump over the gap (notice the Prince
cannot wall run when his feet are in contact with water) and use the save
fountain if desired. Save fountains start the Prince off as a
'checkpoint' if they are used (saving does not matter). This can be
useful when players want to explore a section of the game and do not want to
create new save slots, just to see what has changed or what may have been
missed the first time through. It is also something of protection against
'dead games' where the Prince is stuck in an area with no recourse
but to reload an earlier save.
|
|
|
|
(ABOVE LEFT) Siddling can get the Prince past some obstacles. (ABOVE RIGHT) Jumping from one side to the other in a set-up like this is elementary. |
|
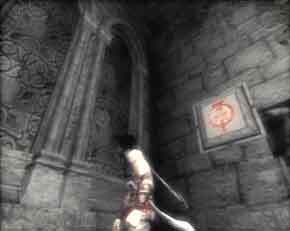
Navigate through the cliffs using
the ledges, jumping, and wall running and do not miss the gallery chest (#002)
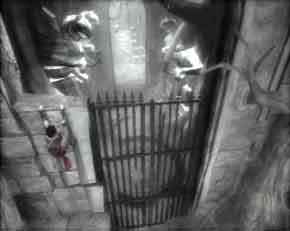
at the top. Go past the large metal gate and get a cut-scene of the Prince
fighting off an ambush. The Spider Sword will allow combo attacks of up to
three hits to be performed. Escape the fight by throwing enemies into the chasm
or simply killing them. Move past the doorway to a save fountain.
|
|
|
|
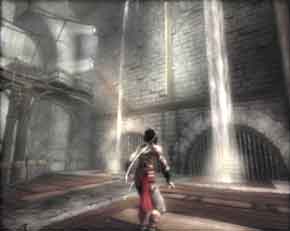
(ABOVE LEFT) Beware of high obstacles such as this gate; once you go in, you may never come out. (ABOVE RIGHT) Landscape view is great for showing you this wall where the Prince kinda needs to vertical wall run up on. |
|
|
|
|
|
|
|
|
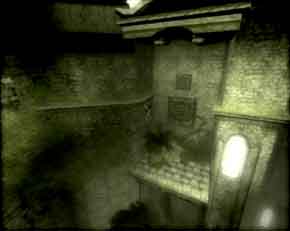
(ABOVE TOP LEFT) Wall run up to the ledge, then bounce to the upper floor. (ABOVE TOP RIGHT) Column jump to the other side. (ABOVE BELOW LEFT) Wall run to the next platform and ignore the Karasuman if you drove it here. (ABOVE BELOW RIGHT) Wall run to the next ledge, column hop and hit the wall switch to open the door to the next room. |
|
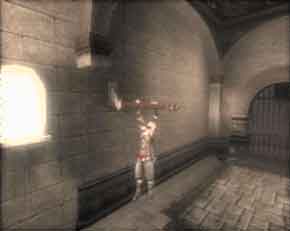
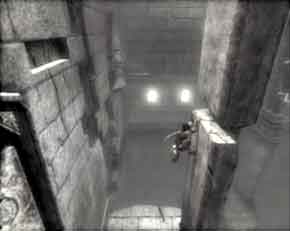
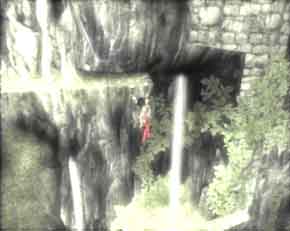
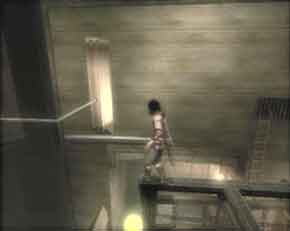
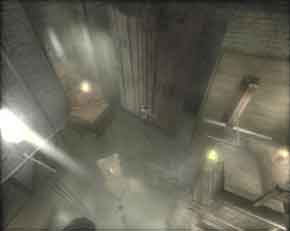
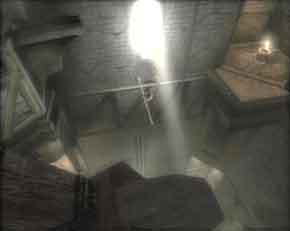
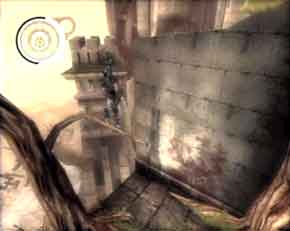
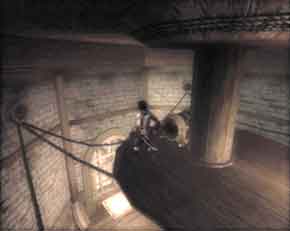
Get treated to the raven swordsman
(Karasuman) cut-scene and either ignore or batter it so it flees to another
spot in the room. Wall run up the nearby wall (from where the Prince enters
this room) and alternately wall run and column hop over to the other side where
a door is. This places the Prince in a room where the only way onward is down
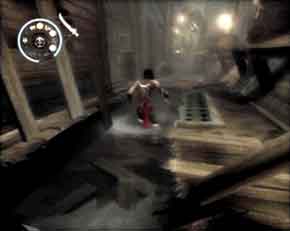
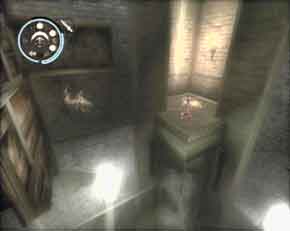
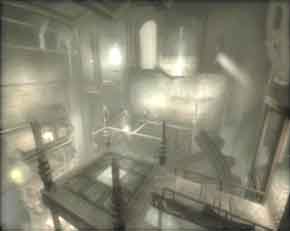
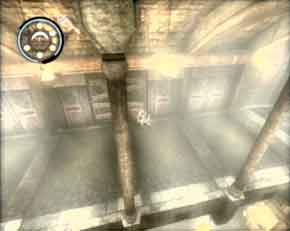
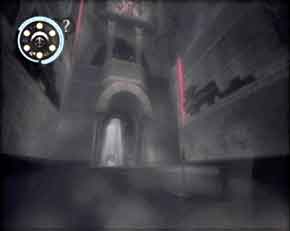
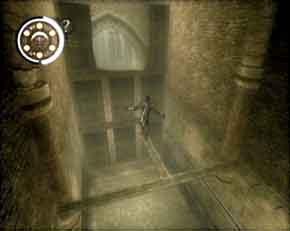
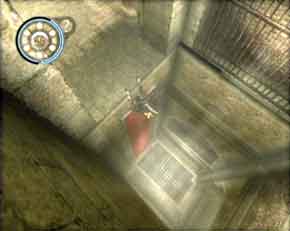
by using the curtain as a fall retarder. Naturally, the way onward is one-way.
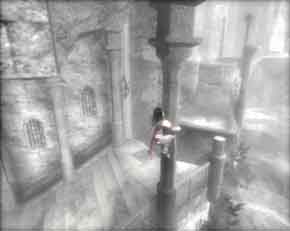
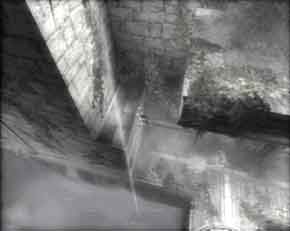
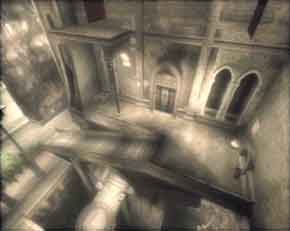
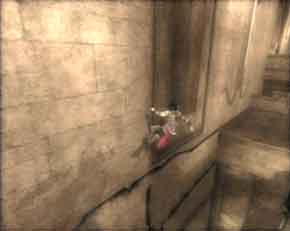
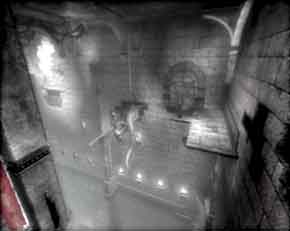
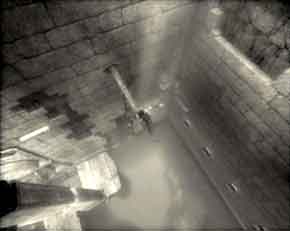
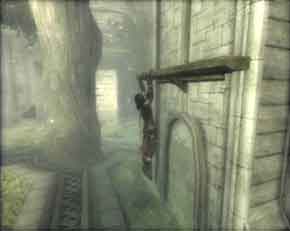
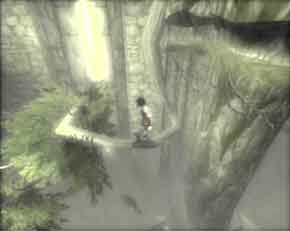
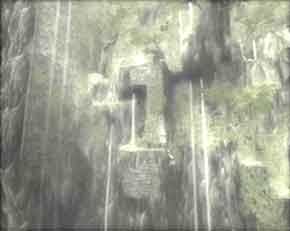
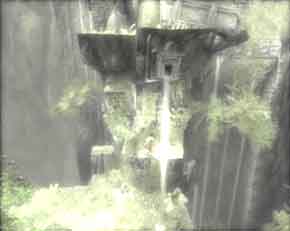
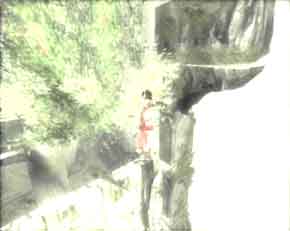
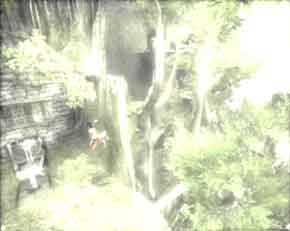
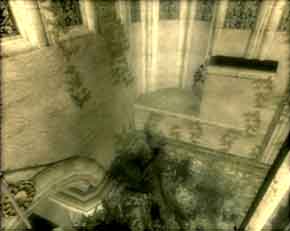
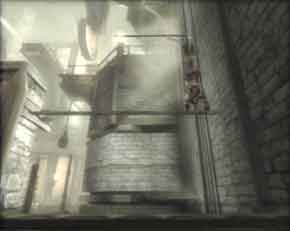
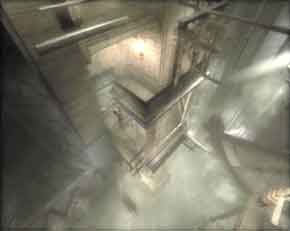
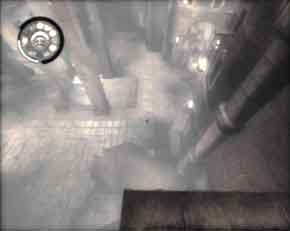
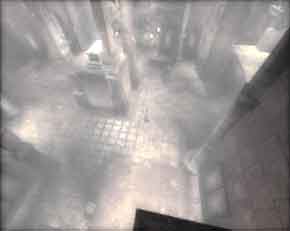
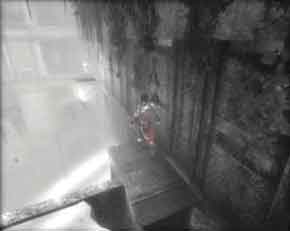
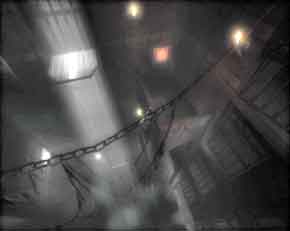
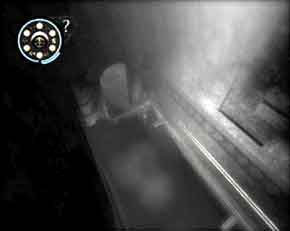
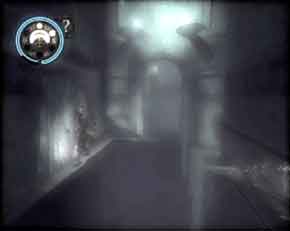
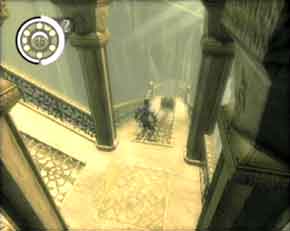
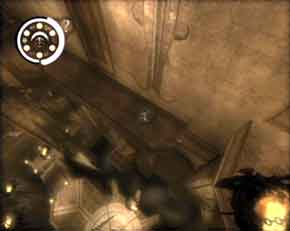
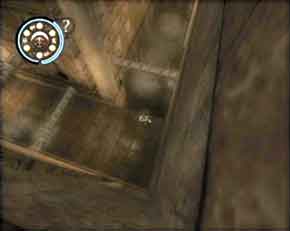
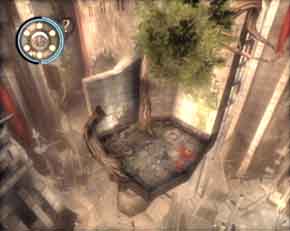
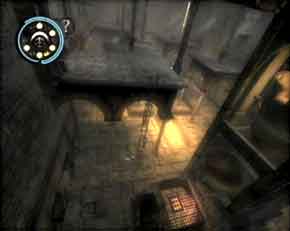
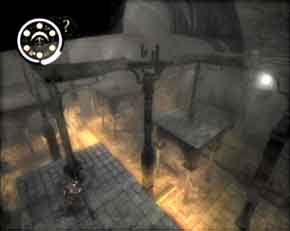
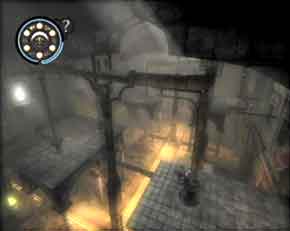
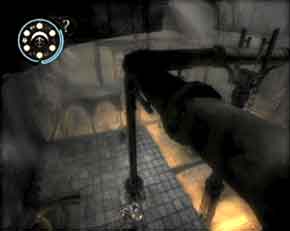
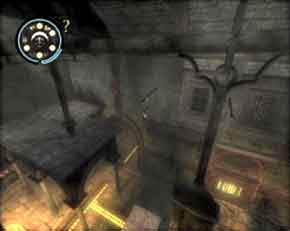
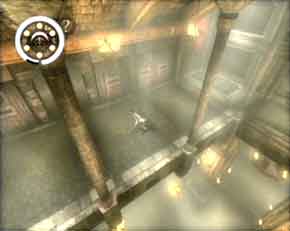
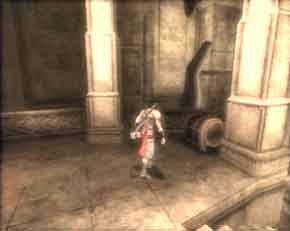
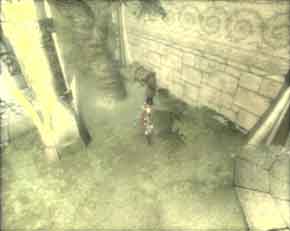
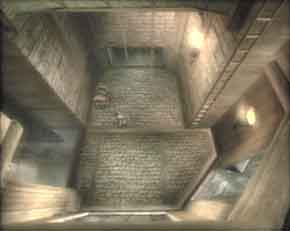
Drop and fight or evade the enemies on the floor; head to the image
illustrating the partly wrecked column that allows the Prince to ledge and
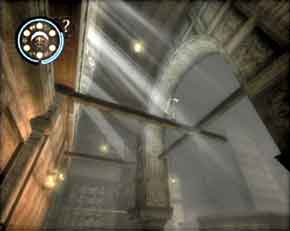
siddle to the upper catwalk to progress. Do so and wall run
across to the ledge and work around the other side.
|
|
|
|
|
|
|
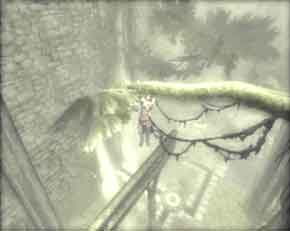
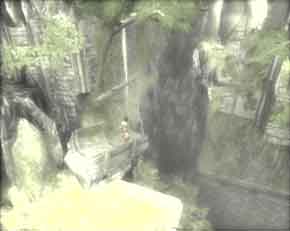
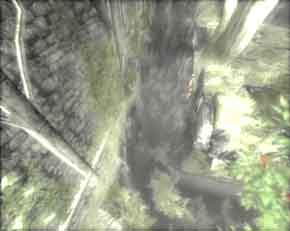
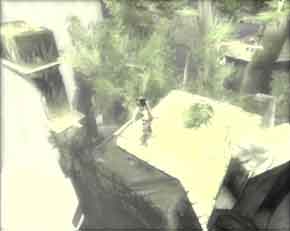
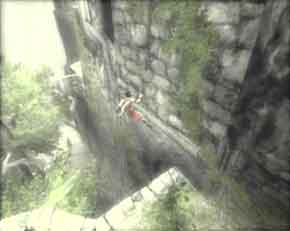
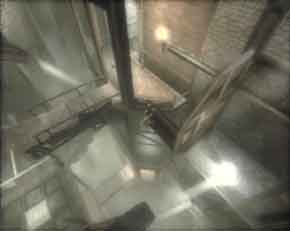
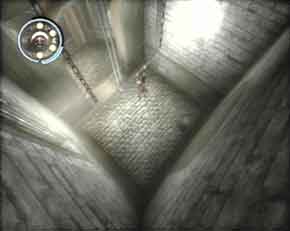
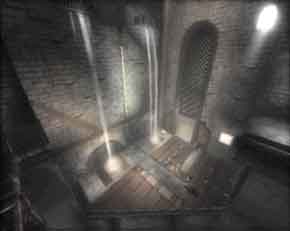
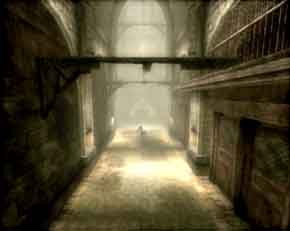
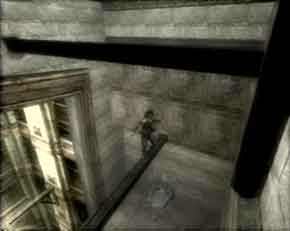
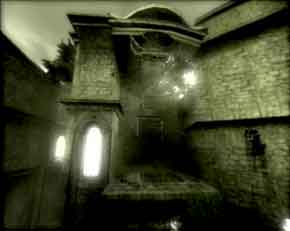
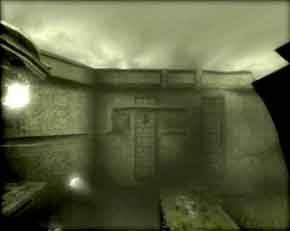
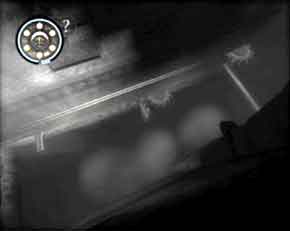
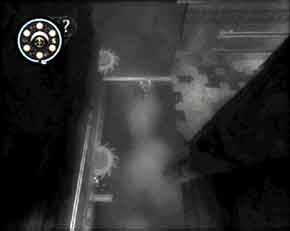
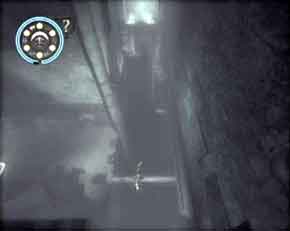
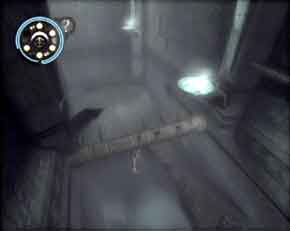
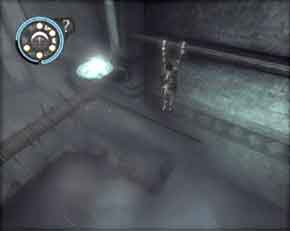
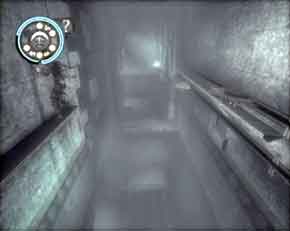
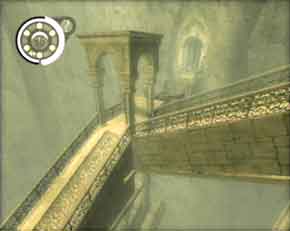
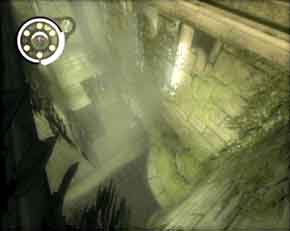
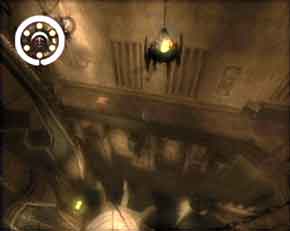
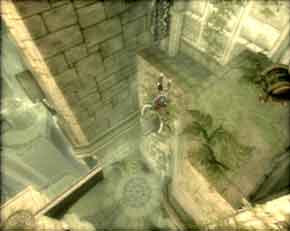
(ABOVE TOP LEFT) Curtain drop down to the room and either fight or avoid the enemies here. (ABOVE TOP RIGHT) Climb this and siddle the ledge to the top floor. (ABOVE BELOW LEFT) Wall run over to the next ledge. (ABOVE BELOW RIGHT) Siddle over and use the interim cavity to soften the drop. Go through all of these screens quickly, since it will be timed a little later in the game. |
|
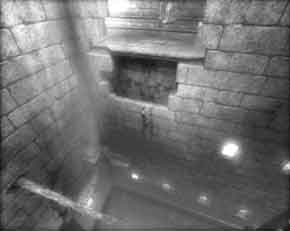
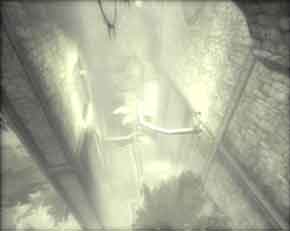
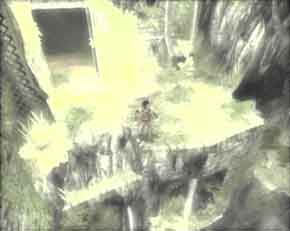
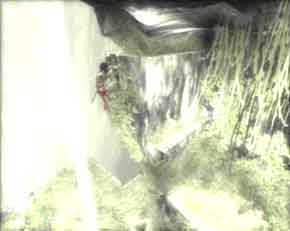
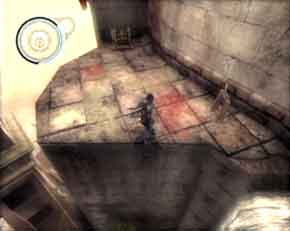
Drop off using the cavity in the wall to slow the Prince's descent (this also allows him to cross back over the gap int this room). This is a rather easy exercise compared to the nightmarish (i.e., timed) ones later in the game. A time portal is past the waterfall door; watch the cut-scene of Miss Sexy Butts going through the time portal.
Entrance, Antechamber & Sacrificial Chamber
What's Happened So Far
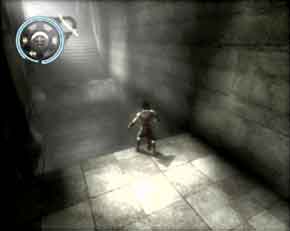
The Prince gains the time power
Rewind after arriving in the past. This ability is the basic power that makes
the Prince of Persia so fun to play. When players make a mistake, hit the
Rewind Power by holding the TIME key and up to ten seconds of real time
gameplay is 'wound back' and places the Prince from lethal situations
like being impaled on spikes to standing quite all right on firm ground. Use
Rewind liberally if you think you've progressed far along into a trapped
hallway and do not want to retry (esp. if several chests have been found). One
use of Rewind uses one sand tank.
|
|
|
|
|
|
|
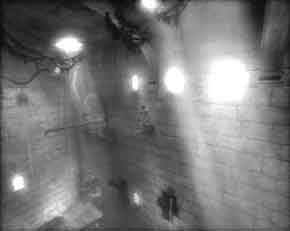
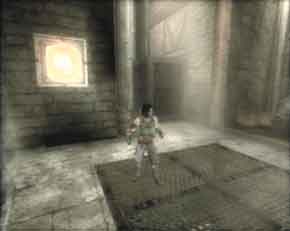
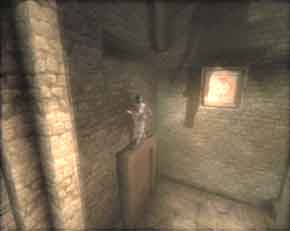
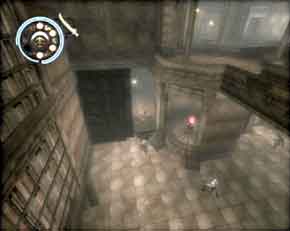
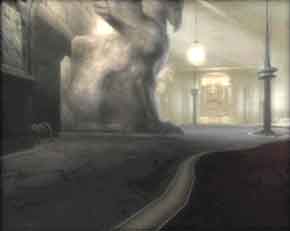
(ABOVE TOP LEFT) You're not in |
|
Exit the time portal room and notice
that traps in the past work very well (before they broke). Be wary that going
from the past to the present and vice versa has varying effects on the
environment. Fight off or evade the enemies in the room before (in da' past)
and work up a column and bounce to the ledge. Be sure not to miss the gallery
chest (#003). Wall run over the switch, hit the curtain and
exit the lower door to the courtyard where the raven swordsman was in
the present. Head out the door, which is one-way; if the chest got missed, head
upstairs and use the wall switch to open a timed door back into the previous
room. Now is not the time to be missing easy gallery chests.
|
|
|
|
|
|
|
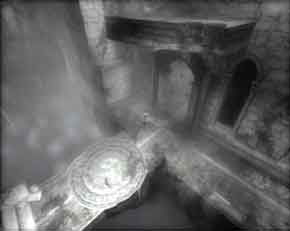
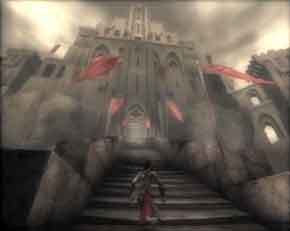
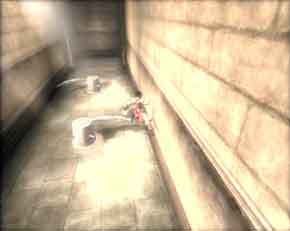
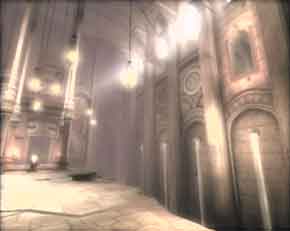
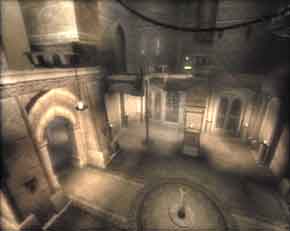
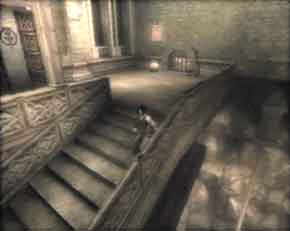
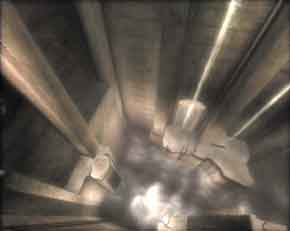
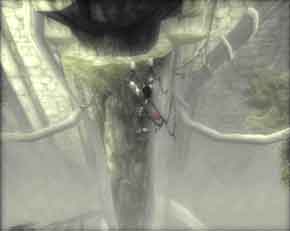
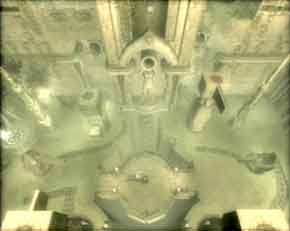
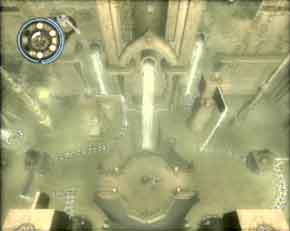
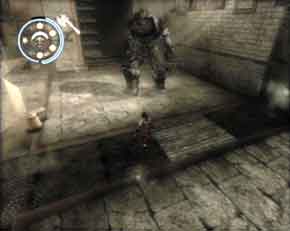
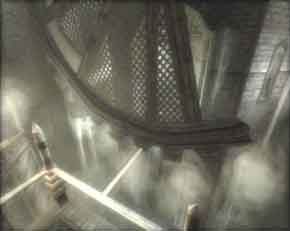
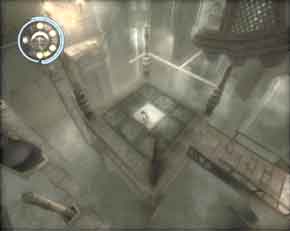
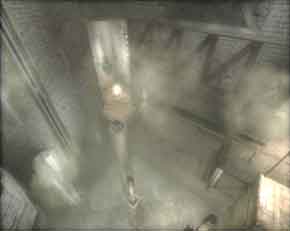
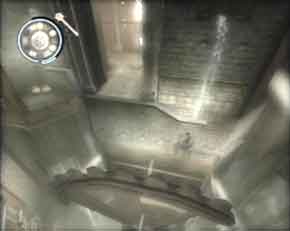
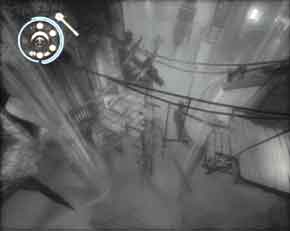
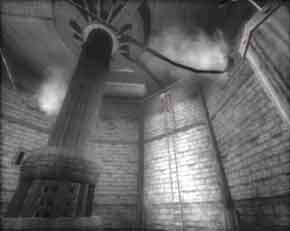
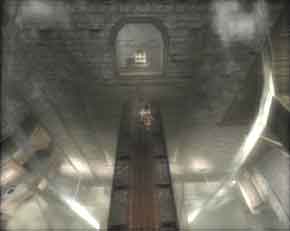
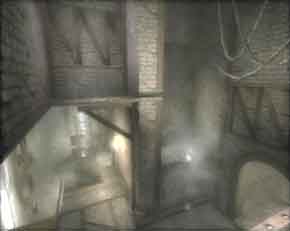
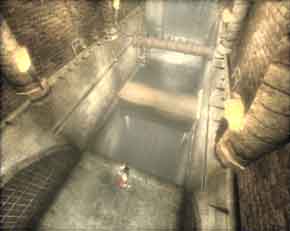
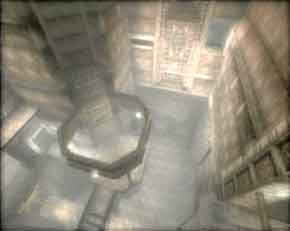
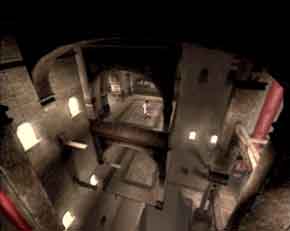
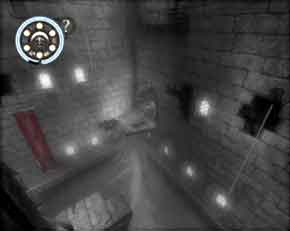
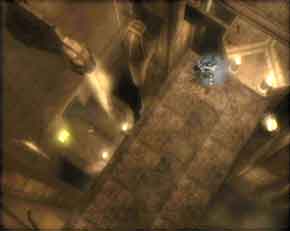
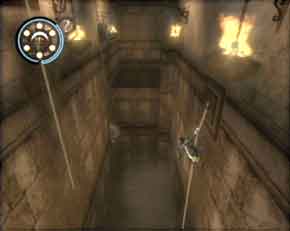
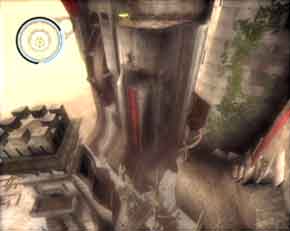
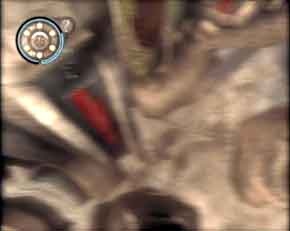
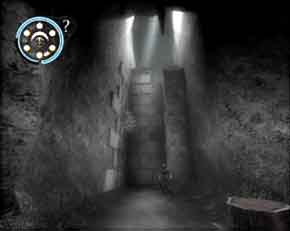
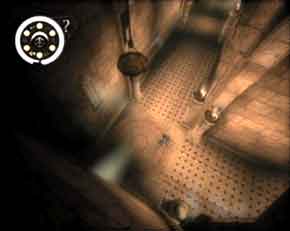
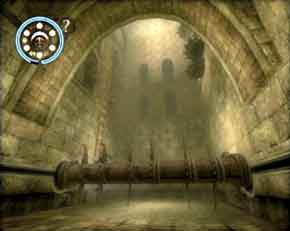
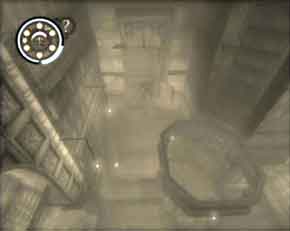
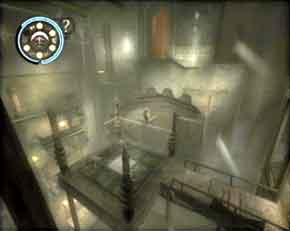
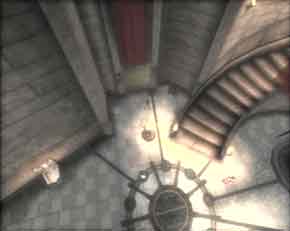
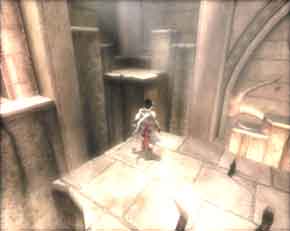
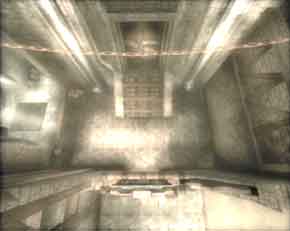
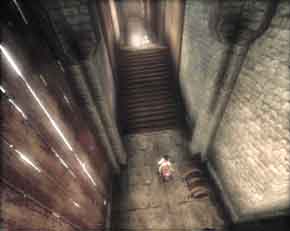
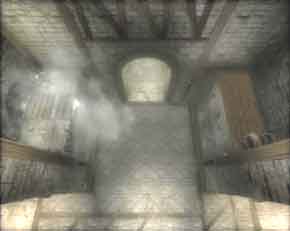
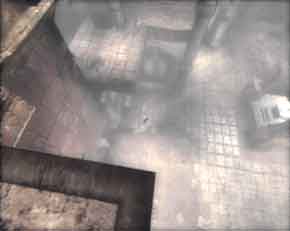
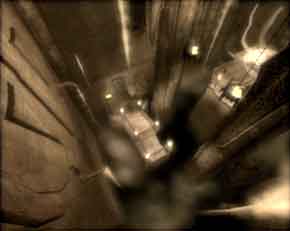
(ABOVE TOP LEFT) Big ass stairs to the big ass Hourglass Chamber. (ABOVE TOP RIGHT) Ledges offer a way for the Prince to move from one tunnel to another by siddling. (ABOVE BELOW LEFT) Wall running can get the Prince over some traps such as these blade traps. (ABOVE BELOW RIGHT) This is the platform device room (or central hall) on the map. Remember this room, since it serves as a connection between most of the island! |
|
Head upstairs anyway -- there is another gallery chest (#004) in the corner. The way onward though, lies in the lower (not upper) path that leads past a trapped hallway to a set of big ass stairs and a save fountain. Remember that rolling allows the Prince to evade some traps. Climb those big ass stairs, navigate the next trapped hallway and enter a very important 'platform device room' (it will be referred to as such in this guide).
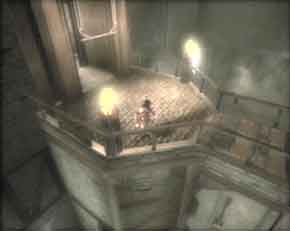
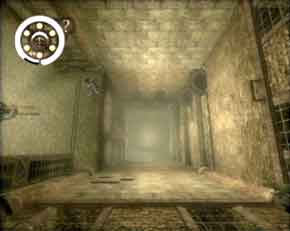
This platform device room serves as a hub that links the various parts of the world together and allows the Prince to move between the Garden tower and the Clock tower, among other things
The game map calls this room the
Central Hall (hit your map key), but really, has the map been all that useful
of late? There is a save fountain near the closed gate of the platform device
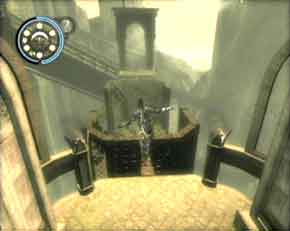
room. Clear the enemies in the platform device room and wall run up onto the
raised platforms, traverse the room using the columns and wall run jump over to
the balcony.
|
|
|
|
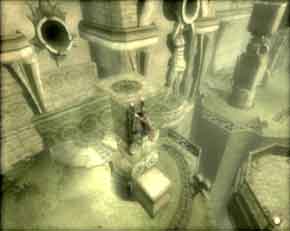
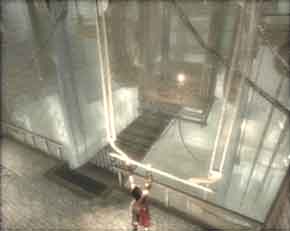
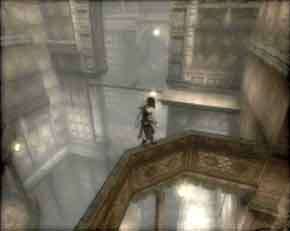
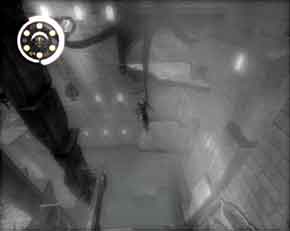
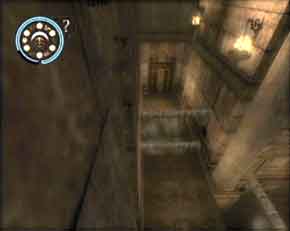
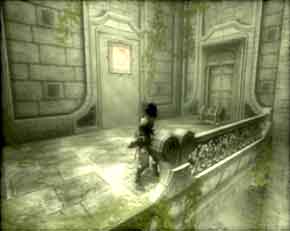
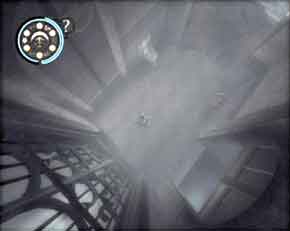
(ABOVE LEFT) Wall run vertically to reach platforms the height of where the Prince can grab the columns. Head to the other side. (ABOVE RIGHT) The hiretho unreachable balcony can be acessed by a wall run and a jump. |
|
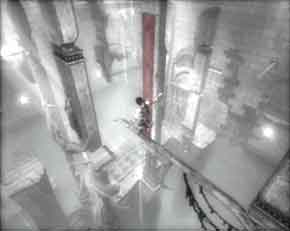
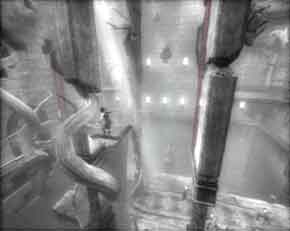
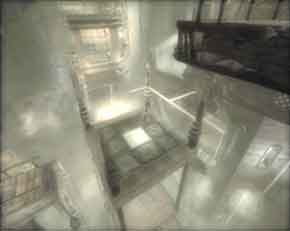
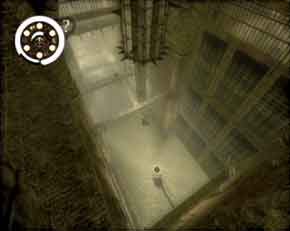
Jump at the edge of the precipice to
make next jump (no wall run, just jump). Wall run and drop past the next few
traps and hit the save fountain. Use ladders and ledges to drop to bottom floor
to proceed. Proceed past the needles and traps by timing movement for the log
to move up when stepping in.
|
|
|
|
|
|
|
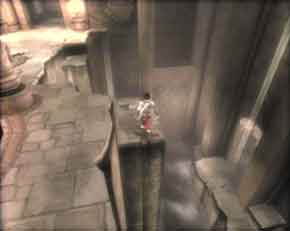
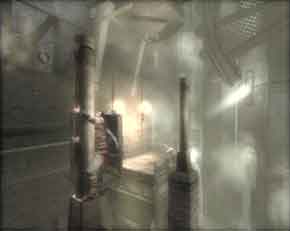
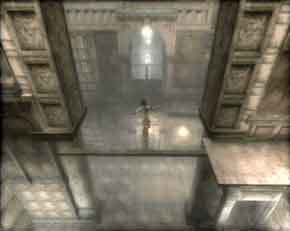
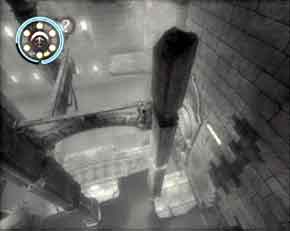
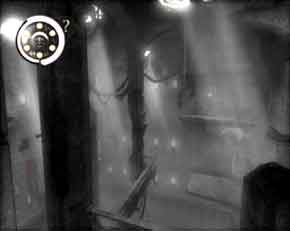
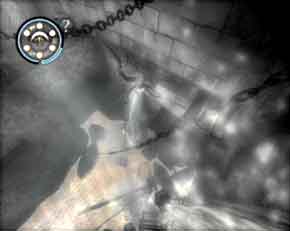
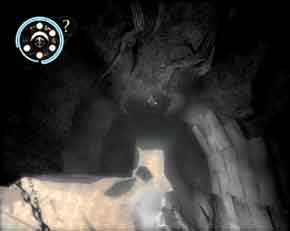
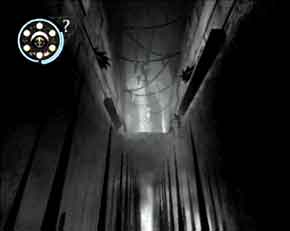
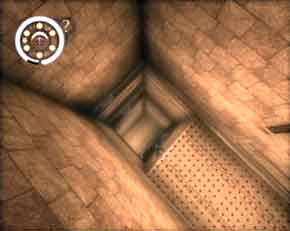
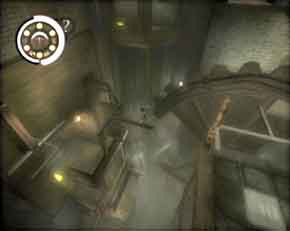
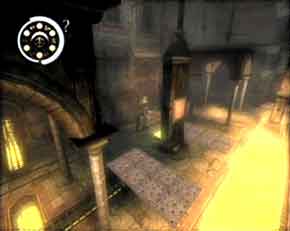
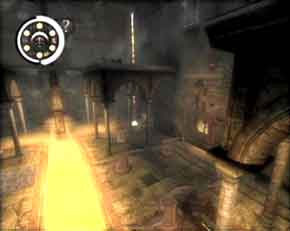
(ABOVE TOP LEFT) Start climbing this room with this bar. (ABOVE TOP RIGHT) Ledge/beams are an element vital to the game. Mantle up and jump to the upper floor. (ABOVE LOWER LEFT) Swing on these bars to go up. (ABOVE LOWER RIGHT) head across the room via the ledge/beams. Watch for ninjas. |
|
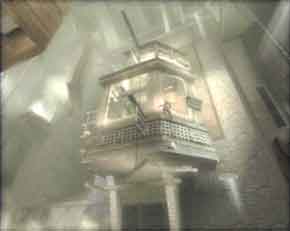
A cut-scene will occur, requiring
the Prince to activate the bar switch to chase after the girl in black. A new
enemy, the red ninja, will make its first appearance. Instead of attacking all
the enemies at once, back up into the previous passageway and engage enemies
one by one by throwing them into the passageway. Once the room is cleared out
one enemy at a time, there is a gallery chest (#005) on the ground floor of
this room, easily accessible by wall runs. Navigate to the room's top using
bars to access the top floor and ledging/wall running to the switch bar. The
balcony's walls can be jumped off from to reach the beams in the middle of the
room; this lets the Prince access the other side. Curtain drop as the path
becomes obvious.
|
|
|
|
|
|
|
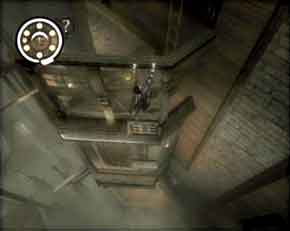
(ABOVE TOP LEFT) Curtain drop down and hop off the last second. (ABOVE TOP RIGHT) Use a charged throw to take out the ninja on the ledge before moving on. (ABOVE LOWER LEFT) You otherwise will have to chop the ninja on the beam - not fun. Use the bars and move up. (ABOVE LOWER RIGHT) One last ninja before you can hit the bar switch, curtain drop and go through the door. |
|
Be sure to keep a second weapon to
throw at any ninja on a balance beam; any hit on the Prince when he is on a
beam will send him falling off. The only part players may have trouble is the
second ninja near the bar switch -- press RH ATTACK before the enemy attacks
and it will be knocked off the beam. Hit the switch by moving under the switch
then jump. Swing off to the curtain and go through the door. Overall,
an easy exercise.
|
Boss - Shadee #2 (also: Miss Sexy Butts) Go through the trapped area (jump
off the curtain drop), use the save fountain and fight Miss Sexy Butts (the
girl in black). Attacking this boss is easy, just
use the girl in red as a distraction. When the boss tries to push off the
girl in red, hit the boss in the back before moving away. Alternatively, try
using the vault attack, but be ready to evade away from the boss in case a
counter attack occurs. Do this enough and you win. |
|
|
|
|
|
(ABOVE LEFT) Alternate between hitting the boss and using the girl in red as a decoy, just like in the Army. (ABOVE RIGHT) Don't miss the life-upgrade behind this altar monument after the fight. |
|
A cut-scene occurs and the Prince
will remain in the 'sacrificial chamber' (past). Grab the gallery
chest (#006) and go to the save fountain on the top of the chamber using ledges
and ropes. The first life upgrade (of several) is available on the ground floor
of the room; move the altar by pulling on it holding BLOCK. Navigate the
trapped hallway and receive a small increase in life for your efforts.
|
|
|
|
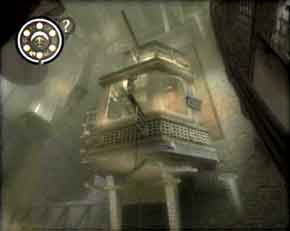
(ABOVE LEFT) Get to the save fountain using this toppled column as a platform. (ABOVE RIGHT) Navigate the ledges to the top and get some rope exercise. |
|
Get up to the save fountain using
ledging, bars, and ropes. Descend break in wall using beaks for ledge/beams to
cross over to other side. Since it is too high to drop safely to where the girl
in red went, the Prince has no choice but to proceed on the upper path to find
a way into the Hourglass Chamber (past the platform device room). Climb the
rope, hit the bar switch to close the shutters, then wall run across to the
other side.
|
|
|
|
|
|
|
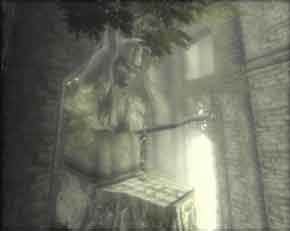
(ABOVE TOP LEFT) The statues' beaks are actually ledge/beams the Prince can use to go across the room. (ABOVE TOP RIGHT) Use ledges to get to the other side. (ABOVE LOWER LEFT) The bar switch will close the shutters allowing the Prince to wall run across the wall. (ABOVE LOWER RIGHT) Wall run across and fight the ninjas using the wall switch to summon spikes - lethal to the enemy as well as the Prince. |
|
Fight ninjas -- use the wall switch to destroy the ninjas when they pursue. From there on, simply work the way up the next circular room using the bars and ledges. Time moving past the traps and make way to the time portal. Hit all four switches to activate the time portal. Wall run up the four wall switches to get them to light up. The sequence is randomised each time (for each game) so players only need to pay attention to which switch stays 'lit-up' when pressed to continue. When all four switches are lit, enter the time portal and zap the Prince back to 1964 so he can be his own father (little Back to the Future joke there).
Fortress Entrance
What's Happened So Far
The Prince gains the use of Slow
Time when he arrives in the present. This ability has become more useful than
it was in the first installment of Prince of Persia. When activated, this power
slows down all manner of things in the environment so the Prince can bypass
them quickly. It is used mostly to deal with traps and doors that move too fast
for the Prince, but comes in handy when you want a cheap solution when dealing
with many enemies. Slow time allows players time for their human reflexes to
catch up to the game. Tap the TIME key to use this power. Slow time uses one
sand tank.
|
|
|
|
|
|
|
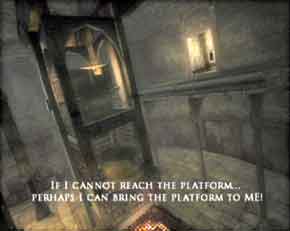
(ABOVE TOP LEFT) Wall run to the ledge in the middle of the wall. (ABOVE TOP RIGHT) The goal is to reach the indicated door (in the cut-scene) without dying. Look for a way to get there and 'work backwards' to where the Prince is. Here's a rope for example. Jump to it. (ABOVE LOWER LEFT) Here's a hint, use this ledge/beam to reach the ledge and then the curtain. (ABOVE LOWER RIGHT) Curtain drop and jump to the beam. |
|
|
|
|
|
|
|
|
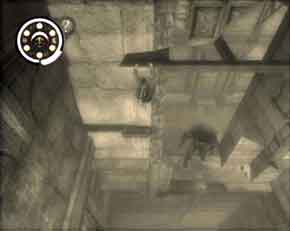
(ABOVE TOP LEFT) Wall run to the bar. (ABOVE TOP RIGHT) Bounce up between pillar and wall. (ABOVE BELOW LEFT) Siddle on the ledge and jump to the bar. (ABOVE BELOW RIGHT) From the bar, jump to the ledge. Mantle up to this entrance and get a brutal taste of the first Dahaka chase. Don't worry about dying; there is usually a checkpoint right before a Dahaka chase. |
|
Navigate through the previous hall and use slow time to get past the fast closing door. Work down to the ground looking for the way back the platform device room. The big platform device room in the present should prove almost no challenge if you readily recognise the various bar, ledge/beam, wall, and other architectural elements the Prince can use to safely descend. Recognise them now instead of later, as you operate under no time constraint for now. Use the save fountain and be ready for the first of many flee-the-Dahaka sequences.
As soon as the Prince makes enough progress down the hall, a cut-scene featuring the tentacled black boogey-man will occur. Basically, fleeing the Dahaka is a simple principle -- the Prince runs away from the Dahaka until certain prescripted events will occur in a cut-scene and the Dahaka drops from sight. The goal is usually a time portal allowing the Prince to escape.
While fleeing, the screen will gradually turn black and white if the Dahaka is close enough to grab the Prince and kill him instantly -- naturally, the secondary goal is to navigate away from the Dahaka as fast as possible and without error
The time power of Rewind works with correcting mistakes when fleeing the Dahaka; however, any gallery chests grabbed up to the Dahaka scene will not be saved (unless a save fountain is available) if the Prince happens to retry that particular Dahaka escape.
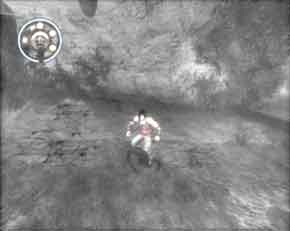
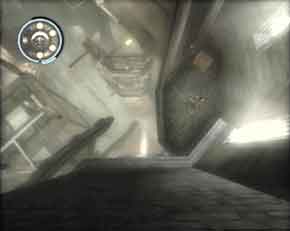
The first Dahaka escape scene will
be described briefly and the tough spots pointed out. No screenshots will be
avaiable as lingering for any moment of time will cut the escape short. There
are collapsing floors involved, so wall run or speed ahead to the bars so the
Prince may use them to swing on. Smash only enough obstacles for the Prince to
get by -- time is now a matter of life and death.
|
|
|
|
|
|
|
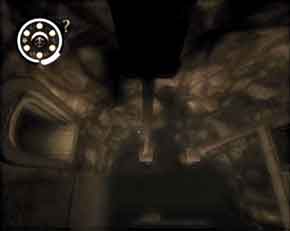
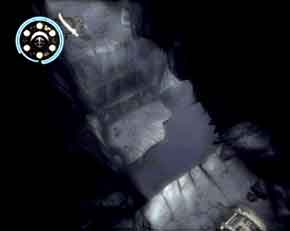
(ABOVE TOP LEFT) See, IGN wasn't kidding when we said work fast through this room. Now the Dahaka is chasing the Prince, you need to work fast to avoid being killed. (ABOVE TOP RIGHT) Climb this quickly and move fast to wall run to the ledge. (ABOVE LOWER LEFT) Wall run over to the next ledge. Hurry the hell up. (ABOVE LOWER RIGHT) Siddle over and make tracks to the time portal. Care to guess what happens if you stall? |
|
Keep fleeing to a familiar looking room (the room after fighting the first Karasuman enemy); wall run up the toppled wall to grab the ledge and navigate quickly to the other side of the large pit. The time portal will be at the of the hallway. Once the Prince makes it past the time portal room, the chase sequence ends. Opt to use the save fountain, if desired.
Once the Dahaka chase sequence ends, the Prince may freely back track and explore the area without fear -- the Dahaka is a game event, and not really a danger unless the event is 'active'. For now, use the time portal to head back into the past. Note to self: Dahaka cannot get its quarry if he lives in Conshelf III or Atlantis.
Device Room & Hourglass Chamber
What's Happened So Far
A cut-scene will occur in the room
past the trapped hallway with the 'Maggot Man'. Head into the next
large courtyard of a room as before (wall run the wall switch). Now that the
Prince has slow time, he can bag the second life upgrade by activating the
floor switch (timed) so he can roll through the small hole leading to the
trapped hallway. Navigate the traps here and earn an increase of life for your
efforts. Ingenious use of wall running and wall run jumping will get the Prince
past the mashing blocks.
|
|
|
|
(ABOVE LEFT) Meet the Maggot Man in this room and try to avoid enemies. (ABOVE RIGHT) With slow time, head into this small gate to get another life upgrade. |
|
Get back outside and head for the platform device room. Notice that the device room has a newly opened door near its save fountain; go through it, navigate the traps and get a cut-scene and some new gear. Trouble at the double rolling log? Simply time the ledging and watch where the Prince is placed depending on whether he is hanging or standing on the ledge. Grab the gallery chest (#007) in the hourglass room and back track outside to the platform device room and use the save fountain. Time to do some real exploring.
The Serpent Sword lets the Prince activate the turnstile switch in the middle of the platform device room. Now you know why this room is referred to as such. Using the nipple cap where the Serpent Sword was entered as '12', the turnstile switch should be looked down upon as an analog clockface.
If you would like to see both endings without doing
too much work, do not get this life-up. Since the last save in the game occurs
relatively near the save fountain in this room, you can get the life-up when
you're ready to see the 'good ending' by making a short detour, or
the 'bad ending' by ignoring the life-up and moving on.
For the third life upgrade, swing
the switch to 6 o'clock position and use a delayed wall bounce to descend
safely to the height of the door leading to the trapped hall. Wall run and then
wall bounce up to the next platform. Do a standing jump to the door and start
navigating the traps. The triple log trap can be wall runned over, or if enough
life can be spared, just drop between the horizontal logs and suck up some
damage. Back track up to the save fountain by using the narrower shaft to wall
bounce upwards.
|
|
|
|
|
|
|
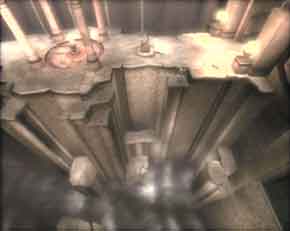
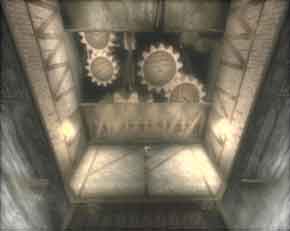
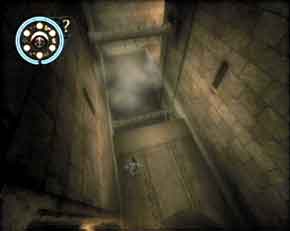
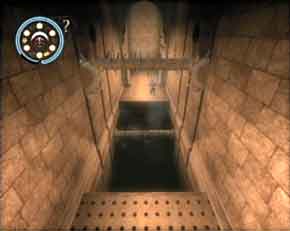
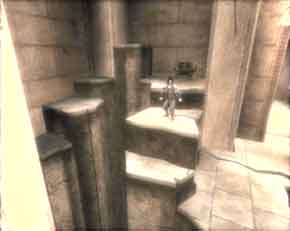
(ABOVE TOP LEFT) With the switch making the bridge whole, you can see there is a door at the bottom of one of the pits. (ABOVE TOP RIGHT) Notice this shaft is wider than the one pictured immediately below it. Wall bouncing here makes the prince descend safely. (ABOVE LOWER LEFT) Wall run and bounce - trust IGN on this one and you can naviagte to the corner of the room. From there, it is fairly obvious what to do to get to the door. (ABOVE LOWER RIGHT) Go back up to the save fountain using this narrower shaft, which only allows an upward wall bounce. |
|
Before moving on to either tower, spend some time in this room to grab gallery chests (#008 and #009) from the 3 o'clock and 9 o'clock positions. Getting them now and then saving can be helpful in cutting down on losses later on. Be sure to use the save fountain after bagging both chests.
The
What's Happened So Far
Head for the
At the floor switch with the fast retracting grating, drop into the pit temporarily to find gallery chest (#010). Head back up and use slow time to navigate the grating quickly to the mid-point platform. Bounce to the bar and hit the wall switch using a bounce jump. Slow time once the switch is hit, drop and run to the save fountain. There's nothing in the second pit (except sand).
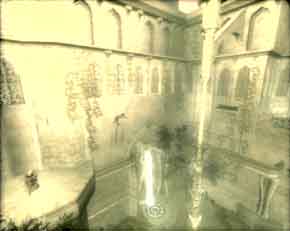
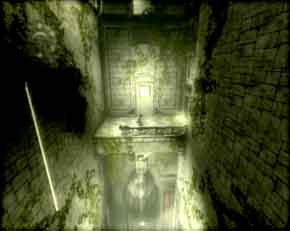
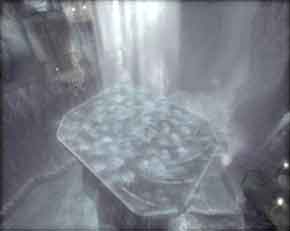
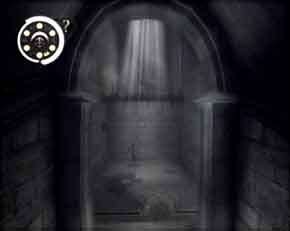
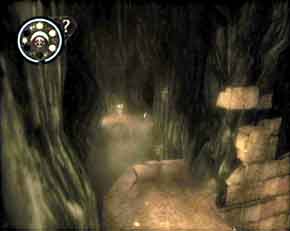
The first room of the
It is also a reference for this
freelancer's indulgence in mermaids drawn by Belgian comic artists, as well as
a more obvious reference to statue in the room. Don't miss the gallery chest
(#011) on the ground floor of the water maiden room -- it is near one of the
statues on the side, under some brush.
|
|
|
|
|
|
|
(ABOVE TOP LEFT) Wall run vertical and jump to get to the ladder. This lets the Prince get to floor #2. (ABOVE TOP RIGHT) The Prince can jump from one side to the other for the gallery chest. Amazing but true. (ABOVE LOWER LEFT) Wall run and jump to the gallery chest. This side is near identical to the other side. (ABOVE LOWER RIGHT) The path to the jungle room. Wall run, jump, and swing to the door. |
|
Climb the ladder and either ignore or fight off the Karasuman enemy. Although the way on is to wall run to the rope and head to the end of the hall, detour a bit first and jump across from one platform to the next. Wall run and hit the rope, then hop off the rope to access gallery chest (#012). Drop off the curtain and repeat the previous few actions back to the 'correct' path. Exit the water maiden room through the door.
Descend this room (it serves to
connect the water maiden room with another room in the second area of the
The Prince will be returning to this
room after the next few tasks are completed. The turnstile switch here acts as
an 'air-lock' allowing the Prince to
visit one area at a time. Go through to the dense jungle like room; dispatch
the enemies here, as the may damage the Prince even more if a jump is missed
here. Keep the sand tanks filled for Rewind, just in case. There is a gallery
chest (#013) on the ground floor of this jungle room.
|
|
|
|
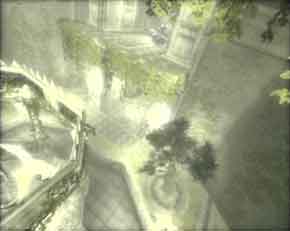
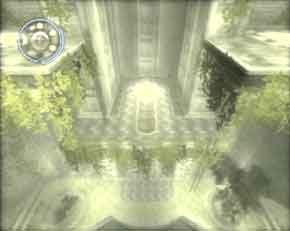
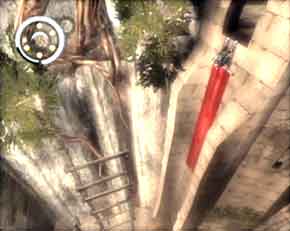
(ABOVE LEFT) See that door? How about that break in the fencing on the upper left of the shot? Go there. This is first person view from the other side of the bridge, looking towards the jungle room. (ABOVE RIGHT) Landscape view shows the place from a different angle. Ledges allow the Prince to descend safely to the door's level. |
|
Before heading up (which is the way
onwards), locate a break in the balcony on the ground floor of the jungle room.
Navigate the ledges down to the door. This leads to a trapped hallway to the
fourth life upgrade. This is also a good place to go if the Prince is short on
sand, since there are some jars in an enemy-free room requiring no new tricks
to access. However to get the life augmentation, the Prince will need to use
slow time on some of the traps here. Backtrack up to the jungle room once the
Prince got his goodies.
|
|
|
|
|
|
|
(ABOVE TOP LEFT) Get on this ledge switch and use slow time to reach the next few elements (i.e., the rising block and the ledge above it). (ABOVE TOP RIGHT) Navigate across the room using bars and ledges. (ABOVE BELOW LEFT) Climb up to the bridge switch using the ledges on this corner pillar. (ABOVE BELOW RIGHT) Yank the bar switch to connect the bridge, move the box to the floor switch and operate the turnstile switch to get some water going. Ledge around back to the exit. |
|
At the jungle room's ground floor,
activate the ledge switch, and use slow time (one of the reasons why there are
regenerating enemies if the Prince heads down the hallway to the life-up) to
get on the short platform to move on. The way onwards to the platform with the
Karasuman and the puzzle is fairly obvious, requiring ledging, bar swinging,
and rope/wall run. See you in two minutes.
|
|
|
|
(ABOVE LEFT) Drop down and look for a rope to get back to where you came from. (ABOVE RIGHT) Notice the partly broken wall the Prince can come back to later. |
|
Head to the corner vertial assembly
and jump over to the bridge's bar switch. This lets the Prince push/pull the
weighted box onto the floor switch to allow him progress (and water) to the
turnstile switch. Head back to the water maiden room after the water starts a
flowin' by ledging to the other side and dropping. Notice the cracked wall that
will be breakable later when the Prince has a wall-breaking sword. Drop down on
the rope and go to the water maiden room. Use the curtain to drop safely to the
ground.
|
|
|
|
(ABOVE LEFT) Curtain drop back to solid ground. (ABOVE RIGHT) Operate the four turnstile switches to get the water flowing. This opens the center door in the Water Maiden room. |
|
Rotate the four turnstile switches to cause water to flow along the little channels in the ground. When all the 'circuits' are connected between the two statues on the side, the central door past the water maiden statue opens and the Prince may continue. The passage leads up -- kill the crows using a simple on-the-ledge attack or get knocked off to death. Go through the time portal and use the save fountain if desired.
he
What's Happened So Far
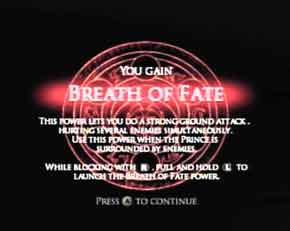
The Prince gains the Breath of Fate
time power, or what this freelancer likes to call, 'Some kinda moving air
current of fate'. Basically, it is a 'ground smash' attack that
knocks enemies away from the Prince. Activate it by drawing the Prince's sword,
holding BLOCK and holding the TIME key to build the energy charge then
releasing TIME. The greater the charge, the more damage is done, but at the
cost of more sand tanks. As the Prince goes deeper into the game, this power
gets progressively stronger and more costly. Be prepared to spare up to three
sand tanks as this power builds; currently, it will only cost one sand tank.
|
|
|
|
|
|
|
(ABOVE TOP LEFT) Use this block and beam to reach the second floor this time (the ladder is gone). (ABOVE TOP RIGHT) No enemies and a simple non-timed balancing exercise. If you die, IGN will alugh at you, then strip you of your Princely clothing. (ABOVE BELOW LEFT) Climb up to the next floor using ledges on the side. (ABOVE BELOW RIGHT) Cross the ledge/beams and drop carefully onto lower ledge/beams. |
|
The overgrowth has made some changes
to the scenery. Wall run, bounce to the ledge/beam above and move on. The goal
is to go past the water maiden room into another part of the
|
|
|
|
|
|
|
(ABOVE TOP LEFT) Descend first then drop. Jumping on ledge/beams is dangerous and can cause the Prince to fly off at inopportune moments. (ABOVE TOP RIGHT) Climb up the ledge/beam and hop over to the door. (ABOVE BELOW LEFT) Ledge exercise. Simple. (ABOVE BELOW RIGHT) Make it to the other side using the ledge/beams in the pit. |
|
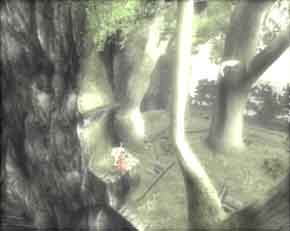
The room after the save fountain is the area leading to the jungle room (with the bridge and box puzzle) from the past. In the present state, the Prince needs to get past each obstacle while avoiding enemies. If you are looking to unlock the different weapons in the gallery, you will need to tough out the fights and combat each enemy then taking up and throwing dropped weapons in turn to complete your collection. However, players should learn to walk before they go to a run.
Clearing Warrior Within with 100% is
not an easy task even for veteran Prince of Persia players, so take stock of
the game on your subsequent try; for now, focus on the simplicty of survival
instead. Navigate the room using ledges, wall running, bar swinging, and beam
balancing to the balcony door shown in the cutscene. Use the save fountain in
the middle of the jungle room to save if desired.
|
|
|
|
|
|
|
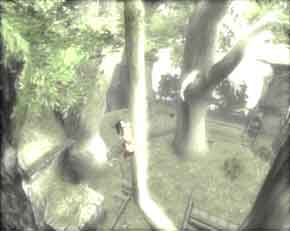
(ABOVE TOP LEFT) Descend the first chance you get. (ABOVE TOP RIGHT) Siddle over to the other side. (ABOVE BELOW LEFT) Wall run over to the next area. (ABOVE BELOW RIGHT) Wall run, ledge up, siddle and head up to the next area. |
|
|
|
|
|
|
|
|
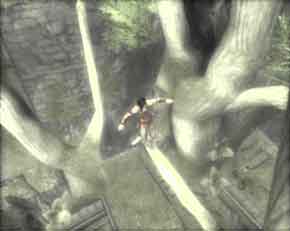
(ABOVE TOP LEFT) Siddling from the previous shot. (ABOVE TOP RIGHT) Get ready to wall run at this broken bridge. (ABOVE BELOW LEFT) Jump and ledge to safe ground. (ABOVE BELOW RIGHT) Ledge up and climb this column resembling a tree. |
|
|
|
|
|
|
|
|
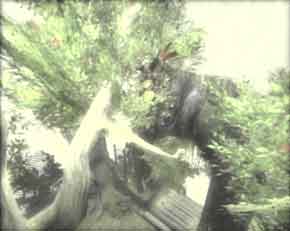
(ABOVE TOP LEFT) Climb up and get to that ledge/beam posing as a branch. (ABOVE TOP RIGHT) Navigate the ledge/beams to the next bar posing as a thin branch. (ABOVE BELOW LEFT) Bar swing to the archway. (ABOVE BELOW RIGHT) Grab the ledge and round the obstacle to the other side. |
|
|
|
|
|
|
|
|
(ABOVE TOP LEFT) Cross over to the high platform in the corner. (ABOVE TOP RIGHT) Jump out onto the other side. (ABOVE BELOW LEFT) Wall run to the small ledge from the corner of this platform. Save fountain is right nearby. (ABOVE BELOW RIGHT) Wall run vertical to the top and use the columns to reach the top. |
|
|
|
|
|
|
|
|
(ABOVE TOP LEFT) Column hop to the next available area. (ABOVE TOP RIGHT) Detailed shot of the columns posing as trees the Prince can navigate past. (ABOVE BELOW LEFT) Wall run to the balcony the Prince could not reach before in the past. (ABOVE BELOW RIGHT) Destination reached. Time to save. |
|
Last obstacles to save fountain only
require standing jumps and one final wall run to the save fountain; use the
same technique again on the next set of mashing blocks to the rope and column.
Fight (or better yet evade) through the enemy filled rooms to the
|
|
|
|
|
|
|
(ABOVE TOP LEFT) Jumps only. Wall run on the second masher block to the save fountain. (ABOVE TOP RIGHT) Jump, jump, then wall run and . (ABOVE BELOW LEFT) Rope, jump off to the column and cross over the trap. (ABOVE BELOW RIGHT) Make it to the other side using the columns. |
|
Wall run jump to the first column.
Although it doesn't look like it, the Prince can jump to most of the columns
from the existing platform or column he is on; just make sure the coumns line
up using the first person camera. A side trip to the side of the
|
|
|
|
|
|
|
(ABOVE TOP LEFT) Wall run and jump to the first column. You can avoid the Karasuman unless you really want to find out what that secondary weapon is on the rack. (ABOVE TOP RIGHT) Another uncommon (but respawning) secondary weapon is in the doorway the Prince has to detour to; if you ain't interested, go the other direction. (ABOVE BELOW LEFT) Bar swing over to the Dahaka chase event. (ABOVE BELOW RIGHT) If you die fleeing the Dahaka, you restart here. Try not to or it may result in some game-stopping bugs. |
|
The Dahaka chase is more difficult this time, so players have a smaller margin of error. Each move made must be made safely away from the Dahaka while preserving sand (for Rewinds). Head down the ladder and cross the gaps quickly. Any jars and urns should be ignored or crushed quickly if there is no way around them. After the urns and jars, the course turns left -- stay on the right side for the rope the Prince requires to lengthen his wall run. Jump to the ladder going down the put and press the ACTION key to drop near the end. This puts the Prince slightly ahead to the time portal. Once the Dahaka extends its tenctacles to the water, the Prince is safe (you can venture back outside to chop the Dahaka after it begins its frsutration animation, quite funny). Use the save fountain if desired then head into the past.
he
What's Happened So Far
The Prince gains a new sand tank,
giving him a total of four tanks (as opposed to three). This allows more
flexibility in the use of time powers and makes for longer stretches between
'pit stops' where the Prince may refill his portions of sand.
|
|
|
|
(ABOVE LEFT) This area is right
above the Water Maiden statue. Don't fall or it's a long detour to get back
up here. (ABOVE RIGHT) Head over this way to the second |
|
Head back upstairs via the ladders and go to the door shown by the cut-scene. Don't make any stupid detours now, as the other side of this room will be explored on the Prince's return journey. Move through to the next room and work the Prince back up to where the Dahaka was in the present. Not a particularly difficult task, but the traps make it more interesting. Slow time is not needed, but some players may want to opt for it; IGN recommends spending sand only on Rewind (unless it cannot be helped) due to risk-assessment.
Compare: slow time (1 sand tank) and
if you mess up, rewind (1 sand tank), making it two sand tanks worth of
mistakes. If you can time the Prince to move past the traps, it will cost no
sand tanks -- if there is a mistake, Rewind takes one sand tank and you'll be
better off down the road.
|
|
|
|
|
|
|
(ABOVE TOP LEFT) Move this ground turnstile switch so the upper left statue points its beak at the column. (ABOVE TOP RIGHT) This lets the Prince wall run to the top of the statue. (ABOVE BELOW LEFT) Ledge over and wall run to the next switch. (ABOVE BELOW RIGHT) The rope will come in handy. |
|
Head for the save fountain and go up
to the
|
|
|
|
|
|
|
(ABOVE TOP LEFT) Operate the second switch to point the statue's beak at the archway. (ABOVE TOP RIGHT) This forms a bridge the Prince can navigate safely to the third turnstile switch. (ABOVE BELOW LEFT) Operate the third turnstile switch to point the statue beak at the great big wall. (ABOVE BELOW RIGHT) Wall run over using the rope to get to the column and statue. |
|
Point the second switch's controlled
statue towards the large archway -- this lets the Prince go across to the other
side of the room using the statues and archway as a 'bridge'. Point
the giant face of the wall (where the switch was shown in the cut-scene). Use
the rope to head to the giant wall and work over to the final switch. A gallery
chest (#015) is also at the end of the road, grab it, operate
the turnstile switch to release the water. After the water starts running, look
for a ledge in this turnstile switch room for a door way to the fifth life
upgrade.
|
|
|
|
|
|
|
(ABOVE TOP LEFT) Jump over to the room using the statue's beak. (ABOVE TOP RIGHT) Turn the water switch to get the water flowing. While you are in there, look up. (ABOVE BELOW LEFT) Ledge up for 'life up time'. (ABOVE BELOW RIGHT) Get back on the ground and rotate the left statue to point the beak right to get the water flowing. |
|
Head back down to the ground. The Prince will need to operate the right turnstile switch back towards the archway to get back. Do so and continue retracing steps down to solid ground. One last use of the ground turnstile switch will unlock one of the two bars to the throne room. Backtrack to time portal; there is nothing more of interest here at this moment.
Back in the Water Maiden Room (room next to the time portal), the cut-scene indicates that the Prince needs to go to the other areas of the room by bar, wall, and ledge.
Wall run to the wall switch -- this
creates a timed platform that sticks out of the wall across the gap. Grab
gallery chest (#016) as well. Use slow time to head back across; wall run jump off to the bar and move to the ledges. Note
that once the Prince swings off the bar, it is impossible for him to return to
the save fountain and time portal (the wall is inclined too steeply to make it
safely back). Be sure to have picked up the life-up in the Turning Statue room
and all the gallery chests before attempting this exercise or you'll be
spending some time coming back to this area.
|
|
|
|
(ABOVE LEFT) Hit that wall switch and head back over with slow time in effect. (ABOVE RIGHT) The sliding platform is timed. Siddle over using the bar/pipes and head down to the platform device room. |
|
Ledge down and pull the bar switch if it wasn't pulled already (to lower the ladder to the next floor). Drop to the ground floor of the Water Maiden room and head back to the platform device room. A cut-scene will occur and the Prince will earn the Lion Sword.
The Lion Sword's power is
significantly improved over the Serpent Sword, although the Prince will
probably never be able to do the charge attack on any difficulty except Easy.
The added power is necessary though, since the enemies in the Clock Tower are
significantly tougher than the ones in the
he Clock Tower, 1st Gear Chamber
What's Happened So Far
The Clock Tower is rife with
game-stopping bugs, many that have yet to be resolved to a satisfactory
conclusion. If you are a GameCube or Playstation 2 owner, consider leaving a
save file on a back-up memory card at this point in the game so you will not
lose everything you've worked so hard for. Xbox and PC owners -- you have ample
space -- just be sure to have one of those slots
preserved in case something happens.
|
|
|
|
|
|
|
(ABOVE TOP LEFT) Past the time ledge switch, the Prince can wall bounce up to the much dreaded Clock Tower. (ABOVE TOP RIGHT) Siddle and descend the ledges. (ABOVE BELOW LEFT) Landscape view, if you need a reference. (ABOVE BELOW RIGHT) Roll between the golem's legs, attack the monster's calves, press the stick towards it when it is kneeling and the JUMP key to get on board, press ATTACK to hit it a few times. JUMP off after three hits. Is it still alive? Repeat the process. |
|
Move turnstile switch to the 3
o'clock to access the Clock Tower. The entrance of the Clock Tower is timed.
Use slow time to head past the traps and through the gate. Wall
bounce up to the next level. Navigate past the masher blocks and traps
to the save fountain. Ledge drop to the ground and fight the
first 'golem' in the game. If you were dumb and chose to
attempt the Clock Tower without the Lion Sword first, you're pretty much forked
with some of these fights since these giant enemies take a lotta hits from the
Serpent Sword. With the Lion Sword, it is slightly easier, but you will need to
be wary not only of the damage the golem does to the Prince (that does not
change unless a new difficulty is used) and the ability of the game to glitch
by respawning enemies when a section is retried, but some switches (and switch
effects) are left in the last position the Prince had them in.
|
Boss - Golem #1 (Tower Bottom) Use of slow time is recommended --
but not necessary -- to beating a golem. Simply roll between its legs (no,
you can't stab the crotch, but that'd be neat if you could) then hack away at
the monster's unarmoured calves. Attack from the back then evade to the side
or away from the golem (the counterattack). Repeat the rolling, calf slashing
attack until the golem kneels. While the golem is kneeling, press stick
towards and JUMP to get on its back. Press the RH ATTACK button no more than
five times (three on Hard, four on |
Did the Prince use Slow Time?
Restock on sand in the arena before progressing. If you relied on slow time as
a crutch for skilled evasion, you should psychologically prepare for a golem
fight that has an enemy with double the life and no sand refills what so ever.
|
|
|
|
|
|
|
(ABOVE TOP LEFT) This wall switch raises a platform that sinks quickly, but slow time is not needed to exploit it. (ABOVE TOP RIGHT) Use slow time to bypass the spinning gears in necessary. (ABOVE BELOW LEFT) The center platform. This will be the primary structure the Prince will use to ascend and descend the Clock Tower's first gear chamber after the initial climb. (ABOVE BELOW RIGHT) Reach the side platform using hte moving columns. |
|
Grab the gallery chest (#017) past the golem and move into the Clock Tower. Hit the wall switch and ledge up to the save fountain. This is the last save you can count on being uncorruptable if this is your first time in the Clock Tower. Be sure also, to keep a secondary weapon when you save -- you will need a secondary weapon (unbroken) for one part in the Clock Tower.
Use slow time to jump past the
rotating gears (take that Castlevania!). The central platform the Prince lands
on will be used as a way to go from one side of the tower to the other; it will
also need to be raised to access the exit from this first gear room. Use the
rising/falling columns to move to the platform on the edge. Tap the wall switch
and use slow time to help the Prince move to the other side of the sliding wall
to get to the turnstile switch. Rotate the turnstile switch to progress.
|
|
|
|
|
|
|
(ABOVE TOP LEFT) This wall moves side to side. Use slow time to wall run to it, then siddle around using the ledge, finally jumping to the switch. A very cool puzzle you only need to do once. (ABOVE TOP RIGHT) Rotate the bar usingthe turnstile switch. (ABOVE BELOW LEFT) Time the swing to hit the moving bar when it is at the lowest point. (ABOVE BELOW RIGHT) Pull this bar switch once and only once to raise the center platform by one step. |
|
Swing onto the rising/falling bar to
the next level. Fight the Prince's first fire beast -- remember these bastards
explode when they are about to die (the flaming body is the indication). Wall
run straight up any wall and that usually gives the Prince enough time for the
enemy to explode without incident. Activate the bar switch to raise the central
platform slightly. Head to the side chamber as indicated in
our illustration.
|
|
|
|
|
|
|
(ABOVE TOP LEFT) Jump over to the side room using the ledge/beams as 'platforms'. The Prince will need to do some of this area the next time he wants to climb the Clock Tower. (ABOVE TOP RIGHT) Climb up on the ledges and work over to the opening. (ABOVE BELOW LEFT) Drop on the 'safe ledge' and enter the room with the ladder. If the Prince doesn't grab the ledge, it may be the wrong one - remember that he only needs to mantle once after the drop to enter the room. (ABOVE BELOW RIGHT) Jump to the ledge on the wall. If this is the second or subsequent time climbing the Clock Tower, go on the beam seen in the lower right of this photo instead and jump to the center platform. Do not pull any more bar switches in this room or you have IGN's congratualtory dead game. |
|
Ledge up, over, and down into the
room to access a gallery chest (#018) and the ladder heading up. Ledge over to the bar, time the jump to the rotating wall,
and operate the turnstile switch so the gear in the distance is moving
clockwise. The Prince can grab onto the edge of the gear's cog and be
transported to the other side. Note that this turnstile switch will need to be
used twice if the section is retried -- once to reset it, and a second time to
get the gear going in the correct direction.
|
|
|
|
|
|
|
(ABOVE TOP LEFT) Spring over to the rotating wall and jump to the tunrstile switch. (ABOVE TOP RIGHT) Use the turnstile switch (esp. each time if you have been retrying) to make the gear in the distance turn clockwise. (ABOVE BELOW LEFT) Draw your sword, hold BLOCK, release and then hold the ACTION key to throw something to send the fire beast off to its doom. This should be done before you wall run to the swinging wall. (ABOVE BELOW RIGHT) Hop over to the other side using the ledges. |
|
There is a timed floor switch that
moves a swinging wall so the Prince may wall run and jump to it. However, a
fire beast is also on the wall, making life rather hazardous. Get rid of this
problem by drawing the Prince's sword, holding BLOCK (to target the enemy),
then holding the ACTION key to charge throw the secondary weapon. You lose the
weapon, and the way is clear.
|
|
|
|
|
|
|
(ABOVE TOP LEFT) The bar switch that raises the lower central platform. Don't use this switch if this is the second or subsequent time you are climbing the Clock Tower. (ABOVE TOP RIGHT) Use the central platform's ledge/beams to head to the exit. Slow time again is essential to bypass the spinning gears. (ABOVE BELOW LEFT) The exit from the first gear room. Don't miss the gallery chest on the left. (ABOVE BELOW RIGHT) This is a simple wall switch ledgin will open. |
|
Raise the central platform one last
time by using the bar switch. Moving onto the central platform will trigger an ambush
of fire beasts. Bat them off to climb the ledge/beams and slow time through the
gears to the exit. Don't miss the gallery chest (#019) before leaving for the
trapped hallway. Navigate the next section of traps, activate the wall switch,
shoot past the gate and go for the save fountain.
|
|
|
|
|
|
|
(ABOVE TOP LEFT) The wall switch here is timed to raise a block; slow time to climb the block and reach the rope. (ABOVE TOP RIGHT) The rope and the block (not pictured since it is lowered). (ABOVE BELOW LEFT) At this junction, right is the way on, left goes to a gallery chest. (ABOVE BELOW RIGHT) Explore this spinning shaft room for a gallery chest. |
|
The Prince is now in the second gear
room of the Clock Tower (as opposed to the bug-filled first gear room). Fight
off the enemies, hit the wall switch and use slow time to access the rope. Head
left when given the choice. This is because bagging a gallery chest (#020) is
important in the turning gear shaft room. Head back outside and head right for
another cut-scene with the 'maggot man'.
|
|
|
|
|
|
|
(ABOVE TOP LEFT) Time the wall run past the spinning wheel to jump to the column (ABOVE TOP RIGHT) Operate the turnstile switch and wall run to the lift. (ABOVE BELOW LEFT) A gallery chest off the side path once the Prince bounces to the top. (ABOVE BELOW RIGHT) The second golem room. |
|
Time the wall run
to avoid the wheel spokes and slow time
for the second wheel to the wall jump off to the column. Rotate the turnstile
switch and ride the lift to the next level (some wall bouncing necessary).
Instead of going into the room, head to the catwalk to get a gallery chest
(#021). Head into the room. Golem
time. A repeat of how to beat down a golem: use of slow time is
recommended -- but not necessary -- to beating one.
|
Boss - Golem #2 (Near Water Paddle) Roll between its legs then hack
away at the monster's unarmoured legs (from the back). Attack from the back
then evade to the side or away from the golem (the counterattack). Repeat the
rolling and leg-slashing attack until the golem kneels. While the golem is
kneeling, press stick towards and JUMP to get on its back. Press the RH
ATTACK button no more than five times (three on Hard, four on |
|
|
|
|
|
|
|
(ABOVE TOP LEFT) Use a second weapon to charge throw the fire beast off the wall before doing the wall run. (ABOVE TOP RIGHT) Water, water everywhere, so why not have a drink? Roll under the water paddles to pass this area. Don't forget to pull the bar switch for the door. (ABOVE BELOW LEFT) Swing over and head for the time portal (ABOVE BELOW RIGHT) A tricky trap (this in the present) requires wall running from the top of the masher block over the log traps in the distance. |
|
Restock on sand and if the Prince still has a secondary weapon, keep it around for about five seconds. It'll be useful in a moment. Head past the golem room and locate a gallery chest (#022) and then head for the side entrance where a fire beast is on the wall. Hold BLOCK and target the enemy, then use a charge weapon throw to get rid of the problem. A secondary weapon in the golem room is available if needed.
Wall run, catch the rope and hit the water. Negotiate the water course by rolling through the openings in the moving paddles. Stop in the middle to pull the bar switch to open the door on the other side and move through it. Head for the time portal at the end of the trapped hallway.
The Clock Tower, 2nd Gear Chamber
What's Happened So Far
The Prince gains the Haste time
power after the cut-scene. Haste is pretty much like the old Sands of Time
power whereby the Prince moves exceedingly fast to strike enemies while they
barely move. It is a more combat oriented version of Slow Time, and lets the
Prince get in several hits with a sword before the effects end. Haste does not
make the Prince invincible -- any damage done to the Prince, say in an
explosion -- will be counted towards the Prince's life after the effect wears
off, possibly killing him. However, Haste does make fighting groups of enemies
more tolerable but the cost is rather high; Haste uses two sand tanks instead
of the more cost-efficient Slow Time. Use Haste by drawing the Prince's weapon,
holding BLOCK, then tapping the TIME key.
|
|
|
|
|
|
|
(ABOVE TOP LEFT) Make it back outside to the second gear room and curtain drop. (ABOVE TOP RIGHT) Go past the spinning wheel to the columns and lift as before. (ABOVE BELOW LEFT) Destroy the wreckage on the right using the fire beast's explosion. (ABOVE BELOW RIGHT) Water in the previously impassable needle filled hallway. Refill and head back to the fight. |
|
Go back through the trapped hall
once more. The masher blocks increases the height from which the Prince starts
his wall run, so use them to go over the low lying traps. The rope in the
middle is also one of the few in the game not designed for swinging (hint,
hint). Head back into the main room and use the curtain to drop down to the
next platform. Head back to the golem room by the same method.
|
|
|
|
|
|
|
(ABOVE TOP LEFT) Jumps are the only way to cross these gaps. (ABOVE TOP RIGHT) What we just said. By the way, these single enemies allow the Prince to strangle and keep a second weapon. Do it, just in case you need it. (ABOVE BELOW LEFT) Drop down using the ledges to the next level below. (ABOVE BELOW RIGHT) All the gaps in this section are navigable using jumps. |
|
The golem room is slightly different
this time -- the Prince needs to lure one of the infinitely spawning fire
beasts to the wreckage of the door to blow it up. Once the wreckage is cleared,
the fire beasts stop spawning. A pool of water is also in the hallway where the
gallery chest was in the past (the pit hall). The wrecked path basically puts
the Prince back on the path of the waterway to the time portal but leads down
instead. Go there.
|
|
|
|
|
|
|
(ABOVE TOP LEFT) Jumps are the only way to cross these gaps. (ABOVE TOP RIGHT) What we just said. By the way, these single enemies allow the Prince to strangle and keep a second weapon. Do it, just in case you need it. (ABOVE BELOW LEFT) Drop down using the ledges to the next level below. (ABOVE BELOW RIGHT) All the gaps in this section are navigable using jumps. |
|
This basically leads to the rotating
gearshaft room where the Prince may have been before. Climb the ladder and jump
through the gap. Use the ledges on the side and on the shaft to ledge up to the
exit. The last wall switch to open the door requires a wall bounce to make the
door in time (naturally). Fairly easy, so long as the Prince
does not fall. You'll be using those sands in short order (i.e., Dahaka
time).
|
|
|
|
|
|
|
(ABOVE TOP LEFT) Go through the gap at the top of the ladder. (ABOVE TOP RIGHT) Ledge up on the sides and jump back to the shaft's ledges when they appear. (ABOVE BELOW LEFT) Ledges are the primary thing to work on in Warrior Within. Get up to the next level using a jump/mantle. (ABOVE BELOW RIGHT) The last wall switch requires the Prince to jump, bounce off the switch and back to the shaft's ledges to make it to the door in time. Doesn't matter if the Prince misses, since he dies from the fall anyway. |
|
Use the save fountain to recharge
the Prince's life to lure fire beasts to the wreckage. As soon as it is
cleared, the Prince will automatically escape the room; it will not happen on
subsequent visits. Bounce up the wall and climb up the right side, then jump to
the center dias. Use the ledges to move up and the
corner platforms to wall run to the ladder (this is an old puzzle from Sands of
Time).
|
|
|
|
|
|
|
(ABOVE TOP LEFT) Blow the wall using the fire beast's explosions and bounce up the shaft. The next time the Prince comes here, the wall will be gone, but the jump you have to make yourself. (ABOVE TOP RIGHT) Wall run up to this platform and jump over to the fallen weight. (ABOVE BELOW LEFT) Ledges are the primary thing to work on in Warrior Within. Get up to the next level using a jump/mantle. (ABOVE BELOW RIGHT) Wall run from the corner platforms to the next one, then again to the ladder. |
|
Hop over the railing to progress.
Avoid the ninjas (unless you aim to collect their weapons by taking and
throwing them) and head down the ladder and hopping to the next ledge with some
caution with the swinging gear. Avoiding the traps is merely skill -- slow time
is not needed for this traps (yet). Negotiate the
traps down the hall and ledge over to the progress. Then meet Mr. 'I Want To Eat Your Face And Turn You Into Poo' Dahaka.
|
|
|
|
|
|
|
(ABOVE TOP LEFT) Don't be hasty, just because you're one cocky Persian s.o.b. with more moves than a womanizing Brat-Packer. This gear can catch the Prince and cause him to fall if the jump is mis-timed. (ABOVE TOP RIGHT) Proceed carefully to the next section. (ABOVE BELOW LEFT) A one-way wall run. Once you drop, you can't stop. (ABOVE BELOW RIGHT) Wall run to the ledge and siddle/jump over the gap. It's Dahaka time. |
|
Flee the Dahaka for a third time to the time portal. This time, there is an extra waterfall door mid-way through the course, giving the Prince some time to use the wall switch to narrow a shaft to wall bounce upwards and to fight fire beasts and enemies. It is generally safer and faster to simply ignore those enemies and head to the time portal. Use the save fountain if desired.
The Clock Tower, 2nd Gear Room
What's Happened So Far
The Prince gains a new sand tank,
for a total of five sand tanks. This will give players more measure of
flexibility when it comes to using time powers. More sand tanks may allow
players to use more expensive powers, but sand is rare -- it can only come from
breakable canopic jars, junk or enemies, so do not waste it. The more sand the
Prince can stock up, the more he will be able to use time powers to make the
game easier.
|
|
|
|
|
|
|
(ABOVE TOP LEFT) Drop down safely using the delayed wall bounce in this wide, wide shaft. (ABOVE TOP RIGHT) The traps can be used to kill enemies as well as the Prince. (ABOVE BELOW LEFT) Cracks in the wall can be destroyed using the third golem's explosives. (ABOVE BELOW RIGHT) The ledge switch in the save room will let the Prince wall run and grab a slowly rising lift past the spinning wheel. |
|
Navigate the hallway back down to
the ground of this second area of the Clock Tower. Whack the fire beasts in the
hall in order for the Prince to sheathe his weapons to roll under the gear.
Conversely, the Prince can target a beast on the opposite side of the gear and
roll to it. Regardless, the fire beasts can go through the small hole in the
gear. Use the delayed wall bounce to descend safely from the top to the floor.
Fight the enemies -- or better yet -- evade them and wall run to the other side
where a giant golem will be throwing explosives from his little base.
|
|
|
|
|
|
|
(ABOVE TOP LEFT) Drop the weights (there are two) by hiding behind them so the golem blows them up with explosives. (ABOVE TOP RIGHT) The turnstile switch creates platforms for the Prince over the rotating gear shafts. (ABOVE BELOW LEFT) Time wall runs when the shutters are down when the Prince reaches them. (ABOVE BELOW RIGHT) The ledge in the corner lets the Prince drop to grab bars. |
|
The sixth life upgrade and a save fountain are both hidden past breakable walls. Since the explosives are the only way to break walls at the moment, have the Prince sucker the golem into throwing explosives on both walls. Grab the life-up at the end of the trapped hall and use the save fountain if desired. By now, slow time may be necessary to bypass some traps in the hallway, so make a note of that.
Operate the ledge switch in the save fountain room -- slow time is not necessary to get to the platform, but the spinning wheel demands the power be used if you can't time it really well. Go up and use the ladder to climb on the suspended weights. The explosion from the golem should knock off the bottom half of the weights and raise the platform slightly so the Prince can reach the corner platforms and wall run to the ladders.
Rotate the turnstile switch on the
top to connect the large gear. Time wall runs to the new platform when the
shutters are down. Drop by timing the gears and head to the other side. Do the
same thing for this second weight as the first weight and head up via the
ladder. Fire beasts ambush the Prince at the second turnstile switch - not much
of a problem, but if you have not take as many life-ups as possible, the
accumulated damage may prove lethal.
|
|
|
|
(ABOVE LEFT) Grab all the chests now. Trying to revisit this area later may result in some rather disturbing bugs. (ABOVE RIGHT) Wall run to each floor in this room. There is a gallery chest where you least expect it. |
|
Wall run to the second gear and move
on to the third turnstile switch for the last gear. Head over to the break in
the wall and grab the gallery chest (#023). Head down the ladder and get across
to the other side. Do not miss out another gallery chest (#024) in this area. Wall run over the entry way before dropping completely on the
ground to earn new artwork. Work back to the save fountain near the
explosive throwing golem, then attack the golem in the arena. Kill it in order
to reach the gear-choked wall behind the golem to reach the final switch.
|
Boss - Golem #3 (Explosive Thrower) Roll between its legs then hack
away at the monster's unarmoured legs (from the back). Attack from the back
then evade to the side or away from the golem (the counterattack). Repeat the
rolling and leg-slashing attack until the golem kneels. While the golem is
kneeling, press stick towards and JUMP to get on its back. Press the RH
ATTACK button no more than five times (three on Hard, four on |
There is a fire beast ambush at the
top, but that should prove a minor challenge if the Prince was smart (and you
weren't) heading back to the save fountain after cacking the golem. The only
thing to really watch for is if the Prince remains on the golem too long, the
resulting counterattack by the big enemy is fatal since there are a lot of pits
lying around.
|
|
|
|
|
|
|
(ABOVE TOP LEFT) Kill the third golem and climb the gear wall to escape. (ABOVE TOP RIGHT) The bar switch to the Clock Tower's objective switch. Turn this bastard and open the other half of the throne room lock. (ABOVE BELOW LEFT) Simple wheels are obstacles to the first gear room. (ABOVE BELOW RIGHT) If the ladder on thecentral platform is not in this position for the Prince to leave, you're screwed. |
|
Back track to the platform device room to head into the throne room by way of the newly opened door. Head through the hallway with some inconvenient but not impossible traps and drop back down to the first gear room (the one with the central platform).
Now for one of the game-stopping Clock Tower glitches -- notice that the ladder on the central platform allows the Prince to go past the bottom of the swinging gears to the rest of the island? If any bar switch is pulled in the first gear room (this room) the ladder moves up and can never be reset back down. As long as you remember not to pull any bar switches in this room and rely soley on the central platform to access the other ledges and bars on the side of this room, the Prince can come and go through the Clock Tower as you please; if you find the ladder somehow moved up so you cannot get back, reload from an earlier save.
Hourglass Chamber & Throne Room
What's Happened So Far
Still in the past, you may opt to make another 'back-up save' when you are at the entrance of the Clock Tower. A bug of unknown effect and unknown solution may occur before, during, or after the next boss fight that causes the boss to blink out of existence, leaving your game rather dead when you retry. Best save before any cut-scenes or events occur that will give you cause to regret later.
At the platform device chamber, a
cut-scene will occur. This one is quite memorable. Head into the hourglass
chamber and save one last time. Go into the throne room via the hourglass
chamber, get some kinda cut-scene and fight the boss. Note that there are two
gallery chests (#025) and (#026) in the boss room. Get them now if possible
since you will not be able to get them until much later in the game.
|
Boss - Empress of Time (also: Big Red) The boss can be cheesed much like the girl in black earlier, but it is harder since the boss teleports around and has a combo that will kill the Prince in a few hits. Here're the key things to beating this boss -- first off, wait for it to teleport. When it teleports, the boss will deliver a kick that does a lotta damage. When the boss teleports, the Prince needs to evade away from the boss using the joystick and JUMP. Second key thing: once the boss
kicks, it is vulnerable to one or two hits with the RH ATTACK. Do one or two
hits and then back away. Third key thing: the boss will have guard-breaking
moves, so standing in front of it like a moron will be lethal. Instead, the
Prince is an acrobat so make with the evasion motions first, then attack.
Playing the game as if the Prince was Death=Adder is not the way to go. |
|
|
|
|
|
When the boss stands on its whirlwind sandstorm thingee and summons suckers to attack, deal with them using vault attacks and return to the old habit. Remember to press RH ATTACK quickly when the Prince locks weapons with the boss. After the cut-scene that reveals who is responsible for the boss' death, the boss will teleport and kick twice in a row. It will do one last summoning -- handle it as before. |
|
For the kicks, simply evade twice, then attack. It does not matter how many times more life or beauty points the boss has over the Prince -- if you keep to this pattern, the boss will have an even redder garment once that last blow lands.
The Catacombs (Prison)
What's Happened So Far
Save the game on a different slot when prompted. If you do not see a cut-scene after the save prompt, you may need to reload the game from the save file 'The Door Is Open' or 'The Empress' in order to bypass the bug in the game.
Flee the Dahaka by using all the
tricks learned thus far. Absolutely try to get the heck away -- it is an all or
nothing exercise at this point, so go for broke. When the Prince escapes into a
really sturdy door, a long cut-scene will kinda explain what the heck happened.
The Prince will now be in the Catacombs area, and in one of the few rooms he
cannot return to normally. Again, use caution when throwing switches or trying
to revisit areas -- you may find yourself inexplicably stuck if some old
switches are left open to you.
|
|
|
|
|
|
|
(ABOVE TOP LEFT) The goal now is to raise this bad boy's coffin by three increments. (ABOVE TOP RIGHT) Each weight pulled will increase the tomb's height by one increment. (ABOVE BELOW LEFT) The first weight is automatic, if you want to survive the Dahaka. (ABOVE BELOW RIGHT) One of two subsequent weights (landscape view). Cross check your progress by hitting landscape view and comparing it with the illustration here. Both weights are accessed via the same tunnel entrance, but requires the Prince to take a forking path to each in turn. The rule is if the Prince runs across the waterfall, he's been down that road. Each weight pulled is also a checkpoint, incase players are killed by the Dahaka. |
|
|
|
|
|
(ABOVE LEFT) One of two subsequent weights (landscape view). Cross check your progress by hitting landscape view and comparing it with the illustration here. Both weights are accessed via the same tunnel entrance, but requires the Prince to take a forking path to each in turn. The rule is if the Prince runs across the waterfall, he's been down that road. Each weight pulled is also a checkpoint, incase players are killed by the Dahaka. (ABOVE RIGHT) Climb the sides of the tomb via ledges to the save fountain. |
|
Head into the next area to escape once more from Mr. Dahaka., but not before you smash and grab the gallery chest in the room (#027). The chest is by the wall in the direction of the tomb figure's feet. Fleeing the subsequent time from the Dahaka requires some quick thinking (and Rewind if needed). Smash only objects that cannot be avoided by running around them. A bar switch activating some water will protect the Prince for a short time so he can explore the local area.
Head over to the next platform and pull out the stone weight. This slowly raises the tomb in the catacomb ever higher. Several weights need to by yoinked, but to get to them, the Prince needs to brave fleeing the Dahaka each time. When a weight is pulled, simply head back outside to the outer tunnel and run the Dahaka course to the next weight. The game is designed so the path the Prince takes needs to be different each time a weight is pulled.
On the second and third tries at the weights - head right to pull a bar switch, always a bar switch with no water, as that indicates a path you have not gone for previously. There is a checkpoint across all systems for each weight pulled, but on the PS2 and GameCube, you will need to crack open the gallery chest each time you retry. After all three weights are pulled, climb the tomb to the top and escape.
Sadly, there is a secret weapon that
can only be grabbed at this critical moment in the game. Since the Prince
cannot go back to it, you must decide now whether or not you want to risk it
(remember that the Prince is under a time restriction). At any time after
pulling the first weight, but before accessing the next save fountain, the
Prince may risk death to retrieve the secret (indestructable) weapon. At the fork,
opt to head left (the rolling path). Before the first obstacle the Prince must
roll under, there is a small niche behind the camera and to the left. Smash the
rack for Rayman's Fist - an obvious tip to UbiSoft's best known character.
Escape quickly, as the Dahaka is about two seconds behind. Use of Slow Time is
not necessary for this weapon, but offers some piece of mind.
|
|
|
|
(ABOVE LEFT) The caves are dangerous only because there are a lot of enemies. That only means you need to throw most of them off the cliff and save the last one for sand and weapons. (ABOVE RIGHT) Bounce and ledge up to the next level. |
|
A save fountain is nearby as well as a gallery chest (#028); save if desired. The goal now is to head back through the caves to get back into familiar territory. Notice that the Prince's sword is broken since the last boss fight, so he will not be able to do much damage until he finds a replacement. Go through the caves and try to collect sand from enemies and preserve some life. If you are really desperate for sand, you can save your game once you gain some sand (but haven't maxxed it out), save, quit, and reload to respawn the enemies.
Head deep enough into the caves and
view a cut-scene of a new sword plus a save fountain. If possible, try to get a
secondary weapon from one of the enemies before or ahead before proceeding
onwards. The enemies in the hallway after the save fountain are only a source
of weapons -- don't squander life or sand on them. Instead, move past to the
next door down (the only door aside the one to the save fountain).
|
|
|
|
(ABOVE LEFT) Balance the Prince and fight off two ninjas on beams. Don't throw that second weapon just yet. (ABOVE RIGHT) The third ninja will wall run to attack. Throw the secondary weapon (charge throw) to get rid of the problem. |
|
Fight two ninjas on the beam - use slow time if you have trouble timing the blow. Navigate across the beams and the third ninja will attempt to wall run and attack when the Prince does. Kill it (or stun it on Hard) by using a charged weapon attack, much like it was in the Clock Tower against fire beasts clinging to the walls. From now on, having a second weapon to throw at crucial times is important.
Ride the curtain down to the sword room and meet that damned Dahaka. Flee it while using a looking-back camera and destroy only enough objects to move ahead to the time portal. Fiarly easy, so long as the Prince keeps moving.
The Catacombs & The Library
What's Happened So Far
The Prince gains the Wind of Fate
power, which is basically the 360 degree blast power (draw sword, hold BLOCK,
hold TIME) that just got more expensive. Haste is a better use of sand than this
power, but so are two uses of Slow Time. Since the Prince is now in the past,
back track through the hallway and grab the Scorpion (a.k.a. Wall Breaking)
sword and gather your adventuresome wits. Time to do some explorin' with the
Prince of Persia!
|
|
|
|
(ABOVE LEFT) Jump on the masher block, then hang off the opposite side (the side you want the Prince to jump to) as the trap passes overhead. Jump to safe ground once the trap is clear but before the masher block completely retracts into the wall. (ABOVE RIGHT) A bevy of blades (landscape view) that can be navigated by timing. Not a problem. Just don't lose too much life doing this since there are a lotta enemies in the next few rooms. |
|
Having trouble with the masher block
and log trap? Slow time is not needed here. The trick is to jump on the masher
block and hang on it while the log trap is on the other side of the pit. Jump
off the masher block to the other side while hanging. Go near the Scorpion
Sword and smashy, smashy!
|
|
|
|
(ABOVE LEFT) Operate the turnstile switch to access the block in the cage. Hold BLOCK to move objects by pulling or pushing the stick. (ABOVE RIGHT) Place the block on the flor switch to escape. |
|
Fight off the dozen enemies using throws and the new sword. Should be easy (not always). The key to surviving is to not lose too much life from the traps before the Scorpion Sword and to fight conservatively when surrounded. Move to the next room when the way is opened by two 'final' enemies.
The floor switch in the next room requires
a weighted box to keep the gate open. Operate the turnstile switch and engage
all the enemies. It is highly unlikely you will be able to push the box to the
switch using the BLOCK key as enemies threaten the Prince. Fight conservatively
again, using the throw to knock enemies down and vault attacks coupled with
evade to kill foes. Open the gate and move on, but not
before opening the gallery chest (#029).
|
|
|
|
(ABOVE LEFT) Suspicious looking walls such as this can now be broken using the Scorpion Sword. (ABOVE RIGHT) A new type of blade trap that sweeps the entire hallway. Rolling is the only way to avoid it. |
|
Navigate through the next area's traps, taking care to either roll under high traps, or using slow time judiciously. Remember that the wall breaking sword will not glance off walls that can be broken (unlike indestructable walls). So hit walls that look broken -- if the sword glances off of it, you can move on, otherwise, break it down!
The room past the hallway has yet
another turnstile switch, as well as spikes the Prince can use to even the odds
on certain fights. Make sure enemies are on the traps when the floor switch is
pressed to kill them instantly. Don't miss the gallery chest (#030) in the next
room. Operate the turnstile switch to move on.
|
Boss - Mummy Golem Bet you're glad to see a save fountain. Use it now, as a rather tough boss is ahead. Wall bounce up to meet it. The golems before were not as tough as this guy, but then, they did not have five times the amount of life. Use all the old tricks of moving between the legs and hitting the boss' legs. Jump up and do the three or four hits before jumping off. Being caught and thrown now is brutal, since the Prince cannot elect to go back down to the save fountain. Do your best here; it may or may not be enough if you rely too heavily on slow time to do your big boss cacking. The mummy golem is tough, but not invincible. Only persistence and practise can get you used to the fight. |
After the fight with the mummy
golem, a ladder will be available for the Prince to climb. If the Prince has
low life, be wary if he needs to retry. The mummy golem will be respawned, but
the ladder that dropped after the fight will be lowered already, so simply make
way to it if the Prince dies and retries.
|
|
|
|
(ABOVE LEFT) After fighting the mummy golem, this ladder drops and stays whether the Prince retries the section or not. Get up on it quickly once you're done with the current floor. (ABOVE RIGHT) This room with the open pit in the middle has two secret walls - break down both to access the switch and enter the trapped hallway for the life-up. |
|
Grab the gallery chest (#031) and exit the room to a Roman courtyard-like room. This room has one open way (and a bunch of enemies). Throw enemies into the pit and don't be afraid to retreat into another room to see how things go. Heading up the next room will force the Prince to climb some ledges/beams. You may want to do that, since a save fountain is nearby.
Get the seventh life upgrade in the
Roman courtyard-like room (back track to it if you hit the next save fountain
after the mummy golem). There are two breakable walls in this room; one is a
wall switch, the other is a timed gate that requires slow time to reach in
time. The walls are all in plain view if one has half-a-brain, so don't fuss
and break both. Navigate the trapped hallway for the life-up. The most
perplexing problem of this hall (aside from the obvious use of slow time) is
the hall proceeds right (to the life-up); don't get caught heading left, or the
Prince may be killed by the traps.
|
|
|
|
(ABOVE LEFT) Bounce up to the ledge/beam and continue working up to the save fountain (ABOVE RIGHT) Right above the save fountain are beams and bars to the library. |
|
|
|
|
|
(ABOVE LEFT) The turnstile switches here move bookcases in and out of the walls for the Prince to proceed. (ABOVE RIGHT) Drag down the ledge switch to open a door between bookcases one and two. Use slow time once to reach it in time since the Prince needs to operate a turnstile switch. |
|
|
|
|
|
|
|
|
(ABOVE TOP LEFT) Pull out the two bookcases and bounce up to the next area. (ABOVE TOP RIGHT) Cross the ledge/beams to the previous area of the library, but with the Prince on the high ground. (ABOVE BELOW LEFT) Jump to the bars and swing to the side of the Library. (ABOVE BELOW RIGHT) Climb to the ledge beams on the top, then drop to reach the other side under the broken transom. |
|
Head past the save fountain, get the
library cut-scene and operate the turnstile switch to move past the bookcases.
Go past the third bookcase to find a ledge switch that opens a gold door
between bookcase number one and bookcase number two (in order of appearance,
like those B-movies on Telemundo). Head through that door (which is timed, use
slow time just once) and grab the gallery chest (#032) atop the ladder in the
next room. Strangulate a ninja or enemy for a secondary weapon before heading
further. Pull out the two bookcases and bounce up. Navigate the beams then
around the shattered entrance to the donut 'ledge ring'. Don't miss
the gallery chest (#033) before the donut ledge ring.
|
|
|
|
|
|
|
(ABOVE TOP LEFT) Drop here if you don't know what a transom is. (ABOVE TOP RIGHT) Jump over the ledge/beams to the first donut ledge structure to continue. (ABOVE BELOW LEFT) Jump to the second donut ledge structure for the life-up. (ABOVE BELOW RIGHT) The wall in this illustration is the home of the life-up. Get this life upgrade now since events later in the game will not allow you to reach this area. |
|
Fight a ninja on the donut ledge
ring and continue to the second donut ledge ring. Make a detour from the second
donut ledge ring for the eighth life upgrade. It is on the very uninteresting
wall with some ledges that are rather hard to see (not towards the direction of
the beams). Visitting the library later is an almost impossible task, since
certain events will change the environment forever. Don't miss this life-up;
life-ups also refill the Prince's energy gauge to full. Backtrack to the second
donut ledge ring to progress. A second ninja is on the ledge/beam; take care of
it but keep the second weapon handy -- do not throw it now.
|
|
|
|
|
|
|
(ABOVE TOP LEFT) From the second donut ledge structure, jump to the next available platform. (ABOVE TOP RIGHT) Fight the ninja on the beam/ledge and move on. (ABOVE BELOW LEFT) A second weapon will be handy to fight off the ninja who can wall run at this spot. Haste will also work, but costs two sand tanks. (ABOVE BELOW RIGHT) A tough hall when the Prince tries to reach the throne room - wall run jump to the platform when the log trap is rolling away and the saw traps are not in the way. Siddle and wall run to the other side when the coast is clear. |
|
Head along the ledge/beams into the next hall and drop to get a gallery chest (#034). A box is conveniently placed on the ground for the Prince to wall run and jump back up to the beams. There is a save fountain after dropping from the ledges past the gallery chest and box.
Swing to avoid the trap then target and charge throw the second weapon to kill the fire beast on the wall. Killing it while in wall run with little or no sand is probably not a good idea. Break the wall and the Prince will find himself back in the Clock Tower's first gear room (the one with the central platform). The goal now is to head back to the throne room, but why not do some exploring?
What's Happened So Far
Exploring the Clock Tower
While the Prince is here in the Clock Tower, let's backtrack here first. Just don't pull any more bar switches, as the Prince has pretty much 'put everything in its place'. Pulling any switch now may cause you to get a dead game.
When the Prince gets to the area
with the golem throwing explosives, climb up to the area where the first weight
was dropped and smash the door/breakable wall for a gallery chest (#035). This
is after the secret weapon (see below).
|
|
|
|
(ABOVE LEFT) In the past. One of the rooms with the weights (near the third golem with explosives) has a breakable door with a gallery chest. This is in the past. (ABOVE RIGHT) In the present. This familiar looking water-filled dead end has a breakable wall with the teddy bear. This is in the present. |
|
The Clock Tower has one secret weapon (listed as 'miscellaneous' in the gallery), that being the teddy bear. Secret weapons are unique one-time weapons, meaning that once they are picked up and thrown, they are gone forever (true for the PS2 and Cube versions; the Xbox saves the data to the profile, then the game reloaded from an earlier point before the secret weapon was picked-up so players can keep it available). However, like all secondary weapons, the Prince can only choose to keep one secret weapon at a time; sometimes, it is better to use a commonly available weapon than to rely on a one-of-a-kind unique weapon.
The teddy bear does almost no damage, but each hit on an enemy will let the Prince gain life, which may prove useful if the Prince progresses deeper into the game. If you decide to get it, go to the hallway just behind the golem near the moving water paddles (the ones the Prince must roll under to get by). The hallway is impassable in the past, so the Prince needs to be in the present. In the present, the area used to have a breakable wall and infinite fire beasts that drop down so the Prince could go past the wreckage (before the Scorpion Sword). The secret room is at the water-filled dead end of the hall. Backtrack to the platform device room (past) when you've had your fill.
Exploring the
There is a gallery chest (#036)
above the turnstile switch for the first run of water (in the past) in the
|
|
|
|
(ABOVE LEFT) In the past. Right above the turnstile switch to the jungle room is the ledge/beam to a breakable wall and gallery chest. This is in the past. (ABOVE RIGHT) In the present. This area is where the Dahaka was chasing most players (after the bar swing and the Dahaka vs Karasuman cut-scene) to few players will recognize this place. It is the Water Maiden room's highest floor balcony, near the time portal that is at the bottom of two ladders. |
|
To get the flamingo secret weapon,
the Prince will need to visit the really, really high balcony in the water
maiden room in the present; this means the Prince has to go through the
majority of the area to reach the proper time portal. From that high balcony,
the Prince can apparently ledge around the large obstacle or simply walk
through it (depending if your game glitches or not). Basically, the Prince
needs to go past the timed sliding platform (from the past) and use the bars
and ledges to get across the room to where one of the Karasuman would be in the
past. Check out the set of screens we have for the exact locations.
|
|
|
|
|
|
|
(ABOVE TOP LEFT) In the present. Get to the other side of the big rock. IGN simply walked right through the rock and jumped to the other platform, but we assume this was a glitch; perhaps the Prince is supposed to ledge over? Navigate the ledge/beams to the wall switch. This switch is no longer timed in this period. (ABOVE TOP RIGHT) In the present. The retracting/extending platform allows the Prince to reach this familiar looking area. He can smash the wall once he drops down to the floor for the flamingo weapon. (ABOVE BELOW LEFT) In the present. Getting back is merely a matter of tracing ledges back to solid ground. (ABOVE BELOW RIGHT) In the present. Use the ledges to drop down to solid ground with your new secret weapon. |
|
Like all secret weapons, the flamingo is a unique one-time weapon, meaning that once picked up and thrown, it is gone forever (true for the PS2 and Cube versions; the Xbox saves the data to the profile, then the game reloaded from an earlier point before the secret weapon was picked-up so players can keep it available). However, like all secondary weapons, the Prince can only choose to keep one secret weapon at a time; sometimes, it is better to use a commonly available weapon than to rely on a one-of-a-kind unique weapon. The flamingo is good for doing counter-attacks and is indestructable.
Exploring The Antechamber & Sacrificial Chamber
Set the turnstile switch in the
platform device room to the 12 o'clock position to get to the second floor
balcony. This hearkens back to when the Prince was chasing the girl in black.
There are some items in that area the Prince may be able to get now that he can
destroy walls.
|
|
|
|
|
|
|
(ABOVE TOP LEFT) The 'antechamber' (as called on the game map) is the room where the Prince needs to climb up to get to the final life-up. Go through it as you normally did before. (ABOVE TOP RIGHT) Check out the gates at each corner platform; there is one (the one pictured) that has a box just past a breakable gate. Smashy, smashy. (ABOVE BELOW LEFT) Smash the gate and move the box outside so the Prince can boucne up and over to the trapped hallway. (ABOVE BELOW RIGHT) To get back, run to the sacrificial chamber where the the girl in black was fought a second time. There are some ledges at the pilaster that allows the Prince to ledge over and drop back into the arena. From there on out, it's retracing the path to the time portal then the platform device room. |
|
Go into the room where the Prince was required to operate a bar switch to open a locked door the girl in black escaped through. Head up the floors and look for one of the gates on a floor with a box behind it. Break it down and move the box out past the gate to the wall. Don't miss the gallery chest ((#037) while there.
Bounce up and over for the ninth and
final life upgrade. Back-tracking is the same as it was before except that the
Dahaka is missing. There is a gallery chest (#38) in the entrance of the
sacrificial chamber where the Prince and the girl in red were initially
separated. Nav the ledges to the save fountain in the sacrificial chamber (get
the life-up at the altar if you missed it) and retrace your steps back.
|
|
|
|
(ABOVE LEFT) The rubble caused by the Dahaka can be scaled. Go on the blocks and ledge over to the outside. (ABOVE RIGHT) Wall run across the gap and drop down to the crawl hole. The time portal and familiar territory should not be far off. |
|
Go to the time portal, zap back to the future (hot mom!) and navigate the ramshackle platform device room to where the Dahaka was going to turn the Prince into butt-sauce. Ledge over to the crawl hole and head to the time portal; this places the Prince squarely back in familar territory. From there, it is only a short jaunt to the platform device room.
Exploring the Platform Device Room
The Central Hall (or platform device room) is right next to the Hourglass Chamber. Right beside the entrance to the third life-up is a brekable wall with the hockey stick secret weapon. Secret weapons are unique one-time weapons, meaning that once they are picked up and thrown, they are gone forever (true for the PS2 and Cube versions; the Xbox saves the data to the profile, then the game reloaded from an earlier point before the secret weapon was picked-up so players can keep it available). However, like all secondary weapons, the Prince can only choose to keep one secret weapon at a time; sometimes, it is better to use a commonly available weapon than to rely on a one-of-a-kind unique weapon.
This is perhaps the easiest secret weapon to get (just like the life-up) so you may want to leave this weapon alone until you decide you need a weapon for the last boss fight (or as your ultimate save game)
|
|
|
|
|
|
|
(ABOVE TOP LEFT) With the switch making the bridge whole, you can see there is a door at the bottom of one of the pits. (ABOVE TOP RIGHT) Notice this shaft is wider than the one pictured immediately below it. Wall bouncing here makes the prince descend safely. (ABOVE LOWER LEFT) Wall run and bounce - trust IGN on this one and you can naviagte to the corner of the room. From there, it is fairly obvious what to do to get to the platform with the breakable wall. (ABOVE LOWER RIGHT) Go back up to the save fountain using this narrower shaft, which only allows an upward wall bounce. |
|
The hockey stick does average damage
and not really exceptional except as a tribute to the sport that makes
Done Back-tracking/Exploring
Have the Prince head from the platform device room to the throne room via the side hall in the hourglass chamber. Smash the breakable wall at the throne's back to access the time portal. If the game is working correctly, several cut-scenes should occur before the Prince makes it to the time portal (all non-lethal, so don't worry) without any bizarre appearances. Make like Dr. Franken and do the time warp again.
The Caves
The Prince gains the final sand
tank, for a total of six tanks. It is imperative that the Prince does not waste
sand now, especially if you need to keep the contents of those secret chests.
Fight off the non-explosive fog beasts and wall run to the top of the room. A
ledge allows the Prince to continue to the cave.
|
|
|
|
|
|
|
(ABOVE TOP LEFT) Wall run up and get ready to use wall runs and ledgs to go through this easy section of caves. Lose life? Don't worry, water is just ahead. (ABOVE TOP RIGHT) Ledges are used often in Warrior Within to navigate some gaps but are often well hidden or not very obvious. Jump or wall run to see if the Prince latches onto something. (ABOVE LOWER LEFT) One last jump to get to the exit. Backtracking is possible since the Prince will land on the ledge to work back down to safe ground. (ABOVE LOWER RIGHT) Dropping into this water pit is a one-way trip. The angled ledge in the illustration is the only way out. |
|
The Prince will leap onto a floating
dias and fight several enemies here. Haste is a waste,
but slow time will allow the Prince to grab and toss the enemies off into the
pit with little problem. A better idea is simply to run to the other side and
jump to the exit. Progress through the tunnels to the save
fountain.
|
|
|
|
(ABOVE LEFT) The dias (this is landscape view) is reached by a jump but is one way only. (ABOVE RIGHT) The dias' exit is on the other side. Jump to it if you're not interested in dying or fighting enemies. |
|
|
|
|
|
|
|
|
(ABOVE TOP LEFT) Slow time is necessary for almost all the traps here. Have six tanks full just in case. Step on the floor switch to get this first retracting platform (landscape view). (ABOVE TOP RIGHT) This column is the destination after the first retracting platform. (ABOVE LOWER LEFT) Jump the columns to the other side. (ABOVE LOWER RIGHT) Wall run, swing and head to the next switch - remember to keep slow time on when you make those jumps. |
|
|
|
|
|
|
|
|
(ABOVE TOP LEFT) Once the switch is hit, move to the next platform quickly. (ABOVE TOP RIGHT) From another angle. (ABOVE BELOW LEFT) Curtain drop and bounce to safe ground. (ABOVE BELOW RIGHT) Safe ground to the exit. |
|
Ignore the fog beasts but fill up on
the Prince's sand tanks. You need all six for the next puzzle, which uses a lot
of sand for slow time. Basically, the Prince needs to step on a switch to
extend a grate over the pit for him to wall run or jump to from his previous
position. Since all the grates are on a timed switch, the Prince may exhaust
his sand tanks by the time he reaches the top -- avoiding fights or fighting
skillfully is necessary by now, as the puzzles will take a very sharp turn for
the worse. Break the wall and move to the next area.
|
|
|
|
|
|
|
(ABOVE TOP LEFT) The Prince will be above the entrance to the dias. Wall run to the ledge in the distance. (ABOVE TOP RIGHT) Ledge up and over the archway. (ABOVE LOWER LEFT) The entrance out of this area is on the other side of the archway. (ABOVE LOWER RIGHT) Curtain drop once you're inside and nab the Mask of the Wraith. |
|
Wall run across and use the ledges to allow the Prince to move up and over the entrance to the dias. When the Prince drops, you will be treated to a very enlightening cut-scene.
The Caves
As a Sand Wraith, the Prince plays
slightly differently than normal. The Prince has infinite sand when it comes to
using Time Powers -- the sand tanks slowly regenerate, meaning the Prince
effectively has infinite sand for most intents and purposes. However, using too
many time powers in a short amount of time will exhaust the Prince's 'time
power effectiveness' -- the upside down crescent meter that allows the
time powers to run full course will only let rewind run for two to five seconds
instead of the normal ten for example, if the time powers are used
consecutively. Balance the usage of time powers (rewind and slow time chiefly)
with locating the next available source of water to stay alive as the Sand
Wraith.
|
|
|
|
|
|
|
(ABOVE TOP LEFT) From the mask room, go past the gate (it will be closed but passable if you retry) and bounce from the wall to reach the bar. (ABOVE TOP RIGHT) Grab the column, but leave the camera as normal to see where to go next. (ABOVE LOWER LEFT) Jump from column to ledge. Siddle over to the busted doorway. (ABOVE LOWER RIGHT) Notice the Prince is standing on the ledge at the height of the ledge/beam. Jumping any other place results in death. |
|
|
|
|
|
|
|
|
(ABOVE TOP LEFT) Use slow time liberally. The Prince can constantly regenerate sand, at the cost of a little life. Note that the life loss stops at 25% of your current maximum, so the more life upgrades earned, the better off the Prince will be. (ABOVE TOP RIGHT) Stand on the first ledge/beam to avoid the lower trap. (ABOVE BELOW LEFT) Hang off the second ledge/beam to avoid the lower trap. (ABOVE BELOW RIGHT) The Prince should be able to make it to end using Slow Time. |
|
Go through the open gate and bounce to the bar. Swing across the bars, bounce again to the column. Jump to the ledges and siddle down to the safe spot to jump to the ledge/beam. Have the Prince siddle on the ledge to the ledge/beam above the saw trap. Stand to avoid the trap. A jump carries the Prince to the second ledge/beam. Hang on it to avoid the trap. Jump to the final ledge/beam to safe ground. Use slow time to run faster than the bladed traps to the time portal. Use the save fountain to regain lost life, then use the time portal to travel into the past.
The Caves and The
The Prince now gains the Cyclone of
Fate attack power. This uses up more sand than the Wind of Fate, allowing the
Prince to use the surround attack while expending one to three sand tanks for
the privilege. Although the Prince now has infinite sand, try not to use these
attack powers, as better use of sand for Slow Time and Rewind will allow the
Prince to get past difficult areas.
|
|
|
|
|
|
|
(ABOVE TOP LEFT) Head back across the bar. Notice that the upper saw works in the past and it is freakin' fast. (ABOVE TOP RIGHT) Slow time and follow the upper saw's ledge (naturally behind the saw). This gives you enough time to stay between the upper and lower saws. Drop when get a clear shot. (ABOVE LOWER LEFT) Siddle the ledge to go under the log trap. (ABOVE LOWER RIGHT) Slow time and wall run to grab the ledge. If you don't know what to do next, you do not deserve to see the good ending of the game! |
|
Work past the old tunnel's traps to
the floating dias (meaning backtrack). The traps now
are usually so fast, use of Slow Time is a must, so save
your sand tanks for this purpose. Slow time past the blade traps to the
ledge/beam. When the saw traps are past the first ledge/beam, slow time and
jump to it. Hang off to avoid the lower saw, mantle and jump to the second
ledge/beam (keep slow time going for an easier time) and jump to the ledge on
the opposite wall; ledge to the other side and head out the door.
|
|
|
|
|
|
|
(ABOVE TOP LEFT) The next set of ledges also require following saws and staying ahead using slow time. Stay in a safe spot to regenerate sand if you need to. (ABOVE TOP RIGHT) Drop around the upper saw to get to safe ground. (ABOVE BELOW LEFT) The dias where the next boss is. (ABOVE BELOW RIGHT) The Prince - Aw crap. |
|
For the next puzzle, drop past the edge then siddle to the arm of the platform. Wall run up to the ledge when the trap allows you to. Siddle over and jump to the opposite ledge when the upper saw trap is going into the distance. Follow it (using slow time) and the Prince should be between the upper and lower saw traps. Drop off the ledge to safe ground when there is an opening.
Use slow time or time the Prince's
roll past the next three log traps. Hit the save fountain and nab the gallery
chest (#039).
|
Boss - Griffon Fight the boss Griffon on the
dias. Use Slow Time to get a bead on the boss. With infinite sand tanks (they
regenerate even as other time powers are in effect) the Prince can literally
take this boss out with few problems. Roll behind the boss and hack away at
it using any attack. The boss is only vulnerable when the Prince is attacking
the boss' rear facing. |
|
|
|
|
|
|
|
Beat the boss and move off the dias in the only direction available. Ledge up and over the
archway to the new door and go back to progress. Wall run, jump to the bar,
curtain drop, jump to the next bar and curtain drop to the ledge. Use slow time
to navigate the next few traps - easy, until there is a log trap that will not
budge and there seems to be no way around, over or under it. Use the pilaster
at the end of the log trap to wall run and jump over the obstacle. The Prince
will summarily arrive in a very familiar
|
|
|
|
|
|
|
(ABOVE TOP LEFT) Jump to the next ledge and bounce up using the side of the archway. (ABOVE TOP RIGHT) Move across the archway as before using ledges again. (ABOVE BELOW LEFT) Use the bars and curtains to drop safely to the ground. (ABOVE BELOW RIGHT) Ride the lower curtain all the way down or you might fly off. |
|
There is a save fountain in the big
drop past the Statue Turning room. Use it, mantle back up then wall run to the
ladder and evade enemies until the Prince reaches the Water Maiden room once
more - or at least the upper balcony/walkway. Use the wall switch to operate
the retracting platform, slow time and head down to the ground floor. Back
track to the platform device room for an interesting cut-scene with the girls
in red and black.
|
|
|
|
(ABOVE LEFT) Slow time when you see an 'impossible' trap; many of the traps the Prince encounters while in the guise of the Sand Wraith require Slow Time to solve. (ABOVE RIGHT) At this part with the immobile log trap, use the pilaster on the sides to wall run then jump over the log. Awesome! |
|
|
|
|
|
|
|
|
(ABOVE TOP LEFT) You might have
seen this structure from afar back when you were solving the |
|
|
|
|
|
(ABOVE LEFT) Mmmm. Empress. (ABOVE RIGHT) IGN would like to applaud UbiSoft for having the Empress of Time bring her two very big talents to the Warrior Within game. |
|
Since the Prince mentions the events
now are, 'Too soon', the obvious path is to head for the time portal
in the
The Caves 2
The Prince will not get any more
time powers from here on out, so don't expect the game to change. Rely on
Rewind, Slow Time, Haste and your mastery of the Prince's moves to carry the
day.
|
|
|
|
(ABOVE LEFT) Can't get to the
present in the |
|
But first things first, step outside
and try to reach the ladder. After the cut-scene, press BLOCK
and restore the Prince's health. Looks like this will be the long way around.
Since there's water, there is no danger of being chased by the Dahaka - for
now. Stay here and let the Prince's sand tanks fill up while using water to
sustain his life. All sand tanks will be put through heavy use in the next few
sections.
|
|
|
|
(ABOVE LEFT) The hallway is easy since all the damage the Prince takes is healed by drinking the water in the hall. (ABOVE RIGHT) Ninja on the wall and don't have or want to throw a secondary weapon? Use haste and chop her off with ease. |
|
Get past all the traps in the
hallway -- it should be easy even if the Prince is hit since the whole hall is
flooded. Against the ninja on the wall, try using Haste (the sand regenerates)
if there is no secondary weapon handy since haste pretty much makes the Prince
cut faster than the enemy ninja.
|
|
|
|
|
|
|
(ABOVE TOP LEFT) Wall run to the ledge/beam. (ABOVE TOP RIGHT) Rope swing to the next platform. (ABOVE BELOW LEFT) Bounce up the far end of the room and reach this ledge. The ninja can be dealt with using slow time. (ABOVE BELOW RIGHT) Stay up top and find a way to the platform with a block. There is a ledge the Prince can mantle on at the end of the ledge/beam with the ninja on it. |
|
|
|
|
|
|
|
|
(ABOVE TOP LEFT) Don't forget some branches are actually bars the Prince can swing on. Yoink. There was a ledge at the end of the ledge/beam with the ninja on it. (ABOVE TOP RIGHT) The ledge here allows the Prince to jump to the platform with a block. (ABOVE BELOW LEFT) Wall run and bounce up the opening in the ceiling to the place before the first Dahaka chase. (ABOVE BELOW RIGHT) Use slow time on the door to get past it after tapping the wall switch. |
|
The Prince should navigate the platform device room rather quickly. The route is to go up to the (now closed) gate that used to lead to the Dahaka and instead head across the room to the 'platform with a block' where the Prince initially dropped into the present and saw the Dahaka for the first time on the island. The ninja on the beam can be defeated easily with application of slow time. Climb the hall to the time portal.
Island Exterior,
|
|
|
|
|
|
|
(ABOVE TOP LEFT) Head back to the sacrificial chamber by dropping down to each successive bar. (ABOVE TOP RIGHT) Head over to the save fountain. Notice a floor switch is there that wasn't before. (ABOVE BELOW LEFT) The floor switch is easy to miss if you do not explore. (ABOVE BELOW RIGHT) Head to the bridge and get an eerie cut-scene. |
|
Go through the traps and head down
the hallway. The Prince will be in the sacrificial chamber, but at the very top.
Use the ledges and bars to drop down safely to the save fountain at the top of
the sacrificial chamber. Hit the floor switch and get a rather eerie deja-vu
cut-scene.
|
|
|
|
|
|
|
(ABOVE TOP LEFT) Slow time or you might wind up dying. (ABOVE TOP RIGHT) Time wall runs when the traps are going away from the Prince's path. (ABOVE BELOW LEFT) Climb the rope and jump across. Swing on the higher rope to get to the other side. (ABOVE BELOW RIGHT) Don't miss the gallery chest on the other side by doing a wall running detour first, then heading back over to descend the ledges. |
|
The path is one way. Use slow time to get past the new trap sequences. Wall runs can elevate the Prince slight above ground level. Reach the save fountain at the end and use it. The next part is timed, so screen shots will be scarce. The first step is to blow open the wall using a fire beast. Chances are with so many enemies, the Prince will not be able to use the wall breaker sword.
Once there is an opening, the timed
sequence starts. Curtain drop and slow time as soon as the
Prince jumps to the first bar. Drop (don't forget slow time) to the next
bar, then swing and bounce off the wall to the columns, which collapse. Simply
move the stick left or right in relation to the Prince (i.e., want the Prince
to move once to the left, tap left once, etc.). Navigate the columns quickly -
even with slow time, the Prince will barely have enough time to go through this
area.
|
|
|
|
|
|
|
(ABOVE TOP LEFT) Once the Prince starts down the curtain (past the broken wall), start the slow time power. Jump to the falling branch, drop to the lower branch and swing to the firt of three collapsing columns. Kep slow time going and nav the columns to the first safe platform. (ABOVE TOP RIGHT) The safe platform has some sand, but feel free to use up all your sand to kill the enemies here. The Prince can regenerate lost sand but at the cost of a little life. (ABOVE BELOW LEFT) Trying to wall run and jump to the branch with enemies is hard since the Prince will do acrobatics to attack enemies instead of doing proper acrobatics you can use to get to high places. (ABOVE BELOW RIGHT) The next area to the second safe platform is stable, so take your time going there and to regenerate empty sand tanks. |
|
Did the Prince take the teddy bear
as a secondary weapon? Get rid of the enemies with the teddy bear mixed in,
since it will partially off-set the lost life of the Prince. If not, that's not
a big problem since the Prince can throw all the humanoid enemies off this rest-stop
ledge. Even if enemies are around, the Prince can
atttempt to run up the wall by smashing the jars by landing on top of them
(either a fore-shortened wall run or clip through). The next section after this
first permanent rest stop is not-timed (except the ever present dribbling of
life).
|
|
|
|
|
|
|
(ABOVE TOP LEFT) Grab the chest and get out fast by falling off the left edge. (ABOVE TOP RIGHT) Rest here and recover sand if needed. (ABOVE BELOW LEFT) Blurry shot, but start the slow time once the Prince starts the curtain drop. Then, it's bar swing, bounce, bar swing, column hop to the collapsing wooden floors. Don't stop the slow time. (ABOVE BELOW RIGHT) Rest here at the non-collapsing bar after the left turn on the collapsing floors. Slow time and bounce up to the neext collapsing floor. The Prince barely has the time to draw a weapon and engage haste to knock out the ninja |
|
Gauge the elements to the second rest-stop platform where a gallery chest (#041) will be. If you can avoid all the enemies, smash the chest and drop to the next curtain, that is best. Once the Prince drops from the second rest-stop platform, the timed sequences start again, so you may want to stop and let your sand tanks regenerate prior to dropping off the ledge to the curtain at the second rest-top platform.
Once the Prince curtain drops, jump
to the bar, swing to the second bar, swing to the collapsing column, and keep
slow time going all the way. Navigate the columns quickly again using the tap
left, or tap right mentality to line the Prince with the next column. Don't
stop at the wooden platforms either - they collapse, so keep slow time going
until the Prince gets to a secure tree branch he can stop temporarily on to
regenerate sand tanks.
|
|
|
|
(ABOVE LEFT) after activating haste and killing the ninja while inthe wall run, cancel the haste effect (press TIME) then activate slow time to buy the Prince enough time to smash the gallery chest then use the charge blow (hold RH ATTACK) to smash the breakable wall. Try saying that five times fast. (ABOVE RIGHT) The floor the Prince arrives at collapses in about six seconds while in slow time. Don't ask anyone how fast it collapses without the time power active or they might just kill you out of sheer frustration. |
|
The next section will take some
practice (once the Prince swings off the branch to the next set of collapsing
wooden platforms). He must keep slow time going while wall run jumping off a
wall to the higher collapsing platforms, then timing his attack while wall
running to kill the ninja on the other side. There is absolutely no time to
throw any weapons or try any other attack, although a landscape view may help
some players get the blow down. Keep slow time going, as a gallery chest (#042)
is right on a set of collapsing platforms -- if you miss it, you miss it. Sorry
folks, but that's the way the ball bounces. The Prince barely has enough time
to crack open the chest (the Prince's auto-combo fighting you will find rather
distracting, atrocious, or both) and then charge the wall breaker move to get
your well-deserved checkpoint.
|
|
|
|
(ABOVE LEFT) Slow time when the saws are at their lowest point, then bounce up. (ABOVE RIGHT) Another ledge and saw trap exercise. Fairly easy if you allow the Prince to build up his sands so you can keep rewind and slow time going. |
|
|
|
|
|
(ABOVE LEFT) Some easy traps and jumps are after that nightmare collapsing area. Don't worry, no more spots will be that tough. (ABOVE RIGHT) Compared to the collapsing areas, these log traps are now fairly tame. Slow time if you really have problems. |
|
|
|
|
|
|
|
|
(ABOVE TOP LEFT) Some traps in this hallway require some skillful steering with the left joystick; slow time usually helps if you are confused. (ABOVE TOP RIGHT) The Prince can grab ledges and the spike floors will not activate or hurt his fingers, leaving him safe. Just make sure there is no saw trap nearby if you opt to hang off the ledge. (ABOVE BELOW LEFT) Drop down the ledges carefully. The life lost by waiting is inconsequential to the amount you lose by running into traps, especially on Hard. (ABOVE BELOW RIGHT) Some traps have a variable pattern - watch them for a few minutes and you'll notice subtle changes like some traps to have a shorter cycle every other time they come close to each other. |
|
Take out the first set of traps using slow time. The ninja needs to be swatted using a standard wall run attack with slow time (haste will not stack its effects with slow time). All the traps afterwards require slow time to bypass, so it is unlikely that anything but a Sand Wraith can go through this area once more.
In the next area, a cut-scene will
occur. A gallery chest (#043) can be seen in the background. Back up slightly
and grab it before continuing onward. Jump past all the columns and reach the
save fountain. Again, the next set of traps are not
much trouble - provided slow time is employed. The Prince will reach a room
where he will spout some lines about, 'If I cannot reach the platform,
perhaps the I can bring the platform to me!' If
the game was this easy, you wouldn't be reading this guide.
|
|
|
|
|
|
|
(ABOVE TOP LEFT) This room has two gallery chests on the ground floor; get them now since you probably won't want to come back. The second floor is a safe spot to regenerate sand, so feel free to use up all the sand to evade the infinite number of enemies on the ground floor. (ABOVE TOP RIGHT) The ladder is on the opposite side of the room where the Prince enters. Get there and climb it. The Prince can be safe to regenerate sand. (ABOVE BELOW LEFT) The first turnstile switch after climbing the ladder should look like this. (ABOVE BELOW RIGHT) The second turnstile switch after climbing the ladder and swinging across the bars (with the saw traps on the wall adjacent) should look like this. |
|
|
|
|
|
(ABOVE LEFT) The third and final turnstile switch (with the lava pouring out) should be like this. If the Prince adjusted all the switches according to IGN's guide, the path to the save point should be open. (ABOVE RIGHT) If you messed up somehow, watcfh it when the Prince swings back on the bars - the traps mandate the Prince use the outer bars to swing safely (or you can get your face cut up, whatever dude). |
|
First, there are two gallery chests
(#044) and (#045) on the ground of the foundry. Locate the chests first if you
care about completing the ho-hum art gallery. It does not help that there are
infinite enemies in the room - use Slow Time to avoid them. The first step in
getting the heck out of the foundry is to locate the ladder to the second
floor. Once there, it is a simple exercise to rotate three of the four
turnstile switches to make the molten metal flow from point A to point B. Follow the illustrations and make your switch look exactly
as shown. Once the platform is in reach, use the save fountain.
|
|
|
|
|
|
|
(ABOVE TOP LEFT) This log trap has to be jumped over as it comes toward the Prince; slow time will delay it as the Prince heads for the ladder (in illustration). (ABOVE TOP RIGHT) Mantle up the ledges past the saw blades. (ABOVE BELOW LEFT) Operate the turnstile switch and wall bounce up to the ledge/beam to be able to pass the log traps over the pit. (ABOVE BELOW RIGHT) Slow time and jump from one side to the other. I'd like to see people make this jump without slow time. Hahahaha. |
|
|
|
|
|
(ABOVE LEFT) On the other side, go to the very end of the ledge/beam, then drop straight down onto the platform below. (ABOVE RIGHT) Ledge hop down to safe ground. |
|
|
|
|
|
|
|
|
(ABOVE TOP LEFT) An interesting puzzle - use slow time once the Prince rolls past the balde trap, then wall run and jump to the ledge/beam before the traps activate again (this is first-person view). (ABOVE TOP RIGHT) Jump in the hole in the palace if you go (a little Legend of Zelda joke there). I kill me. (ABOVE BELOW LEFT) Curtain drop into the Roman courtyard room with one of the old life-ups. (ABOVE BELOW RIGHT) Remeber this room? Look for the Library save fountain and move on. |
|
Hit the save fountain and go through the trapped hallway. The first set of traps uses slow time (easy). Bounce over the next log trap. Use slow time liberally while mantling the ledges past the saw traps. Operate the turnstile switch for an air-lock door to move on. Wall run and jump to the ledge/beam, slow time to jump past the log traps. Drop down on the other side - the Prince can safely land at the precipice between the log trap and saw trap or even hang off without harm; use slow time to time the Prince's descent to safe ground. Curtain drop into a very familiar room (Library) and make way to the save fountain as before, using the ledge/beams after a wall run.
Break into the Library again (the
wall will not be there if you did not retry since the first break-in at the
Library) and navigate the Library's stacks as before, pulling out the two
bookcases to wall bounce up. Take care of regenerating the Prince's sands right
now - a timed sequence will be coming up very, very soon.
|
|
|
|
|
|
|
(ABOVE TOP LEFT) Bounce up the two bookcases and head through the Library as before. (ABOVE TOP RIGHT) Bar swing to the glass transom in the distance. (ABOVE BELOW LEFT) Drop to the lowest ledge and attempt to siddle across to the other side. How's that for a surprise? (ABOVE BELOW RIGHT) Change of plans; mantle up over the Dahaka and go to the end of the ledge/beam, and look for ledges to drop down. Once the Prince does, it's Dahaka time! |
|
A cut-scene will occur if the Prince proceeds far enough; simply move up and over the Dahaka at first (it cannot hear the Prince yet) by navigating the ledge/beams carefully. Dropping off at the end will instigate the chase sequence. Since the Prince starts so close to the Dahaka, consider using Slow Time to get a better gauge of the surroundings. Wall run, swing, and jump through all the obstacles until a second cut-scene occurs; the Prince should be able to escape to the next available save fountain.
Be sure to grab a secondary weapon
before moving through the fog filled cavern (where a cut-scene about fog will
occur). Don't miss the gallery chest (#046) by doing a wall run over the drop.
It is fairly easy to get and the way on is rather obvious. Drop down on the
ledge filled side.
|
|
|
|
|
|
|
(ABOVE TOP LEFT) Don't miss the gallery chest past the save fountain after the very brief Dahaka chase. (ABOVE TOP RIGHT) Another shot in case you need it. (ABOVE BELOW LEFT) Grab any old secondary weapon and throw it at the fog beast on the wall. (ABOVE BELOW RIGHT) Ledge exercise to the next area. Simple and untimed. |
|
Clear the platform of enemies and
use the secondary weapon to drop the fog beast on the wall. They don't explode,
but they are tougher than fire beasts. Bounce up the wall and follow the narrow
path to wall run to the stalagtites. Unlike Sands of Time, most stalagtites
start to shatter once the Prince grips one - use slow time to buy enough time
to escape to the next stalagtite. Hit the floor switch and use slow time to
escape to the next room. A secret weapon (the light blade) is here in this next
room. In this room, use slow time again to hit the floor switch and get out.
|
|
|
|
|
|
|
(ABOVE TOP LEFT) The path is fog-filled and enemy choked, but very undangerous unless you let enemies attack you. (ABOVE TOP RIGHT) Avoid the dogs and move along the path using slow time. (ABOVE BELOW LEFT) Grab this stalagtite using wall run and jump. Head over to the floor switch. (ABOVE BELOW RIGHT) tap the floor switch and then use a wall run to reach the set of stalagtites to get to the door in time. Naturally, use slow time all the way. |
|
|
|
|
|
(ABOVE LEFT) The secret weapon wall can be broken in the pit. The light sword is rather unhelpful since it drains the Prince's life each time it impacts an enemy. (ABOVE RIGHT) Another shot of the same pit, also revealing the floor switch for the room's exit. |
|
|
|
|
|
|
|
|
(ABOVE TOP LEFT) Ledge over to the other side. (ABOVE TOP RIGHT) No one is here to kill you, so take it slow and regenerate sand as you hop from ledge to ledge. (ABOVE BELOW LEFT) The path onwards. (ABOVE BELOW RIGHT) Wall run over the gap and head back into the Clock Tower. |
|
Wall run to the next ledge and go
through the tunnel using all the skills learned thus far. The Prince winds up
at a save fountain; past it is the formerly impassable passageway to the second
golem in the Clock Tower. Once there, the Prince only needs to move past the
golem room to the bar switch next to the gallery chest; pull it, head back into
the golem room for a cut-scene.
|
|
|
|
|
|
|
(ABOVE TOP LEFT) The hallway leading back into the first gear room is navigable by the ledges on the wall's side. (ABOVE TOP RIGHT) If you still don't know how to get down the Clock Tower's first gear room, here's a step by step process; slow time past the upper half of the spinning gear to the center platform. (ABOVE BELOW LEFT) Head over to the ledge/beam near the ladder side-room with the gallery chest (usually opened, unless you missed it). (ABOVE BELOW RIGHT) The ledge/beams form the bridge the Prince can jump from the center platform to the ladder side-room. |
|
|
|
|
|
|
|
|
(ABOVE TOP LEFT) Drop down the ledges on the ladder side-room to get to the same height as the middle level of the center platform. (ABOVE TOP RIGHT) That conspicuous ledge/beam is the way back to the center platform. (ABOVE BELOW LEFT) This ledge/beam is what the Prince lands on, but you will not be able to see it unless you use first-person camera or make that leap of faith. (ABOVE BELOW RIGHT) Climb down the ladder (don't flip any bar switches in this room) and slow time past the lower half of the spinning gears to the platform device room. This room can be traversed as such any time during the game (except the first time the climb is made). |
|
|
|
|
|
(ABOVE LEFT) The Mask of the Wraith. Luckily for UbiSoft, there is no Phantom of the Opera game, or we're talking some serious copyright issues. (ABOVE RIGHT) Hi, I'm the Prince of Persia and I'm a stupid moron who likes to put on strange magic masks I can't remove until I kill my old self or have a temporal demon rip my face off. |
|
Afterwards, head through the door to the water paddle structure and work down to the bottom of the tower. Hit the save fountain and keep moving through the next tunnel to the first gear room of the Clock Tower. Use the save fountain at the base of the Clock Tower in case the game bugs. Head to the platform device room and get an interesting cut-scene.
Throne Room Past/Present, Caves 1
Now that the Prince is more or less
'normalised', it's time to get nasty with the Empress (and not in the
good way). Use the save fountain if desired. Head into the throne
room for some cinematics. Use the time portal and head into the present.
Note that (in the present) once the Prince goes past the small pool of water to
the dias, there is no turning back.
|
Boss - The Empress Of Time (also: Miss Hubba-Hubba, Big Red) The last boss fights somewhat like
the first time, but with some notable changes. The boss now teleports three
times in a row, kicking each time. However, the boss guards a lot more than
it did in the previous fight. That being the case, the best way to combat it
is to Slow Time. While the time power is in effect, the Prince can hit the
boss once, charge a sword blow, then follow up with a four hit single weapon
combo. That should do some relatively good damage; with luck, the Prince can
roll or mount a second four hit combo before the time effect meter runs dry.
Once the time power has resolved, immediately slow time again and repeat the
charge blow, combo, combo attack pattern. |
|
|
|
|
|
When the time twisters (little
Magic The Gathering joke there) starts ripping apart
the dias, the Prince needs to react quickly. Each time twister will
independently charge straight at the Prince - all he needs to do is to dodge
each twister perpendicular to the twister's direction of travel. However,
there can be up to three twisters in play at once, so you need to move
quickly. Do not expend any sand while dodging the twisters, as sand is better
used for the powers of Rewind and Slow Time when fighting the boss instead.
One last note - each time twister may leave behind some sand when it dies
down, but only if it 'dies' on the dias. |
|
|
|
|
|
|
|
Throne Room Past/Present, Caves 1
|
|
|
|
(ABOVE LEFT) The Water Sword appears mysteriously in the Hourglass Chamber if all nine life-upgrades are earned. (ABOVE RIGHT) Be sure to have a save game before you grab the sword so you have the choice to fight the Empress or the Dahaka when you reload your last save file. |
|
If the Prince chased down all nine
of the life upgrades, then a pleasant surprise will be waiting for him in the
Hourglass Chamber in the save file 'The Death of a Prince'. A
mysterious sword is in the room (get it after the cut-scene) that makes all
other swords look like theatre props made out of cardboard and tinfoil. Saving after getting this weapon will also change the save file
name from 'Death of a Prince' to 'Warrior Within' (hence
the origin of the title).
|
Boss - Mr. Dahaka (also: I-Like-To-Eat-Your-Face, Big Black Boogie-man) Head through the throne room as before, armed with something more potent. The cut-scenes will be mostly the same, untile of course, the Dahaka shows up. Mr. Dahaka has had enough of the Prince, so there's no running away this time. However, the presence of the Water Sword will protect the Prince from the Dahaka -- this gives you a chance to score a really good ending. And IGN does mean 'score'. Huhuhuhuhu. First off, this fight is different from the one with the Empress of Time. Sand will continuously form on the dias, perhaps a by-product of the interim alliance with the Empress. This sand is the only way for the Prince to continuously use his time powers. Make sure to take a break to grab sand when the Prince is down to one or two tanks of sand. The Dahaka has two attacks - long
and short. At long range, the Dahaka tries to rape the Prince using its
tentacles. It is fairly easy to avoid them provided the Prince holds BLOCK
and zig-zags around the dias. Slow Time gives the Prince the advantage, but
requires a sand tank. Hanging off the dias to approach the boss is not an option
any more, as the tentacles will knock off the Prince into the chasm, so all
the fighting will be done on solid ground and on the dias. |
|
|
|
|
|
Once the boss takes enough damage,
the Empress sends a mystical bolt to blast the Dahaka off the edge. Even
demons can die when they fall, so attack the boss when it is clinging to the
edge. Note that when the cut-scene of the boss being blasted occurs, any time
powers in effect are cancelled; this means you must reactivate slow time to
regain its effects (which sucks if the Prince was on his last sand tank).
Slow time is necessary since the Prince needs the effect to run to the boss
to attack it. Try a charged blow followed by the four hit combo in quick
succession to do the most damage. As always, keep the slow
time effect going to beat down the boss. |
|
|
|
|
|
Once the boss takes enough damage,
the Empress sends a mystical bolt to blast the Dahaka off the edge a second
time. Reactivate slow time to regain its effects, run to the boss and attack
it once more. As always, keep the slow time effect
going to beat down the boss. The final blow must be delivered to the boss at
the dias edge. Treat yourself to some nice food and drink as the best
cut-scene in the game rolls. Also, try to keep your hands out of your
pockets. |
|
|
|
|
Gallery Chests
|
|
- Present. On the beach the Prince lands on initially has a treasure chest on the end of the beach near the bottom of the stairs. |
|
|
- Present. Almost in plain sight on the cliffs after making several ledging and columns exercises. |
|
|
- Past. In the room where the Prince fights some enemies past the first time portal. |
|
|
- Past. The room outside the timed crawl space gate to the second life upgrade. In the present, the first Karasuman enemy was found here. |
|
|
- Past. On the ground floor of the room labelled Antechamber on the game map. This room also has the ninth life upgrade. |
|
|
- Past. In the Sacrificial Chamber after fighting Shadee (the girl in black) a second time. |
|
|
- Past. In the Hourglass Chamber, after meeting with Kaileena (the girl in red). |
|
|
- Past. Platform Device Room (Central Hall). Clock Tower path. |
|
|
- Past. Platform Device Room (Central Hall). |
|
|
- Past. In one of the pits the Prince needs to get by using Slow Time and fast retracting grates. |
|
|
- Past. |
|
|
- Past. |
|
|
- Past. |
|
|
- Past. |
|
|
- Past. |
|
|
- Past. |
|
|
- Past. Clock Tower. Past the first golem, there is a chest next to some stairs. |
|
|
- Past. Clock Tower. First Gear room. The side-room with a ladder has a gallery chest. |
|
|
- Past. Clock Tower. Right after using slow time to shoot past the upper half of the spinning gear, there is a small paltform with a chest on the left. |
|
|
- Past. Clock Tower. The spinning shaft room in the water paddle room has a chest. |
|
|
- Past. Clock Tower. Before fighting the second golem, there is a walkway with a treasure chest. |
|
|
- Past. Clock Tower. After fighting the second golem, there is a chest in the impassable spike tunnel room just beyond. |
|
|
- Past. Clock Tower. In the second gear room, where the Prince lowers four giant gears by virtue of turnstile switches then wall runs over closed shutters (and the third golem who throws explosives), there is a chest at the final gear shaft. |
|
|
- Past. Clock Tower. One more treasure chest is above the entrance to the room to the explosive throwing golem. |
|
|
- Past. The throne room. |
|
|
- Past. The throne room. |
|
|
- Present. The Catacombs. In the rising tomb room where the three weights are. |
|
|
- Present. Catacombs. Near the save fountain past the rising tomb room. |
|
|
- After bagging the Scorpion Sword, the Prison where there is a weight box guarded by a lotta enemies. |
|
|
- The same prison area after bagging the Scorpion Sword; the room has some spiked floors and a column for fighting enemies. |
|
|
- After fighting the mummy golem boss, at the top of the ladder the fight resolution creates. |
|
|
- Past. Library. On the second floor of the Library after passing the three alternatively open/close bookcases (controlled via turnstile switches) and the timed door. |
|
|
- Past. Library. Past the shattered glass transom and window, some wreckage that requires the Prince to descend from the ledge/beam then siddle to the donut ledge structures. |
|
|
- Past. Library. Past the donut ledge structures but before the wall running ninja attack. Drop in the hallway and then use the weighted box to wall run back up to the ledge/beam. |
|
|
- Past. Clock Tower. Scorpion Sword needed. Break the door in the towers that required the Prince to drop weights using the explosive throwing golem. |
|
|
- Past. |
|
|
- Past. Antechamber. Right next to the box for life-up number nine. |
|
|
- Past. Sacrificial Chamber. At the broken stairs before heading back up to the save fountain. |
|
|
- Present. The Mask of |
|
|
- Past. |
|
|
- Past. The Collapsing Area. At the second 'pit stop' there is a chest in the corner. |
|
|
- Past. The Collapsing Area. At the end of this section, there is a floor with the chest. You have six seconds in Slow Time to grab the chest then break the wall with a charge attack. |
|
|
- Past. Fortress Entrace. In the room where the Prince attacks his old self with an axe, there is a chest in the cut-scene's background. Backtrack slightly to grab it before moving on. |
|
|
- Past. Foundry. On the ground floor next to the wall switch. |
|
|
- Past. Foundary. On the ground floor on the side with the multiple switch blade traps (or as we call them, mechanical faididi). |
|
|
- Past. The Caves. Right before a rather obvious drop, the chest is in the distance. Wall run to grab it. |
Misc. Weapons
|
|
|
|
Teddy Bear - Present. Clock Tower. Go to the room where the second golem was fought and look for the flooded dead end. Crack open the wall and nab the data on the teddy bear. Incidentally, it will restore the Prince's life with each hit on an enemy. |
|
|
|
|
|
Hockey Stick - Past. Platform Device Room (Central Hall). Head down to the third life-upgrade and crack the wall next to the doorway. The hockey stick increases the damage of the Prince's attacks. |
|
|
|
|
|
Pink Flamingo - Present. |
|
|
Rayman Fist - Present. Catacombs. This is the only weapon the Prince does not need a Scorpion Sword for, but is far more danagerous to get since you must get it as the Dahaka is chasing the Prince. After pulling out the first of three weights to raise the tomb to escape, the Prince may take either a left or right at a fork to the subsequent weights. The left path (the one with the rolling obstacles) has the secret weapon in a small niche before the first rolling obstacle. It is on the left and behind the camera, so you may want to use Slow Time to give yourself some room for error. Said the freelancer who wrote this guide about a picture of the area -- Not just no, but HELL no. |
|
|
|
|
|
Light Sword - Past. |
|
Life-Upgrades
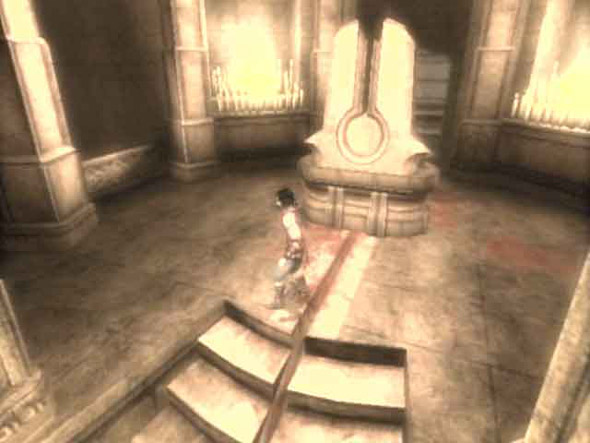
Life Upgrade 1 - Past. Sacrifical Chamber. After fighting the girl in black a second time, pull the large altar on ground level of the sacrificial chamber to reveal a secret door. Go through the trapped hallway and bag the life upgrade. If you miss this, you can still get it as a Sand Wraith or by rotating the turnstile switch in the platform device room to 12 o'clock and braving the altar hall again.
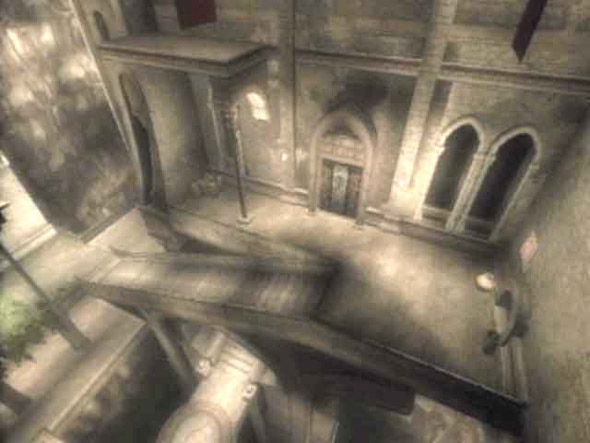
Life Upgrade 2 - Past. Courtyard Area. This is after Slow Time is earned. From the room where the Prince has a cut-scene with the maggot man creature, head back out into the large courtyard like room with a timed floor switch next to some stairs. This floor switch opens a low gate at the top of the same set of stairs. Go through that low gate for the trapped hallway and life upgrade. You can get this upgrade as long as you have access to the Central Hall and the surrounding areas.
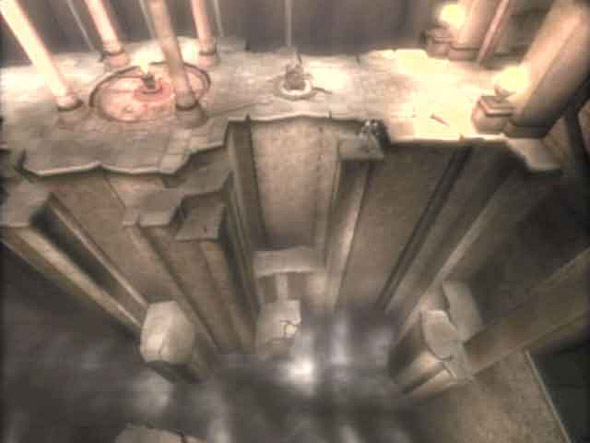
Life
Upgrade 3 - Past. Platform Device Room (Central Hall). This is after the
Serpent Sword is earned. Go to the central room ('Central Chamber' on the map)
that connects the Clock Tower and the
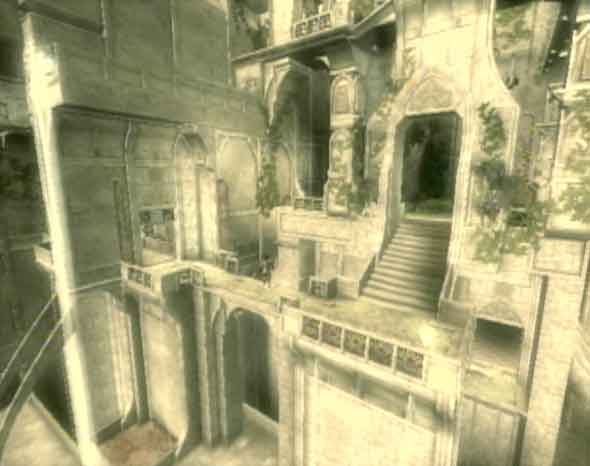
Life
Upgrade 4 - Past.
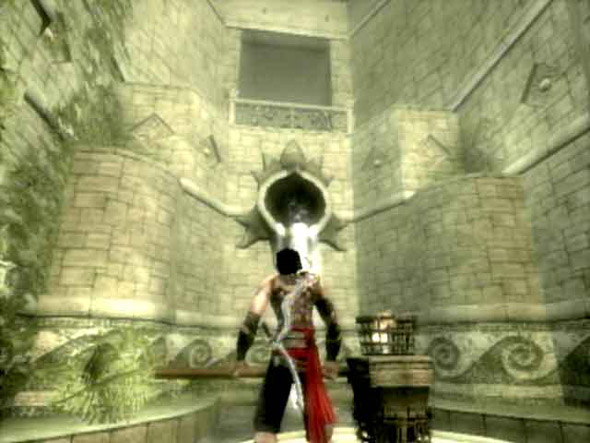
Life
Upgrade 5 - Past.
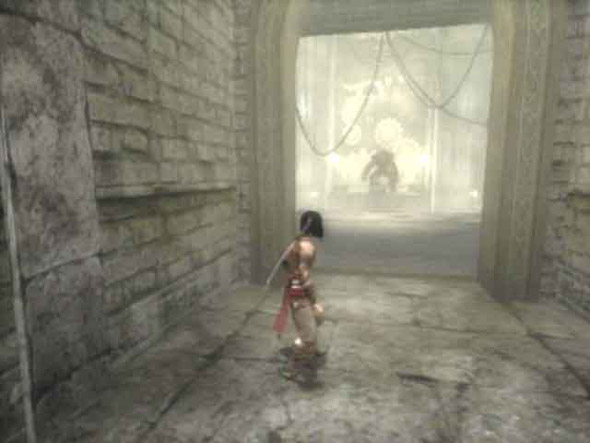
Life Upgrade 6 - Past. Clock Tower. When exploring the Clock Tower, look for the third golem that throws explosives. One breakable wall is a save fountain, but a second breakable wall on the other end of the room leading to the life upgrade. Head left at this illustration to find the wall. This upgrade is permanently barred from the Prince after fighting the Empress the first time.
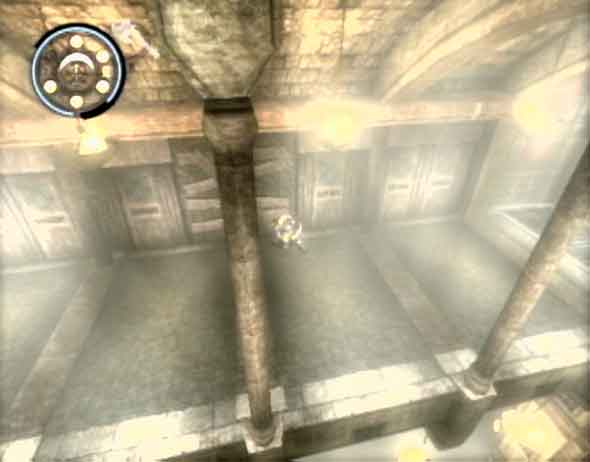
Life Upgrade 7 - Past. Area Between Catacombs and Library. After gaining the Scorpion Sword and fighting the mummy golem, a ladder leads to a Roman courtyard room above the boss golem's room; two breakable walls are here as well as the way on (which is naturally open). Behind one breakable wall is a switch, the other breakable wall has the timed door. Use slow time to reach and pass the door. This life-up can be earned when the player returns to this room as a Sand Wraith, but not afterwards.
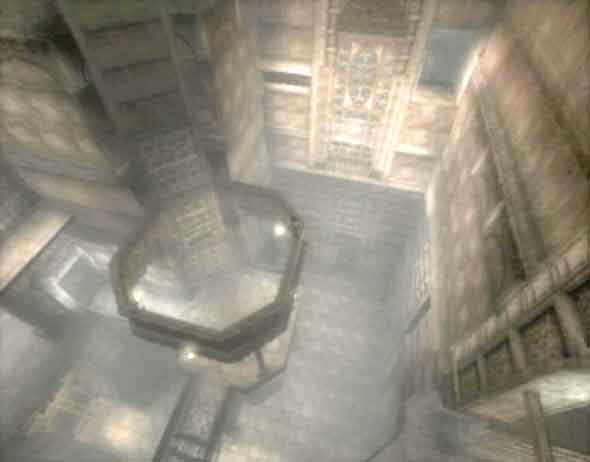
Life Upgrade 8 - Arriving in the Library, the Prince goes must pull out two bookcases to access some bars. The Prince will fight a ninja on one of two circular ledge/beams shotly thereafter. Detour to the second circular ledge/beam and jump to the wall with the three levels of ledges and crappy Ottoman lattice work. The door on the wall is the trapped hallway to the life upgrade. This upgrade is permanently barred from the Prince if missed the first time around.
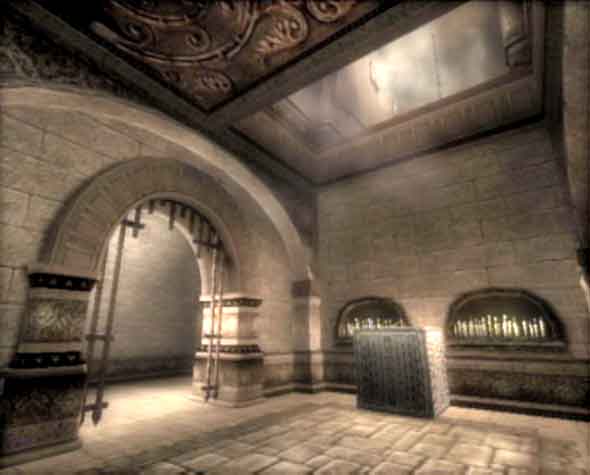
Life Upgrade 9 - Past. Antechamber. After passing the Library and reaching the platform device room once more, turn the switch in the room to the 12 o'clock (original) position to reach the 2nd floor balcony. This is back when the Prince was chasing Shadee (the girl in black). Take the same route and locate the room where the first ninja on a ledge/beam was encountered. Climb the floors and inspect each of the gates in the corner floor sections; one is conspicuously cracked with a box past it. This box can be pulled out (after the gate is busted) to allow the Prince to access the life-upgrade hallway. This upgrade can be earned any time so long as the Prince has the Scorpion or Water Sword and may access the platform device room (Central Hall).
|
Politica de confidentialitate | Termeni si conditii de utilizare |

Vizualizari: 1979
Importanta: ![]()
Termeni si conditii de utilizare | Contact
© SCRIGROUP 2024 . All rights reserved