| CATEGORII DOCUMENTE |
DOCUMENTE SIMILARE |
|||||
|
|||||
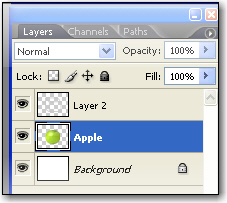
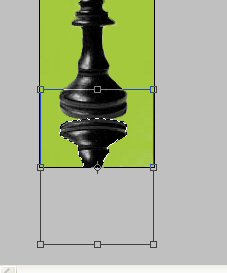
I have picture with two layers one is
the with object and other is just green background
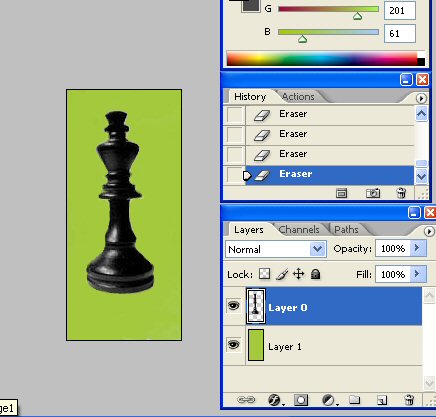
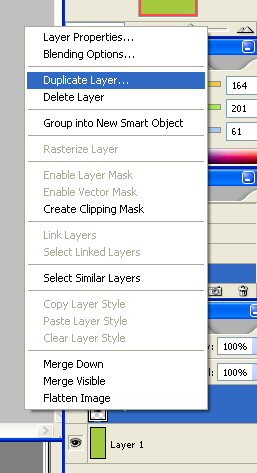
Dublicate the layer with the object
Select the object and with mouse right click select free transform
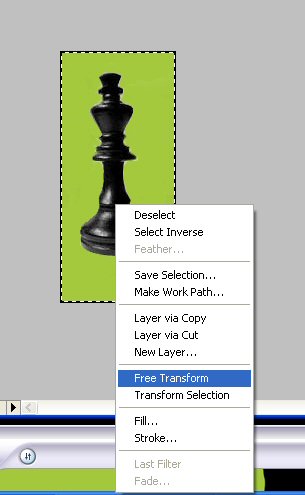
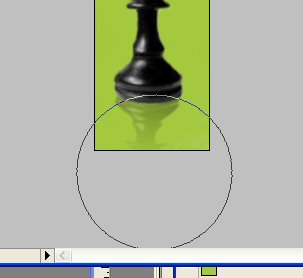
and transform it like this
Then on the selection click with right click select
Warp
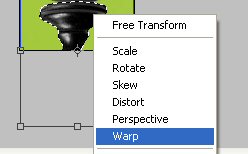
and deform it!
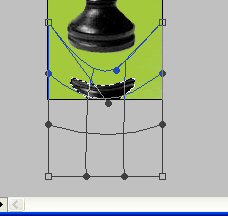
And move it!
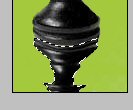
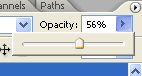
Set the layer opacity to less then 60%
Take the Eraser tool and delete a little under the
object reflection to make it realistic
Alt tutorial
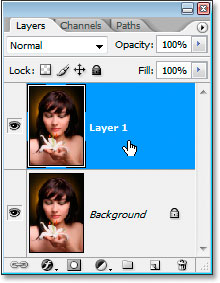
The first thing we want to do is duplicate our Background layer since it contains our original image data and we don't ever want to touch that. To quickly copy the Background layer, use the keyboard shortcut Ctrl+J (Windows) / Command+J (Mac), and that gives us our copy in the Layers palette:
With the copy of our Background layer selected, we're going to bring up Photoshop's Lighting Effects filter. To do that, go up to the Filter menu at the top of the screen, select Render, and then select Lighting Effects. This brings up the Lighting Effects dialog box:
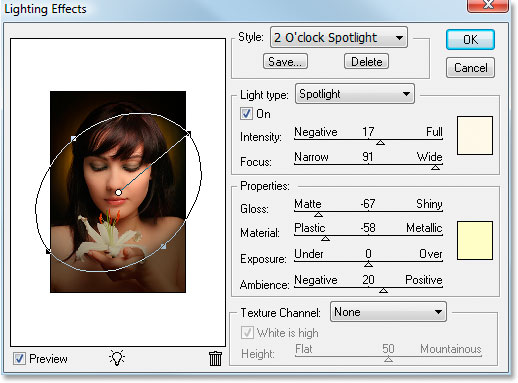
Photoshop's Lighting Effects filter dialog box.
If you've never used the Lighting Effects filter before, you may be looking at the dialog box above and thinking 'Oh my god, there's no way I can do this'. Don't worry, there's only a couple of things we're going to be doing here, and they're very simple. You can safely ignore most of what you're seeing.
Step 3: Select The 'Flashlight' Lighting Style
The first option we're going to change is the one at the very top, the lighting Style. Click on the down-pointing arrow to bring up a list of available styles, and choose Flashlight from the list:
Select the 'Flashlight' lighting style from the list.
As soon as you select the Flashlight style, the image in the preview window on the left of the Lighting Effects dialog box changes to reflect the new lighting:
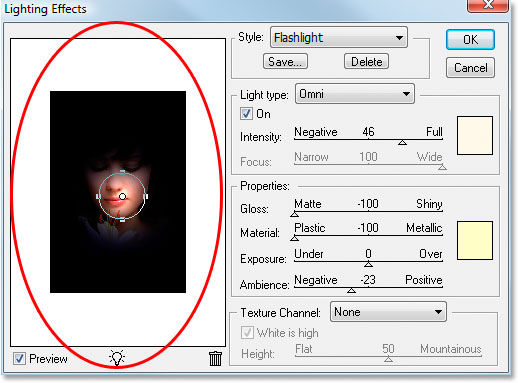
The preview window on the left changes to show how the Flashlight effect currently looks.
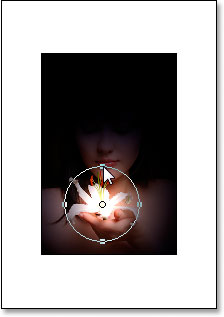
Step 4: Drag The Light Source To Reposition It
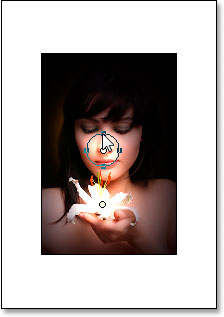
As we saw in the preview window, the light source is currently located in the center of the image, which isn't where I want it. I want it to be coming from the center of the flower she's holding, so I need to reposition it, which is easy to do.
The light source is surrounded by a circle with four square handles on it, and a small circle in the middle. To reposition the light source, I'm just going to click on that small circle in the center with my mouse and drag the light to a new location. I'll drag it over the flower:

Repositioning the light source by dragging it by the small circle in the center to a new location.
Now we can see in the preview that the light is coming from the flower.
Step 5: Resize The Light Source If Needed
I'm going to increase the size of my light source by dragging the top handle upward
Dragging the top handle upward to increase the size of the light source.
With the Flashlight style we're using here, it doesn't matter which handle you use, since the light is in a circle. Other lighting styles will give you different results depending on which handle you drag. Again, it makes no difference with the Flashlight style.
We're going to add more lights to our image next.
I now have a light source on the flower, and I could stop here if all I wanted to do was focus on the flower. But I want to bring attention to the woman's face as well and make it seem like the light from the flower is shining on her face. For that, I'll need a second light source. I want my second light source to use the 'Flashlight' style as well, so the easiest thing to do is simply copy the original one to create a second one, and then reposition the second one over her face. In fact, I can do both at the same time.
I'm going to hold down my Alt key (Windows) / Option key (Mac), and then I'm going to click on the center of my light source again and drag it over the woman's face to reposition it. By holding down Alt/Option as I drag, rather than moving the original light source, I'm copying it, giving me my second light source, already set to the 'Flashlight' style, and all I need to do is drag it to where I want it. I'll drag it to the bottom of her nose:
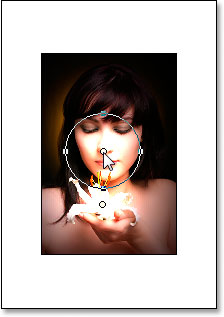
Hold down 'Alt' (Windows) / 'Option' (Mac) to create a cope of the original light source as you drag it to a new location.
I want to make this second light source smaller, so I'll just drag the top handle inward to reduce its size:
Reducing the size of the second light source by dragging the top handle inward.
Step 7: Add More Light Sources As Needed
I think I'll add a third light source just to intensify the effect. I'll add one just below her eye on the left. Again, all I need to do is copy one of my existing light sources. I'll copy the one I just created, so to do that, once again I'll hold down my Alt (Windows) / Option key to create a copy of it as I'm dragging, and I'll drag it just below her eye. Then I'll drag one of the handles inward to decrease the size of this third light source a little:
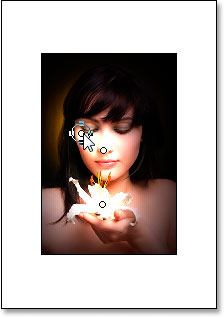
Adding a third light source to the image by creating a copy of the second one as I'm dragging, and then resizing it with one of the handles.
I think that looks pretty good, so now that I'm done adding my light sources, I'll click OK to exit out of the Lighting Effects filter.
I think I like how intense the lighting effect is with my image, but if you find you want to lower the intensity, before you click on anything else in Photoshop (you'll lose this option if you don't do this right away), go up to the Edit menu at the top of the screen and select Fade Lighting Effects. This will bring up the Fade dialog box. To lower the intensity of your lighting, simply reduce the opacity of the effect by dragging the Opacity slider towards the left:
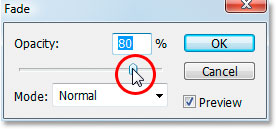
Lower the opacity of the effect with the Fade command to reduce the intensity of the lighting if needed.
As I said, I'm going to leave mine the way it is at full intensity, but the Fade option is there if you need it.
And that's it! The lighting effect is complete. Here's my original image once again for comparison:
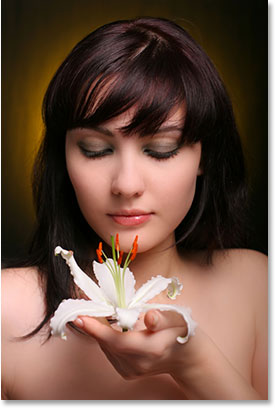
The original image once again.
And here is the completed 'focus with light' effect:
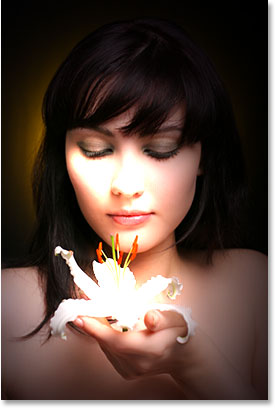
The final 'focus with light' result.
Alt tutorial
In this Photoshop tutorial I'll teach you how
to make simple logo, with a star.
Create a new file (File>New)
having 450x450 px and 72 dpi.
Pick up the here indicated Ellipse Tool (U)
to represent the primary layer of the logo to draw next.
The layer's parameters:
Blending Options>Gradient Overlay
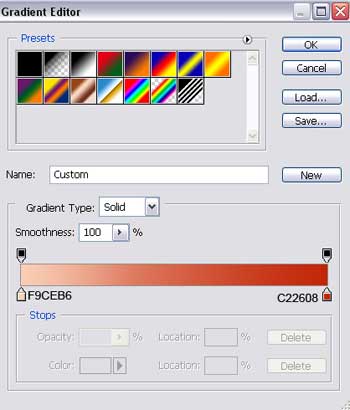
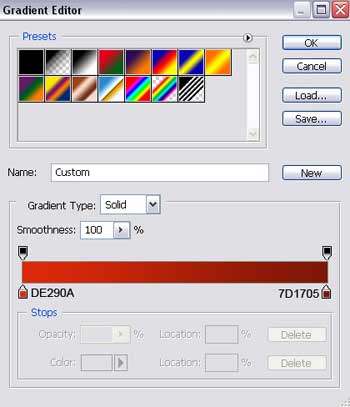
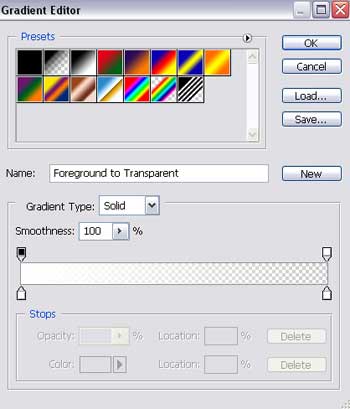
Gradient's parameters:
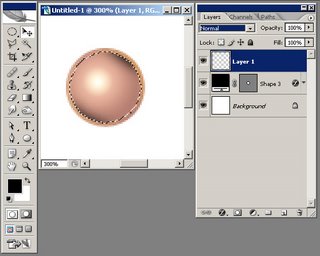
Using the previous applied instrument, we'll create firstly the outside edges
of the ring and then press the Alt button
to cut out the inside part, selecting the same instrument.
The layer's parameters
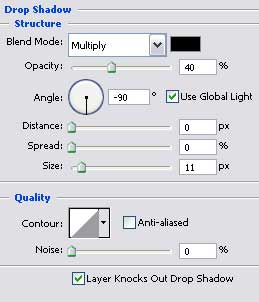
Blending Options>Drop Shadow
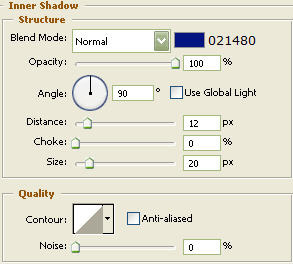
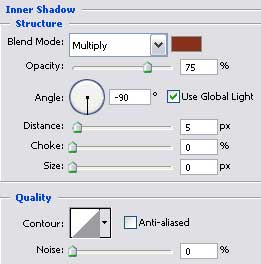
Blending Options>Inner Shadow
Blending Options>Gradient Overlay
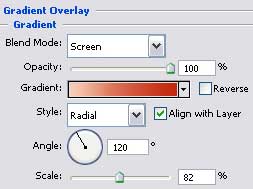
Gradient's parameters:
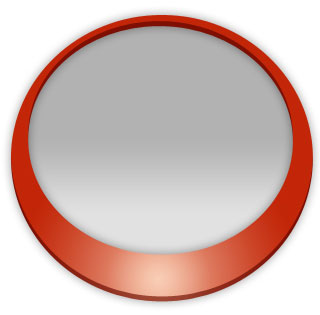
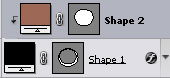
Applying the same Ellipse Tool (U),
we'll represent one more layer reserved for the indicator, colored with # 9C6856.
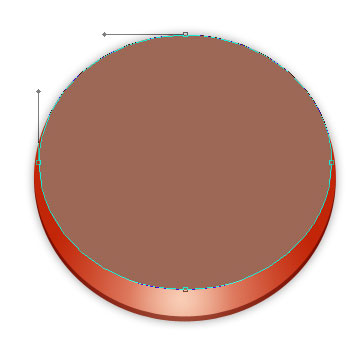
Make a mouse's click between the ring's layers and the recently made one,
pressing simultaneously the Alt
button and the layer will be applied in the ring's limits.

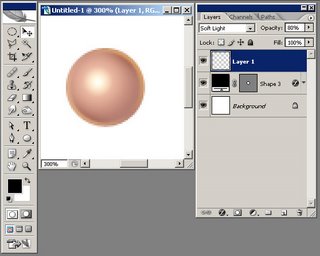
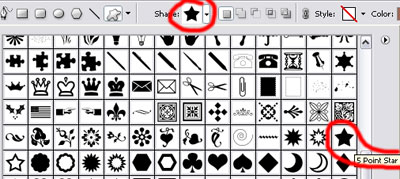
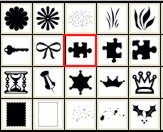
Next step includes selecting the Custom Shape Tool (U) for choosing the
appropriate shape indicated in the next shown table.

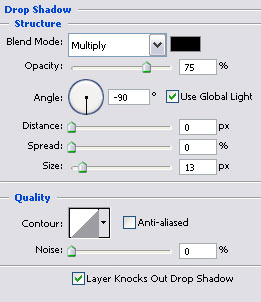
The layer's parameters:
Blending Options>Drop Shadow
Blending Options>Gradient Overlay
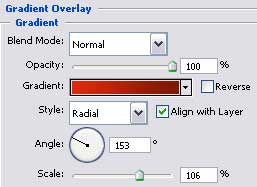
Gradient's parameters:
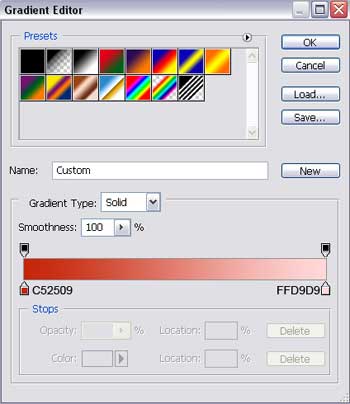
Blending Options>Stroke
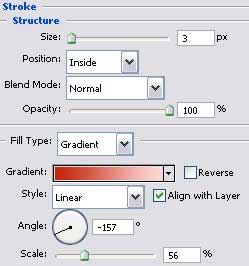
Gradient's
parameters:

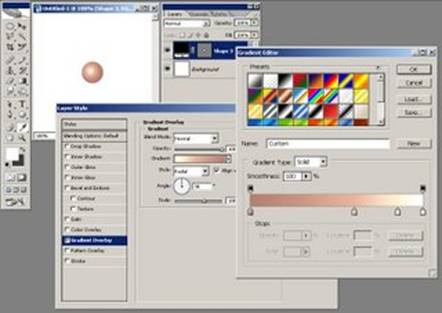
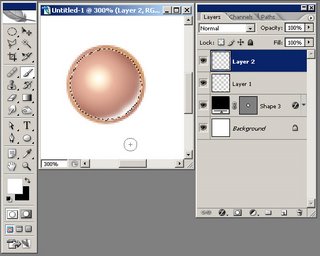
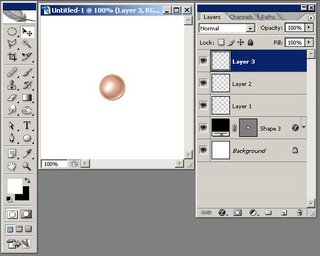
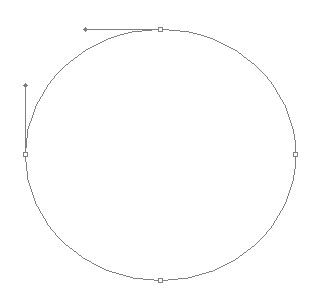
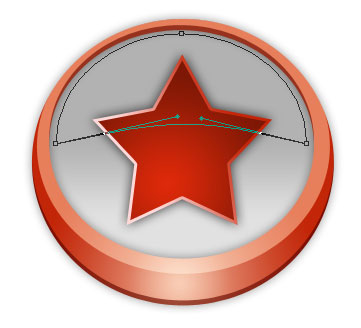
Choose the already well known Ellipse Tool (U)
to draw a flare on the logo's surface.
After that select the Delete
Anchor Point Tool to move off the circle's top. The Convert Pont Tool will be helpful in
correcting the circle's shape.
The layer's parameters
Fill 0% on the layers.
Blending Options>Gradient Overlay
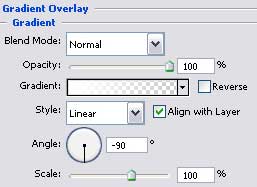
Gradient's parameters:

Alt tutorial
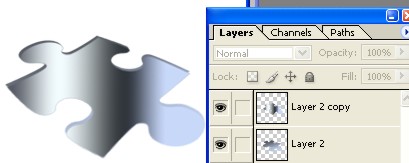
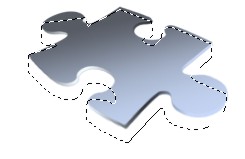
Let's make 3D Jigsaw Puzzle Piece.
1. First of all open a New
Document here
I have selected 300 Pixel / 300pixel.
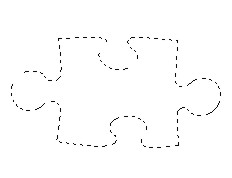
Now from the Custom Shape Tool seelct
a shape that look like a jigsaw puzzle piece.
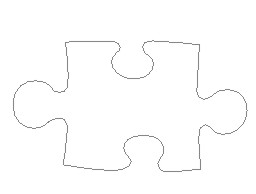
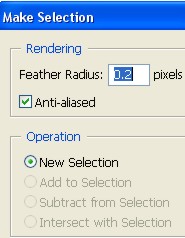
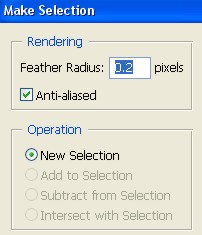
2. Select Pen Tool ![]() ,
and Right click
,
and Right click
on the shape > Make Selection > click ok
at 0.2 pixel.

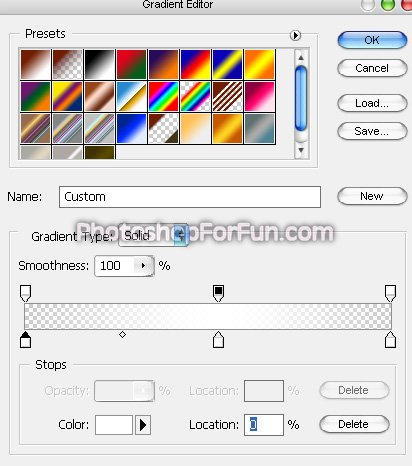
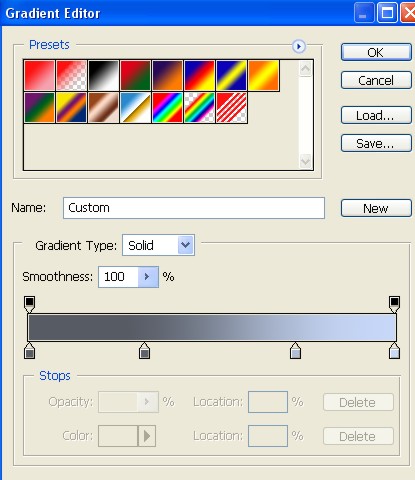
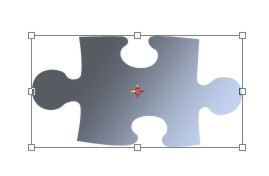
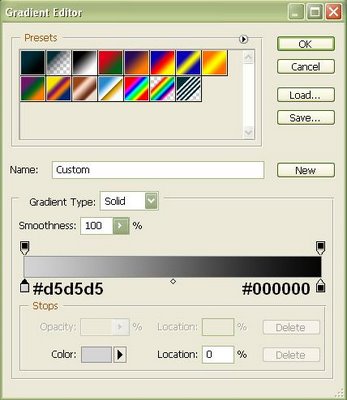
3. Now select Gradient Tool ![]() >
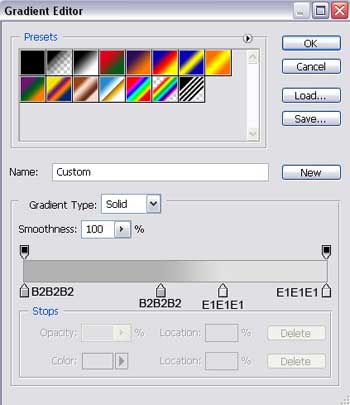
>
go to Gradient Editor > set color in the Gradient Editor ,
and then fill the Gradient color #575B64, #5C606B,
#ADC0D1, #C9D7FA in the Layer1. Press Ctrl+D.
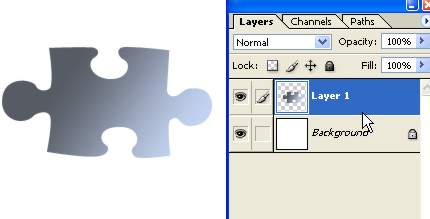
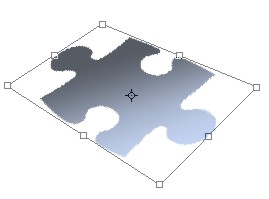
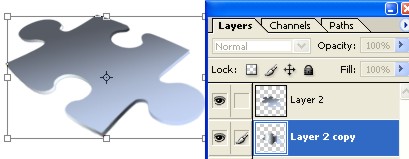
4. Now go to Edit > click
on Free Transform,
and then turn the shape as shown below.
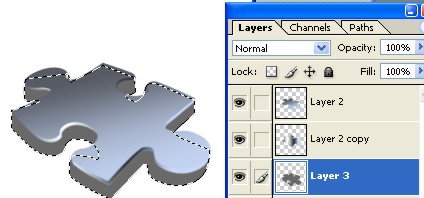
5. Now make a copy of the Layer2.
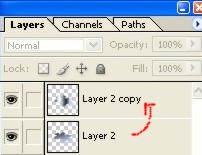
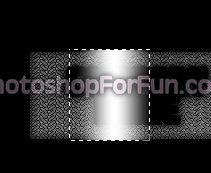
6.Now to make selection click on the
copied
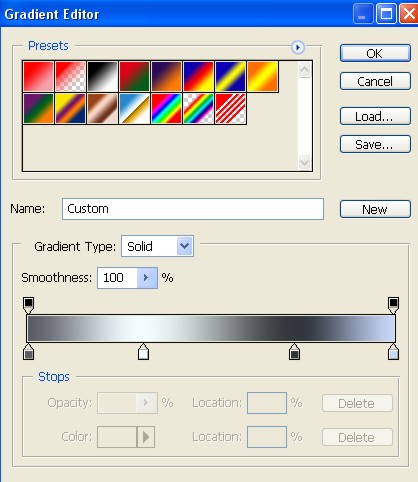
image while pressing Ctrl, and then select Gradient Tool
![]() ,
,
go to Gradient Editor and change the color as shown below.
Now fill the Gradient color #595C63, #F2FCFE,
#31363C,
#C4D6FA in the copied Layer.
7. Now set the Layer as
shown below, and then go to
Edit > click on Free Transform and set the shape as
you can see in the Image below.
|
|
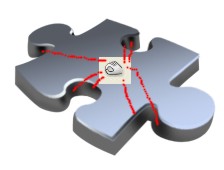
8. Now with the help of Pen
Tool ![]() create
a
create
a
shape as shown below > Right click on the created Shape
> Make Selection > click ok at 0.2 pixel.
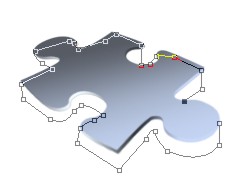
9. Now here fill the color #67686A in the layer3.
10. Now select Burn Tool ![]() ,
,
and give Effect with the help of the Image below. You
can chnage the size of the Brush if you want.
11. Now select Dodge Tool ![]() ,
and give Effect with the help of the Image below. You can chnage
the size of the Brush if you want.
,
and give Effect with the help of the Image below. You can chnage
the size of the Brush if you want.
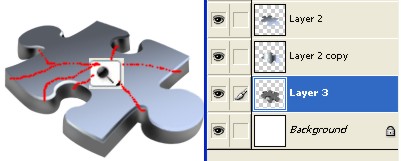
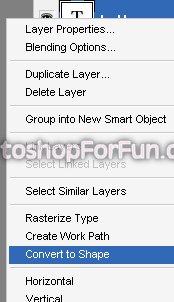
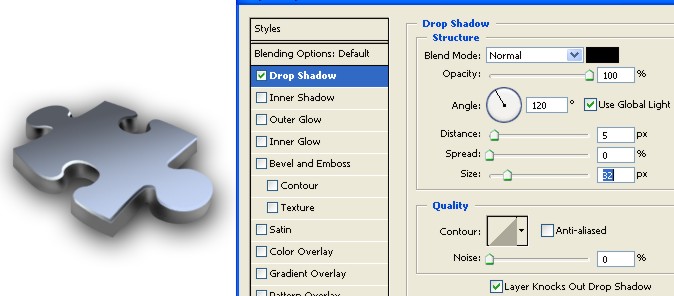
12. Now Double click on the
Layer3 > Layer Style > in the
Drop Shadow give Effect with the help of Image below.
13. Final Image.

alt tutorial
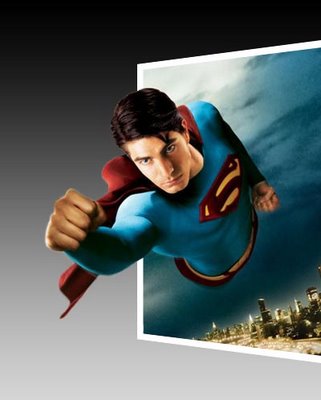
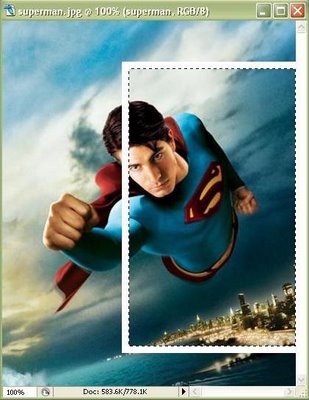
--Photoshop-- Stick Out From Picture
This time you
will learn how can you make any object stick out form any image like this:
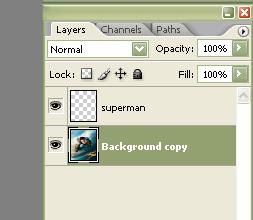
1. Open your image, duplicate layer (delete first one) and make new layer. You
should have this in layer palette:
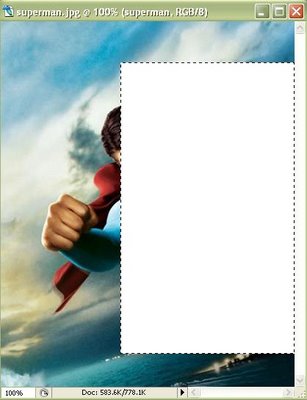
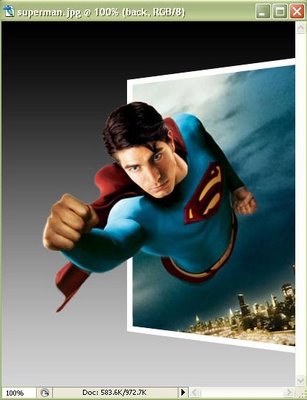
2. Now select Rectangular Marquee Tool, make selection on 'superman
layer' and fill it with white like this:
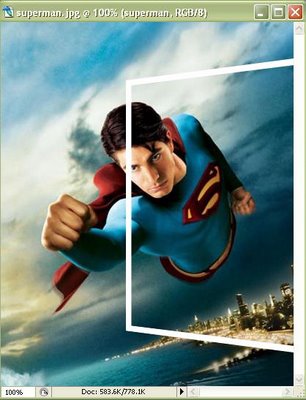
3. Select Rectangular Marquee Tool again, make square on the white area and use
Erase Tool to bring back the old photo:
4. Select first selection with rectangular again and press Ctrl+T
to transform it. Right click on transform area to select Perspective. Transform
selection like this:
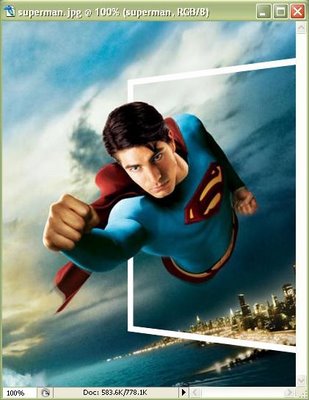
5. Use Erase Tool to remove part of border that should not be seen:
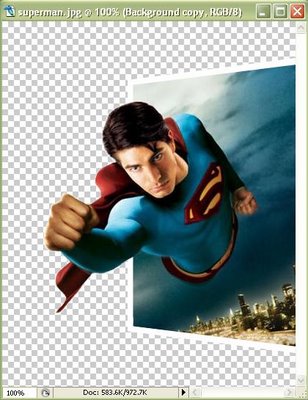
6. Now select 'Background copy' layer and using erase tool remove all
all background of image except that in border (it is
easier to zoom image and use erase tool):
7. Create another new layer (for background) and drag it below background layer
like this:
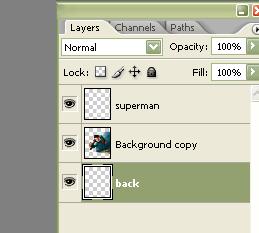
8. select 'Back' layer and fill it with some color (no matter which
one):
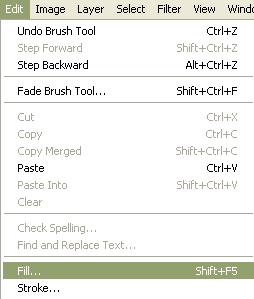
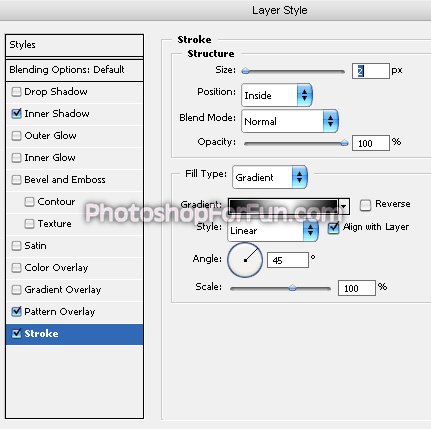
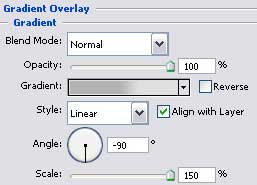
9. Now double click on 'back' layer to open Blending Options and in
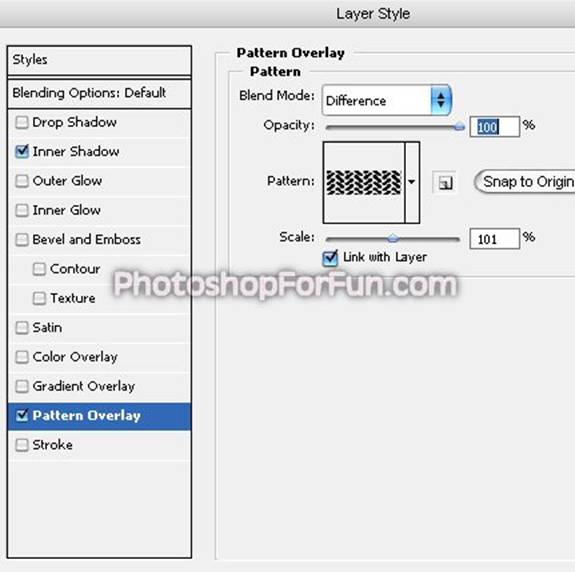
Gradient Overlay set this:
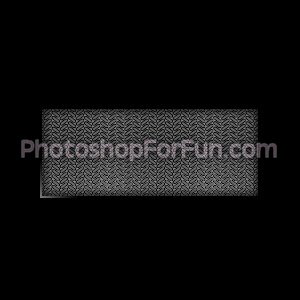
It is done! Your final result will be:
Alt tutorial
|
|
| ||||||||||||||||||||||||||||||||||||||||||||||||||||||||||||||||||||||||||||||||||||||||||||||||||||||||||||||||||||||
|
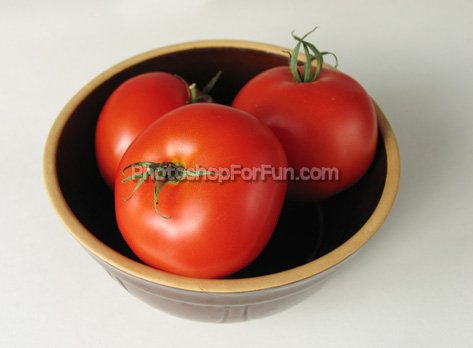
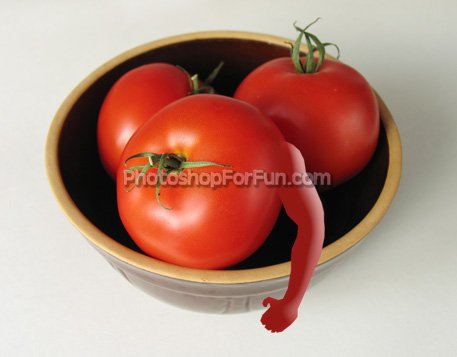
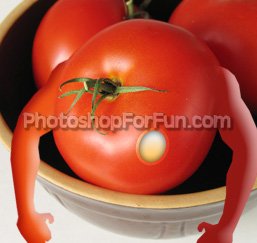
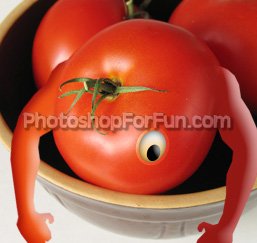
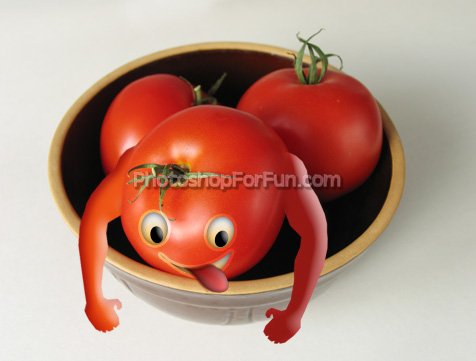
Start by opening an image of some tomatoes.
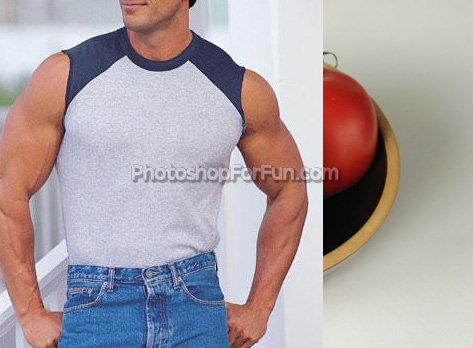
Insert and image of a muscle man.
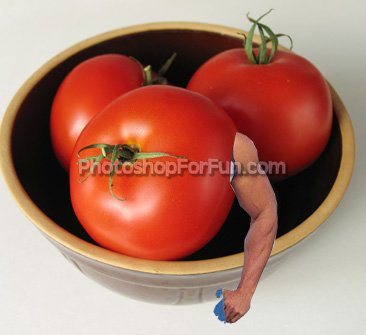
Create cutout of the muscle man hand and place as shown.
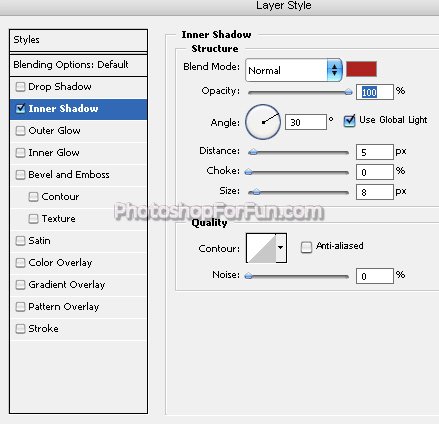
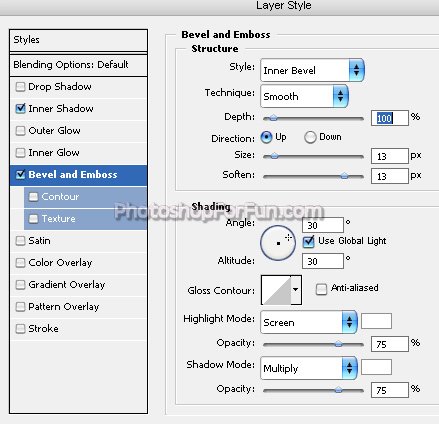
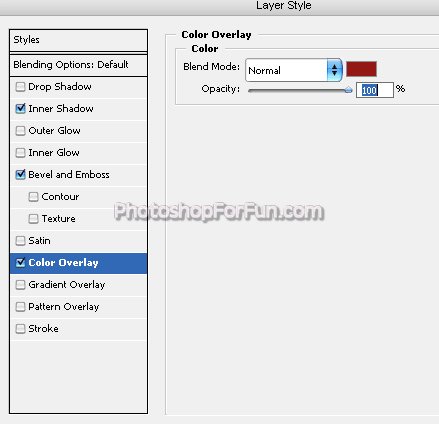
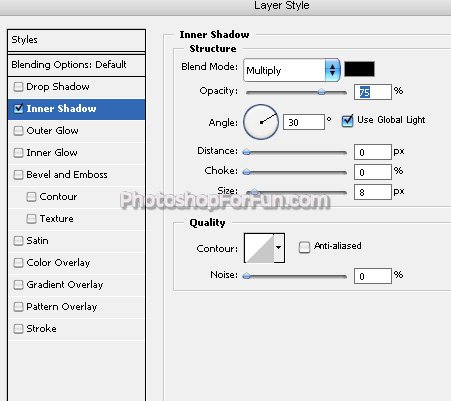
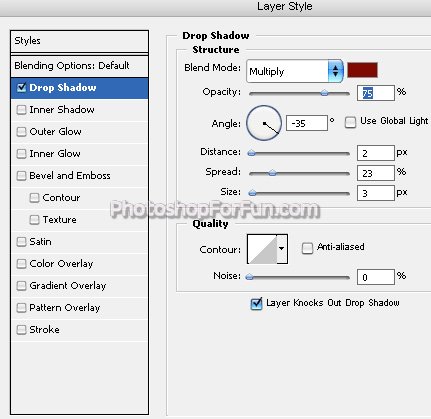
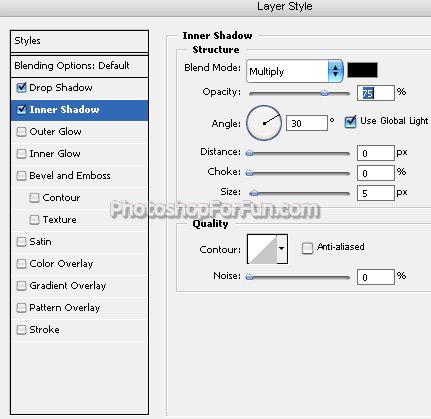
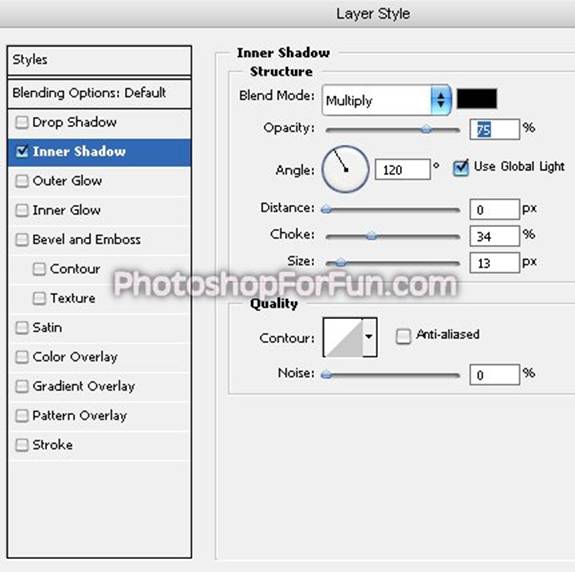
Double click the layer to open layer style window. Apply settings as shown.
|
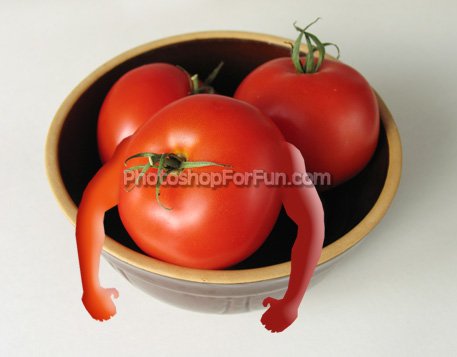
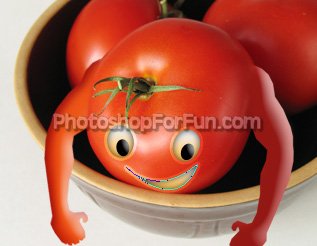
Duplicate the layer. Press Ctrl+T. Right click and select Flip Horizontal and place on the other side. Adjust the layer style colors according to tomato's left edge color.
Create an ellipse for the eye using elliptical shape tool.
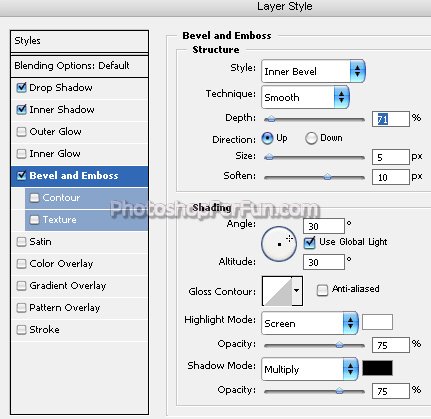
Double click the layer to open layer style window. Apply settings as shown.
Apply settings as shown.
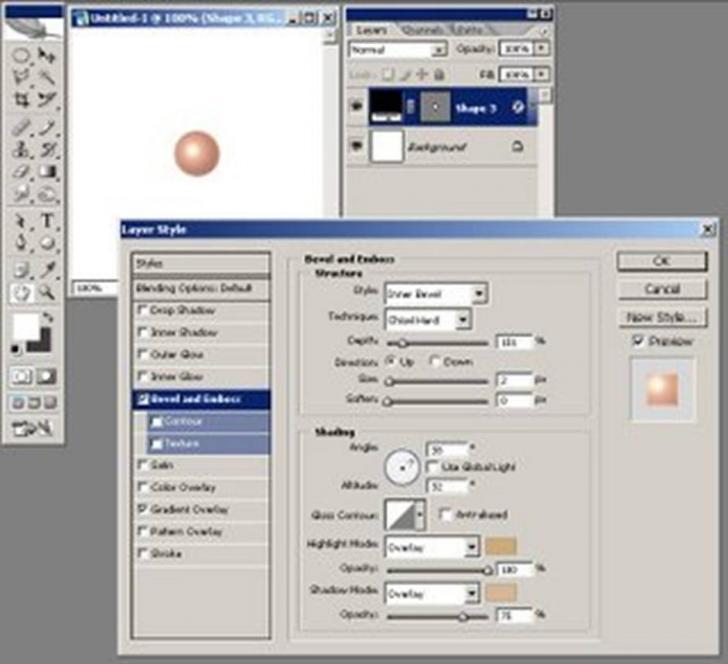
Create another ellipse for the eyeball using elliptical shape tool. Apply some 'bevel & emboss' layer style.
Duplicate the eye layers. Press Ctrl+T. Right click and select Flip Horizontal and place on the other side.
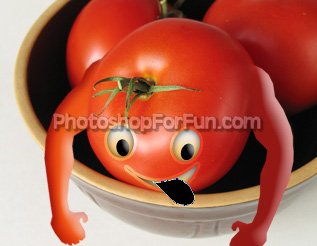
Create mouth using pen tool. Apply same layer style we used for the eye layers.
Now create tongue coming out of the mouth using pen tool.
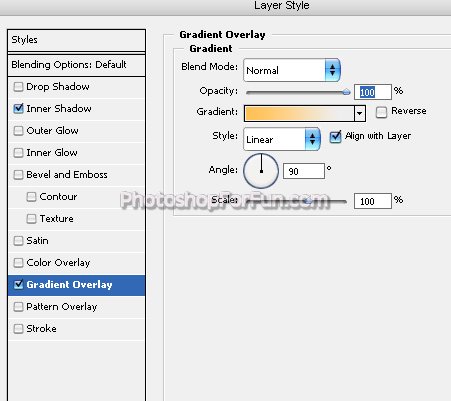
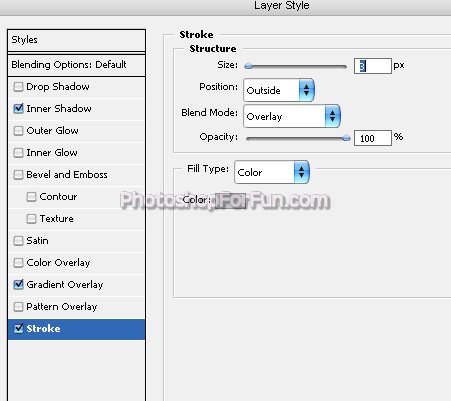
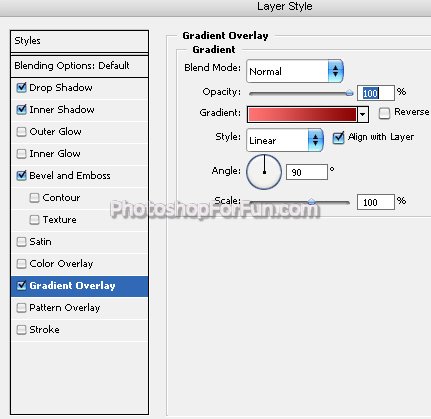
Double click the layer to open layer style window. Apply settings as shown.
Now set the gradient for the tongue as shown in the gradient drop down.
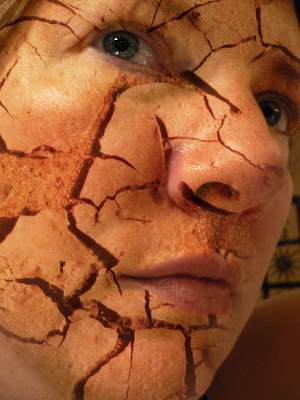
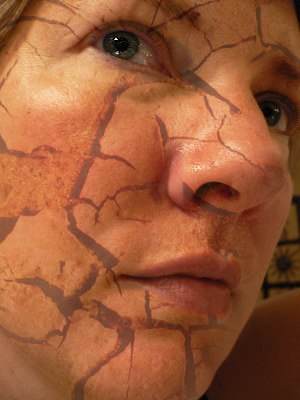
alt tutorial In
this tutorial I will show you how to create a cracked skin Manipulation, like
shown below Alt tutorial
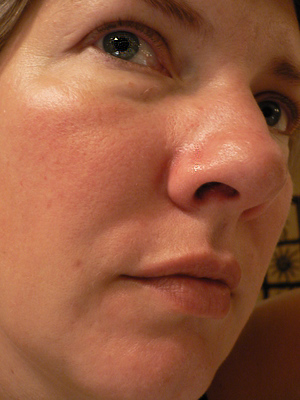
Alt tutorial Digital Face Photoshop TutorialHome Tutorials Photoshop Tutorials In this tutorial we will be manipulating a black and white photo of a man's face into a futuristic digital image. First thing we need is a good face to start with, I downloaded the following image from https://www.sxc.hu/.
This is a black and white photo, so lets add a little bit of color. Create a new layer, and change the layer mode to 'color.' Use your ellipse marquee tool to select the man's eye, and then use the polygon lasso tool, while holding alt, to subtract whatever part of your selection traveled outside the border of the eye.
Fill your selection with a light blue to dark blue radial gradient.
Now we are going to add a little bit of texture to our face. I used the metal photo shown below.
Click on your eraser tool, and increase the size until you have a large enough brush to work with. Start erasing the parts of your metal texture that traveled into the eye and off of the face.
Change the layer mode of your metal texture layer to overlay. Next I adjusted the hue of the metal slightly to better match the blue/gray feeling of our image. To adjust the hue, choose Image > Adjust > hue Saturation, and play with the hue bar until you find a pleasing value.
Next we are going to add a reflection to our eye. I used the image below.
Ctrl Click the layer we used earlier to color our eye to make a selection. Create a new layer and choose 'past into.' Your reflection image will be placed inside your eye selection. Change the layer mode to overlay, and used your eraser tool to reveal some of the pupil below. I also added some reddish/brown to our color layer to give a 'rusty' effect to our metal texture.
Flatten your image by choosing Layer > Flatten Image. Next select the dodge tool, and choosing 'highlights' from the dropdown menu. Use your dodge tool to brighten areas within your eye.
Now we are going to add some 'light beams' emanating from the eye. Duplicate your layer by choosing Layer > Duplicate Layer. Move the copied image so that the eye is in the center of the canvas.
Choose Filter > Blur > Radial Blur. Choose a quality of 'best' and a type of 'zoom.' Move the bar to 100%. After your image has been blurred, move your eye back into its normal position.
Use your eraser tool to erase everything except the border around the eye to reveal the original image below. Now all we are left with are light rays.
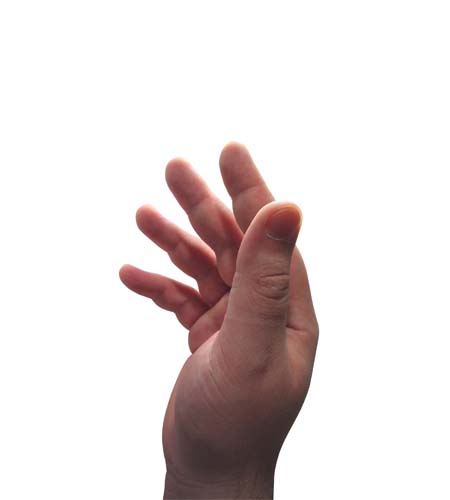
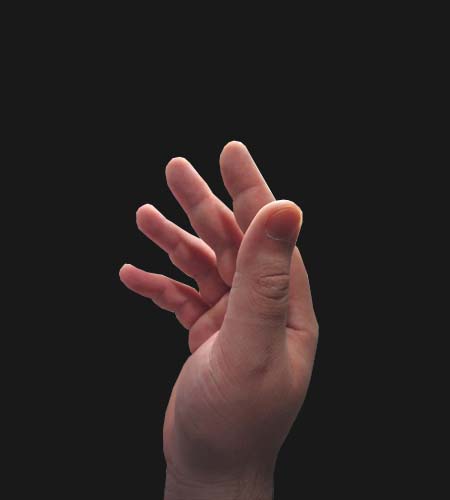
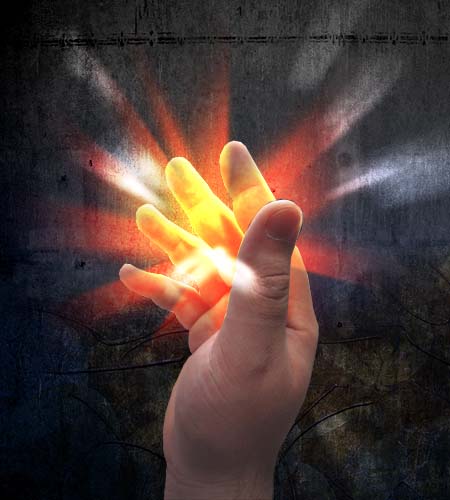
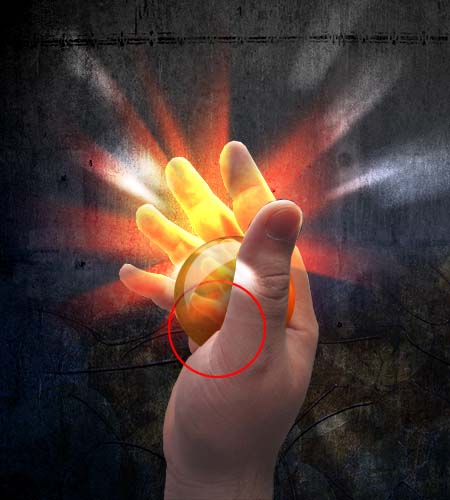
Add a border and some text and you are done! Here is how mine turned out. Alt tutorial Magic Hands Photoshop TutorialIn this tutorial we will be taking a picture of a hand and turning it into a wizard's flaming hand of magic. First we need a good hand, I used the one below from https://www.sxc.hu/ This tutorial is in my 'advanced' section, so I am assuming intermediate knowledge of photoshop.
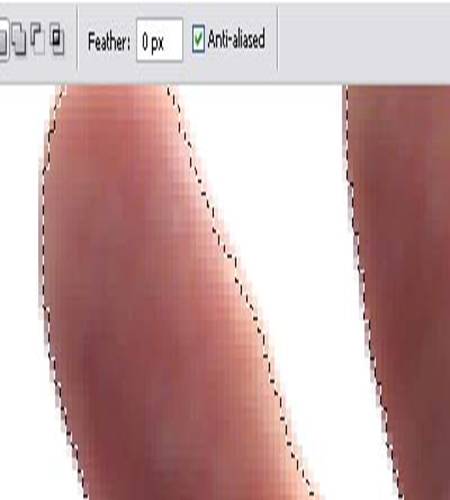
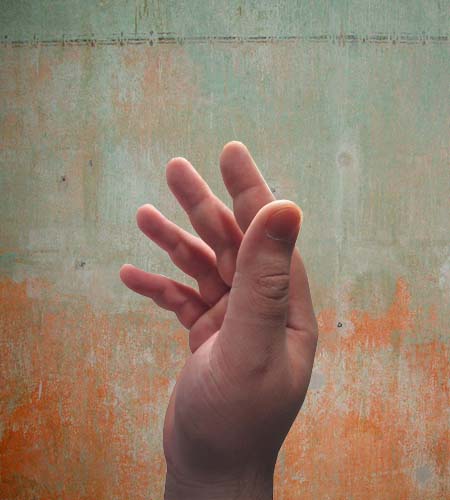
Use your magic want tool to select the white space around your hand, and press delete to remove the white space.
Change the color of your background layer to black, and examine your hand for any extra white pixels. Make touch ups are necessary.
Now we need a little something to texturize our background. Once you have found a desirable image, copy and paste it below your hand layer. Afterwards you can adjust the hue, brightness, and contrast as you see fit. You will see that I have lowered the brightness significantly. We are creating a glowing ball of light, so it will look much more brilliant over a dark background.
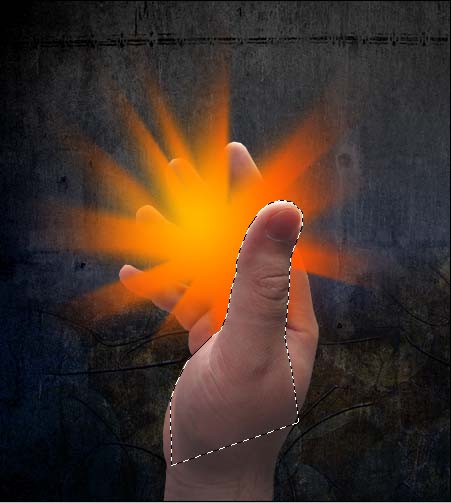
Create a circle in the center of your image on a new layer above your hand, and use your polygon selection tool to cut pieces out of the edges. After you have fudged up the edges a bit, apply a radial blur by choosing Filter > Blur > Radial Blur. Choose a quality of best, and type of zoom. Reapply the filter a few times by press Ctrl+F. Then, use your selection too to subtract the thumb from your radiating light. The easier way to do this is to hide your light layer, and use your polygon selection tool to select an outline of your thumb. Unhide the light layer and delete your selection, you should have something similar to mine.
Create a new layer, and use your paintbrush tool to create some random blotches of white, as shown below.
Apply a radial blur again by pressing Ctrl+F, or choosing it from the menu. Change the layer mode to Overlay, and duplicate your layer if you want the light beams to appear more strongly.
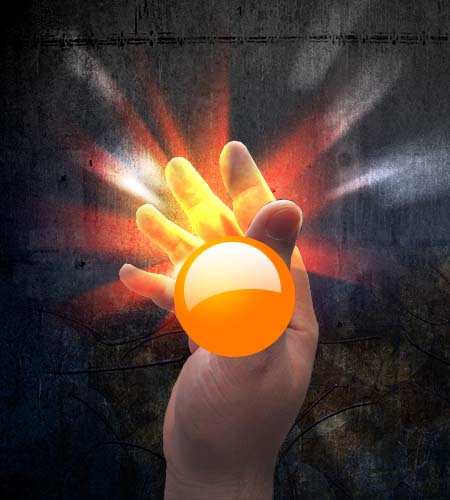
Create a new layer and use your ellipse tool to create a circle in the palm of your hand. Apply a radial gradient of light orange and dark orange. Create a new layer above your orange circle, and create a reflection using a white-transparent gradient.
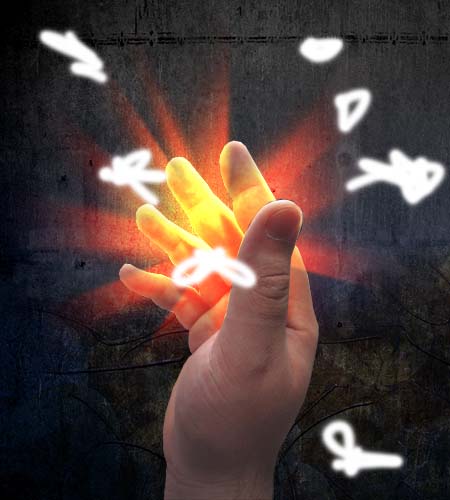
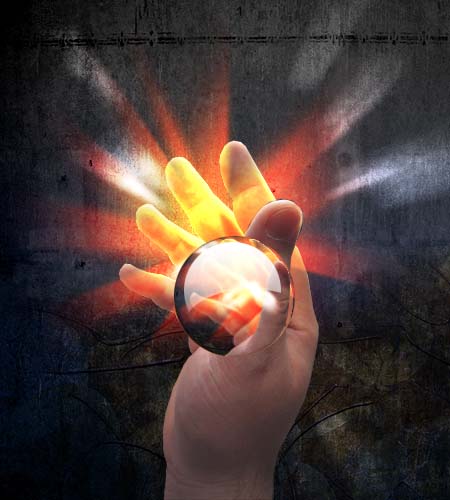
Create a new layer, and Ctrl+Click your orange ball layer to get the selection. Capture a picture of your screen by pressing the 'print screen' button on your keyboard, and then choose Edit > Past Into to past your capture into your selection. Edit the scale of your capture screen by choose Edit > Transform > Scale. Reduce the size and center the image so that a reduced image of the piece you are working on is shown in the orb. This will act as a reflection.
Reduce the opacity of this reflection layer so the orange color of your orb is not overpowered. Next use the same method we used in the beginning to select an outline of your thumb, and delete the selection from your orb layers. You now have three layers you need to delete this selection from.
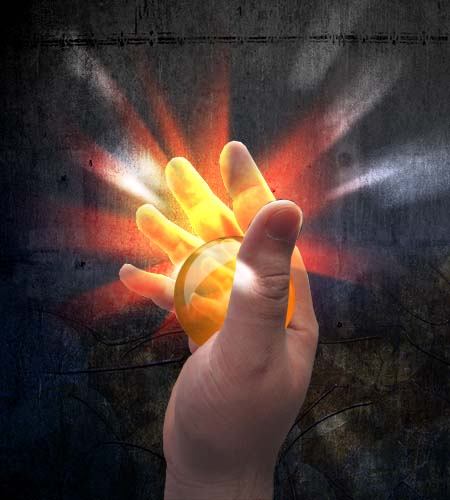
Use your burn tool to darken your original orange ball layer where shadows would naturally appear. This will help to enhance the illusion that this ball is being held by the hand.
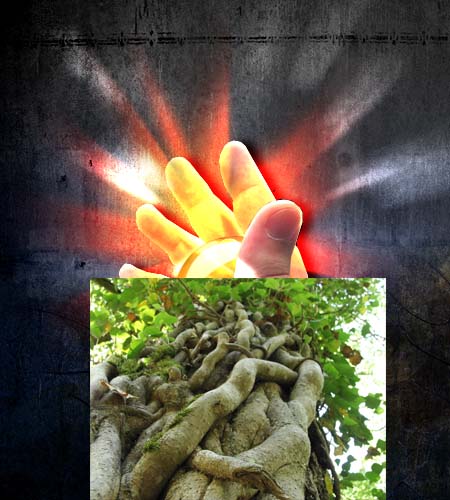
Next I decided that i didn't like how plain the wrist of the hand looked, and found an image to overlay into it. I searched https://www.sxc.hu/ from 'vines' and copied the image below into my canvas. I changed the layer mode the overall, and erased the extraneous parts.
Finally I added some text, and we are done! Here is how mine turned out.
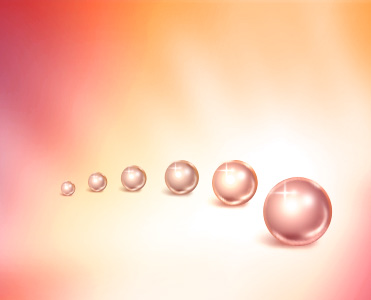
alt tutorial Learn How to create a silk pearl with this photoshop tutorialAfter weeks of
waiting I finally come up with a new photoshop tutorial, this time I
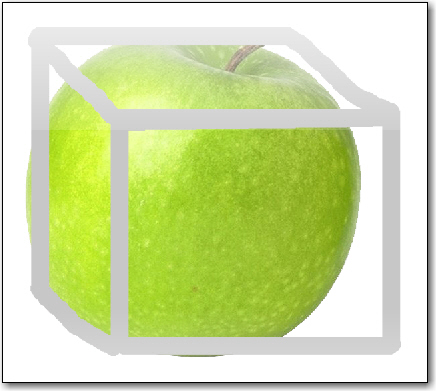
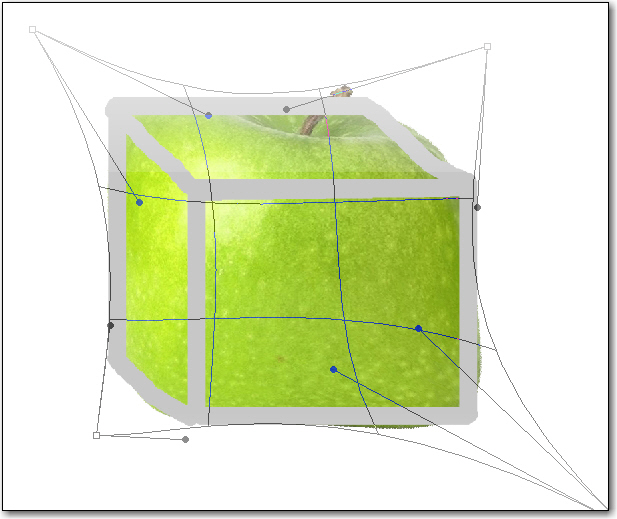
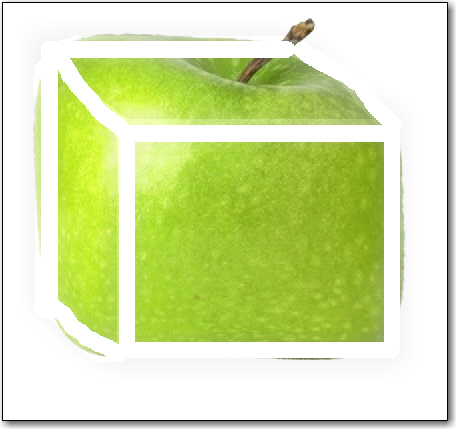
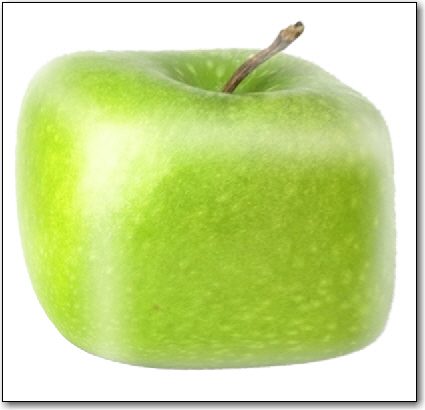
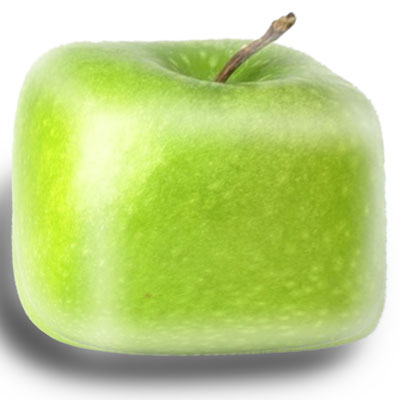
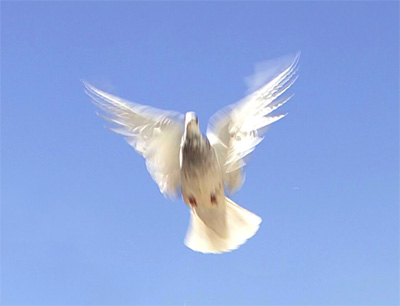
though I might show you how to make a silk pearl in photoshop. Alt tutorial Description: In this tutorial, we'll be creating a 3D spherical cage and then put an object inside it.
Alt tutorial So let's start.I will use this apple in this tutorial. ( you can use also a tomato, orange ) Alt tutorial Burning wheels Step 1 Step 2 Step 3 Step 4 Step 5 Step 6 Step 7 Step 8 Step 9 Alt tutorial This tutorial will teach you
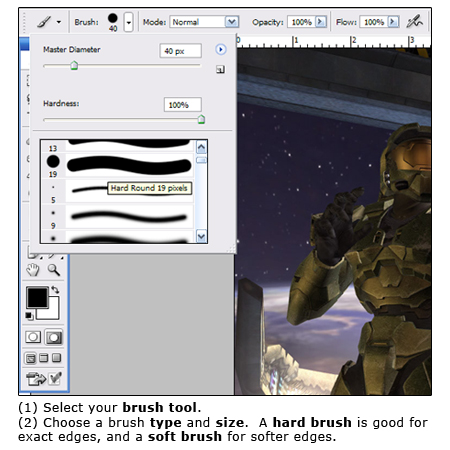
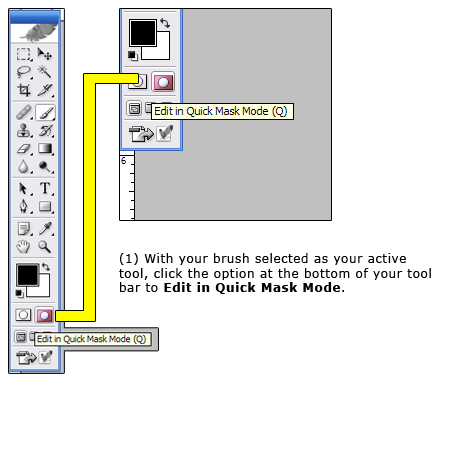
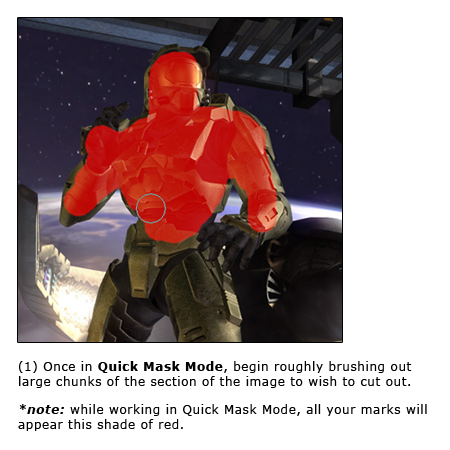
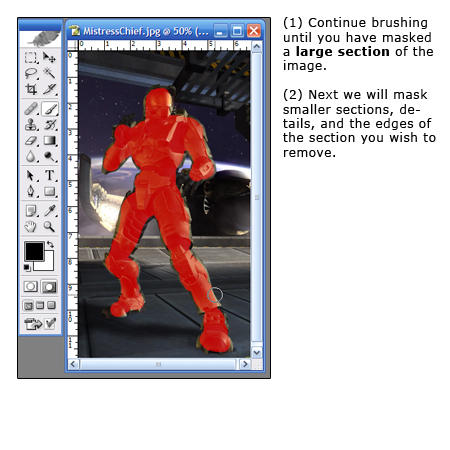
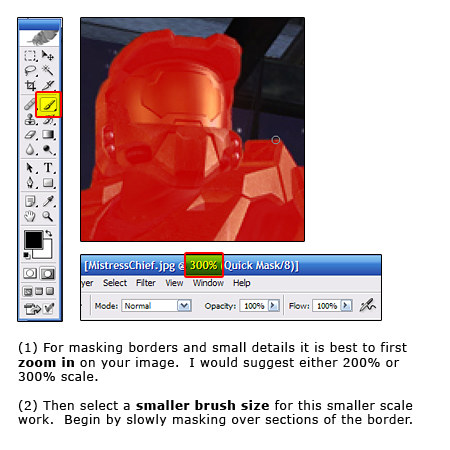
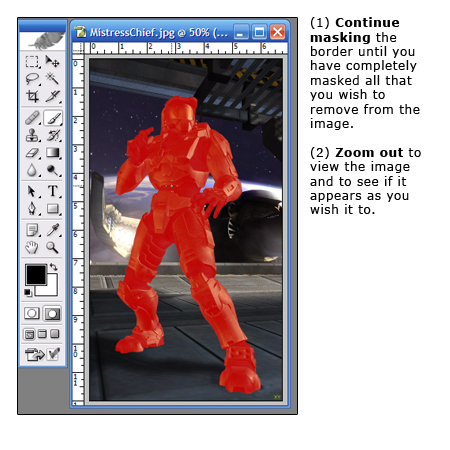
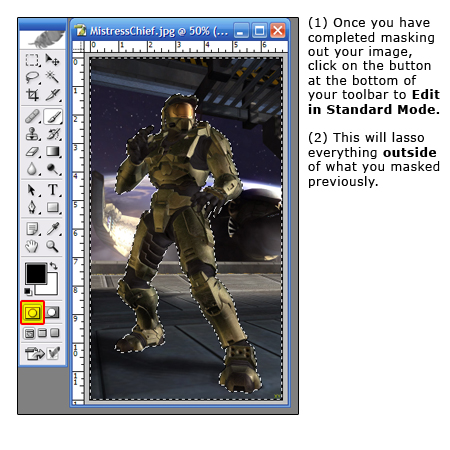
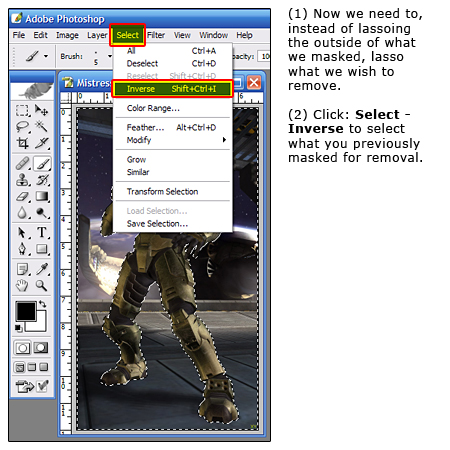
how to use 'Quick Masking', a tool in Photoshop, which I
believe will give you the best results in cutting out a section of an image. Alt tutorial Realistic Bulletholes Nobody likes getting shot. But a action-packed photo looks much cooler with a few bulletholes in the wall! Step 1 Open a document of a large size and add a white retangle on a new layerin the left corner;
Step 2 Add some wind Filter>Stylise>Wind and choose wind from the left;
Step 3 Rotate the canvas by going to Image>Rotate Canvas>90 CW;
Step 4 Press CTRL+E to merge the 2 layers and go to Filter>Distort>Polar Cordinates and make sure it's gonna get round;
Step 5 Press CTRL+I to invert the image;
Step 6 Go to Select>
Step 7 Add these settings to it;
Step 8 Now don't rasterise it or merge it with another layer! Just leave it as it is with the layer-styles still active!
Step 9 Then duplicate the layer and resize it to a nice amount! (Always make the bullethole bigger then you want it!)
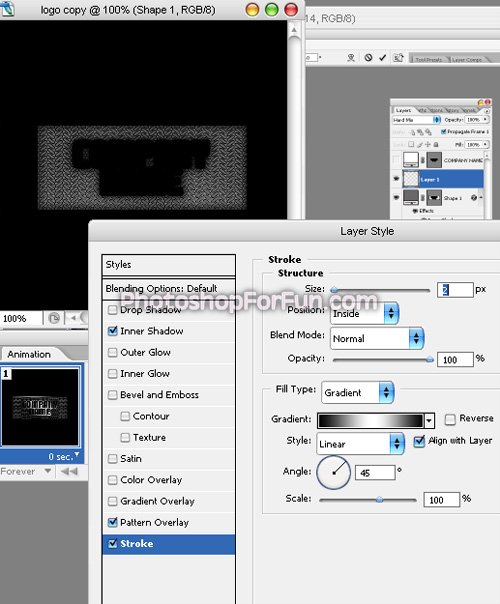
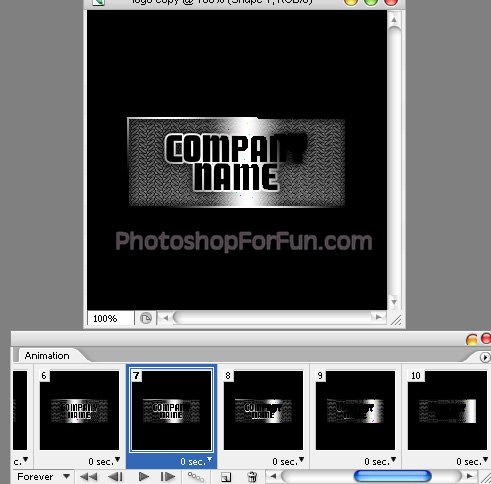
Alt Tutorial Adding Movies Learn how to add movies to your graphics and save them as a .gif-file Step 1 For this tutorial, you are gonna
need a movie which is in the filetype .mov. No other filetype will work!
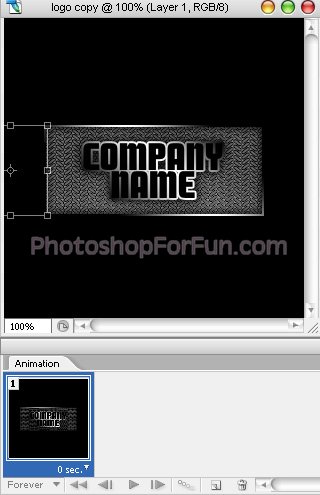
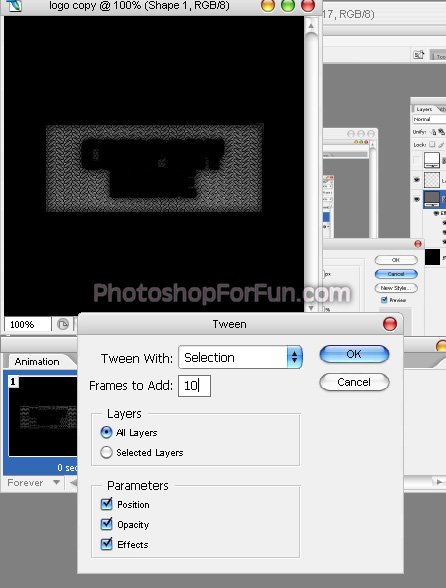
Step 2 Once you have your piece of movie, and making sure it ain't HUGE, select all layers and set the time to NO DELAY;
Step 3 Export this
piece to Photoshop, where we will put graphics around it. Mak
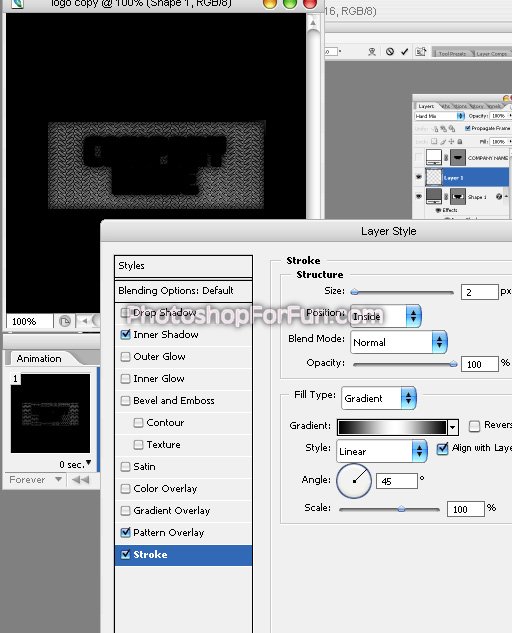
sure you have the 1st frame in Image-Ready selected before you export it.
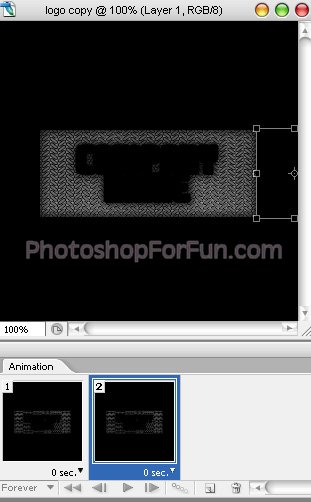
Step 4 Build *something* around it, WHILE MAKING SURE YOU DON'T TOUCH THE LAYERS THAT CONTAIN THE ANIMATION!!!
Step 5 And then finally, move over to Image-Ready and save the .gif
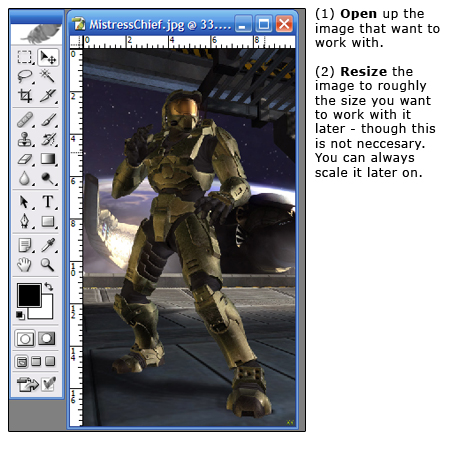
Alt tutorial 1) Lets make a different job by taking advantage of Photoshop's blessings. As you see below there are 2 photos, one is a negro rapper, and the other is a wolf. We will try to have a different display by binding these 2 photos. We can call this photomontage, lets see if we can do it. | ||||||||||||||||||||||||||||||||||||||||||||||||||||||||||||||||||||||||||||||||||||||||||||||||||||||||||||||||||||||
|
Mac Sphere icon |
||||||||
|
|
||||||||
|
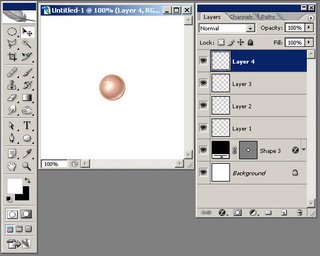
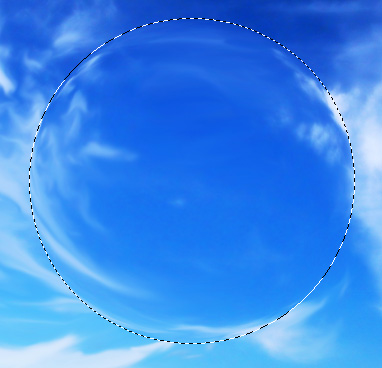
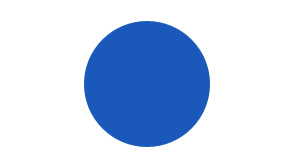
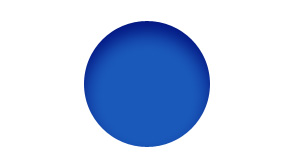
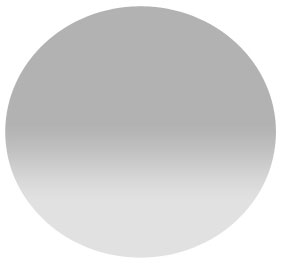
We'll begin this tutorial, by selecting the 'Elipse Tool' and drawing a circle as I have done below. Color does not matter. My canvas size is 294 x 168. |
||||||||
|
|
||||||||
|
|
||||||||
|
||||||||
|
|
||||||||
|
You should now have the below image. |
||||||||
|
|
||||||||
|
|
||||||||
|
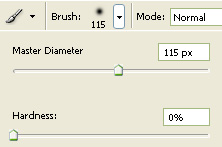
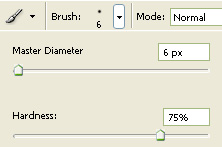
Now select the 'Brush Tool' and set the foreground color to a7f0f7, and use the below settings. |
||||||||
|
|
||||||||
|
|
||||||||
|
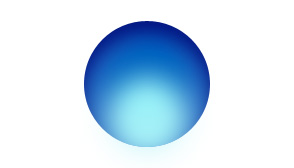
Create a new layer and click toward the bottom of your circle as I have illustrated below. Two clicks should do it. |
||||||||
|
|
||||||||
|
|
||||||||
|
|
||||||||
|
Create, yet another layer and with the 'Brush Tool' still selected, click one last time toward the top of the circle. It's a bit bright right now so change the blending mode to 'Color Burn' on that layer and turn the Fill down to |
||||||||
|
|
||||||||
|
|
||||||||
|
You should now have the following: |
||||||||
|
|
||||||||
|
|
||||||||
|
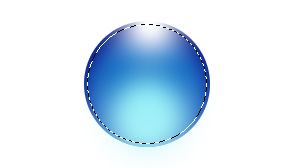
Create, yet another layer and with the 'Brush Tool' still selected, click one last time toward the top of the circle again with White as the color while using the below settings. |
||||||||
|
|
||||||||
|
|
||||||||
|
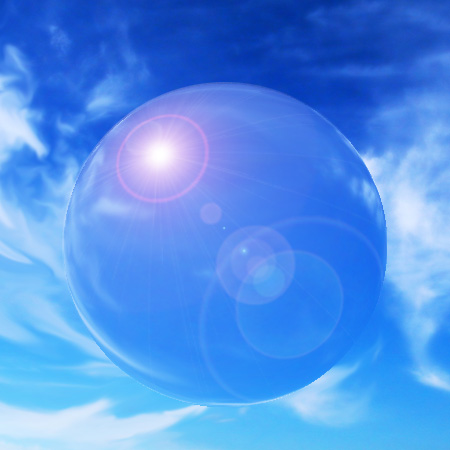
You should now have the following: |
||||||||
|
|
||||||||
|
|
||||||||
|
Now, 'Ctrl' click the circle layer to create a selection then go to the main menu and click 'Select' then 'Modify' and 'Contract' by 3 pixels. Then Inverse the selection by going to the main menu and selecting 'Select' then 'Inverse'. Now go to 'Edit' and lastly 'Cut |
||||||||
|
|
||||||||
|
|
||||||||
|
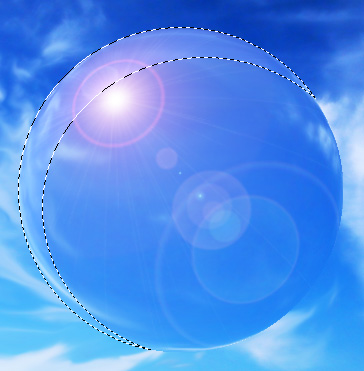
You should now have the following: |
||||||||
|
|
||||||||
|
|
||||||||
|
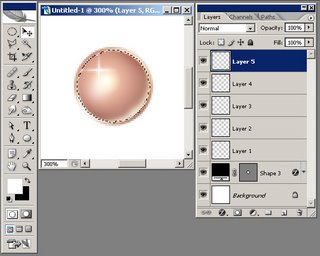
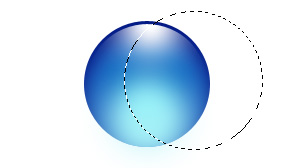
Now select the 'Eliptical Marquee Tool' and draw a selection like the below image. Create a new layer, then go the the main menu and select 'Edit' then 'Stroke'. Choose White as the color at 1 pixel and centered |
||||||||
|
|
||||||||
|
|
||||||||
|
|
||||||||
|
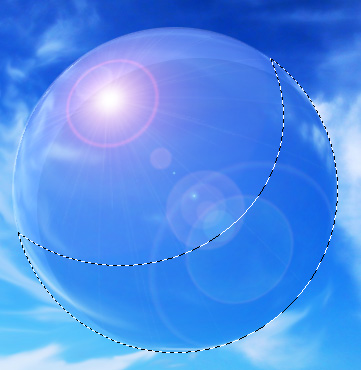
You should now have the following: |
||||||||
|
|
||||||||
|
|
||||||||
|
Do this several times, on the same layer, till you get the below image: |
||||||||
|
|
||||||||
|
|
||||||||
|
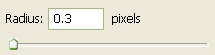
Now go to 'Filter' then 'Blur' then 'Gaussian Blur' and use the following settings. |
||||||||
|
|
||||||||
|
|
||||||||
|
You should now have the following: |
||||||||
|
|
||||||||
|
|
||||||||
|
Next, create another layer and select the 'Brush Tool' with White as the color while using the below settings. |
||||||||
|
|
||||||||
|
|
||||||||
|
Click on the intersecting strokes as I have done below: |
||||||||
|
|
||||||||
|
|
||||||||
|
Do this several times, on the same layer, changing the brush size, on occasion, till you get the below: |
||||||||
|
|
||||||||
|
|
||||||||
|
Now, 'Ctrl' click the circle layer again to create a selection, then click on the circular stroked layer to select it. Next, go to the main menu and choose 'Select' then 'Inverse' and lastly 'Edit' then 'Cut |
||||||||
|
|
||||||||
|
|
||||||||
|
Ctrl' click the circle layer again to create a selection, then create another layer and drag it so it's above all other layers in the layers palette. Using the 'Brush Tool' with 3264af as the color and a brush size at about , begin to brush along the top and sides of the inside of the selection. Change the blending mode to Color Burn and turn the fill down to |
||||||||
|
|
||||||||
|
|
||||||||
|
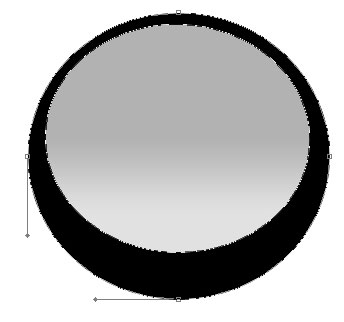
Next, select the 'Elipse Tool' and draw a circle as I have done below using Black as the color. Draw the below shape. This layer will go below the circle layer. |
||||||||
|
|
||||||||
|
|
||||||||
|
Then go to 'Filter' then 'Blur' then 'Gaussian Blur' again and use the following settings. |
||||||||
|
|
||||||||
|
|
||||||||
|
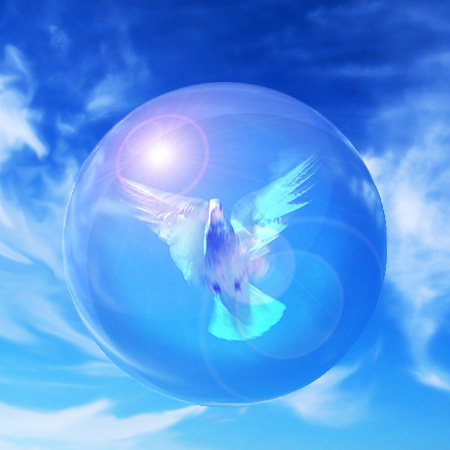
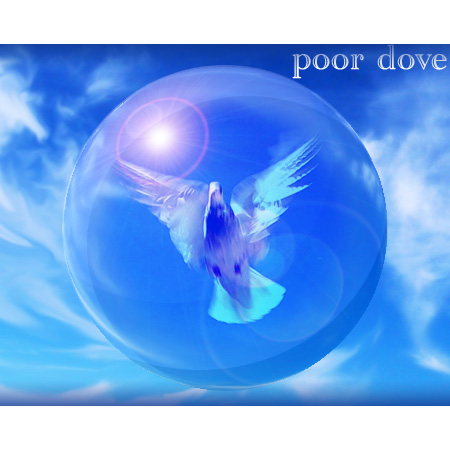
The Results!!! |
||||||||
|
I hope you had fun and learned a little something from this tutorial. |
||||||||
|
|
||||||||
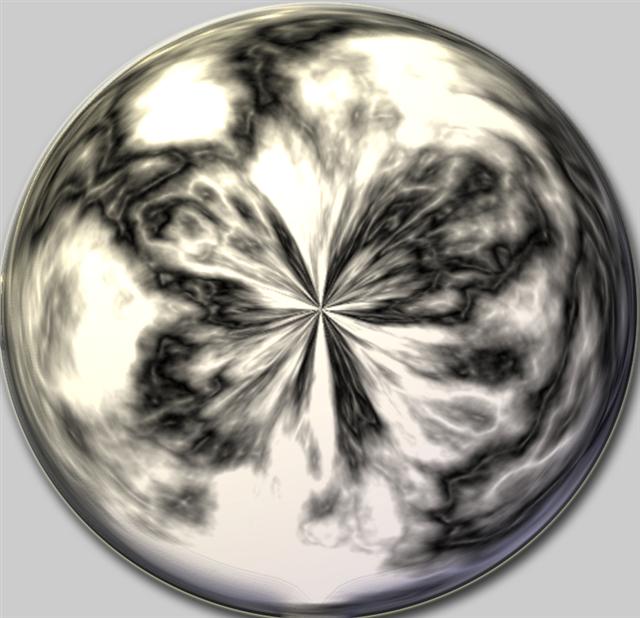
Altu
create a new document must
be prefectly square i used
768x768
Now do Filter>Render>Clouds
do filter>render>differential clouds
repeate until you have more white than black showing.
Duplicate the layer
On the top layer do
Filter> Artistic>plastic wrap
i used HighLight strength:
7 detail: 9 and smoothness: 11
set the layer mode to linear dodge
merge the layer Ctrl+E
go to filter>distort>polar coordinates
select polar to rectangle.
do edit>transform>flip verticle
then do filter>distort>polar Coordinates
selecte rectangle to polar
there you have it!
Adjust the colors maybe drop the shadow in the blending properties of the layer
and you have yourself a Stormy Looking orb.
Attached Image
altu
|
Politica de confidentialitate | Termeni si conditii de utilizare |

Vizualizari: 3153
Importanta: ![]()
Termeni si conditii de utilizare | Contact
© SCRIGROUP 2025 . All rights reserved