| CATEGORII DOCUMENTE |
Using 3D software with Flash to create media rich content.
We all use Flash to create media-rich websites and presentations. Some people opt to use a more two-dimensional approach, while others prefer to show their ActionScripting abilities. However, one of the most eye-catching and amazing uses of Flash is the incorporation of 3D media, which you can create using a third-party application and import into Flash for final editing and compositing.
I have a background in cinematic visual effects, so when the opportunity came up to efficiently use 3D graphics in my Flash websites, I recognized the benefits of being able to produce something unusual. But you don't have to be a special effects guru to use 3D software for Flash. The required knowledge for working with 3D in Flash is much more basic than what you would need to learn to create cinematic special effects. However, you may find that learning a 3D software package for simple uses may get you comfortable enough to begin doing some pretty advanced things in the 3D world. In this tutorial, we are going to skim through the basics of 3D production using MAYA. However, if you happen to have a different program such as 3D Studio Max, Lightwave or many other programs, this tutorial will apply.
I tend to use 3D to create several elements for my web projects, from animations to menus to overall look and feel. In this tutorial, I will outline the process for creating a stunning 3D intro animation for a wheel company. At the end I will also show you how to create a more simple 3D menu.
Let's begin!
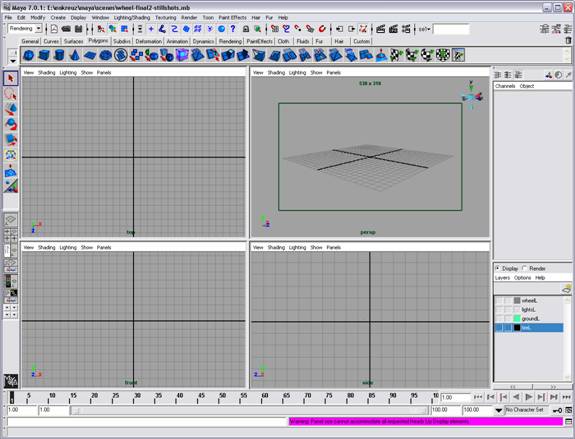
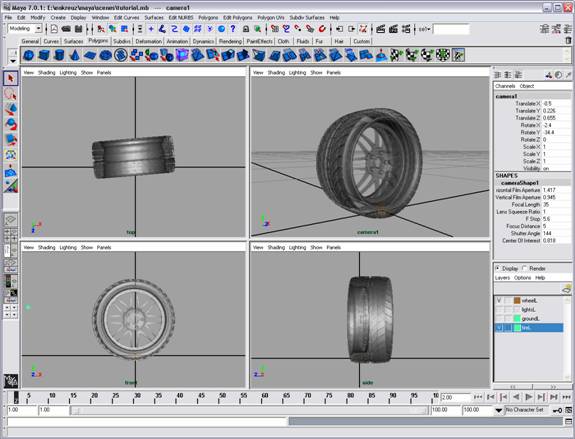
Initially, open whatever 3D program you are comfortable with. Personally, I like MAYA, primarily because it is designed for artists. All the leading 3D software packages have one thing in common: they all have four viewing planes. This allows you to view your 3D object from several different angles and cameras depending on your particular project.
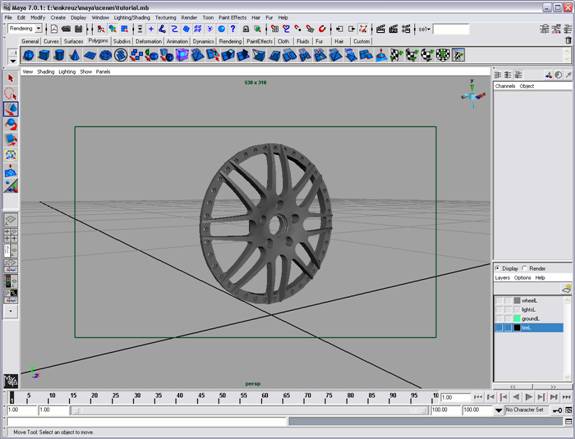
In this sample, we have a 3D model of a performance wheel which I created using the actual CAD engineering files given to me by the company that manufactures the wheels.
You can easily view whichever camera angle you wish to view by
quickly hitting the space key while hovering over the selected view.
Whichever program you are using, start by learning the key shortcuts and also the program interface. In MAYA, you can move, toggle, and pan quite simply by using the alt+mousebuttons. Maya can be very intimidating at first, but remember, we are doing some basic 3D modeling, lighting and animating, not much more.
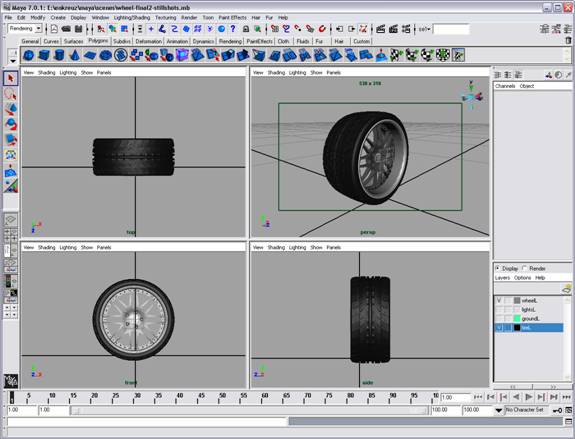
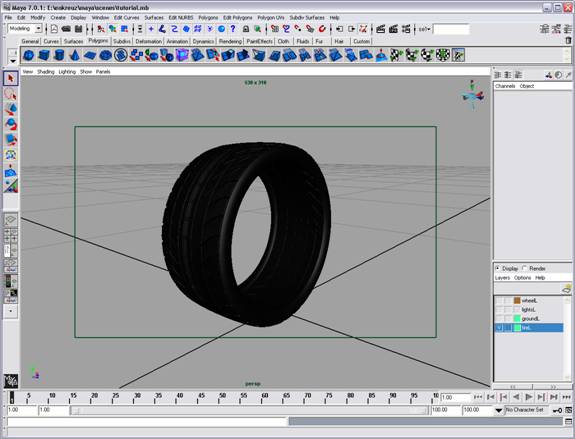
The original 3D file was given to me in .OBJ format, which is the standard 3D object extension used by Maya and other programs. When I import that file into my project, I have the following result:
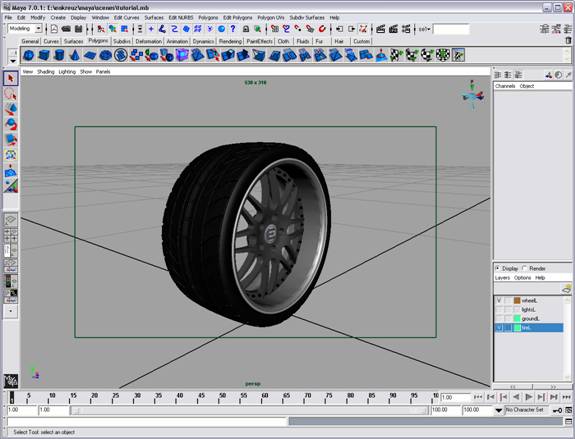
It is now left to us to create a more realistic-looking wheel by adding a tire, the rest of the wheel components, and some textures.
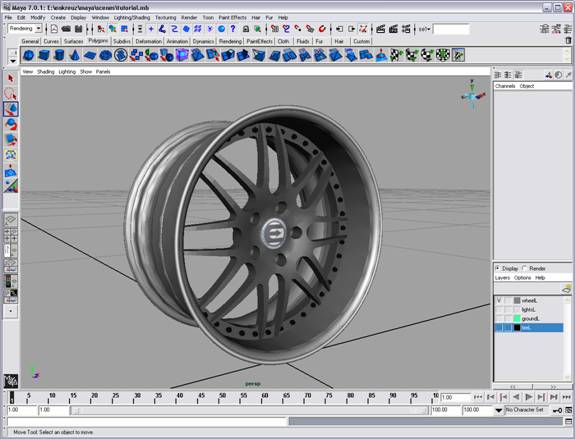
Since this model had to be based on an exact product, the manufacturer provided me with most of the 3D geometry, but I still needed to create a tire.
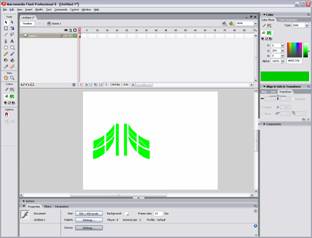
Online, I found pictures of what the tire tread looks like on performance wheels. I then used Flash to create a vector trace of that tire tread.
I rotated this pattern and multiplied it by about 30 times to create this image:
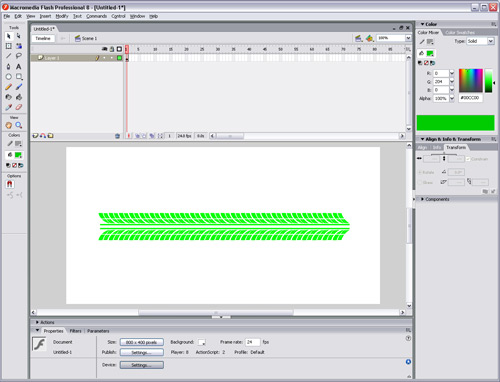
I exported the image as a vector .ai file. You may wonder why I use Flash instead of Illustrator. The answer is that I find Flash to be not only more user-friendly, but less time-consuming.
I imported that tire outline into my 3D program. It appears as a series of lines. I extruded those lines to make them 3-dimensional.
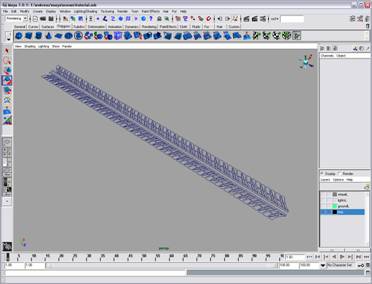
Once extruded, I used a bend distortion to wrap the tread into a full circle. A variation on this process can be found in almost all 3D programs.
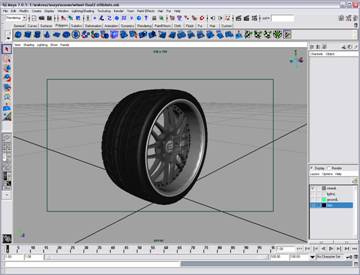
My wheel is essentially created now. We need to give the different objects appropriate colors. The idea is simple: select the various objects, and assign a shader or material to them. In this example, I have given a nice rubbery black to the tire and a dual-tone metallic shade to the wheel.
Our wheel is looking good. But keep in mind that we are going to be using this for a high impact Flash animation. Instead of using standard colors, I'll use an X-ray effect. To do this, I have created a standard shader, changed the color to an off-white, and made it almost transparent.
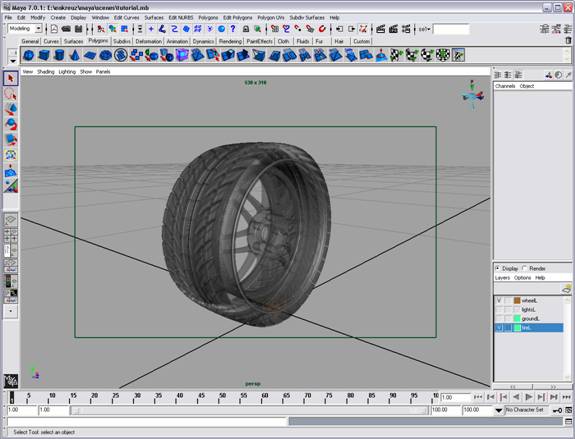
I have also added a slight glow to the wheel to give it that X-ray look.
Time to animate
Animating your object:
For this particular shot, we are going to animate both the object (the wheel) and the camera for extra impact. The wheel is simply rotated on the y axis while the camera pans around it. We will make this animation four seconds long. Select the wheel making sure all objects are grouped (ctrl+G in Maya). On the timeline, place a keyframe on the first frame. Scroll to frame 96, rotate your wheel 360 degrees and place another keyframe.
Animating your camera:
Create a new camera. In Maya, choose Create > Camera. In your four-view setting, you should now be able to view through this newly created camera. Since the camera will be created in the actual intersection of the axis, chances are you will need to pan out and move the camera around a bit to view your object clearly.
You can animate your camera as you would an object. We'll start off at keyframe 1 and move the camera to keyframe 96. I would go into the details of keyframing, but there may be some users not using Maya, so it is important, once again, to familiarize yourself with the controls of the program you are using.
Remember that this is a tutorial of how to use 3D content with Flash more than a tutorial about how to use 3D software.
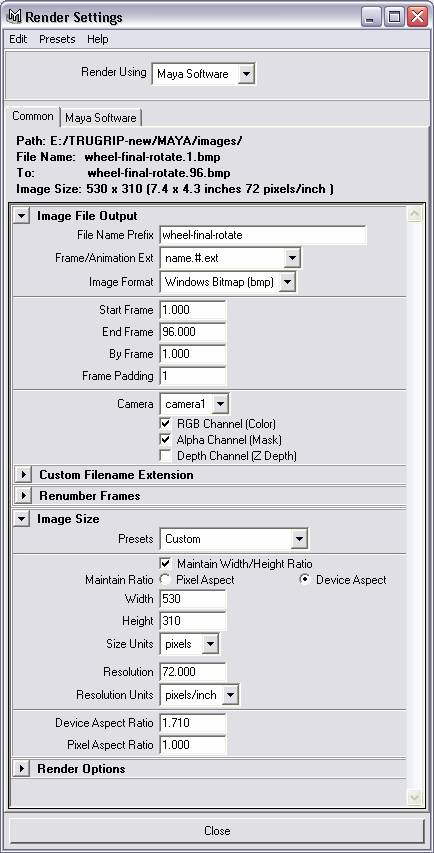
Now that you have your 3D scene animated, we need to render it. Maya allows you to set up your renders in a very broad manner of ways, using a plethora of rendering engines. Having said this, just try to keep your render settings on high, and for this animation, we are going to be exporting the scene using the same size proportions as our Flash animation.
Since I have opted to use an X-ray effect, I did not need to light my scene. However, you should learn basic lighting techniques, regardless of the program you are using.
Rendering:
When you are ready to render, select Batch Render. This basically converts each frame to a crisp image. I have selected .BMP for the output, but you can render in a variety of formats. I have also made sure my settings are high and that motion blur is on for an extra cinematic effect. Once the images are imported into Flash, you can compress them and adjust their settings for better download.
In Maya, rendered images are places into a folder named "images", which is created when you create a new project. Make sure you learn about setting up a new project in whatever program you are using. Maya project directories are very useful, because they separate your scenes, rendered images and other data very efficiently.
Compositing your scene in Flash:
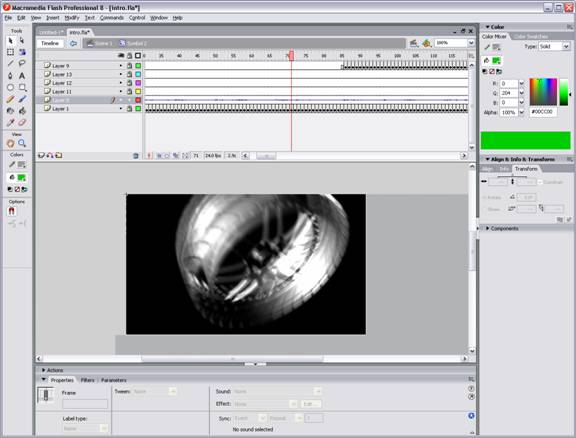
Import your image sequence into your Flash timeline. If you rendered correctly, your 3D software should have rendered your scene images numerically. Flash will recognize this and ask you if you would like to import the entire sequence.
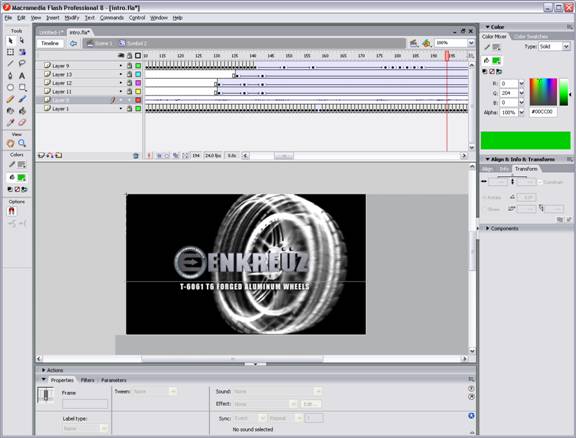
You can then overlay images created in Photoshop, such as PNGs, which retain alpha channels and quality very well.
Find a juicy soundtrack and voila!
Tips:
All the frames are seen for a split second. Any single frame image which doesn't stay on screen long can be edited in the Flash library to a lower quality. You can really maximize the efficiency and download time of your animation this way.
Cheat. If you can loop your animation or recycle frames, then DO. This way you can extend your animation without increasing the file size.
Be creative. If you don't use your creativity, then all the knowledge in the world won't make your animations cool. You can have all the tools in the world, but if you have no creativity, your projects will suck J
|
Politica de confidentialitate | Termeni si conditii de utilizare |

Vizualizari: 2727
Importanta: ![]()
Termeni si conditii de utilizare | Contact
© SCRIGROUP 2025 . All rights reserved