| CATEGORII DOCUMENTE |
| Asp | Autocad | C | Dot net | Excel | Fox pro | Html | Java |
| Linux | Mathcad | Photoshop | Php | Sql | Visual studio | Windows | Xml |
Looking at the Work Area
Getting familiar with the work area
The Photoshop and ImageReady work area is arranged to help you focus on creating and editing images.
About the work area
The work area consists of the following components:
Menu bar The menu bar contains menus for performing tasks. The menus are organized by topic. For example, the Layers menu contains commands for working with layers. Options bar The options bar provides options for using a tool. (See "Using the tool options bar" on page 26.)
Toolbox The toolbox holds tools for creating and editing images. (See "Using the tools"
on page 24.)
Palette well (Photoshop) The palette well helps you organize the palettes in your work area. (See "Using the palette well (Photoshop)" on page 26.)
Palettes Palettes help you monitor and modify images. (See "Using palettes" on page 28.)
Using the toolbox
The first time you start the application, the toolbox appears on the left side of the screen. Some tools in the toolbox have options that appear in the context-sensitive tool options bar. (See "Using the tool options bar" on page 26.) These include the tools that let you use type, select, paint, draw, sample, edit, move, annotate, and view images. Other tools in the toolbox allow you to change foreground/background colors, go to Adobe Online, work in different modes, and jump between Photoshop and ImageReady applications.
For more information on the foreground and background color controls, see "Choosing foreground and background colors" on page 257.
Toolbox overview (1 of 3)
* Photoshop only
ImageReady only

The marquee tools make rectangular, elliptical, single row, and single column selections.


The crop tool trims images.


The patch tool * repairs imperfections in a selected area of an image using a sample or pattern.

The move tool moves selections, layers, and guides.

The slice tool creates slices.

The brush tool paints brush strokes.
The lasso tools make freehand, polygonal
(straight-edged), and magnetic * (snap-to) selections.
The slice selection tool selects slices.

The pencil tool paints hard-edged strokes.


The magic wand tool
selects similarly colored areas.


The healing brush tool * paints with a sample or pattern to repairs imperfections in a image.

The clone stamp tool paints with a sample of an image.

The pattern stamp tool * paints with part of an image as a pattern.
The history brush tool * paints a copy of the selected state or snapshot into the current image window.

The art history brush tool * paints with stylized strokes that simulate the look of different paint styles, using a selected state or snapshot.

The magic eraser tool erases solid- colored areas to trans- parency with a single click.
Toolbox overview (2 of 3)
* Photoshop only
ImageReady only

The eraser tool erases pixels and restores parts of an image to a previously saved state.

The blur tool blurs hard edges in an image.

The background eraser tool * erases areas to transparency by dragging.

The sharpen tool sharpens soft edges in an image.

The gradient tools create straight-line, radial *, angle *, reflected *, and diamond *, blends between colors.

The smudge tool smudges data in an image.

The paint bucket tool fills similarly colored areas with the foreground color.

The dodge tool lightens areas in an image.

The burn tool darkens areas in an image.


The type mask tools * create a
selection in the shape of type.

The sponge tool changes the color saturation of an area.

The pen tools * let you draw
smooth- edged paths.


The path selection tools * make shape or segment selections showing anchor points, direction lines, and direction points.

The custom shape tool * makes customized shapes selected from a custom shape list.

The type tools create
type on an image.


The annotation tools * makes notes and audio annota- tions that can be attached to an image.

Toolbox overview (3 of 3)
* Photoshop only
ImageReady
only

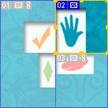
The eyedropper tool samples colors in an image.
The measure tool * measures
distances, locations, and angles.
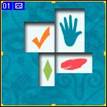
![]()

The hand tool moves an image within its window.


The zoom tool magnifies and reduces the view of an image.


The image map tools define image map areas in an image.

The preview
document tool previews rollover
effects directly in ImageReady.
![]()
Using the tools

The image map select tool
selects image maps.

The preview in default browser tool previews animations in a Web browser.
The toggle image map visibility tool toggles between showing and hiding image maps.
The toggle slices visibility tool toggles between showing and hiding slices in an image.
You select a tool by clicking its icon in the toolbox. A small triangle at the lower right of a tool icon indicates hidden tools. Positioning the pointer over a tool displays a tool tip with the tool's name and keyboard shortcut.
To show or hide the toolbox:
Choose Window > Tools. A check mark indicates the item is showing.
To move the toolbox:
Drag the toolbox by its title bar.
To select a tool:
Do one of the following:
. Click its icon or press its keyboard shortcut. If the icon has a small triangle at its lower right corner, hold down the mouse button to view the hidden tools. Then, click the tool you want to select.
. Press the tool's keyboard shortcut. The keyboard shortcut is displayed in its tool tip.
To cycle through hidden tools:
Hold down Shift and press the tool's shortcut key.
To enable or disable cycling through a set of hidden tools (Photoshop):
1 Do one of the following:
. In Windows or Mac OS 9.x, choose Edit > Preferences > General.
. In Mac OS X, choose Photoshop > Preferences > General.
2 Select or deselect Use Shift Key for Tool Switch.
To display or hide tool tips:
1 Do one of the following:
. In Windows or Mac OS 9.x, choose Edit > Preferences > General.
. (Photoshop) In Mac OS X, choose Photoshop > Preferences > General.
. (ImageReady) In Mac OS X, choose ImageReady > Preferences > General.
2 Select or deselect Show Tool Tips.
Using the tool pointers
When you select most tools, the mouse pointer matches the tool's icon. The marquee pointer appears by default as cross hairs, the text tool pointer as an I-beam, and painting tools default to the Brush Size icon.
Each default pointer has a different hotspot, where an effect or action in the image begins. With all tools except the move tool, annotation tools, and the type tool, you can switch to precise cursors, which appear as cross hairs centered around the hotspot.
To set the tool pointer appearance:
1 Do one of the following:
. (Photoshop) In Windows or Mac OS 9.x, choose Edit > Preferences > Display & Cursors.
. (Photoshop) In Mac OS X, choose Photoshop > Preferences > Display & Cursors.
. (ImageReady) In Windows or Mac OS 9.x, choose Edit > Preferences > Cursors.
. (ImageReady) In Mac OS X, choose ImageReady > Preferences > Cursors.
2 Choose a tool pointer setting:
. Click Standard under Painting Cursors, Other Cursors, or both to display pointers as tool icons.
. Click Precise under Painting Cursors, Other Cursors, or both to display pointers as cross hairs.
. Click Brush Size under Painting Cursors to display the painting tool cursors as brush shapes representing the size of the current brush. Brush Size cursors may not display for very large brushes.
3 Click OK.
The Painting Cursors options control the pointers for the following tools:
. (Photoshop) Eraser, pencil, paintbrush, healing brush, rubber stamp, pattern stamp, smudge, blur, sharpen, dodge, burn, and sponge tools.
. (ImageReady) Paintbrush, pencil, and eraser tools.
The Other Cursors options control the pointers for the following tools:
. (Photoshop) Marquee, lasso, polygon lasso, magic wand, crop, slice, patch, eyedropper, pen, gradient, line, paint bucket, magnetic lasso, magnetic pen, measure, and color sampler tools.
. (ImageReady) Marquee, lasso, magic wand, eyedropper, paint bucket, and slice tools. To toggle between standard and precise cursors in some tool pointers, press Caps Lock. Press Caps Lock again to return to your original setting.
|
Politica de confidentialitate | Termeni si conditii de utilizare |

Vizualizari: 977
Importanta: ![]()
Termeni si conditii de utilizare | Contact
© SCRIGROUP 2026 . All rights reserved