| CATEGORII DOCUMENTE |
| Asp | Autocad | C | Dot net | Excel | Fox pro | Html | Java |
| Linux | Mathcad | Photoshop | Php | Sql | Visual studio | Windows | Xml |
Using palettes
Palettes help you monitor and modify images By default palettes appear stacked together in groups.
To display one palette:
Choose the palette name in the Window menu.
To show or hide multiple palettes:
Do one of the following:
To show or hide all open palettes the options bar and the toolbox press Tab.
To show or hide all palettes press Shift+Tab.
Changing the palette display
You can rearrange your palettes to make better use of your work area by using the following techniques:
To make a palette appear at the front of its group click the palette s tab or choose the palette name from the Window menu.
To move an entire palette group drag its title bar.
To rearrange or separate a palette group drag a palette s tab Dragging a palette outside of an existing group creates a new group.
To move a palette to another group drag the palette s tab to that group.
To
display a palette menu position the pointer on the triangle ![]() in the upper right corner of the palette and press
the mouse button.
in the upper right corner of the palette and press
the mouse button.
To change the size of a palette drag any corner of the palette ( Windows) or drag the size box at its lower right corner (Mac OS) Not all palettes can be resized.
To collapse a group to palette titles only click the Minimize/Maximize box ( Windows) or the Zoom box (Mac OS) or double-click a palette s tab. You can still access the menu of a collapsed palette.
A
![]()
B
![]()
Click to collapse or expand palette.
A. Windows B Mac OS X
(ImageReady) To
show or hide options for palettes
that include hidden options (the Optimize
Layer Options and Slice palettes) click the Show Options button ![]() on the palette tab to cycle through
palette displays or choose Show Options or Hide Options from
the palette menu.
on the palette tab to cycle through
palette displays or choose Show Options or Hide Options from
the palette menu.
Docking palettes together
Docking palettes together lets you view multiple palettes at the same time and move them as a group Entire palette groups cannot be docked together at once but you can dock the palettes from one group to another one at a time.
In Photoshop docked palettes and their locations are saved when you save a workspace. In Photoshop you can also store palettes in the palette well of the tool options bar.
(See "Using the tool options bar on page 26
To dock palettes together:
Drag a palette s tab to the bottom of another palette so that the bottom of the target palette is highlighted.
To move an entire docked group drag its title bar.
Customizing your workspace
The positions of all open palettes and movable dialog boxes are saved when you exit the application Alternatively you can always start with default palette positions or restore default positions at any time.
In addition to saving the positions of palettes and dialog boxes when you exit the appli- cation you can save multiple layouts as different workspaces.
To save the current workspace layout:
Choose Window > Workspace > Save Workspace.
Enter a name for the workspace and click OK.
To choose a workspace:
Choose Window > Workspace and choose a workspace from the submenu.
To delete a workspace:
Choose Window > Workspace > Delete Workspace.
Select the workspace you want to delete and click Delete.
To reset palettes to the default positions:
Do one of the following:
In Windows or Mac OS 9.x choose Edit > Preferences > General then select Save Palette
Locations.
(Photoshop) In Mac OS X choose Photoshop > Preferences > General then select Save
Palette Locations.
(ImageReady) In Mac OS X choose ImageReady > Preferences > General then select
Save Palette Locations.
Choose Window > Workspace > Reset Palette Locations.
To always start with the default palette and dialog box positions:
Do one of the following:
In Windows or Mac OS 9.x choose Edit > Preferences > General.
(Photoshop) In Mac OS X choose Photoshop > Preferences > General.
(ImageReady) In Mac OS X choose ImageReady > Preferences > General.
Deselect Save Palette Locations. The change takes effect the next time you start the application.
Using pop-up sliders
A number of palettes and dialog boxes contain settings that use pop-up sliders (for example the Opacity option in the Layers palette).
To use a pop-up slider:
Do one of the following:
Position the pointer over the triangle next to the setting hold down the mouse and drag the slider or angle radius to the desired value.
Click the triangle next to the setting to open the pop-up slider box and drag the slider or angle radius to the desired value Click outside the slider box or press Enter or Return to close the slider box. To cancel changes press the Escape key (Esc).
To increase or decrease values in 10% increments when the pop-up slider box is open, hold down Shift and press the Up or Down arrow key.
Using pop-up palettes
Pop-up palettes provide easy access to libraries of brushes swatches gradients styles, patterns contours and shapes. You can customize pop-up palettes by renaming and deleting items and by loading saving and replacing libraries. You can also change the display of a pop-up palette to view items by their names as thumbnail icons or with both names and icons.
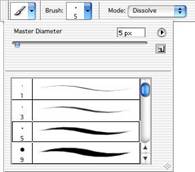
The Brush pop-up palette in the options bar
To select an item in a pop-up palette:
Click the thumbnail image in the options bar.
Click an item in the pop-up palette.
To rename an item in a pop-up palette:
Select
an item click the triangle ![]() in the upper right corner of the pop-up palette and choose the Rename command from
the palette menu
Enter a new name.
in the upper right corner of the pop-up palette and choose the Rename command from
the palette menu
Enter a new name.
To delete an item in a pop-up palette:
Do one of the following:
Select an item click the triangle ![]() in the upper right corner of the pop-up palette and choose the Delete command
from the palette menu.
in the upper right corner of the pop-up palette and choose the Delete command
from the palette menu.
Hold down Alt ( Windows) or Option (Mac OS) and click an item.
To customize the list of items in a pop-up palette:
Click the
triangle ![]() in the upper right corner of the pop-up palette to
view the palette menu.
in the upper right corner of the pop-up palette to
view the palette menu.
To return to the default library choose the Reset command. You can either replace the current list or append the default library to the current list.
To load a different library do one of the following:
Choose the Load command to add a library to the current list. Then select the library file you want to use and click Load.
Choose the Replace command to replace the current list with a different library. Then select the library file you want to use and click Load.
Choose a library file (displayed at the bottom of the palette menu). Then click OK to replace the current list or click Append to append the current list.
To save the current list as a library for later use choose the Save command. Then enter a name for the library file and click Save.
(Mac OS) You can specify that a file extension is always appended to a library file by setting Append File Extension to Always in the File Handling Preferences. You should
put the extension on a library filename so that you can easily share the libraries across operating systems.
To change the display of items in a pop-up palette:
Click the
triangle ![]() in the upper right corner of the pop-up palette to
view the palette menu.
in the upper right corner of the pop-up palette to
view the palette menu.
Select a view option: Text Only Small Thumbnail Large Thumbnail Small List and
Large List.
Using the Info palette (Photoshop)
The Info palette displays information about the color values beneath the pointer and, depending on the tool in use other useful measurements.
To display the Info palette:
Choose Window > Info.
The Info palette displays the following information:
When displaying CMYK values the Info palette displays an exclamation point next to the CMYK values if the color beneath the pointer or color sampler is out of the printable CMYK color gamut (See "Identifying out-of-gamut colors (Photoshop) on page 136
When you use the marquee tool the Info palette displays the x- and y-coordinates of the pointer position and the width ( W ) and height (H) of the marquee as you drag.
When you use the crop tool or zoom tool the Info palette displays the width ( W ) and height (H) of the marquee as you drag. The palette also shows the angle of rotation of the crop marquee.
When you use the line tool pen tool or gradient tool or when you move a selection, the Info palette displays the x- and y-coordinates of your starting position the change in X (DX) the change in Y (DY ) the angle (A) and the distance (D) as you drag.
When you use a two-dimensional transformation command the Info palette displays the percentage change in width ( W ) and height (H) the angle of rotation (A) and the angle of horizontal skew (H) or vertical skew ( V ).
When you use any color adjustment dialog box (for example Curves) the Info palette displays the before and after color values of the pixels beneath the pointer and beneath color samplers (See "Seeing the color values of pixels (Photoshop) on page 133
(ImageReady) The Info palette displays the following information:
The RGB numeric values for the color beneath the pointer.
The Opacity value for the pixels beneath the pointer.
The hexadecimal value for the color beneath the pointer.
The index color table position for the color beneath the pointer.
The x- and y-coordinates of the pointer.
The x- and y-coordinates of your starting position (before you click in the image) and your ending position (as you drag in the image) when you use the marquee tool the shape tools the crop tool and the slice tool.
The width ( W ) and height (H) of the selection as you drag when you use the crop tool, the shape tools the slice tool or the zoom tool.
The percentage change in width ( W ) and height (H) the angle of rotation (A) and the angle of horizontal skew (H) or vertical skew ( V ) when you use a Transform or Free Transform command.
To change the Info palette options:
Choose Palette Options from the Info palette menu.
For First Color Readout choose one of the following display options:
Actual Color to display values in the current color mode of the image.
Total Ink to display the total percentage of all CMYK ink at the pointer s current location, based on the values set in the CMYK Setup dialog box.
Opacity to display the opacity of the current layer. This option does not apply to the background.
Any other option to display the color values in that color mode.
For Second Color Readout choose a display option listed in step 2.
For Ruler Units choose a unit of measurement.
Click OK.
To change measurement units click the cross-hair icon in the Info palette for a menu of options. To change color readout modes click the eyedropper icon.
|
Politica de confidentialitate | Termeni si conditii de utilizare |

Vizualizari: 916
Importanta: ![]()
Termeni si conditii de utilizare | Contact
© SCRIGROUP 2025 . All rights reserved