CONTENT
Chapter
1 Hardware Installation. 2
Chapter 2
Driver Installation. 4
Chapter 3
WinDVB™ Function. 9
Chapter 4
How to search the TV program.. 22
Chapter 5
Trouble Shooting. 29
Chapter
1 Hardware Installation
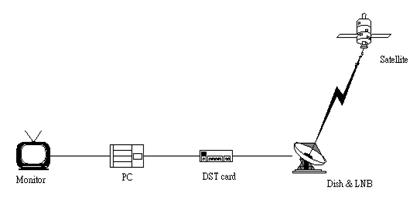
Before You Begin
Before you begin hardware installation, make sure your computer system
meets the peripheral requirements and the power of computer and all related
equipment is turned off.
Insert Your Digital
Satellite TV Card
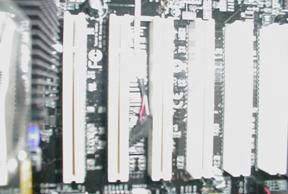 Remove the cover for the slot you intend to use and
unscrew the mounting bracket. Then pick up the DST Card and position it over
the expansion slot youtve chosen. Push the card firmly and evenly until itts
fully seated in the slot. Screw the bracket of the DST Card and computer
chassis.
Remove the cover for the slot you intend to use and
unscrew the mounting bracket. Then pick up the DST Card and position it over
the expansion slot youtve chosen. Push the card firmly and evenly until itts
fully seated in the slot. Screw the bracket of the DST Card and computer
chassis.
 When handling a card, hold it by its
edges, and avoid touching its circuitry
When handling a card, hold it by its
edges, and avoid touching its circuitry
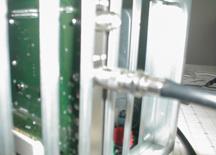
Connect Cable
Connect the cable from Satellite Dish LNB to the LNB-IN connector of DST
Card and fasten the plug.
Chapter
2 Driver Installation
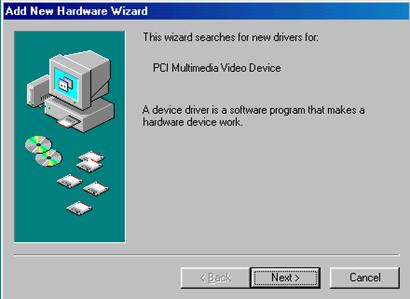
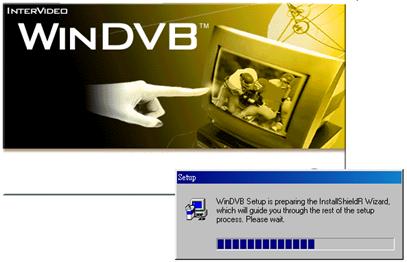
Step 1
Please boot your pc after
finishing the hardware installation.
In Microsoft Windows
98SE/ME/2000, you will find the message tNew Hardware Foundt after
power on your PC.
Please click the tCancelt.
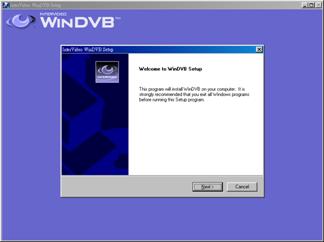
Step 2
Please insert the
Installation CD into the CD-ROM driver and the auto run page will pop up
automatically. On the auto run page, please choose tSatellite TV Cardt
and then click on the tWinDVBt to start the installation. Follow the system
prompt to finish the installation.
Please follow the
installation steps to finish.

Please click the tYest.
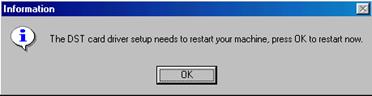
Please Click the tOKt
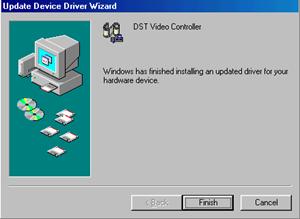
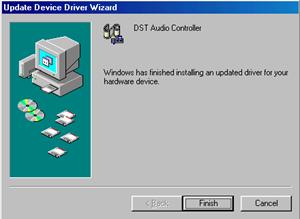
The windows will be reset,
then automatically install the DST Card driver
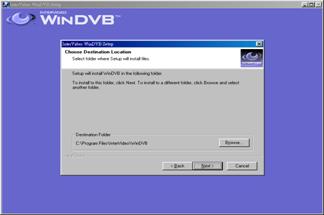
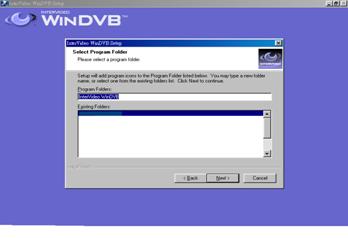
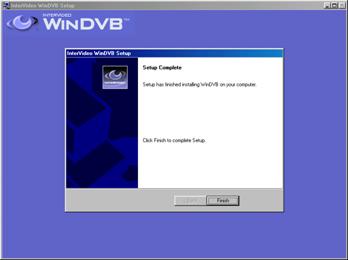
Step 3
After finishing the drivers installation, the application will
be installed then.
Please follow the
installation steps.
Choose the path to install.
Setting the name in the tProgram Folderst.
Chapter
3 WinDVB™ Function
Visual Overview
To navigate through all WinDVB functions and settings, use the controls
shown in this section. The controls are designed to look like the controls on
most media players such as DVD or other media players. Please note that all
functions may not be available for all users in all areas. Some functions may depend
on hardware or subscription services arranged by the user.
Properties
To access all WinDVB
settings, click  .
The Properties window will appear. Or right click in the video viewing window
and select properties from the pop-up function menu.
.
The Properties window will appear. Or right click in the video viewing window
and select properties from the pop-up function menu.
n
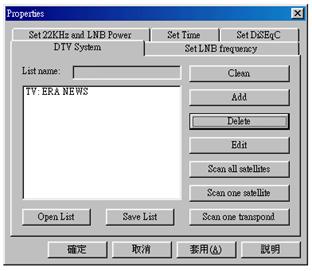
DTV System
n
Setting LNB frequency
n
Set 22KHz and LNB Power
n
Set Record Time
n
Set DiSEqC
n
Storage
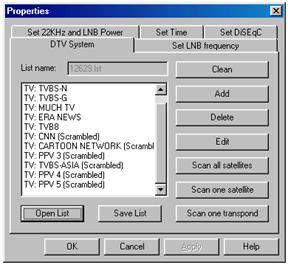
Click the button; the tPropertiest panel will
pop up.
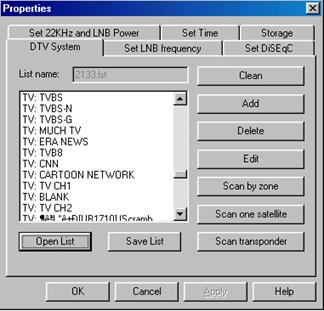
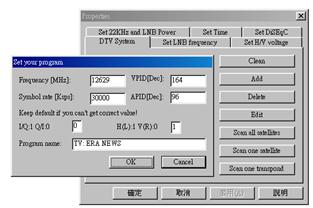
DTV System:
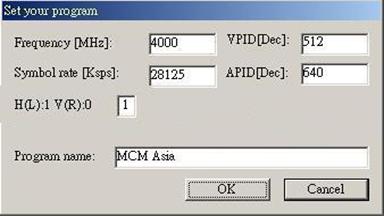
1.Button Function

Add a program to the list by
manual input. In this function dialog, the system will ask you to fill out
following parameters: Frequency (MHz),
Symbol Rate (Ksps), VPID, APID, t1t for
horizontal or t0t for vertical
polarization.
For example: when add tMCMt program of Asia 2 to the list, please fill out as follows: ( To find the parameters
needed for each TV program please refer to chapter4 )
|
Frequency
|
4000
|
|
Symbol Rate
|
28125
|
|
Polarization
|
1
|
|
VPID
|
512
|
|
APID
|
640
|
|
Program Name
|
MCM Asia
|
 .
.
2.Quick Search for one satellite
After choose the ,
Choose Scan one satellite in Properties panel. The system will ask you
to choose the satellite which your Dish is focus at.
,
Choose Scan one satellite in Properties panel. The system will ask you
to choose the satellite which your Dish is focus at.
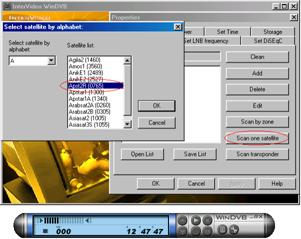
It will search the programs form the
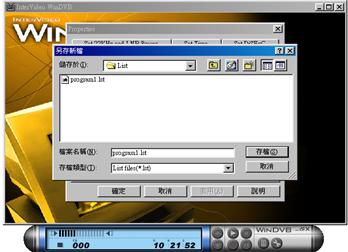
database.
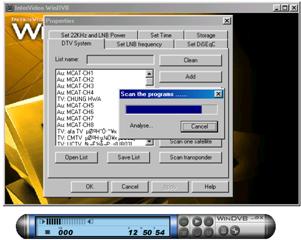
After finish scanning please save the
programs that it search to file (xxx.lst).
Choose
the programs list and select the program you want to see.
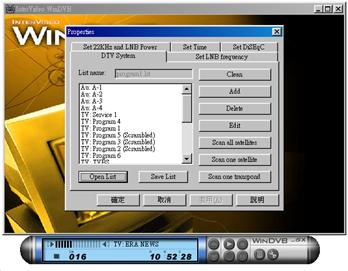
3.Open List
You can also use tOpen Listt open the default
program list of the known satellite. When open a list by clicking the tOpen
Listt button, please make sure that the program list matches with the satellite
which the dish is aiming; otherwise, the programs wontt be received. 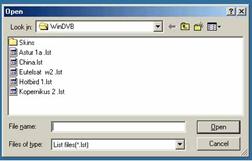
Choose any program list from the window then
click the tOpent button for loading the pre-set program list. After loading the
pre-set list, click tOKt for returning to the control bar.
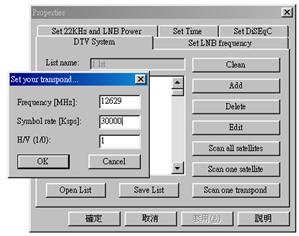
4.Scan One
Transponder
Scan One Transponder allows you to scan only one transponder
on specific Satellite. Please fill out the Frequency, Symbol rate and H/V
polarization of the transponder then click tOKt button.
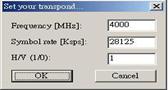 To find the parameters needed for each
transpond please refer to chapter 4 or Visit the website, https://www.satcodx.com
To find the parameters needed for each
transpond please refer to chapter 4 or Visit the website, https://www.satcodx.com
.
Other Setting:
There are five setting
panels, which are Set DiSEqC,
Set Time, Set 22KHz and LNB Power , Set LNB frequency and Storage on the
Properties panel.

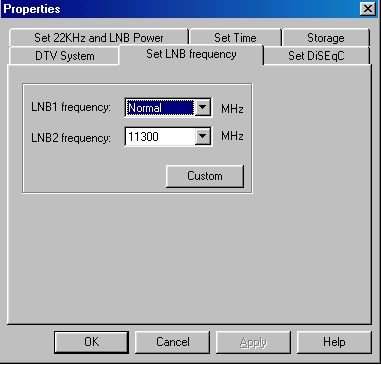
Set LNB Frequency
Please check the specification of the LNB.
For C band, the LNB frequency (Local Frequency) could be set 5150. For Ku band,
the LNB frequency (Local Frequency) could be 9750, 10000, 10600, 10750, 11000,
11250, 11475, 11300, 11475tKetc., it varies by different LNBs. Please note that
when changing the LNB frequency, other parameters will also be changed.
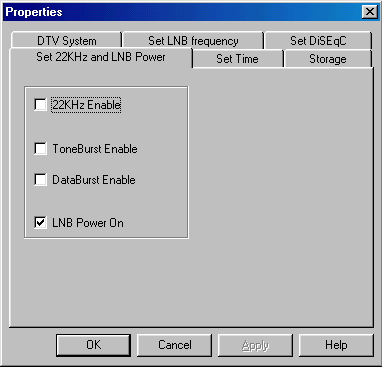
Set 22KHz and
LNB Power
Tick the box to enable LNB Power On to supply
the LNB with 13 or 18 voltage. Tick the box to enable either 22KHz or Tone
Burst, if your DST Card is connected with an t2 in & 1 outt switch.
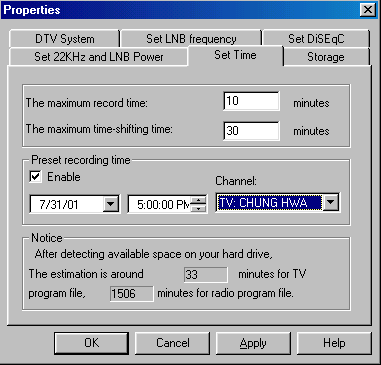
Set Time
Set the time limit for time-shifting and
recording functions.
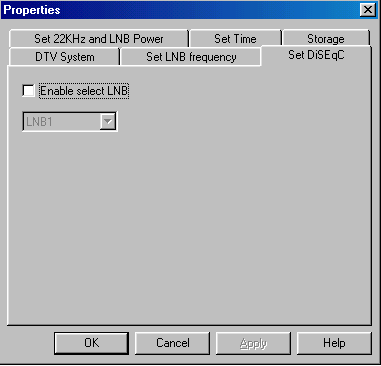
Set DiSEqC
Tick the box to enable the DiSEqC support for
tLNB Switch Boxt.
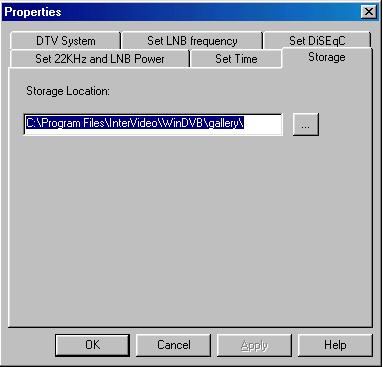
Storage:
Choose the location to
save the recorded mpeg files:
Chapter
4 How to search the TV program
Since the information of the
TV channels on a satellite may be varing by time. The default setting of the
program list (ex:ASPTAR-2R(0765).lst) may not being correct anymore. The user
would have to search the TV channel information and build their own program
list for each satellite.
There are 3 methods to
search the DTV channels:
1. Scan
one satellite
2. Scan
one transpond
3. Add
on more program in the exist program list.
Below are the steps for the
user to find the Free to Air TV channels:
Start to find Free To Air
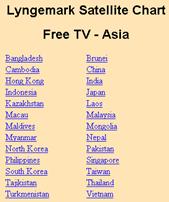
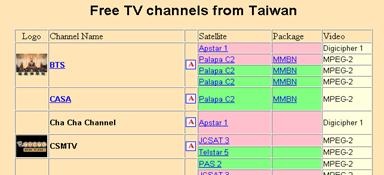
Step 1. First, you need to find the satellites information
form the internet.You can find some web sites, like this etctK
EXtGhttps://www.lyngsat.com/

Step 2. To select tu Free TVtv
Step 3. To select the area where you are at

Step 4. Select country
where you are begin at
Step 5. Find the parameters
you need
tThere
are three methods to search the programs:
(Example:
To select Taiwan
tERA Newst program)
1.
Scan one satellite
2.
Scan one transpond
3.
Add one more program in the exist program list.
Method
1tGScan one satellite
In
the method you need only enter one parameter the degree of the satellite.


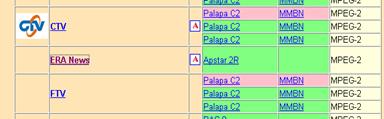
èPlease choose the satellite
that the tERA Newst in
(Note: You must make sure that
dish is direct the satellite that you want to receiver)
You
can find the degrees for satellite that you want to receiver


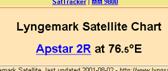
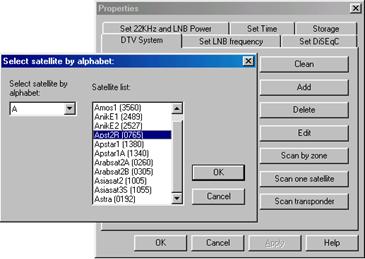
Then
select the Apst2R ( if your satellite is Apst2R). Click the tOKt. It
will search the programs form the database. ( Note: If it has the word
tscrambledt, It cantt play.)

Method
2tGScan one transpond


Please
enter the parameter. You can get the program from the transpond.
Method 3tGAdd
more program in the program list


Please enter the parameter. You can get the program that you
want to receiver.
AftertK
The channels are always be change. You can find the latest
information on the web by yourself.
Chapter
5 Trouble Shooting
1.
Windows can not find
DST Card
n
Check if DST Card was inserted correctly.
2.
Windows can not find
the driver of DST Card
n
Make sure the DST Card CD-ROM is in the CD-ROM
drive.
n
Please indicate the correct directory where the
drivers located for Windows.
3.
Can not set up the
software
n
Please check the OS version. DST Card is for Windows
98SE/ME/2000.
n
Please find tSetup.exet on the CD-ROM.
4.
Can not lock any
program channel when auto scan
n
Check whether the dish aims to the right satellite.
n
Check the cable connection between DST Card and the
dish.
n
Check whether the voltage for LNB is correct.
(18V-21V for Horizontal or 11V-14V for Vertical)
n
Check the setting of satellite; for example, LNB
frequency for C band or Ku band.
n
Please re-insert the DST Card to the other PCI slot.
n
Please install Microsoft DirectX 8.0.
5.
When the dialog tFail
to set your programt pops up
n
Check whether the value of program frequency
subtracts LNB frequency is between 950 ~ 2150MHz.
n
Check the setting of polarization (H or V)
6.
When error dialog box
pops up (error code:1) or black screen appears
n
Might be resulted from poor signal quality, the DST
Card application
program doesntt get the enough data of program or get the wrong data. Please
check the connection between DST Card and the cable.
7.
When error dialog box
pops up (error code is other than 1)
n
Please make sure your operation system is Microsoft
Windows 98SE/ME/2000 and Microsoft Direct X 7.0 or higher is installed.
8.
Video is playing but
Audio is failed
Please check the sound card
or the volume setting
NOTE
NOTE
