HDD Scan and Repair Program Ver3.0
Installation and User Manual
Salvation HDD Research Center
Thank you for using Salvation
HDD Scan and Repair Program Ver3.0. In order to make sure your installation
successful, please read the following carefully before your installation. You
could visit our homepage or contact us via Email in case you want to acquire
the further information concerned about our products. We appreciate your kindly
inquiries and instructions.
Before Getting The Installation Started
Floppy Disk Version
CD-ROM Version
The Installation Process
Floppy Disk Version
Run Installation
Program
Prepare for
Installation
Start Installation
CD-ROM Version
Burn Image
Before Using the Program
Start Using the Program
Loading Program
Program Console
Defaulted Scan
Advanced Scan
Defects Map
Fast Restore
User Help
Exit Program
Technical Support
Before
Getting the Installation Started
Floppy Disk Version
1.
Please make sure the floppy
disk used to create the bootable disk is in a good condition; we strongly
recommend you have the floppy disk formatted once again before using in the
creation.
2.
DO NOT attempt to run any
other application or process any other operation during the course the
application program is creating the bootable disk.
3.
The installation program
will only create the bootable application for this program in the floppy disk
but not your computer.
4.
The bootable disk created
uses special designed OS of its own, therefore the disk could not be recognized
by any other standard or nonstandard OS (for example, the bootable disk could
not be accessed under Windows). You should read carefully our product use
manual.
CD-ROM Version
1.
You must have a CD-ROM Recorder
correctly installed in your computer in order to create bootable CD-ROM using
the CD-ROM version installation program.
2.
Please make sure the CD-R or
CD-RW use for creating the bootable CD-ROM is writable.
3.
The installation program will
only create the bootable application for this program in the CD-ROM but not
your computer.
4.
The bootable CD-ROM created uses
special designed OS of its own, therefore the CD-ROM could not be recognized by
any other standard or nonstandard OS (for example, the bootable CD-ROM could
not be accessed under Windows). You should read carefully our product use
manual.
The Installation Process
Floppy Disk Version
1tRun Installation Program
Double click on the
installation program Setup.exe, there will be a window
showing welcome messages as follow appears:
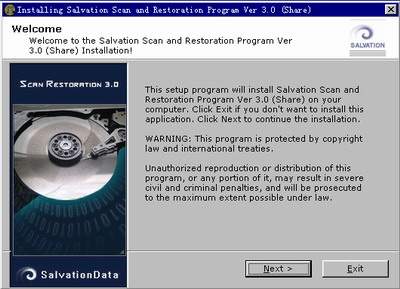
Press
tNextt if you decided to install, window as follow appears:
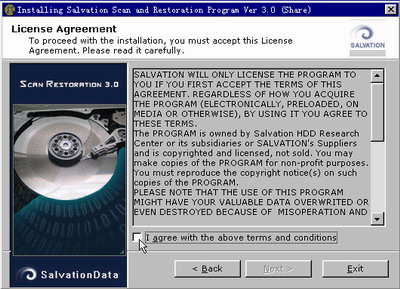
This window contains the License
Agreement of SalvationData, you must read carefully then agree with all the
terms and conditions before you can go to the next step of installation.
2tPrepare for Installation
You will see the follow window
appears:
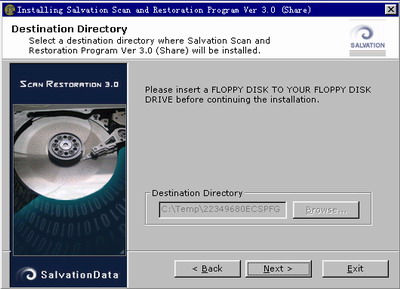
Please insert the floppy disk
prepared into the floppy disk drive as required. Click the tNextt button to
enter the next step when you are ready.
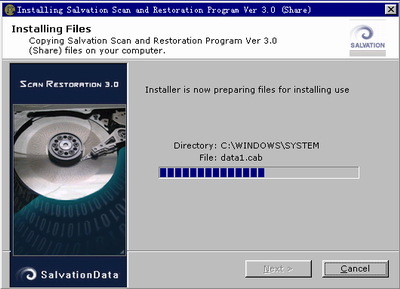
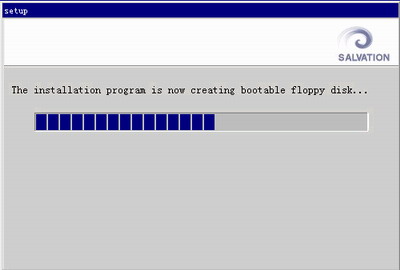
3tStart Installation
The installation program starts
to copy the files necessary for the installation:
The installation program begins to create a bootable floppy
disk:
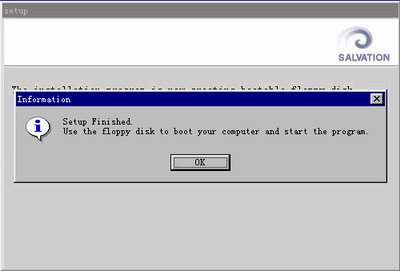
The
Installation of Salvation HDD Scan and Repair Program FDD edition Ver3.0 has
been finished:
The Installation Process
CD-ROM Version
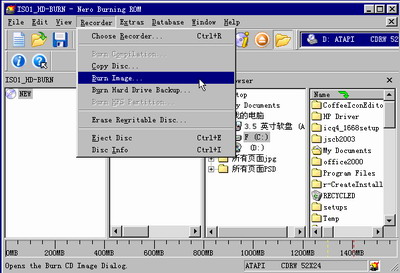
Use a DATA CD
burning software (i.e. NERO) to burn image. In the next step we use NERO for an
example to show how to create a bootable CD-ROM.
First select NERO tmake data disct function and select tburn
imaget from the menu tRecordert as the following picture showed:
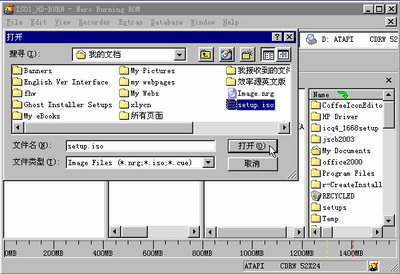
Select the CD-ROM version installation program (thatts an ISO
package) setup.iso.
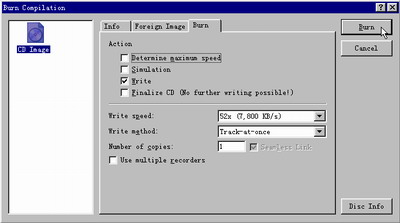
There will be a window for Burn Compilation, we could use
the default setting for burning, just click tBurnt to continue.
Click the tDonet button on the bottom right corner when the
burning is finished, NERO will eject the CD-ROM automatically.
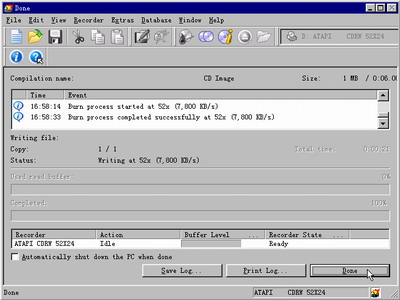
The
Installation of Salvation HDD Scan and Repair Program Ver3.0 CD-ROM edition has
been finished.
Before
Using the Program
1.
Please make sure that your
HDD to be scanned and restored has been connected to the computer exactly as
the program required:
I. The HDD must be connected to IDE Primary.
II. Set the HDD to be the IDE Primary Master device.
2.
Meanwhile, make sure you
have set your computer to boot from FDD (or boot from CD-ROM Drive if you use a CD-ROM version).
Start
Using the Program
1tLoading Program
Insert the bootable Floppy Disk (or CD-ROM) created then
start up the computer, the Salvation Scan and Restoration Program will load and
run automatically, there will be window showing the loading message appears:

Once the program loaded, system will show you some important
information. You must read it carefully.
After you finishing the reading and go forward, you will
enter the program console as you can see below:
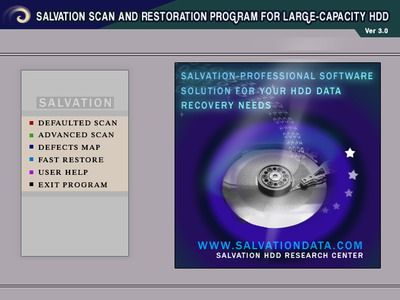
Salvation Scan and Restoration Program has a very intuitionistic
operation interface. Just highlight the function you need from the menu, the
application will do professional scan and defective sector restoration to the
target HDD automatically and rapidly.
2tProgram Console
1. Defaulted Scan
The system will do the scan based on the default settings (from 0% to 100%).
This scan mode could do defective sector scan to all sectors of the HDD but
meanwhile is time-consuming.
2. Advanced Scan
You could set the scan range by input the starting
point and the end point. In this case, the system will only scan the sectors
within the range set and save your time spent on scanning.
3. Defects Map
Any physical defective sector found during the scanning will be mapped here and
make it to be clear at a glance.
4. Fast Restore
Provides two mode of restoration: Manual one and Intellective one. Manual
Restoration allows users to set a range for the restoration operation; Intellective
Restoration can automatically do the restoration to the defective sectors found
during HDD scan (because Intellective restoration is based on the HDD scan
result, if you have not run HDD scan or there is no defective sector found
through HDD scan, there will be no effect using the Intellective Restoration).
5. User Help
Here you could acquire information about other available resources of
Salvation.
6. Exit Program
Exit Salvation HDD Scan and Repair Program Ver3.0 safely.
Technical Support
If you encounter any problem
during installing or using Salvation Scan and Restoration Program, please visit
us at https://www.salvationdata.com
for FAQs or quiz on the forum; you could also send Email to salvationdata@hotmail.com or call
us at 0086 28 85211099 (GMT-8 from 9:30 am to 5:30 pm) for supports. We will do
our best providing service to you.
If you are a registered user of
Salvation products, please quote us your information when you face us for
services, we will treat it as top priority.
Thank you
again for using Salvation product.
