| CATEGORII DOCUMENTE |
| Bulgara | Ceha slovaca | Croata | Engleza | Estona | Finlandeza | Franceza |
| Germana | Italiana | Letona | Lituaniana | Maghiara | Olandeza | Poloneza |
| Sarba | Slovena | Spaniola | Suedeza | Turca | Ucraineana |
 Creating
A Bootable CDROM
Creating
A Bootable CDROM|
Introduction |
|
This tutorial is based on information
gleaned from Bart Lagerweij's web page on building Bootable CD's. For
advanced CD building topics and tutorials his is the place to go. A link to
his web page is listed in the Required Software section below. Required software:
|
|
The_Village_Idiot's 2.88 MB Boot Image File. |
||||||||||||||||||||||||||||||||||||||||||||||||||||||||
|
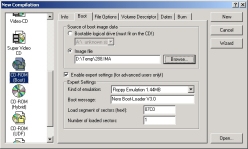
Why a 2.88MB boot image? Oh, that's simple. If you've ever tried to make a boot disk of your very own, you'd have found out that you just couldn't fit all the little programs onto it that you needed to make life easy. This boot disk image is double the size of a normal boot disk letting you fit in twice as much. What's in it? Actually, nothing special at all. It's a very basic boot disk image with the files listed below contained within it. Upon boot it will load a generic IDE cdrom driver, doskey, a mouse driver and smartdrv to help speed up disk and cd access by caching information. These files take up about half of the 2.88MB diskette image leaving about 1.44 MB for your own files if you wish to inject them into the image using WinImage 5.0 - or you can just use the diskette image as-is.
|
|
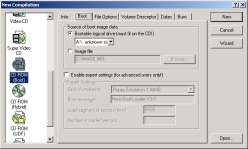
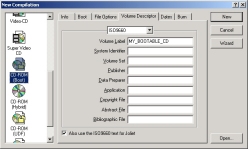
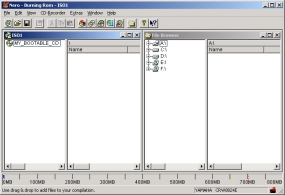
Making a Bootable CDROM - The Easy Way. |
|||||||||||||||||||||||||||||||||
|
|
Making a Bootable CDROM - The Not-Quite-As-Easy Way. |
||||||||||||||||||||||||||||||
|
This method actually details how to create your own boot disk image required to make the cdrom bootable. Part 1. To make the boot disk image you'll need to have an existing boot disk. A windows boot disk is good. You'll also need WinImage and MKBT (links above). For this example our working directory will be d:temp.
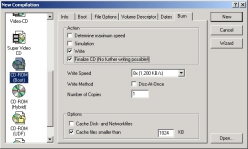
(The You could also have just used WinImage to open my existing 288.IMA file, dragged out everything you didn't want to be in it leaving just IO.SYS, MSDOS.SYS and COMMAND.COM and then adding your own files - but where would the fun be in that? And would you understand how it was made? Part 2. Now that you have your custom boot disk image, you need to make the cdrom bootable and burn the data to disk. To learn how to do this, jump back up the page to Making a Bootable CDROM - The Easy Way. From here on out, everything is the same as detailed therein. |
|
Politica de confidentialitate | Termeni si conditii de utilizare |

Vizualizari: 1401
Importanta: ![]()
Termeni si conditii de utilizare | Contact
© SCRIGROUP 2025 . All rights reserved