| CATEGORII DOCUMENTE |
| Asp | Autocad | C | Dot net | Excel | Fox pro | Html | Java |
| Linux | Mathcad | Photoshop | Php | Sql | Visual studio | Windows | Xml |
Overview of Part 2
Windows Forms is Microsoft's next generation rich client forms package that breaks through the ceiling in desktop applications that once existed. Delivered as part of the .NET Framework, Windows Forms is available to all Visual Studio .NET developers, enabling developers to use the skills they possess today and the languages they know now to build the most powerful desktop applications ever.
So, back to our sample company, Downhill Bikes. The company wants to add a smart client so that their call center staff can quickly retrieve details of customer orders as they field customer inquiries.
We're going to build a Windows Forms-based application using the Visual Studio .NET designer. Using a third-party control, we will then extend the form to add reporting, and we will call the XML Web service we built in Part 1. You'll see how easy it is to build and extend Windows Forms with Visual Studio .NET, and how straightforward it is to integrate business data and logic residing in XML Web services.
Part 2: Build a Rich Windows Form
Step 1 of 9: Add a new Visual Basic Windows Form project
Create a new Visual Basic .NET Windows project for our Customer Service program.
a. From the File menu, choose Add Project, then New Project.
b. In the Projects Type list, choose Visual Basic Projects. In the Templates list, choose Windows Application. Finally, in the Name box, type CustomerService and click OK.

c. From the Project menu, click Set as StartUp Project.
Part 2: Build a Rich Windows Form
Step 2 of 9: Add a data grid to the form
Now we'll add a data grid to the form. We'll use the data grid to see customer and order data. We'll be able to make changes directly in the grid, resize columns, change sort order and drill into the order data details.
a. From the View menu, click Toolbox. CTRL+ALT+X
b. Locate the Windows Forms tab and click it.
c. Double-click the DataGrid icon to add it to the form.
d. Show the Grid Properties by pressing F4. Select the Dock property, type the letter T to change it from None to Top. Then, stretch the data grid until it fills the top two-thirds of the form.
e. Drag a TextBox, a Button and a StatusBar onto the form below the DataGrid. (You may need to scroll down in the Toolbox for the StatusBar.)
f. Click the Button and show its properties by pressing F4. Select the Text property and type[LLR1]: Search
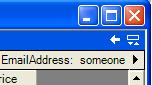
Your form should look like the following image:

Part 2: Build a Rich Windows Form
Step 3 of 9: Add a Web reference to our Web service
Visual Studio .NET makes it easy to consume XML Web services in a Windows Forms application. In this step, we'll consume the XML Web service we created earlier.
a. From the Project menu, click Add Web Reference.
b. Type https://localhost/DownhillBikes/Service1.asmx in the Address box.
c. Click Add Reference.
Part 2: Build a Rich Windows Form
Step 4 of 9: Add the Imports statements
Adding the Imports statements to our code documents the namespaces we are using. Doing so reduces the code a developer has to type by eliminating those namespaces from the written code.
a. From the View menu, click Code. F7
b. Add a new, empty line at the top of the file.
c. From the View menu, click Toolbox. CTRL+ALT+X
d. In the toolbox, click the Guided Tour tab and double-click on 2.4 Import statements to insert the two import declarations:

Part 2: Build a Rich Windows Form
Step 5 of 9: Add the Visual Basic. NET source code
This code will complete the loop, referencing and calling the XML Web service, taking the data DataSet returned and binding it to the DataGrid on our form.
a. Position the insertion point on the line above the End Class statement.
b. Double-click on 2.5 VB methods to insert all the code.
Part 2: Build a Rich Windows Form
Step 6 of 9: Run the program and make changes
The DataGrid automatically senses the shape of the XML data and adds a plus sign to let the user drill into customer order details. The DataGrid also allows sorting of columns and editing of data if security permissions are met.
![]() Important
Important
In the following steps, you may press the F5 key as a shortcut to build and run the project. Please make sure that the GuidedTour Add-in Tool Window does not have focus when you use F5. Pressing F5 when the GuidedTour Tool Window has focus will cause it to go to part 0. (If this happens, you can simply navigate back to this step.)
a. From the Debug menu, click Start to run the application. (Or, press F5.)

b. Expand a customer record (by clicking the in the left-most column) and click CustomerOrders to view its orders.
c. Expand an order record and click OrdersDetails to view its details.
d. Click the left-arrow icon twice to return to the customer records.
e. Type you in the box next to the Search button.
f. Click Search.
g. Change Rob Young to Robert Young and press the DOWN ARROW key.
h. Close the Form1 window.
i. From the Debug menu, click Start to run the application. (Or, press F5.)
j. Note that the change made in sub-step g is persistent. Close the Form1 window.
![]() Important
Important
If the CustomerService program doesn't start, make sure it's your default project. In the Solution Explorer, right-click CustomerService, then click Set as StartUp Project.
Part 2: Build a Rich Windows Form
Step 7 of 9: Stop the Web service
Stopping IIS will stop the XML Web Service. Once we do this, the rich Windows application will switch to offline mode, giving the user full access to the data.
a. Click the Windows Start button and choose Run. [WINDOWS KEY ] + R
b. In the Open box, type iisreset /stop and click OK.

Part 2: Build a Rich Windows Form
Step 8 of 9: Try it again
With the XML Web service offline, access to the application data is not available. The Microsoft .NET Framework provides built-in Web caching to our application when we use ADO.NET which enables the offline scenario.
a. In Visual Studio .NET, from the Debug menu, click Start to run the application. (Or, press F5.)
b. Note the status bar displays Working in offline mode.
c. Change the password of Robert Young to abc and press the DOWN ARROW key.
d. Close the Form1 window.
Part 2: Build a Rich Windows Form
Step 9 of 9: Start IIS and run once more
When we start IIS and access our Windows application, we will see our offline data has been added to the SQL Server 2000 Database, completing the reconnect portion of the offline scenario.
a. Click the Windows Start button, then click Run. . (Or, press [WINDOWS KEY ] + R.)
b. In the Open box, type iisreset /start and click OK.
c. After the console window appears, wait for it to close by itself.
c. In Visual Studio .NET, from the Debug menu, click Start to run the application. (Or, press F5.)
d. Note that Robert Young's password is abc and the status bar says Connected to WS.
e. Close the Form1 window.
f. In Visual Studio .NET, from the Window menu, click Close All Documents. If asked to save changes, click Yes.
You have just completed the construction of a data-bound smart client application using Visual Studio .NET and the Windows Form designer. In this exercise, we incorporated the XML Web service built in Part I to extend the functionality of our Windows Form application. The next step in our Guided Tour will introduce us to the power and breadth of the Visual Studio .NET extensibility model and Crystal Reports for Visual Studio .NET.
[LLR1] Where should I type this?
|
Politica de confidentialitate | Termeni si conditii de utilizare |

Vizualizari: 1347
Importanta: ![]()
Termeni si conditii de utilizare | Contact
© SCRIGROUP 2025 . All rights reserved