| CATEGORII DOCUMENTE |
| Asp | Autocad | C | Dot net | Excel | Fox pro | Html | Java |
| Linux | Mathcad | Photoshop | Php | Sql | Visual studio | Windows | Xml |
Automating Tasks
About actions
An action is a series of commands that you play back on a single file or a batch of files. For example, you can create an action that applies an Image Size command to change an image to a specific size in pixels, followed by an Unsharp Mask filter that resharpens the detail, and a Save command that saves the file in the desired format.
Most commands and
tool operations are recordable in actions. Actions can include stops that let you perform tasks that
cannot be recorded (for example, using a painting tool). Actions can also
include modal controls that let you enter values in a dialog box while playing an
action. Actions form the basis for droplets,
small applications that automati-
cally process all files that are
dragged onto their icon.


Action applied to an image
Both Photoshop and ImageReady ship with a number of predefined actions, although Photoshop has significantly more actions than ImageReady. You can use these actions as is, customize them to meet your needs, or create new actions.
Using the Actions palette
You use the Actions palette to record, play, edit, and delete individual actions. This palette also lets you save and load action files.
In Photoshop, actions are grouped into sets-you can create new sets to better organize your actions. (See "Organizing sets of actions (Photoshop)" on section 494.) In ImageReady, you cannot group actions into sets.
To display the Actions palette:
Choose Window > Actions, or click the Actions palette tab if the palette is visible but not active.
By default, the Actions palette displays actions in list mode-you can expand and collapse sets, actions, and commands. In Photoshop, you can also choose to display actions in button mode (as buttons in the Actions palette that play an action with a single mouse click). However, you cannot view individual commands or sets in button mode.
To expand and collapse sets, actions, and commands:
Click the triangle to
the left of the set, action,
or command in the Actions palette.
![]()
Alt-click ( Windows) or Option-click (Mac OS) the triangle to expand or collapse all actions in a set or all commands in an action.
To select actions:
Do one of the following:
. Click an action name to select a single action.
. (Photoshop) Shift-click action names to select multiple, discontiguous actions.
. (Photoshop) Ctrl-click ( Windows) or Command-click (Mac OS) action names to select multiple, contiguous actions.
To display actions as buttons (Photoshop):
Choose Button Mode from the Actions palette menu. Choose Button Mode again to return to list mode.
Recording actions
Keep in mind the following guidelines when recording actions:
. You can record most-but not all-commands in an action.
. You can record operations that you perform with the marquee, move, polygon, lasso, magic wand, crop, slice, magic eraser, gradient, paint bucket, type, shape, notes, eyedropper, and color sampler tools-as well as those that you perform in the History, Swatches, Color, Paths, Channels, Layers, Styles, and Actions palettes.
In ImageReady, you can drag a command from the History palette to the action in the Actions palette in which you want the command recorded. You cannot drag italicized commands from the History palette to the Actions palette. (Commands in italics are nonactionable.)
. Results depend on file and program setting variables, such as the active layer or the foreground color. For example, a 3-pixel Gaussian blur won't create the same effect on a
72-ppi file as on a 144-ppi file. Nor will Color Balance work on a grayscale file.
. When recording actions that include dialog box and palette settings, keep in mind that only changed settings are recorded. For example, to record an action that sets a particular preference to its current value, you must first change that preference to some other value, and then record the action as you change the preference back to its original value.
. Modal operations and tools-as well as tools that record position-use the units currently specified for the ruler. A modal operation or tool is one that requires you to press Enter or Return to apply its effect, such as the transformation and crop commands. Tools that record position include the marquee, slice, gradient, magic wand, lasso, shape, path, eyedropper, and notes tools.
In Photoshop, when recording an action that will be played on files of different sizes, set the ruler units to percent. As a result, the action will always play back in the same
relative position in the image.
. You can record the Play command listed on the Actions palette menu to cause one action to play another.
Creating a new action
When you create a new action, the commands and tools you use are added to the action until you stop recording.
To create a new action:
1 Open a file.
2 In
the Actions palette, click the New Action button ,
or choose New Action from the palette menu.
![]()
3 Enter a name for the action.
4 (Photoshop) Choose a set from the pop-up menu.
5 If desired, set one or both of the following options:
. Assign a keyboard shortcut to the action. You can choose any combination of a
Function key, the Ctrl key ( Windows) or Command key (Mac OS), and the Shift key
(for example, Ctrl+Shift+F3).
. (Photoshop) Assign a color for display in Button Mode.
6 Click
Record. The Record button
in the Actions palette turns red .
![]()
Important: When recording the Save As command, do not change the filename. If you enter a new filename, Photoshop records the filename and uses that filename each time you run the action. Before saving, if you navigate to a different folder, you can specify a different location without having to specify a filename.
7 Choose the commands, and perform the operations you want to record.
8 To stop recording, click the Stop button, choose Stop Recording from the Actions palette menu, or press the Escape key. To resume recording in the same action, choose Start Recording from the Actions palette menu.
Recording paths (Photoshop)
The Insert Path command lets you include a complex path (a path created with a pen tool or pasted from Adobe Illustrator) as part of an action. When the action is played back, the work path is set to the recorded path. You can insert a path when recording an action or after it has been recorded.
Note: Playing actions that insert complex paths may require significant amounts of memory. If you encounter problems, increase the amount of memory available to Photoshop.
To record a path:
1 Do one of the following:
. Start recording an action.
. Select an action's name to record a path at the end of the action.
. Select a command to record a path after the command.
2 Select an existing path from the Paths palette.
3 Choose Insert Path from the Actions palette menu.
If you record multiple Insert Path commands in a single action, each path will replace the previous one in the target file. To add multiple paths, record a Save Path command using the Paths palette after recording each Insert Path command.
Inserting stops
You can include stops in your action that let you perform a task that cannot be recorded
(for example, using a painting tool). Once you've completed the task, click the Play button in the Actions palette to complete the task. You can insert a stop when recording an action or after it has been recorded.
You can also display a short message when the action reaches the stop. For example, you can remind yourself what needs to be done before continuing with the action. A Continue button can be included in the message box. This lets you check for a certain condition in the file (for example, a selection) and continue if nothing needs to be done.
To insert a stop:
1 Choose where to insert the stop:
. Select an action's name to insert a stop at the end of the action.
. Select a command to insert a stop after the command.
2 Choose Insert Stop from the Actions palette menu.
3 Type the message you want to appear.
4 (Photoshop) If you want the option to continue the action without stopping, select
Allow Continue.
5 Click OK.
Setting modal controls
A modal control pauses an action so that you can specify values in a dialog box or use a modal tool. You can only set modal controls for actions that launch dialog boxes or activate modal tools. If you do not set a modal control, dialog boxes do not appear when you play the action, and you cannot change the recorded values.
![]()
A modal control is indicated by a dialog box icon to the left of a command, action, or set in the Actions
palette. Actions
and sets in which some, but not all, available commands are
modal display a red dialog box icon .
In Photoshop, you must be in list mode-not button mode-to
set a modal control.
![]()
To set a modal control:
Do one of the following:
. Click the box to the left of the command name to display the dialog box icon. Click again to remove the modal control.
. To turn on or disable modal controls for all commands in an action, click the box to the left of the action name.
. (Photoshop) To turn on or disable modal controls for all actions in a set, click the box to the left of the set name.
Excluding commands
You can exclude commands that you don't want to play as part of a recorded action. In
Photoshop, you must be in list mode-not button mode-to exclude commands.
To exclude or include a command:
1 To expand the listing of commands in an action, click the triangle to the left of the action you want to work with.
2 Click the check mark to the left of the specific command you wish to exclude; click again to include the command. To exclude or include all commands in an action, click the check mark to the left of the action name.
When you exclude a command, its check mark disappears. In addition, the check mark of the parent action turns red to indicate that some of the commands within the action are excluded.
Inserting nonrecordable commands (Photoshop)
The painting and toning tools, tool options, view commands, and window commands cannot be recorded. However, many commands that cannot be recorded can be inserted into an action using the Insert Menu Item command.
An inserted command is not executed until the action is played, so the file remains unchanged when the command is inserted. No values for the command are recorded in the action. If the command has a dialog box, the dialog box appears during playback, and the action pauses until you click OK or Cancel. You can insert a command when recording an action or after it has been recorded.
Note: When you use the Insert Menu Item command to insert a command that opens a dialog box, you cannot disable the modal control in the Actions palette.
To insert a menu item in an action:
1 Choose where to insert the menu item:
. Select an action's name to insert the item at the end of the action.
. Select a command to insert the item at the end of the command.
2 Choose Insert Menu Item from the Actions palette menu.
3 With the Insert Menu Item dialog box open, choose a command from its menu.
4 Click OK.
Specifying an output folder (ImageReady)
You can specify the folder in which images are placed after actions are performed. Note: In Photoshop, you can set an output folder when using the Batch command to process files. (See "Using the Batch command (Photoshop)" on section 495.)
To specify an output g:
1 Select the action for which you want to specify an output folder in the Actions palette.
2 Choose Insert Set Output Folder from the Actions palette menu.
3 Select a folder, and click OK.
Recording image size options (ImageReady)
Resizing images is a typical step in preparing irregularly sized images for use on the Web. You can automate this task by creating an action that includes the Image Size command. ImageReady provides several options that give you control over how an action resizes images.
To record Image Size options:
1 Start recording an action.
2 Choose Image > Image Size, and enter the desired image dimensions. (See "Changing the pixel dimensions of an image" on section 67.)
3 Select Action Options.
4 Choose an option from the Fit Image By menu:
. Width to constrain proportions using the new width value.
. Height to constrain proportions using the new height value.
. Width & Height to constrain proportions using either the new width value or the new height value.
. Percent to constrain proportions using the new percent value.
5 Select Do Not Enlarge to prevent images that are smaller than the new dimensions from being sized up.
6 Click OK and continue recording the action.
Inserting optimization settings for selected slices (ImageReady) When you record a Save Optimized action step, ImageReady includes optimization settings for the entire image. You can insert optimization settings for individual slices using the Insert Set Optimization Settings command.
To insert optimization settings in an action:
1 Select the slice or slices for which you want to record optimization settings. (See
"Selecting slices" on section 373.)
2 Select the action in which you want to insert the optimization settings.
3 Do one of the following:
. Choose Insert Set Optimization Settings to current file format from the Actions palette menu. ( The command indicates the optimization file format currently applied to the selected slice.)
. Drag the droplet
icon
![]() from
the Optimize palette onto
the Actions palette.
from
the Optimize palette onto
the Actions palette.
Playing actions
Playing an action executes the series of commands you recorded in the active document. You can exclude specific commands from an action or play a single command. If the action includes a modal control, you can specify values in a dialog box or use a modal tool when the action pauses.
Note: In button mode, clicking a button executes the entire action-though commands previously excluded are not executed.
To play an action on a file:
1 Open the file.
2 Do one of the following:
.
To play an entire action, select the
action name, and click the Play
button in the
![]()
Actions palette, or choose Play from the palette menu.
. If you assigned a key combination to the action, press that combination to play the action automatically.
. To play part of an action, select the command from which you want to start playing, and click the Play button in the Actions palette, or choose Play from the palette menu.
To play a single command in an action:
1 Select the command you want to play.
2 Do one of the following:
. Ctrl-click ( Windows) or Command-click (Mac OS) the Play button in the Actions palette.
. Press Ctrl ( Windows) or Command (Mac OS), and double-click the command.
To undo an entire action:
Do one of the following:
. (Photoshop) Take a snapshot in the History palette before you play an action, and then select the snapshot to undo the action.
. (ImageReady) Choose Edit > Undo Action Name.
Setting playback options (Photoshop)
Sometimes a long, complicated action does not play properly, but it is difficult to tell where the problem occurs. The Playback Options command gives you three speeds at which to play actions, so that you can watch each command as it is carried out.
When working with actions that contain audio annotations, you can specify whether or not the action will pause for audio annotations. This ensures that each audio annotation completes playing before the next step in the action is initiated.
To specify how fast actions should play:
1 Choose Playback Options from the Actions palette menu.
2 Specify a speed:
. Accelerated to play the action at normal speed (the default).
. Step by Step to complete each command and redraw the image before going on to the next command in the action.
. Pause For to enter the amount of time Photoshop should pause between carrying out each command in the action.
3 Select Pause For Audio Annotation to ensure that each audio annotation in an action completes playback before the next step in the action is initiated. Deselect this option if you want an action to continue while an audio annotation is playing.
4 Click OK.
Editing actions
After you record an action, you can edit it in a variety of ways. You can rearrange actions and commands in the Actions palette; record additional commands in an action; rerecord, duplicate, and delete commands and actions; and change action options.
Rearranging actions and commands
You can rearrange actions in the Actions palette and rearrange commands within an action to change their order of execution.
To rearrange actions:
In the Actions palette, drag the action to its new location before or after another action. When the highlighted line appears in the desired position, release the mouse button. To rearrange commands:
In the Actions palette, drag the command to its new location within the same or another action. When the highlighted line appears in the desired position, release the mouse button.
Recording additional commands
You can add commands to an action using the Record button or the Start Recording command in the Actions palette.
To record additional commands:
1 Do one of the following:
. Select the action name to insert a new command at the end of the action.
. Select a command in the action to insert a command after it.
2 Click the Record button, or choose Start Recording from the Actions palette menu.
3 Record the additional commands.
4 Click the Stop button to stop recording.
In ImageReady, you can drag a command from the History palette to the Actions palette without clicking the Record button or choosing Start Recording from the
Actions palette menu.
Rerecording and duplicating actions and commands
Rerecording an action or command lets you set new values for it. Duplicating an action or command lets you make changes to it without losing the original version.
To record an action again (Photoshop):
1 Select an action, and choose Record Again from the Actions palette menu.
2 For a modal tool, do one of the following:
. Use the tool differently, and Press Enter ( Windows) or Return (Mac OS) to change the tool's effect.
. Press Cancel to retain the same settings.
3 For a dialog box, do one of the following:
. Change the values, and click OK to record them.
. Click Cancel to retain the same values.
To record a single command again:
1 In the Actions palette, double-click the command.
2 Enter the new values, and click OK. To duplicate an action or command: Do one of the following:
. Alt-drag ( Windows) or Option-drag (Mac OS) the action or command to a new location in the Actions palette. When the highlighted line appears in the desired location, release the mouse button.
. Select an action or command. Then choose Duplicate from the Actions palette menu. The copied action or command appears after the original.
. Drag an action or command to the New Action button at the bottom of the Actions palette. The copied action or command appears after the original.
In Photoshop, you can duplicate sets as well as actions and commands.
Deleting actions and commands
If you no longer need an action or command, you can delete it from the Actions palette.
To delete an action or command:
1 In the Actions palette, select the action or command you want to delete.
2 Delete the action or command:
. Click the Trash button ![]() on the Actions palette.
Click OK to delete the action or command.
on the Actions palette.
Click OK to delete the action or command.
. Alt-click ( Windows) or Option-click (Mac OS) the Trash button to delete the selected action or command without displaying a confirmation dialog box.
. Drag the action or command to the Trash button on the Actions palette to delete the selected action or command without displaying a confirmation dialog box.
. Choose Delete from the Actions palette menu.
To delete all actions in the Actions palette (Photoshop): Choose Clear All Actions from the Actions palette menu. Changing action options
You can change the name, keyboard shortcut, and button color (Photoshop) for an action in the Action Options dialog box.
To rename an action:
Double-click the action name in the Actions palette and enter a new name.
To change action options:
1 Do one of the following:
. Select the action, and choose Action Options from the Actions palette menu.
2 Type a new name for the action, or change other options. For more information about action options, see "Recording actions" on section 485.
3 Click OK.
Managing actions in the Actions palette
By default, the Actions palette displays predefined actions (shipped with the application) and any actions you create. You can also load additional actions into the Actions palette. Note: Photoshop actions are not compatible with ImageReady, and vice versa.
Saving and loading actions (Photoshop)
Actions are automatically saved to the Actions Palette folder in the Adobe Photoshop 7.0
Settings folder. If this file is lost or removed, the actions you created are lost. You can save your actions to a separate actions file so that you can recover them if necessary. You can also load a variety of action sets that are shipped with Photoshop.
Note: The default location of the Adobe Photoshop 7.0 Settings folder varies by operating system. Use your operating system's Find command to locate this folder.
To save a set of actions:
1 Select a set.
2 Choose Save Actions from the Actions palette menu.
3 Type a name for the set, choose a location, and click Save.
You can save the set anywhere. However, if you place the file in the Presets/Photoshop Actions folder inside the Photoshop program folder, the set will appear at the bottom of the Actions palette menu after you restart the application.
Press Ctrl+Alt ( Windows) or Command+Option (Mac OS) when you choose the Save
Actions command to save the actions in a text file. You can use this file to review or print the contents of an action. However, you can't reload the text file back into Photoshop.
To load a set of actions:
Do one of the following:
. Choose Load Actions from the Actions palette menu. Locate and select the action set file, the click Load. (In Windows, Photoshop action set files have the extension .atn.)
. Select an action set from the bottom of the Actions palette menu.
To restore actions to the default set:
1 Choose Reset Actions from the Actions palette menu.
2 Click OK to replace the current actions in the Actions palette with the default set, or click Append to add the set of default actions to the current actions in the Actions palette. Saving actions (ImageReady)
All actions you create are saved in the ImageReady Actions folder in the Adobe ImageReady 7.0 Settings folder. ImageReady can only access actions that reside in this folder. You add actions to ImageReady by dragging actions into the ImageReady Actions folder on your computer. Because ImageReady does not include a Load Actions command, you must add files to the ImageReady Actions folder manually.
Note: The default location of the Adobe ImageReady 7.0 Settings folder varies by operating system. Use your operating system's Find command to locate this folder.
You can remove actions from ImageReady by dragging the actions out of the ImageReady Actions folder or by using the Delete Action command in the Actions palette menu. Actions you remove by dragging can be saved in another folder. Actions you remove by deleting are removed permanently.
If you add or remove files from the ImageReady Actions palette, you can direct
ImageReady to scan the Actions folder for changes and update the Actions palette.
(ImageReady scans the Actions folder and updates the Actions palette whenever you launch the application.)
To update the Actions folder:
1 Drag an action file into or out of the ImageReady Actions folder.
2 Choose Rescan Actions Folder from the Actions palette menu.
Organizing sets of actions (Photoshop)
To help you organize your actions, you can create sets of actions and save the sets to disk. You can organize sets of actions for different types of work-such as print publishing and online publishing-and transfer sets to other computers.
Although ImageReady doesn't allow you to create sets, you can manually organize actions in the ImageReady Actions folder. For example, if the Actions palette contains
too many actions, create a new folder inside the ImageReady Actions folder and move less-used actions from the ImageReady Actions folder to this new folder. The relocated actions are removed from the palette until you return them to the ImageReady Actions folder.
To create a new set of actions:
1 In
the Actions palette, click the New Set button
,
or choose New Set from the palette menu.
![]()
2 Enter the name of the set, and click OK.
To move an action to a different set:
In the Actions palette, drag the action to a different set. When the highlighted line appears in the desired position, release the mouse button.
To rename a set of actions:
1 In the Actions palette, choose Set Options from the pop-up menu.
2 Enter the name of the set, and click OK.
Using the Batch command (Photoshop)
The Batch command lets you play an action on a folder of files and subfolders. If you have a digital camera or a scanner with a document feeder, you can also import and process multiple images with a single action. Your scanner or digital camera may need an acquire plug-in module that supports actions. (If the third-party plug-in wasn't written to import multiple documents at a time, it may not work during batch-processing or if used as part of an action. Contact the plug-in's manufacturer for further information.)
When batch-processing files, you can leave all the files open, close and save the changes to the original files, or save modified versions of the files to a new location (leaving the originals unchanged). If you are saving the processed files to a new location, you may want to create a new folder for the processed files before starting the batch.
For better batch performance, reduce the number of saved history states and deselect the Automatically Create First Snapshot option in the History palette.
To batch-process files using the Batch command:
1 Choose File > Automate > Batch.
2 For Play, choose the desired set and action from the Set and Action pop-up menus.
3 For Source, choose a source from the pop-up menu:
. Folder to play the action on files already stored on your computer. Click Choose to locate and select the folder.
. Import to import and play the action on images from a digital camera or scanner.
. Opened Files to play the action on all open files.
. File Browser to play the action on the selected files in the File Browser.
4 Select Override Action "Open" Commands if you want Open commands in the action to refer to the batched files, rather than the filenames specified in the action. If you select this option, the action must contain an Open command because the Batch command will not automatically open the source files.
Deselect Override Action "Open" Commands if the action was recorded to operate on open files or if the action contains Open commands for specific files that are required by the action.
5 Select Include All Subfolders to process files in subfolders.
6 Select Suppress Color Profile Warnings to turn off display of color policy messages.
7 Choose a destination for the processed files from the Destination menu:
. None to leave the files open without saving changes (unless the action includes a
Save command).
. Save and Close to save the files in their current location, overwriting the original files.
. Folder to save the processed files to another location. Click Choose to specify the destination folder.
8 Select Override Action "Save As" Commands if you want Save As commands in the action to refer to the batched files, rather than the filenames and locations specified in the action. If you select this option, the action must contain a a Save As command because the Batch command will not automatically save the source files.
Deselect Override Action "Save As" Commands if the action contains Save As commands for specific files that are required by the action.
9 If you chose Folder as the destination, specify a file-naming convention and select file compatibility options for the processed files:
. For File Naming, select elements from the pop-up menus or enter text into the fields to be combined into the default names for all files. The fields let you change the order and formatting of the filename parts. You must include at least one field that is unique for every file (for example, filename, serial number, or serial letter) to prevent files from overwriting each other.
. For File Name Compatibility, choose Windows, Mac OS, and UNIX to make filenames compatible with Windows, Mac OS, and UNIX operating systems.
Saving files using the Batch command options always saves the files in the same format as the original files. To create a batch process that saves files in a new format,
record the Save As command followed by the Close command as part of your original action. Then choose Override Action "Save In" Commands for the Destination when setting up the batch process.
10 Select an option for error processing from the Errors pop-up menu:
. Stop for Errors to suspend the process until you confirm the error message.
. Log Errors to File to record each error in a file without stopping the process. If errors are logged to a file, a message appears after processing. To review the error file, click Save As and name the error file.
To batch-process using multiple actions, create a new action and record the Batch command for each action you want to use. This technique also lets you process
multiple folders in a single batch. To batch-process multiple folders, create aliases within a folder to the other folders you want to process, and select the Include All Subfolders option.
Using droplets
A droplet is a small
application that applies
an action to one or more images
that you drag
onto
the droplet icon: ![]() in Photoshop or
in Photoshop or ![]() in ImageReady. You can save a droplet on the
desktop or to a location on disk.
in ImageReady. You can save a droplet on the
desktop or to a location on disk.
Creating a droplet from an action
Actions are the basis for creating droplets-you must create the desired action in the
Actions palette prior to creating a droplet. (See "Recording actions" on section 485.)
In ImageReady, you can also create droplets with the Optimize palette, so that you can apply Optimize palette settings to single images or batches of images.
To create a droplet from an action (Photoshop):
1 Choose File > Automate > Create Droplet.
2 Click Choose in the Save Droplet In section of the dialog box, and select a location to save the droplet.
3 Select the desired set and action from the Set and Action menus.
4 Set Play options for the droplet:
. Select Override Action "Open" Commands if you want Open commands in the action to refer to the batched files, rather than the filenames specified in the action. Deselect Override Action "Open" Commands if the action was recorded to operate on open files or if the action contains Open commands for specific files that are required by the action.
. Select Include All Subfolders to process files in subdirectories.
. Select Suppress Color Profile Warnings to turn off display of color policy messages.
5 Select a destination for the processed files from the Destination menu:
. None to leave the files open without saving changes (unless the action included a
Save command).
. Save and Close to save the files in their current location.
. Folder to save the processed files to another location. Click Choose to specify the destination folder. Select Override Action "Save As" Commands if you want Save As commands in the action to refer to the batched files, rather than the filenames and locations specified in the action. Deselect Override Action "Save As" Commands if the action contains Save As commands for specific files that are required by the action.
6 If you chose Folder as the destination, specify a file-naming convention and select file compatibility options for the processed files:
. For File Naming, select elements from the pop-up menus or enter text into the fields to be combined into the default names for all files. Elements include document name, serial number or letter, file creation date, and file extension.
. For File Name Compatibility, choose Windows, Mac OS, and UNIX to make filenames compatible with Windows, Mac OS, and UNIX operating systems.
7 Select an option for error processing from the Errors pop-up menu:
. Stop for Errors to suspend the process until you confirm the error message.
. Log Errors to File to record each error in a file without stopping the process. If errors are logged to a file, a message appears after processing. To review the error file, click Save As and name the error file.
To create a droplet from an action (ImageReady):
1 For best results,
make sure that the action contains at least one Set Optimization command. To
add a Set Optimization command,
adjust the settings in the Optimize
palette, and then drag the droplet
icon ![]() from
the Optimize palette onto
the part of the Actions palette where
you want to add that command.
from
the Optimize palette onto
the part of the Actions palette where
you want to add that command.
If you do not add a Set Optimization command to the droplet, ImageReady will process files using the optimization settings in place at the time the droplet was created.
2 Create the droplet:
. Drag the name of the action from the Actions palette onto the desktop. The droplet has the same name as the action it was created from. You can rename the droplet as you do other desktop icons.
. Select an action, and choose Create Droplet from the Actions palette menu. Name the droplet, choose a location where the droplet will be saved, and click Save.
Creating droplets for use on different operating systems
When creating droplets that may be used in both Windows and Mac OS, keep the following compatibility issues in mind:
. When moving a droplet created in Windows to Mac OS, drag the droplet onto the
Photoshop icon. Photoshop will launch and update the droplet for use in Mac OS.
. When creating a droplet in Mac OS, use the .exe extension to make droplets compatible with both Windows and Mac OS.
. References to filenames are not supported between operating systems. Any action step that references a file or folder name (such as an Open command, Save command, or adjustment command that loads its settings from a file) will pause and prompt the user for a filename.
Using droplets to process files
To use a droplet, simply drag
a file or folder onto the droplet
icon: ![]() in Photoshop
or
in Photoshop
or ![]() in ImageReady. If the application you used to
create
the droplet is not currently running, the droplet launches
it.
in ImageReady. If the application you used to
create
the droplet is not currently running, the droplet launches
it.
In ImageReady, you can control droplet processing in the following ways:
. To temporarily pause processing, click Pause. Click Resume to continue the processing.
. To cancel processing, click Stop.
Editing droplets (ImageReady)
In ImageReady, you can edit the commands in a droplet in the same ways you edit the commands in an action. You can also set batch options for a droplet before or after you create it. For example, you can set the droplet to operate in the background during execution, so that you can work in other applications while ImageReady processes images. To edit a droplet:
1 Double-click the droplet to open the droplet window in ImageReady. The droplet window looks like a simplified version of the Actions palette.
2 Edit the droplet in the same ways you would edit an action:
. Change the order of commands by dragging them in the droplet list.
. Delete commands
by dragging them to the Trash button
![]() .
.
. Add a command by dragging a state from the History palette to the area in which you want the command recorded in the droplet window.
To adjust droplet batch options:
1 Do one of the following:
. Before you create the droplet, select an action and choose Batch Options from the
Actions palette menu.
. After you create the droplet, double-click the droplet to open the droplet window, and double-click Batch Options at the top of the droplet list.
2 Select Original (same name and folder) to save the original file with the same name and in the same folder.
3 Select Optimized to save an optimized version of the file. Then do any of the following:
. For In, choose the location in which you want to save the optimized file.
. For If Duplicate File Name, choose how and whether to append numbers or letters to indicate the optimized file in cases of duplicate filenames.
. For Modify File Name For, choose whether ImageReady appends or rewrites the filename using Windows, Mac OS, or UNIX file-naming conventions.
4 Select playback options:
. Run In Background to hide ImageReady during droplet execution, so that you can work in other applications while processing takes place. When you select Run In Background, other playback options requiring user input during processing are turned off. ImageReady appears when the droplet completes execution.
Note: ImageReady is not available for creating and modifying current images while background processing is taking place.
. Display Image to show the images as they are being processed.
. Pause Before Save to stop the processing of each image before saving it.
5 Choose error options from the Errors menu:
. Stop to suspend the process until you confirm the error message.
. Skip Step to not process steps in which errors are encountered.
. Skip File to not process files in which errors are encountered.
Using droplets to automate optimization settings (ImageReady)
You can save Optimize palette settings for use on individual images or batches of images by creating a droplet for the settings. The droplet lets you apply the compression settings to an image or batch of images that you drag onto the droplet icon.
To create a droplet for automating Optimize palette settings:
1 With an image displayed in the image window, choose a compression format and desired compression options in the Optimize palette. (See "Optimizing images" on section 415.)
2 Create a droplet:
. Drag the droplet
icon
![]() from
the Optimize palette onto
the desktop.
from
the Optimize palette onto
the desktop.
The droplet is named with a brief description of the compression settings, including file format and color palette or quality setting information. You can rename the droplet as you do other desktop icons.
. Click the droplet icon on the Optimize palette. Name the droplet, choose a location where the droplet will be saved, and click Save.
. Choose Create Droplet from the Optimize palette menu. Name the droplet, choose a location where the droplet will be saved, and click Save.
You can add optimization settings to an action by dragging the droplet icon in the
Optimize palette to the Actions palette.
Using the Automate commands (Photoshop)
The Automate commands simplify complex tasks by combining them into one or more dialog boxes. Photoshop includes the following commands (third-party companies may provide additional commands):
. Conditional Mode Change changes the color mode of an image to the mode you specify, based on the original mode of the image. Record this command in an action to ensure that images use the correct color mode and avoid generating unwanted error messages.
. Contact Sheet produces a series of thumbnail previews on a single sheet from the files in the selected folder. (See "Creating contact sheets" on section 464.)
. Fit Image fits the current image to the width and height you specify, without changing its aspect ratio.
Note: This will resample the image, changing the amount of data in the image.
. Multi-Page PDF to PSD converts each page of a PDF document you select to a separate
Photoshop file. (See "Opening and importing PDF files" on section 74.)
. Picture Package places multiple copies of a source image on a single page, similar to the photo packages traditionally sold by portrait studios. (See "Creating picture packages" on section 464.)
. Web Photo Gallery generates a Web site from a set of images-complete with a thumb- nails index page, individual JPEG image pages, and navigable links. (See "Creating Web photo galleries (Photoshop)" on section 390.)
To use an automated command:
Choose File > Automate, and then choose any of the commands listed under it.
External automation
Photoshop supports some external automation using OLE Automation ( Windows) or AppleScript (Mac OS). Using either of these methods lets you start Adobe Photoshop and execute actions externally.
Using external automation lets you perform such tasks as:
. Having another scriptable application generate a series of files, and having Photoshop batch-process them.
. Having Photoshop batch-process files and save them to your Web site.
. Writing a script that runs an action and then shuts down your computer late at night after you've gone home.
If you have further questions about OLE, contact Microsoft Corporation. For questions about AppleScript, see your Mac OS documentation or contact Apple Computer.
Creating templates for data-driven graphics (ImageReady) Templates for data-driven graphics streamline how designers and developers work together in high-volume publishing environments.
About data-driven graphics
Data-driven graphics make it possible to produce multiple versions of an image quickly and accurately. Let's say, for example, that you need to produce 500 different Web banners based on the same template. In the past, you had to manually populate the template with data (images, text, and so on). With data-driven graphics, you can use a script referencing a database to generate the Web banners for you.
You can turn any image into a template for data-driven graphics by defining variables for layers in the image. In addition, you can create different sets of variable data to view what your template will look like when it is rendered.
Using variables
You use variables to define which elements in a template are dynamic (changeable). A variable's type corresponds to the type of data you want to change in a template. Visibility variables let you show or hide the content of a layer. Pixel Replacement variables let you replace the pixels in the layer with pixels from another image file. Text Replacement variables let you replace a string of text in a type layer.
A
B

C
A
B
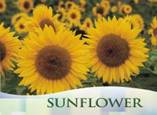
C
Two versions of a Web image based on the same template:
A. Visibility variable B. Pixel Replacement variable C. Text Replacement variable
To define variables:
1 In the Layers palette, select a layer for which you want to define variables.
Note: You cannot define variables for the Background layer.
2 Choose Image > Variables > Define, or choose Variables from the Layers palette menu.
3 Select one or more types of variables:
. Visibility to show or hide the content of the layer.
. Pixel Replacement to replace the pixels in the layer with pixels from another image file. Note: You specify the replacement image when you define a data set. (See " Using data sets" on section 503.)
. Text Replacement to replace a string of text in a type layer.
4 If desired, enter names for the variables. Variable names must begin with a letter, under- score, or colon and cannot contain spaces or special characters (except for periods, hyphens, underscores, and colons).
5 For Pixel Replacement variables, click Pixel Replacement Options, and do the following:
. Choose a method for scaling the replacement image: Fit to scale the image to fit within the bounding box (which may leave parts of the bounding box empty); Fill to scale the image to entirely fill the bounding box (which may cause the image to extend beyond the bounding box); As Is to not scale the image; Conform to scale the image non- proportionally to fit within the bounding box.
. Click a handle on the alignment
icon
![]() to
choose an alignment for placing the
image inside the bounding box.
to
choose an alignment for placing the
image inside the bounding box.
. Select Clip to Bounding Box to clip areas of the image that do not fit within the bounding box. This option is only available when the Fill replacement method or As Is replacement method is selected.
6 To define variables for an additional layer, choose a layer from the Layer pop-up menu. Repeat Steps 3 through 5.
7 Click OK.
To rename a variable:
1 Choose Image > Variables > Define, or choose Variables from the Layers palette menu.
2 Choose the layer which contains the variable from the Layer pop-up menu.
3 Enter a name in the Name text box. Variable names must begin with a letter, under- score, or colon and cannot contain spaces or special characters (except for periods, hyphens, underscores, and colons).
Note: If you are using data sets and want to rename a variable globally (in all layers), change the name in the Data Sets section of the Variable dialog box. (See " Using data sets" on section 503.)
To remove variables:
1 Choose Image > Variables > Define, or choose Variables from the Layers palette menu.
2 Choose a layer from the Layer pop-up menu.
3 Deselect one or more variables.
4 Repeat Steps 2 and 3 to remove variables from additional layers, then click OK.
Using data sets
A data set is a collection of variables and associated data. You can switch between data sets to upload different data into your template.
To edit the default data set:
1 Do one of the following:
. Choose Image > Variables > Data Sets.
. If the Variables dialog box is open, choose Data Sets from the pop-up menu at the top of the dialog box, or click Next.
. Choose Variables from the Layers palette menu. Then choose Data Sets from the pop-up menu at the top of the dialog box, or click Next.
Note: You must define at least one variable before you can edit the default data set.
2 Select a variable from the Name pop-up menu or the list at the bottom of the dialog box.
3 Edit the variable data:
. For Visibility variables ![]() ,
select Visible to show
the layer's content or Invisible
to hide the layer's content.
,
select Visible to show
the layer's content or Invisible
to hide the layer's content.
. For
Pixel Replacement variables ![]() ,
click Browse ( Windows) or Choose
(Mac OS) and select a replacement image file.
,
click Browse ( Windows) or Choose
(Mac OS) and select a replacement image file.
. For Text
Replacement variables ![]() , enter a text
string in the Value text box.
, enter a text
string in the Value text box.
4 Repeat Steps 2 and 3 for every variable in the template.
5 Do one of the following:
.
Click the Save Data Set button .
![]()
. Click OK.
To create a new data set:
1 Click
the New Data Set button .
![]()
2 Edit the variable data, and click the Save Data Set button.
To rename a data set:
Enter a name in the Data Set text box.
To select a data set:
Do one of the following:
. Choose a data set from the Data Set pop-up menu.
. Click the Previous
Data Set button ![]() to
select the previous set in the list.
to
select the previous set in the list.
. Click the
Next Data Set button ![]() to
select the next set in the list.
to
select the next set in the list.
To change the data in a data set:
Select the data set you want to modify, edit the variable data, and click the Save Data Set button.
To delete a data set:
Select
the data set you want to delete,
and click the Trash button ![]() .
.
Previewing data-driven graphics
Preview Document mode lets you preview how a template will look when it is rendered using different sets of data.
To enable or disable Preview Document mode:
Do one of the following:
. Choose Image > Preview Document. A check mark appears next to the command when
Preview Document mode is enabled.
. Click the Preview Document button in the tool box.
To preview data-driven graphics:
1 Enable Preview Document mode.
2 In the options bar, choose a data set from the Data Set pop-up menu, click the Previous
![]()
Data Set button ,
or click the Next Data Set button . The
data changes in the document window.
![]()
Saving templates for use with other Adobe products
You can save a template in PSD format for use with other Adobe products, such as Adobe AlterCast (available only in English) and Adobe GoLive 6.0. For example, a GoLive user can place a PSD template in a page layout, bind its variables to a database using dynamic links, and then use AlterCast to generate iterations of the artwork. Likewise, a developer working with AlterCast can bind the variables in the PSD file directly to a database or another data source.
For more information on using PSD templates to create data-driven graphics, see the
Adobe GoLive User Guide, GoLive online Help, and the Adobe AlterCast Developer Guide.
|
Politica de confidentialitate | Termeni si conditii de utilizare |

Vizualizari: 909
Importanta: ![]()
Termeni si conditii de utilizare | Contact
© SCRIGROUP 2025 . All rights reserved