| CATEGORII DOCUMENTE |
| Asp | Autocad | C | Dot net | Excel | Fox pro | Html | Java |
| Linux | Mathcad | Photoshop | Php | Sql | Visual studio | Windows | Xml |
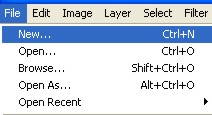
1. First of all to open a new Document. Go to Menu, select
File > new and then a new document will appear.
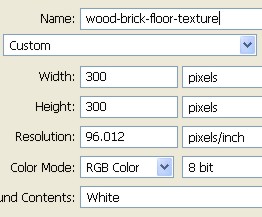
In the new Document type the name of the document and then
specfy the size width = 300 pixel, height = 300 pixel
and
resolution = 96.012 pixel/inch. You can do it with the
file new > then press Ctrl+N.
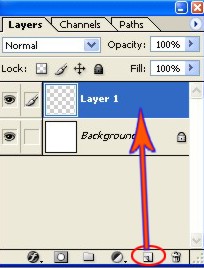
[2]-. Now look at your right, you will see
the layer window. Here in the Layer window
create a new Layer by clicking on the icon
which is encircled with Red. This layer will
be named as Layer1 by default
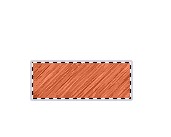
|
|
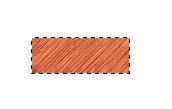
3. Now select Rectangular Marquee
Tool from the Toolbar and create a new
shape as shown below.

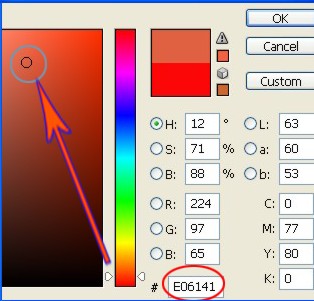
[4]-Now to fill the layer with the color
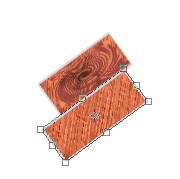
code # E06141, go to the toolbar and click
on the 2 square shape icon which is used
for set foreground color. Enter the code
#E06141 in the field marked as # in the
color picker and press ok. This is how
you choose the color, now to fill the layer
press Alt+ Backspace
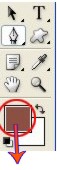
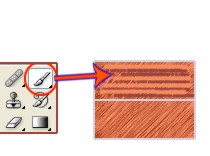
5. Now in the Toolbar click on the Gradient
Tool and press it for longer time then you
will get Pain Bucket Tool now select Pain
Bucket Tool.
![]()
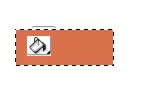
6. Now click on the shape with the Paint
Bucket Tool and the shape will be filled
with the color.
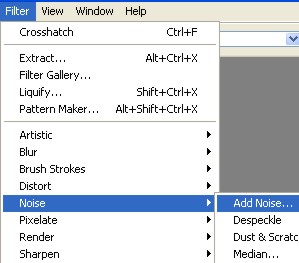
7. Now here from Menubar Select >
Filter > Noise > Add Noise.
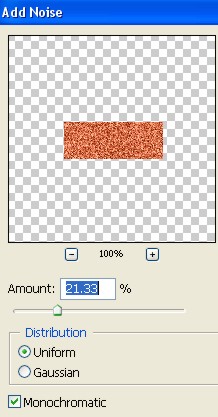
8. In the Add Noise select Amount: 21.33 %
/ Uniform / Monochromatic click ok.
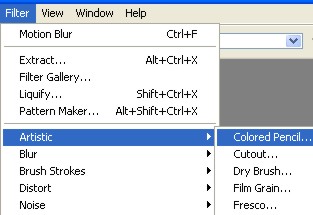
9. Now again select FIlter > Artistic >
Colored Pencil.
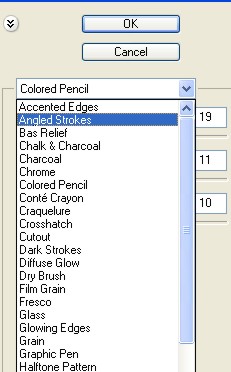
10.When you click on the colored Pencil you
will get the window which is shown below
click on the red circle.

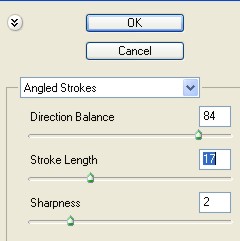
11. In the step 11 when you click on the
red circle you will get another window
as shown below from there select Angled
Stroke.
|
|
12. In the Angled Stroke select Direction
Balance-84 / Stroke Length-17 / Sharpness-2
click ok.
13. Now the Image will look like
this as shown below.
14.Now select Rectagular
Marquee
Tool or Lasoo Tool > Right click >
Select Stroke.
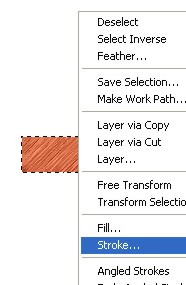
15. When you click on Stroke you will
get a window as shown below select
Width-2 px / Location- outside / color
#D2D3E1 to choose the color click
on the red circle click ok after
that Deselect Ctrl+D.
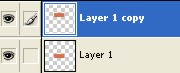
16. To make a copy of the Layer Press
Ctrl+J and then select Moove
Tool
from the Toolbarafter that with the
Move Tool drag the copied shape.
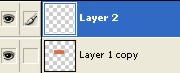
17. Now create a new Layer2.
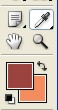
18. In the Toolbar click on the Forground
color and select a new color #A34A41.
19. Now select Brush Tool from the
Toolbar and draw lines as shown below.
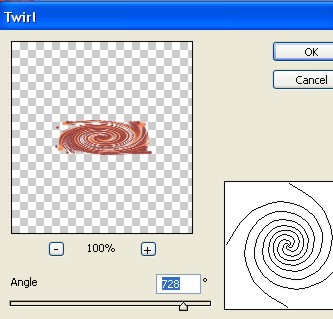
20. Now click on the copied Layer1 while
pressing Ctrl for the selection and then select Filter
> Distort > Twirl with the Angle= 728 click ok.
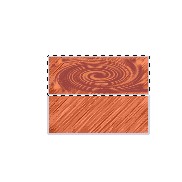
21. Now the Image will look like this and
then select Layer2 and press Ctrl+E to
merge both Layers.
22. Now press Ctrl+T for Transform
selection and the make the corners of
Transform se;ection round
with the
help of mouse after that press Enter
to finish the Transform Selection.
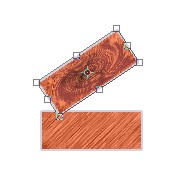
23. Now select Layer1 and repeat step 22.
24. Now make copy of the Layers
and arrange them with the Transform
selection as shown below.
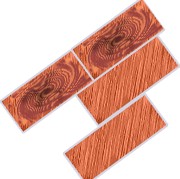
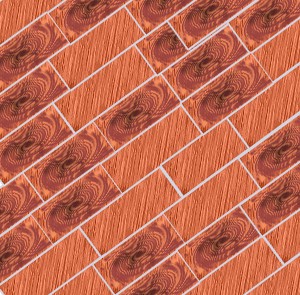
25. Final Image.
|
Politica de confidentialitate | Termeni si conditii de utilizare |

Vizualizari: 1097
Importanta: ![]()
Termeni si conditii de utilizare | Contact
© SCRIGROUP 2025 . All rights reserved