| CATEGORII DOCUMENTE |
| Asp | Autocad | C | Dot net | Excel | Fox pro | Html | Java |
| Linux | Mathcad | Photoshop | Php | Sql | Visual studio | Windows | Xml |
Preparing Graphics for the Web
About optimization
Optimization is the process of fine-tuning the display quality and file size of an image for use on the Web or other online media. Adobe Photoshop and Adobe ImageReady give you an effective range of controls for compressing the file size of an image while optimizing its online display quality.
There are two methods of optimizing images:
. For basic optimization, the Photoshop Save As command lets you save an image as a GIF, JPEG, PNG, or WBMP file. Depending on the file format, you can specify image quality, background transparency or matting, color display, and downloading method. However, any Web features-such as slices, links, animations, and rollovers-that you've added to a file are not preserved.
For complete information on using the Save As command to save an image as a GIF, JPEG, or PNG file, see "Saving images" on section 446.
. For precise optimization, you can use the optimization features in Photoshop or ImageReady to preview optimized images in different file formats and with different file attributes. You can view multiple versions of an image simultaneously and modify optimization settings as you preview the image to select the best combination of settings for your needs. You can also specify transparency and matting, select options to control dithering, and resize the image to specified pixel dimensions or a specified percentage of the original size.
When you save an optimized file using the Save for Web (Photoshop) or Save Optimized
(ImageReady) command, you can choose to generate an HTML file for the image. This file contains all the necessary code to display your image in a Web browser.
Optimizing images
In Photoshop, you use the Save for Web dialog box to select optimization options and preview optimized artwork. In ImageReady, you can view and work with optimized images at any time in the document window.
415
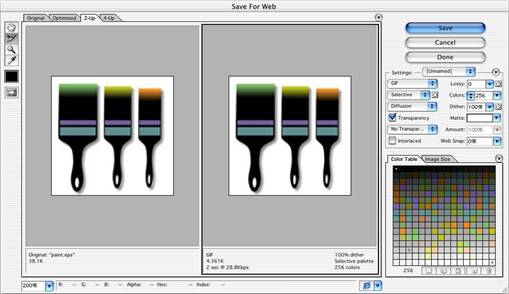
Using the Save for Web dialog box (Photoshop)
You use the Save for Web dialog box to select optimization options and preview optimized artwork.
A B
C
D
E F G
Save for Web dialog box
A. Toolbox B. Preview pop-up menu C. Optimize pop-up menu D. Color Table pop-up menu
E. Zoom text box F. Original image G. Optimized image
Displaying the Save for Web dialog box Choose File > Save for Web.
Previewing images Click a tab at the top of the image area to select a display option: Original to view the image with no optimization, Optimized to view the image with the current optimization settings applied, 2-Up to view two versions of the image side by side, or 4-Up to view four versions of the image side-by-side.
If the entire artwork is not visible
in the Save for Web dialog box, you can use the hand tool to
bring another area into view. Select the hand tool ![]() (or hold down the spacebar), and drag
in the view area to pan over
the image. You can also use
the zoom tool to magnify or reduce
the view. Select the zoom tool
(or hold down the spacebar), and drag
in the view area to pan over
the image. You can also use
the zoom tool to magnify or reduce
the view. Select the zoom tool ![]() , and click in a view to zoom
in; hold down Alt
, and click in a view to zoom
in; hold down Alt
(Windows) or Option (Mac OS), and click in a view to zoom out. Alternatively, you can specify a magnification level in the Zoom text box at the bottom of the Save for Web dialog box.
Selecting a view Click a different pane in the Save for Web dialog box to select a new view. If you're working in 2-Up or 4-Up view, you must select a view before you apply optimization settings. A black frame indicates which view is selected.
Viewing annotations The annotation area below each image in the Save for Web dialog box provides valuable optimization information. The annotation for the original image shows the filename and file size. The annotation for the optimized image shows the current optimization options, the size of the optimized file, and the estimated download time using the selected modem speed. You can choose a modem speed in the Preview pop-up menu.
Working with slices in the Save for Web dialog box (Photoshop)
If your artwork contains multiple slices, you must specify the slices to be optimized. You can apply optimization settings to additional slices by linking the slices. Linked slices in GIF and PNG-8 format share a color palette and dither pattern to prevent the appearance of seams between the slices.
To show or hide all slices in the Save for Web dialog box:
Click
the Toggle
Slices Visibility button ![]() .
.
To show or hide auto slices in the Save for Web dialog box:
Choose Hide Auto Slices from the Preview pop-up menu. A check mark indicates that slices are hidden.
To select slices in the Save for Web dialog box:
1 Select the
slice select tool ![]() .
.
2 Click a slice to select it. Shift-click or Shift-drag to select multiple slices.
Note: In the Save for Web dialog box, unselected slices are dimmed. This does not affect the color of the final image.
To view slice options in the Save for Web dialog box:
Select the slice select tool, and double-click a slice. (See "Specifying slice options" on section 378.)
To link slices:
1 Select two or more slices that you want to link.
2 Choose
Link Slices from the Optimize pop-up
menu
![]()
![]() . The link icon appears on the linked slices.
. The link icon appears on the linked slices.
To unlink slices:
Do one of the following:
. To unlink a slice, select the slice, and then choose Unlink Slice from the Optimize pop-up menu.
. To unlink all slices in an image, choose Unlink All Slices from the Optimize pop-up menu.
Using the Optimize palette (ImageReady)
You use the Optimize palette to select optimization options. This palette corresponds to the Optimize panel in the Photoshop Save for Web dialog box.
Displaying
the Optimize palette Choose Window
> Optimize. To show
all the optimi- zation options, click the Show Options control ![]() on the Optimize palette tab or
choose Show Options from the Optimize palette menu.
on the Optimize palette tab or
choose Show Options from the Optimize palette menu.
Using the Optimize palette menu Click
the triangle ![]() in the upper right corner of the palette.
in the upper right corner of the palette.
Viewing optimized images (ImageReady)
In ImageReady, you view and work with optimized images directly in the document window. You can view up to four versions of an optimized image simultaneously and easily switch between the optimized and original (non-optimized) versions of an image.
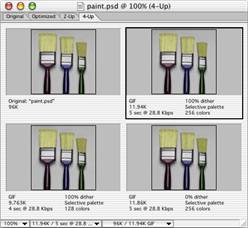
Document window in 4-Up mode
To preview optimized images:
Click a tab at the top of the document window to select a display option:
. Original to view the image with no optimization.
. Optimized to view the image with the current optimization settings applied.
. 2-Up to view two versions of the image side by side.
. 4-Up to view four versions of the image side- by-side.
To select a view:
Click the view you want to select. A black frame indicates which view is selected. Note: If you're working in 2-Up or 4-Up view, you must select a view before you apply optimization settings.
In 2-Up and 4-Up view, the annotation area below each view provides valuable optimi- zation information. The annotation for the original image shows the filename and file size. The annotation for the optimized image shows the current optimization options, the size of the optimized file, and the estimated download time using the selected modem speed. You can choose a modem speed in the image information box at the bottom of the document window. (See "Displaying file and image information" on section 48.)
To hide or show optimization annotations in 2-Up and 4-Up mode:
Choose View > Hide Optimization Info or View > Show Optimization Info.
Applying optimization settings
You use the Optimize panel in the Save for Web dialog box (Photoshop) and the Optimize palette (ImageReady) to set optimization options. If you're working in 2-Up or 4-Up mode, you can repopulate the views to automatically generate lower-quality versions of the image based on the selected settings.
To apply optimization settings:
1 Select a view to which you want to apply optimization settings.
2 If your artwork contains multiple slices, select one or more slices to which you want to apply the optimization settings. (See "Working with slices in the Save for Web dialog box
(Photoshop)" on section 417 and "Selecting slices" on section 373.)
3 Do one of the following:
. Choose a named optimization setting from the Settings menu. For information on creating custom named settings, see "Saving and resetting optimization settings" on section 425.
. Choose a file format from the File Format menu.
4 Set additional optimization options. The file format you chose in Step 3 determines which options are available to you.
For more information on specific optimization options, see "Optimization options for GIF
and PNG-8 formats" on section 420, "Optimization options for JPEG format" on section 423,
"Optimization options for PNG-24 format" on section 424, and "Optimization options for
WBMP format" on section 424.
To apply optimization settings based on file size:
1 Choose Optimize to File Size from the Optimize pop-up menu (Photoshop) or the
Optimize palette menu (ImageReady).
2 Choose a Start With option:
. Current Settings to use current optimization settings.
. Auto Select GIF/JPEG to automatically generate a GIF or JPEG file. (Photoshop or ImageReady selects GIF or JPEG format, depending on its analysis of colors in the image.)
3 Enter a value for file size, and click OK.
To repopulate optimization settings:
1 Apply optimization settings to a view in 2-Up or 4-Up mode.
2 Choose Repopulate Views from the Optimize pop-up menu (Photoshop) or the
Optimize palette menu (ImageReady).
The the optimization settings for the selected view and the original view are not altered during repopulation.
To restore an optimized version of an image to the original version:
1 Select an optimized version of the image in 2-Up or 4-Up mode.
2 In the Optimize panel/palette, choose Original from the Settings pop-up menu.
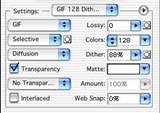
Optimization options for GIF and PNG-8 formats
GIF is the standard format for compressing images with flat color and crisp detail, such as line art, logos, or illustrations with type. You can lower the size of GIF images by reducing the number of colors in the file. Like the GIF format, the PNG-8 format efficiently compresses solid areas of color while preserving sharp detail; however, not all Web browsers can display PNG-8 files. PNG-8 settings are very similar to the GIF settings.
(See "About file formats" on section 453.)
E
A B
C
D
Optimization panel for GIF format:
A. File format menu B. Color Reduction Algorithm menu C. Dither Algorithm menu
D. Transparency dithering menu E. Optimize menu
Note: In
ImageReady, you can control which options show in the Optimize palette by
clicking the Show Options control ![]() on the Optimize palette tab. To show all options, choose Show Options
from the Optimize palette menu.
on the Optimize palette tab. To show all options, choose Show Options
from the Optimize palette menu.
Lossy (GIF only) Specify a Lossy value to allow for lossy compression. Lossy compression reduces file size by selectively discarding data-a higher Lossy setting results in more data being discarded. You can often apply a Lossy value of 5-10, and sometimes up to 50, without degrading the image. File size can often be reduced 5%-40% using the Lossy option.
You can use masks from type layers, shape layers, and alpha channels to vary lossy compression across an image. This technique produces higher-quality results in critical image areas without sacrificing file size. (See "Using weighted optimization" on section 428.) Note: You cannot use the Lossy option with the Interlaced option or with Noise or Pattern Dither algorithms.
Color Reduction Algorithm and Colors Choose a algorithm for generating a color table from the Color Reduction Algorithm menu. (See "Generating a color table" on section 431.) Then specify the maximum number of colors in the Colors text box. If you choose Web for the color reduction algorithm, the Auto option becomes active in the Colors pop-up menu. Use the Auto option if you want Photoshop or ImageReady to determine the number of colors in the color table based on the frequency of colors in the image.
You can use masks from type layers, shape layers, and alpha channels to vary color reduction across an image. This technique produces higher-quality results in critical image areas without sacrificing file size. (See "Using weighted optimization" on section 428.)
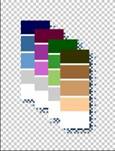
Dithering Dithering
refers
to the method of simulating colors not available in the color
display system of your computer. Images
with primarily solid
colors may work well with no
dither. Images with continuous-tone color
(especially color gradients) may require dithering to prevent color
banding.
GIF image with 0% dither, and with 100% dither
Choose a option from the Dither Algorithm menu:
. No Dither applies no dither to the image.
. Diffusion applies a random pattern that is usually less noticeable than Pattern dither. The dither effects are extended across adjacent pixels. If you select this algorithm, specify a Dither percentage to control the amount of dithering that is applied to the image. A higher dithering percentage creates the appearance of more colors and more detail in an image, but can also increase the file size. You can use masks from type layers, shape layers, and alpha channels to vary the Dither percentage across an image. This technique produces higher-quality results in critical image areas without sacri- ficing file size. (See "Using weighted optimization" on section 428.)
Note: Diffusion dither may cause detectable seams to appear across slice boundaries. Linking slices diffuses the dither pattern across all linked slices, and eliminates the seams.
. Pattern applies a halftone-like square pattern to simulate any colors not in the color table.
. Noise applies a random pattern similar to the Diffusion dither algorithm, but without diffusing the pattern across adjacent pixels. No seams appear with the Noise algorithm.
Transparency and Matte Select a combination of Transparency and Matte options to specify how transparent pixels in the image are optimized:
. To make fully transparent pixels transparent and blend partially transparent pixels with a color, select Transparency and select a matte color.
. To make all pixels with greater than 50% transparency fully transparent and all pixels with 50% or less transparency fully opaque, select Transparency and choose None from the Matte menu.
. To fill fully transparent pixels with the selected color and blend partially transparent pixels with the same color, select a matte color and deselect Transparency.
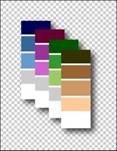
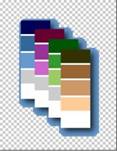
A
B
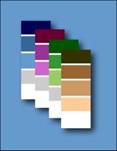

C D
Examples of transparency and matting:
A. Original image B. Transparency selected with a matte color C. Transparency selected with no matting D. Transparency deselected with a matte color
To select a matte color, click the Matte color swatch and select a color in the color picker. Alternatively, choose an option from the Matte menu. The matte color should match the background color of the Web page.
Transparency Dithering When the Transparency option is selected, you can choose a method for dithering partially transparent pixels:
. No Transparency Dither applies no dither to partially transparent pixels in the image.
. Diffusion Transparency Dither applies a random pattern that is usually less noticeable than Pattern dither. The dither effects are diffused across adjacent pixels. If you select this algorithm, specify a Dither percentage to control the amount of dithering that is applied to the image.
. Pattern Transparency Dither applies a halftone-like square pattern to partially trans- parent pixels.
. Noise Transparency Dither applies a random pattern similar to the Diffusion algorithm, but without diffusing the pattern across adjacent pixels. No seams appear with the Noise algorithm.
Example of Pattern Transparency dithering
Interlace Select Interlaced to create an image that displays as a low-resolution version in a browser while the full image file is downloading. Interlacing can make downloading time seem shorter and can assure viewers that downloading is in progress. However, inter- lacing also increases file size.
Web Snap Specify a tolerance level for shifting colors to the closest Web palette equiva- lents (and prevent the colors from dithering in a browser). A higher value shifts more colors.
Use Unified Color Table (ImageReady) Select to use the same color table for all rollover states.
Optimization options for JPEG format
JPEG is the standard format for compressing continuous-tone images such as photo- graphs. Optimizing an image as a JPEG format relies on lossy compression, which selec- tively discards data. (See "About file formats" on section 453.)
C
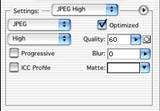
A B
Optimization panel for JPEG format:
A. File format menu B. Quality Level menu C. Optimize menu
Note: In
ImageReady, you can control which options show in the Optimize palette by
clicking the Show Options control ![]() on the Optimize palette tab. To show all options, choose Show Options
from the Optimize palette menu.
on the Optimize palette tab. To show all options, choose Show Options
from the Optimize palette menu.
Quality Choose an option from the Quality Level menu, or specify a value in the Quality text box. The higher the Quality setting, the more detail the compression algorithm preserves. However, using a high Quality setting results in a larger file size than using a low Quality setting. View the optimized image at several quality settings to determine the best balance of quality and file size.
You can use masks from type layers, shape layers, and alpha channels to vary the quality level across an image. This technique produces higher-quality results in critical image areas without sacrificing file size. (See "Using weighted optimization" on section 428.) Optimized Select Optimized to create an enhanced JPEG with a slightly smaller file size. The Optimized JPEG format is recommended for maximum file compression; however, some older browsers do not support this feature.
Progressive Select Progressive to create an image that displays progressively in a Web browser. The image will display as a series of overlays, enabling viewers to see a low- resolution version of the image before it downloads completely.
Note: Progressive JPEGs require more RAM for viewing, and are not supported by some browsers.
Blur Specify the amount of blur to apply to the image. This option applies an effect identical to that of the Gaussian Blur filter and allows the file to be compressed more, resulting in a smaller file size. A setting of 0.1 to 0.5 is recommended.
ICC Profile Select ICC Profile to preserve the ICC profile of the artwork with the file. ICC profiles are used by some browsers for color correction. (See "Setting up color management" on section 104.)
Matte Specify a fill color for pixels that were transparent in the original image:
. Click the Matte color swatch and select a color in the color picker.
. Choose an option from the Matte menu.
Pixels that were fully transparent in the original image are filled with the selected color, pixels that were partially transparent in the original image are blended with the selected color.
Preserve EXIF Metadata (ImageReady) Select to preserve metadata from a digital camera.
Optimization options for PNG-24 format
PNG-24 is suitable for compressing continuous-tone images; however, it produces much larger files than JPEG format. (See "About file formats" on section 453.)
The advantage of using PNG-24 is that it can preserve up to 256 levels of transparency in an image. To save an image with multilevel transparency, select Transparency. For more information on the Interlaced, Transparency, and Matte options, see "Optimization options for GIF and PNG-8 formats" on section 420.
Optimization options for WBMP format
WBMP format is the standard format for optimizing images for mobile devices, such as cell phones. WBMP supports 1-bit color, which means that WBMP images contain only black and white pixels.
Choose an option from the Dither Algorithm menu to determine the method for converting pixel values to black or white:
. No Dither applies no dither to the image.
. Diffusion applies a random pattern that is usually less noticeable than Pattern dither. The dither effects are diffused across adjacent pixels. If you select this algorithm, specify a Dither percentage to control the amount of dithering that is applied to the image. You can use masks from type layers, shape layers, and alpha channels to vary the Dither
percentage across an image. This technique produces higher-quality results in critical image areas without sacrificing file size. (See "Using weighted optimization" on
page 428.)
Note: Diffusion dither may cause detectable seams to appear across slice boundaries. Linking slices diffuses the dither pattern across all linked slices, and eliminates the seams.
. Pattern applies a halftone-like square pattern to determine the value of pixels.
. Noise applies a random pattern similar to the Diffusion dithering, but without diffusing the pattern across adjacent pixels. No seams appear with the Noise algorithm.
Saving and resetting optimization settings
You can save optimization settings as a named set and apply the settings to other images. Settings that you save appear in the Settings pop-up menu, together with the predefined named settings. If you edit a named set or a predefined set, the Settings menu displays the term "Unnamed."
In Photoshop, after you optimize an image, you can return to the artboard without losing your settings. When you choose the Save for Web command again, the optimization settings are just as you left them.
To save a named set of optimization settings:
1 Set optimization options as desired, and choose Save Settings from the Optimize pop-up menu (Photoshop) or the Optimize palette menu (ImageReady).
2 Name the settings, and save them in the Presets/Optimized Settings folder inside the
Photoshop program folder.
Note: If you save the settings in a location other than the Presets/Optimized Settings folder, they will not be available from the Settings pop-up menu.
To edit a named set of optimization settings:
1 Choose the named set from the Settings pop-up menu.
2 Edit the optimization settings as desired. The Settings menu will display the term
"Unnamed," since the settings no longer match a named set.
3 Choose Save Settings from the Optimize pop-up menu (Photoshop) or the Optimize palette menu (ImageReady), and save the settings with the name of the original set.
To delete optimization settings:
1 Choose a named set or predefined set of optimization settings from the Settings pop-up menu.
2 Choose Delete Settings from the Settings panel menu.
Note: You cannot restore deleted settings, so use the Delete Settings command with care.
To save the current optimization setting (Photoshop):
Do one of the following:
. To save the settings and close the Save for Web dialog box, click Done.
. To save the settings without closing the Save for Web dialog box, press Alt ( Windows) or
Option (Mac OS), and click Remember.
To reset optimization settings to the last saved version (Photoshop):
Press Alt ( Windows) or Option (Mac OS), and click Reset.
Resizing the image during optimization (Photoshop)
When optimizing an image in the Photoshop Save For Web dialog box, you can resize the image to specified pixel dimensions or to a percentage of the original size.
To change the pixel dimensions of an image during optimization:
1 Click the Image Size tab in the Save For Web dialog box.
2 To maintain the current proportions of pixel width to pixel height, select Constrain
Proportions.
3 Enter values for Width, Height, or Percent.
4 Choose an interpolation method from the Quality pop-up menu:
. Jagged (Nearest Neighbor) for the faster, but less precise, method. This method is recommended for use with illustrations containing non-anti-aliased edges, to preserve hard edges and produce a smaller file.
. Smooth (Bicubic) for the slower, but more precise, method, resulting in smoother tonal gradations.
For more information on interpolation, see "About resampling" on section 66.
5 Click Apply.
Controlling optimization (ImageReady)
By default, Photoshop and ImageReady automatically regenerate the optimized image when you click the Optimized, 2-Up, or 4-Up tab at the top of the document (if you have modified the image since the last optimization), when you change optimization settings with the optimized image displayed, or when you edit the original image.
In ImageReady, you can turn off auto-regeneration so that the last version of the optimized image remains in the image window until you manually reoptimize the image or reactivate auto-regeneration. This feature is useful if you want to edit the image without pausing for reoptimization with each modification. You can also cancel optimization while it's in progress, and preserve the previous image.
When auto-regeneration
is turned off, the Regenerate button appears in the lower- right corner of each optimized image view. A regeneration
alert symbol also appears in the Color Table palette if the optimized image is in GIF or PNG-8 format, indicating that the
color table is out of date.
![]()
To turn Auto Regenerate on or off:
In the Optimize palette, choose Auto Regenerate from the palette menu. A check mark indicates that the option is turned on.
To manually optimize an image:
Choose a method for optimizing:
.
Click the Regenerate button in the lower-right corner of the optimized
image (if it appears).
![]()
. Choose Regenerate from the Optimize palette menu.
Note: Manually optimizing an image does not turn auto-regeneration on.
To cancel optimization:
Click the Stop button next to the progress bar at the bottom of the image window.
Setting optimization preferences (ImageReady)
You can set preferences in ImageReady to determine the default optimization settings and the default configuration of panels in 2-Up and 4-Up views.
To set optimization preferences:
1 Do one of the following:
. In Windows and Mac OS 9.x, choose Edit > Preferences > Optimization.
. In Mac OS X, choose ImageReady > Preferences > Optimization.
2 Choose an option in the Default Optimization section:
. Previous Settings to automatically apply the last used optimization settings.
. Auto Selected GIF or JPEG to automatically optimize the image as a GIF or JPEG. ImageReady selects GIF or JPEG based on an analysis of the image.
. Named Setting and select an option from the Named Settings pop-up menu to apply that setting.
3 Under 2-Up Settings or 4-Up Settings, specify settings for the 1st, 2nd, 3rd, and 4th panes (3rd and 4th panes apply to 4-Up view only):
. Original to display the original image in the specified pane. ( This option is available for the first pane only.)
. Current to display the image with current Optimize palette settings in the specified pane. ( This option is available for all panes.)
. Auto to display a smaller optimized version of the image generated automatically by ImageReady, based on the current Optimize palette settings. ( This option is available for the second, third, and fourth panes.)
. Select one of the named settings to display the optimized image with those settings.
(This option is available for the second, third, and fourth panes.)
4 Click OK.
Using weighted optimization
Weighted optimization lets you smoothly vary optimization settings across an image using masks from text layers, shape layers, and alpha channels. This technique produces higher- quality results in critical image areas without sacrificing file size. With weighted optimi- zation, you can produce gradual variations in GIF, PNG-8, and WBMP dithering, lossy GIF settings, and JPEG compression. Weighted optimization also lets you favor colors in selected image areas when you generate a color table.
About masks and weighted optimization
Photoshop and ImageReady automatically generate masks when you create a type layer or a shape layer. You can also manually create masks and store them in alpha channels. When you use a mask to apply optimization settings, the white areas of the mask describe the highest level of image quality, while the black areas for the mask describe the lowest level of image quality. ( The level of optimization in gray areas of the mask decreases by a linear scale.)
Weighted optimization is available for
specific settings in the Optimize
panel/palette, as indicated by
the mask button ![]() . To
access the weighted optimization
dialog box, simply click the mask button.
. To
access the weighted optimization
dialog box, simply click the mask button.
To create masks for use during optimization:
Do one or more of the following:
. Create a type layer. (See "Creating type" on section 342.)
. Create a shape layer. (See "Creating shape layers" on section 201.)
. (Photoshop) Save a selection as a mask, or create a new alpha channel and use the painting and editing tools to modify it. (See "Storing masks in alpha channels" on section 280.)
. (ImageReady) Use a selection tool to select an area of the image. (See "Making pixel selections" on section 157.) Either save the selection using the Select > Save Selection command, or choose the Save Selection command from the Channel pop-up menu in the weighted optimization dialog box.
Using masks to modify JPEG quality
When you use masks to optimize the range of quality in a JPEG image, white areas of the masks yield the highest quality, and black areas of the masks yield the lowest quality. You can adjust the maximum and minimum level of quality in the Modify Quality Setting dialog box.
To use masks to modify JPEG quality:
1 In the Optimize panel/palette, choose a JPEG setting from the Settings menu, or choose
JPEG from the file format menu.
2 Click the
mask button ![]() to
the right of the Quality text box.
to
the right of the Quality text box.
3 Choose which masks to use:
. All Text Layers to use the masks from all text layers in the image.
. All Vector Shape Layers to use the masks from all shape layers in the image.
. Channel to choose an alpha channel from the menu. In ImageReady, you can choose
Save Selection to create a new alpha channel based on the current selection.
4 To preview the results of the weighted optimization, select the Preview option.
5 Define the quality range:
. To set the highest level of quality, drag the right (white) tab on the slider, enter a value in the Maximum text box, or use the arrows to change the current value.
. To set the lowest level of quality, drag the left (black) tab on the slider, enter a value in the Minimum text box, or use the arrows to change the current value.
6 Click OK.
Using masks to modify GIF lossiness
When you use masks to optimize the amount of lossiness (or quality reduction) in a GIF image, white areas of the masks yield the highest quality, and black areas of the masks yield the lowest quality. You can adjust the maximum and minimum level of quality reduction in the Modify Lossiness Setting dialog box.
To use masks to modify GIF lossiness:
1 In the Optimize panel/palette, choose a GIF setting from the Settings menu, or choose
GIF from the file format menu.
2 Click the
mask button ![]() to
the right of the Lossy text box.
to
the right of the Lossy text box.
3 Choose which masks to use:
. All Text Layers to use the masks from all text layers in the image.
. All Vector Shape Layers to use the masks from all shape layers in the image.
. Channel to choose an alpha channel from the menu. In ImageReady, you can choose
Save Selection to create a new alpha channel based on the current selection.
4 To preview the results of the weighted optimization, select the Preview option.
5 Define the quality range:
. To set the highest level of quality, drag the left (white) tab on the slider, enter a value in the Minimum text box, or use the arrows to change the current value.
. To set the lowest level of quality, drag the right (black) tab on the slider, enter a value in the Maximum text box, or use the arrows to change the current value.
Note: Lossiness is a reduction in quality; therefore, the highest level of image quality is defined by the Minimum value, and the lowest level of image quality is defined by the Maximum value. This is the opposite of the JPEG quality setting.
6 Click OK.
Using masks to modify dithering
When you use masks to optimize the amount of dithering in a GIF, PNG-8, or WBMP image, white areas of the masks yield the most dithering, and black areas of the masks yield the least dithering. You can adjust the maximum and minimum levels of dithering in the Modify Quality Setting dialog box.
To use masks to modify dithering:
1 In the Optimize panel/palette, choose a GIF or PNG-8 setting from the Settings menu, or choose GIF or PNG-8 from the file format menu.
2 Click the
mask button ![]() to
the right of the Dither text box.
to
the right of the Dither text box.
3 Choose which masks to use:
. All Text Layers to use the masks from all text layers in the image.
. All Vector Shape Layers to use the masks from all shape layers in the image.
. Channel to choose an alpha from the menu. In ImageReady, you can choose Save
Selection to create a new alpha channel based on the current selection.
4 To preview the results of the weighted optimization, select the Preview option.
5 Define the dithering range:
. To set the highest percentage of dithering, drag the right (white) tab on the slider, enter a value in the Maximum text box, or use the arrows to change the current percentage.
. To set the lowest percentage of dithering, drag the left (black) tab on the slider, enter a value in the Minimum text box, or use the arrows to change the current percentage.
6 Click OK.
Using masks to modify color reduction
When you use mask to optimize the colors in a GIF or PNG-8 image, the white areas of the masks indicate to the color reduction algorithm which pixels are highly important, whereas black areas of the masks indicate which pixels are less important.
To use masks to modify color reduction:
1 In the Optimize panel/palette, choose a GIF or PNG-8 setting from the Settings menu, or choose GIF or PNG-8 from the file format menu.
2 Choose a color reduction algorithm and specify the maximum number of colors.
3 Click the
mask button ![]() to
the right of the Color Reduction
Algorithm pop-up menu.
to
the right of the Color Reduction
Algorithm pop-up menu.
4 Choose which masks to use:
. All Text Layers to use the masks from all text layers in the image.
. All Vector Shape Layers to use the masks from all shape layers in the image.
. Channel to choose an alpha channel from the menu. In ImageReady, you can choose
Save Selection to create a new alpha channel based on the current selection.
5 To preview the results of the weighted optimization, select the Preview option.
6 Click OK.
Optimizing colors in GIF and PNG-8 images
Decreasing the number of colors in an image is a key factor in optimizing GIF and PNG-8 images. A reduced range of colors will often preserve good image quality while dramati- cally reducing the file space required to store extra colors.
The color table gives you precise control over the colors in optimized GIF and PNG-8 images (as well as original images in indexed color mode). With a maximum of 256 colors, you can add and delete colors in the color table, shift selected colors to other colors or to transparency, and lock selected colors to prevent them from being dropped from the palette.
Viewing a color table
The color table for a slice appears in the Color Table panel in the Save for Web dialog box
(Photoshop) or the Color Table palette (ImageReady).
Note: In ImageReady, be careful not to confuse the Color Table palette with the Color palette or Swatches palette. You use the Color Table palette to optimize colors; you use the Color palette and Swatches palette to select colors.
To view the color table for an optimized slice:
1 (ImageReady) Choose Window > Color Table.
2 Select a slice that is optimized in GIF or PNG-8 format. (See "Selecting slices" on section 373.) The color table for the selected slice appears in the Color Table palette.
Note: In ImageReady, the color table for the selected slice will not appear if Auto Regen- erate is off. For more information, see "Controlling optimization (ImageReady)" on
page 426.
If an image has multiple slices, the colors in the color table may vary between slices
(you can link the slices first to prevent this from happening). If you select multiple slices that use different color tables, the color table is empty and its status bar displays the message "Mixed."
Generating a color table
You can change the palette-or set of colors-in the color table by selecting a color reduction option in the Optimize panel/palette. There are three categories of options:
. Dynamic options use a color reduction algorithm to build a palette based on the colors in the image and the number of colors specified in the optimization setting. The colors in the palette are regenerated every time you change or reoptimize the image. Perceptual, Selective, and Adaptive are dynamic options.
. Fixed options use a set palette of colors. In other words, the set of available colors is constant, but the actual colors in the palette will vary depending on the colors in the image. Web, Mac OS, Windows, Black & White, and Grayscale tables are fixed options.
. The Custom option uses a color palette that is created or modified by the user. If you open an existing GIF or PNG-8 file, it will have a custom color palette.
To select a color reduction algorithm:
Choose an option from the Color Reduction Algorithm pop-up menu (below the file format menu in the Optimize panel/palette):
Perceptual Creates a custom color table by giving priority to colors for which the human eye has greater sensitivity.
Selective Creates a color table similar to the Perceptual color table, but favoring broad areas of color and the preservation of Web colors. This color table usually produces images with the greatest color integrity. Selective is the default option.
Adaptive Creates a custom color table by sampling colors from the spectrum appearing most commonly in the image. For example, an image with only the colors green and blue produces a color table made primarily of greens and blues. Most images concentrate colors in particular areas of the spectrum.
Web Uses the standard 216-color color table common to the Windows and Mac OS 8-bit
(256-color) palettes. This option ensures that no browser dither is applied to colors when the image is displayed using 8-bit color. ( This palette is also called the Web-safe palette.) If your image has fewer colors than the total number specified in the color palette, unused
colors are removed.
Using the Web palette can create larger files, and is recommended only when avoiding browser dither is a high priority.
Custom Preserves the current color table as a fixed palette that does not update with changes to the image.
Mac OS Uses the Mac OS system's default 8-bit (256-color) color table, which is based on a uniform sampling of RGB colors. If your image has fewer colors than the total number specified in the color palette, unused colors are removed.
Windows Uses the Windows system's default 8-bit (256-color) color table, which is based on a uniform sampling of RGB colors. If your image has fewer colors than the total number specified in the color palette, unused colors are removed.
Other color tables appear in the menu if you have saved them previously. (See "Loading and saving color tables" on section 437.)
You can use an alpha channel to influence the generation of color tables. (See "Using masks to modify color reduction" on section 430.)
To regenerate a color table (ImageReady):
Choose Rebuild Color Table from the Color Table palette menu. Use this command to generate a new color table when the Auto Regenerate option is off. (See "Controlling optimization (ImageReady)" on section 426.)
Changing the display of the color table
You can sort colors in the color table by hue, luminance, or popularity, making it easier to see an image's color range and locate particular colors. In ImageReady, you can also change the size of the color swatches in the color table.
To sort a color table:
Choose a sorting order from the Color Table palette menu:
. Unsorted. Restores the original sorting order.
. Sort By Hue, or by the location of the color on the standard color wheel (expressed as a degree between 0 to 360). Neutral colors are assigned a hue of 0, and located with the reds.
. Sort By Luminance, or by the lightness or brightness of a color.
. Sort By Popularity, or by the colors' frequency of occurrence in the image.
To change the size of the color swatches (ImageReady):
Choose Small Swatches or Large Swatches from the Color Table palette menu.
Adding new colors to the color table
You can add colors that were left out in building the color table. Adding a color to a dynamic table shifts the color in the palette closest to the new color. Adding a color to a fixed or Custom table adds an additional color to the palette. (See "Generating a color table" on section 431.)
To add a new color:
1 Deselect all colors in the color table (see "Selecting colors" on section 434).
2 Choose a color:
. Click the color selection box in the Save for Web dialog box (Photoshop) or the toolbox
(ImageReady), and choose a color from the color picker.
. Select the eyedropper
tool
![]() in the Save for Web dialog box (Photoshop) or the toolbox
(ImageReady) and click in the image.
in the Save for Web dialog box (Photoshop) or the toolbox
(ImageReady) and click in the image.
. Select the eyedropper
tool
![]() , click in the image, hold the mouse down,
and drag anywhere on the desktop. You can use this option
to select a color displayed in another
application, such as a color in a
Web page displayed in a browser.
, click in the image, hold the mouse down,
and drag anywhere on the desktop. You can use this option
to select a color displayed in another
application, such as a color in a
Web page displayed in a browser.
. (ImageReady) Select a color from the Color palette or the Swatches palette.
3 Do one of the following:
.
Click the New Color
button in the Color Table
palette.
![]()
. Select New Color from the Color Table palette menu.
. (ImageReady) Drag the color from the color selection box, Color palette, or Swatches palette to the Color Table palette.
To switch the color table to a Custom palette, hold down Ctrl ( Windows) or Command
(Mac OS) when you add the new color.
The new color appears in the color table with a small white square in the lower right corner, indicating that the color is locked. (See "Locking colors in the color table" on
page 436.) If the color table is dynamic, the original color is displayed in the upper left and the new color is displayed in the lower right.
Including black and white in a color table
You can add black and white to the color table when the image does not include these colors. Including black and white is useful when preparing files for multimedia authoring applications, such as Adobe After Effects.
To add black or white to the color table for an image:
1 Choose black or white as the foreground color. (See "Choosing foreground and background colors" on section 257.)
2 Add the color to the color table. (See "Adding new colors to the color table" on section 433.)
Selecting colors
You select colors directly in the optimized image or in the color table. In ImageReady, you can select a color from another application, such as a Web page displayed in a browser. To select a color from the optimized image:
1 Select the eyedropper
tool
![]() in the Save for Web dialog box (Photoshop) or the toolbox
(ImageReady).
in the Save for Web dialog box (Photoshop) or the toolbox
(ImageReady).
2 Click a color in the image. A white border
![]() appears around that color in the
color table. Shift-click to select additional colors.
appears around that color in the
color table. Shift-click to select additional colors.
To select a color from another application (ImageReady):
(ImageReady) Select the eyedropper tool, click in the image, hold the mouse down, and drag anywhere on the desktop. You can use this option to select a color displayed in another application, such as a color in a Web page displayed in a browser.
To select a color directly in the color table:
Click the color in the Color Table palette.
To select a contiguous group of colors, press Shift and click another color. All colors in the rows between the first and second selected colors are selected.
To select a discontiguous group of colors, press Ctrl ( Windows) or Command (Mac OS) and click each color that you want to select.
To select colors based on a selection in the image (ImageReady):
1 Make a selection in the image using the selection tools or the Select menu commands.
2 Choose Select All From Selection from the Color Table palette menu.
To select all colors:
Choose Select All Colors from the Color Table palette menu.
To select all Web-safe colors:
Choose Select All Web Safe Colors from the Color Table palette menu.
To select all non-Web-safe colors:
Choose Select All Non-Web Safe Colors from the Color Table palette menu.
To view selected colors in an image (ImageReady):
Select the optimized image. Then click and hold a selected color in the Color Table palette to temporarily invert the color in the optimized image, enabling you to see which areas of the image contain the color.
To view a contiguous group of colors, press Shift and click and hold another color. All colors in the rows between the first and second selected colors are inverted.
To view a discontiguous group of colors, press Ctrl ( Windows) or Command (Mac OS) and click each color that you want to select, and hold the mouse button down on any color in the group.
To deselect all colors:
Choose Deselect All Colors from the Color Table palette menu.
Shifting colors
You can change a selected color in the color table to any other RGB color value. When you regenerate the optimized image, the selected color changes to the new color wherever it appears in the image.
To shift a color:
1 Double-click the color in the color table to display the default color picker.
2 Select a color.
The original color appears at the upper left of the color swatch and the new color at the lower right. The small square at the lower right of the color swatch indicates that the color is locked. If you shift to a Web-safe color, a small white diamond appears at the center of the swatch.
To revert shifted colors to their original colors:
Do one of the following:
. Double-click the swatch for the shifted color. The original color is selected in the color picker. Click OK to restore the color.
. To revert all shifted colors in a color table (including Web-shifted colors), choose Unshift
All Colors from the Color Table palette menu.
Shifting to Web-safe colors
To protect colors from dithering in a browser, you can shift the colors to their closest equivalents in the Web palette. This ensures that the colors won't dither when displayed in browsers on either Windows or Macintosh operating systems capable of displaying only
256 colors.
To shift colors to the closest Web palette equivalent:
1 Select one or more colors in the optimized image or color table. (See "Selecting colors"
on section 434.)
2 Do one of the following:
.
Click the Web Shift button in the Color Table
palette.
![]()
. Choose Shift Selected Colors to Web Palette from the Color Table palette menu.
The original color
appears at the upper left of the color
swatch and the new color at the lower right.
The small white diamond ![]() in the center of the color swatch indicates that the color is Web-safe; the small square at the lower right of the color swatch indicates that the
color is locked.
in the center of the color swatch indicates that the color is Web-safe; the small square at the lower right of the color swatch indicates that the
color is locked.
To revert Web-shifted colors to their original colors:
Do one of the following:
.
Select a Web-shifted
color in the color table and click the Web Shift button in the
![]()
Color Table palette.
. To revert all Web-shifted colors in the color table, choose Unshift All Web Shifted Colors from the Color Table palette menu.
To specify tolerance for shifting colors automatically to the closest Web palette equivalents:
In the Optimize panel/palette, enter a value for Web Snap or drag the pop-up slider. A higher value shifts more colors.
(In
ImageReady, click the Show
Options control ![]() on the Optimize palette tab or
choose Show Options from the Optimize palette menu to view the Web Snap option.) Mapping colors to transparency
on the Optimize palette tab or
choose Show Options from the Optimize palette menu to view the Web Snap option.) Mapping colors to transparency
You can add transparency to an optimized image by mapping existing colors to trans- parency.
To map colors to transparency:
1 Select one or more colors in the optimized image or color table. (See "Selecting colors"
on section 434.)
2 Do one of the following:
.
Click the Map Transparency button in the Color Table
palette.
![]()
. Choose Map Selected Colors to Transparent from the Color Table palette menu.
The transparency grid ![]() appears in half of each mapped color. The
small square at the lower
right of the color swatch indicates
that the color is locked.
appears in half of each mapped color. The
small square at the lower
right of the color swatch indicates
that the color is locked.
To revert transparency to its original colors:
Do one of the following:
.
Select the colors
you want to revert, click the Map Transparency
button or choose
![]()
Unmap Selected Colors from Transparent from the Color Table palette menu.
. To revert all transparency-mapped colors, choose Unmap All Transparent Colors.
Locking colors in the color table
You can lock selected colors in the color table to prevent them from being dropped when the number of colors is reduced and to prevent them from dithering in the application. Note: Locking colors does not prevent them from dithering in a browser.
To lock a color:
1 Select one or more colors in the color table. (See "Selecting colors" on section 434.)
2 Lock the color:
. Click the Lock button ![]() .
.
. Choose Lock/Unlock Selected Colors from the Color Table palette menu.
A
white square ![]() appears in the lower right corner of each locked color.
appears in the lower right corner of each locked color.
Note: If the selected colors include both locked and unlocked colors, all colors will be locked.
To unlock a color:
1 Click the locked color to select it.
2 Unlock the color:
. Click the Lock button ![]() .
.
. Choose Lock/Unlock Selected Colors from the Color Table palette menu. The white square disappears from the color swatch.
Deleting colors from the color table
You can delete selected colors from the color table to decrease the image file size. When you delete a color, areas of the optimized image that previously included that color are rerendered using the closest color remaining in the palette.
When you delete a color, the color table automatically changes to a Custom palette. This is because the Adaptive, Perceptual, and Selective palettes automatically add the deleted color back into the palette when you reoptimize the image-the Custom palette does not change when you reoptimize the image.
To delete selected colors:
1 Select one or more colors in the color table. (See "Selecting colors" on section 434.)
2 Delete the color:
. Click on the Trash button ![]() .
.
. Choose Delete Color from the Color Table palette menu.
Loading and saving color tables
You can save color tables from optimized images to use with other images and to load color tables created in other applications. Once you load a new color table into an image, the colors in the optimized image are changed to reflect the colors in the new color table. To save a color table:
1 Select Save Color Table from the Color Table palette menu.
2 Name the color table and choose a location where it will be saved. By default, the color table file is given the extension .act (for Adobe Color Table).
If you want to access the color table when selecting Optimization options for a GIF or PNG image, save the color table in the Presets/Optimized Colors folder inside the Photoshop program folder.
3 Click Save.
Important: When you reload the table, all shifted colors will appear as full swatches and they will be unlocked.
To load a color table:
1 Select Load Color Table from the Color Table palette menu.
2 Navigate to a file containing the color table you want to load-either an Adobe Color Table (.act) file, an Adobe Color Swatch (.aco) file, or a GIF file (to load the file's embedded color table).
3 Click Open.
Using master palettes (ImageReady)
You can create a master palette to use with a group of GIF or PNG-8 images that will be placed on a CD-ROM or other multimedia storage medium. When you include the master palette with a batch of images, all images display using the same colors.
To build a master palette, you add colors from a set of images and then build and save the master palette. To create a master palette for a batch of images, you add colors to the palette from other optimized images.
To create and apply a master palette:
1 With an image displayed, choose Image > Master Palette > Clear Master Palette (if available). Clearing the master palette ensures that colors from previous images are not included in the new palette.
2 Open an image whose colors you want to include in a master palette.
3 Choose Image > Master Palette > Add To Master Palette. All color information for the current image is added to the master palette.
4 Repeat steps 2 and 3 for all images whose colors you want to include in the master palette.
5 In the Optimize palette, select optimization settings for the master palette.
6 Choose Image > Master Palette > Build Master Palette to create a new color table from the color information of images used in steps 2, 3, and 4.
7 Choose Image > Master Palette > Save Master Palette.
8 Name the master palette and choose a location where it will be saved. By default, the master palette file is given the extension .act (for Adobe Color Table).
If you want to access the color table when selecting Optimization options for a GIF or PNG image, save the master palette in the Optimized Colors folder, inside the Presets folder in the Adobe Photoshop folder.
9 Click Save.
10 To apply the master palette to the image or images for which it was created, open the image or images and select the master palette:
. If the master palette appears in the Color Reduction Algorithm menu in the Optimize palette, select the master palette from this menu. ( The Color Reduction Algorithm menu includes all palettes saved in the Optimized Colors folder, inside the Presets folder in the Adobe Photoshop folder.)
. Load the master palette. (See "Loading and saving color tables" on section 437.)
Working with hexadecimal values for color
You can view colors as hexadecimal values in the Info palette. In addition, you can copy colors as hexadecimal values to the Clipboard and paste them into an HTML document. Viewing hexadecimal values for colors in the Info palette
In Photoshop, hexadecimal values for colors are displayed in the Info palette when you select Web Color Mode for one or both color readouts. In ImageReady, hexadecimal values for colors are displayed automatically in the right side of the Info palette, next to RGB color values. The Photoshop and ImageReady Info palettes also display other information, depending on the tool being used.
To view hexadecimal color values in the Info palette:
1 Choose Window > Info or click the Info palette tab to view the palette.
2 (Photoshop) Choose Palette Options from the palette menu. Under First Color Readout or Second Color Readout, choose Web Color from the Mode menu and click OK.
3 Position the pointer over the color you want to view hexadecimal values for.
Copying colors as hexadecimal values
You can copy colors as hexadecimal values from files in Photoshop or ImageReady, using the context menu with the eyedropper tool, or using menu commands. In Photoshop, you copy a color as a hexadecimal value while in the main work area (not the Save for Web dialog box).
To copy a color as a hexadecimal value using the eyedropper tool:
1 Select the eyedropper
tool
![]() in the toolbox.
in the toolbox.
2 Select a color to copy:
. Right-click ( Windows) or Control-click (Mac OS) a color in the image to select the color and view the eyedropper tool context menu.
. (ImageReady) Click the color in the image which you want to copy. The color you click becomes the foreground color. With the eyedropper tool still over the image, right-click
(Windows) or Control-click (Mac OS) to view the eyedropper tool context menu.
3 Choose Copy Color as HTML (Photoshop) or Copy Foreground Color as HTML
(ImageReady) from the eyedropper tool context menu.
The selected color is copied to the Clipboard as a the HTML COLOR attribute with the hexadecimal value (COLOR=#XXYYZZ). To paste the color into an HTML file, choose Edit > Paste with the HTML file displayed in your HTML editing application.
To copy a color as a hexadecimal value using menu commands:
1 Select a color to copy.
2 Copy the color:
. Choose Copy Color As HTML from the Color palette menu.
. (ImageReady) Choose Edit > Copy Foreground Color as HTML.
The foreground color is copied to the Clipboard as the HTML COLOR attribute with the hexadecimal value (COLOR=#XXYYZZ). To paste the color into an HTML file, open a desti- nation application and choose Copy > Paste with the HTML file displayed.
To copy a color as a hexadecimal value by dragging (ImageReady):
Drag the Foreground Color from the toolbox or a selected color from the Color Table palette or the Swatches palette into the HTML file in the destination application. Note: This feature is not supported by all text and HTML editing applications.
Using a droplet to automate optimization settings
(ImageReady)
You can save Optimize palette settings for use on individual images or batches of images by creating a droplet, a small application that applies the optimization settings to an image or batch of images that you drag over the droplet icon. You can drag a droplet to the desktop or save it to a location on disk. When you create the droplet you can choose where the images will be saved. When you drag an image over it, the droplet launches ImageReady if the program is not currently running.
Note: You can also drag a droplet onto the ImageReady Actions palette to create an action step, or you can drag a droplet onto a slice to apply the optimization settings to the slice.
To create a droplet for automating Optimize palette settings:
1 With an image displayed in the image window, choose a compression format and compression options in the Optimize palette.
2 Create a droplet:
. Drag the droplet
icon
![]() from
the Optimize palette onto
the desktop.
from
the Optimize palette onto
the desktop.
The droplet is named with a brief description of the compression settings, including file format and color palette or quality setting information. You can rename the droplet as you do other desktop icons.
. Click the droplet icon on the Optimize palette. Name the droplet, choose a location where the droplet will be saved, and click Save.
. Choose Create Droplet from the Optimize palette menu. Name the droplet, choose a location where the droplet will be saved, and click Save.
To use a droplet:
1 Drag a single image or a folder of images onto the droplet icon. As the images are processed, a progress bar appears.
2 Do any of the following to control the processing:
. To temporarily pause the processing, click Pause. You can then click Resume to continue the processing.
. To cancel the processing, click Stop.
. Let the process finish on its own.
For more information on working with droplets, see "Using droplets" on section 496.
Saving optimized images
When you've applied a combination of settings that achieve a balance between quality and file size, you're ready to save the optimized image.
To save an optimized image:
1 Select the view with the desired optimization settings, and do one of the following:
. (Photoshop) Click Save in the Save For Web dialog box.
. (ImageReady) Choose File > Save Optimized to save the file in its current state. If you previously saved the optimized file using the File > Save Optimized command, applying the command again saves the file with the filename and Save options specified in the first save operation. The Save dialog box does not appear.
. (ImageReady) Choose File > Save Optimized As to save an alternate version of the file with a different filename.
2 Type a filename, and choose a location for the resulting file or files.
3 Choose a Format option:
. HTML and Images to generate all files required to use your artwork as a Web page. This includes an HTML file and separate image files for the slices in the artwork. The HTML file includes code for any links, image maps, and other effects in the document.
. Images Only to save your artwork with the specified optimization settings. If the artwork contains multiple slices, each slice is saved as a separate file.
. HTML Only to generate an HTML file but not save any image files.
4 To set preferences for saving image files and HTML files, choose predefined output options from the Settings pop-up menu, or choose Other to set different options.
(See "Setting output options" on section 442.)
5 Choose an option for slices from the pop-up menu:
. All Slices to save all slices in the image.
. Selected Slices to save only the selected slices. If you select this option in conjunction with the HTML and Images option, ImageReady or Photoshop generates the HTML code based on the outermost bounds of the selected slices, and generates auto-slices as needed to create a complete HTML table.
Note: You must select the desired slices before starting this procedure.
. (ImageReady) A slice selection to save only the slices in the selection. You must save a slice selection in order for this option to appear in the menu. (See "Selecting slices" on section 373.)
6 Click Save.
Setting output options
When you save an optimized image as a Web page, you can specify how HTML files are formatted, how slices are named, how files are named, and how background images are handled. You set these options in the Output Settings dialog box.
Using the Output Settings dialog box
The Output Settings dialog box displays different sets of options. In ImageReady, you can save your output settings and apply them to other files.
Displaying the Output Settings dialog box Do one of the following:
. When you save an optimized image, choose Other from the Settings pop-up menu in the Save Optimized or Save Optimized As dialog box. The Save and Load options are not available when you use this method to access the Output Settings dialog box.
. (ImageReady) Choose the desired preferences set from the File > Output Settings submenu. Use this method if you want to load and save settings.
. (Photoshop) Choose Edit Output Settings from the Optimize pop-up menu in the Save
For Web dialog box. Use this method if you want to load and save settings. Displaying predefined output options Choose an option from the Settings pop-up menu.
Switching to a different set of options Choose an options set from the pop-up menu below the Settings menu. Alternately, click Next to display the next set in the menu list; click Prev to display the previous set.
Saving output settings Set the options as desired, and click Save. Type a filename, choose a location for the saved file, and click Save.
You can save the output settings anywhere. However, if you place the file in the Presets/ Optimized Output Settings folder inside the Photoshop program folder, the file will appear in the Settings pop-up menu in both Photoshop and ImageReady.
Loading output settings Click Load, select a file, and click Open.
Setting HTML output options
You can set the following options in the HTML set:
Tags Case Specifies the capitalization for tags.
Attribute Case Specifies the capitalization for attributes.
Setting tags and attributes to all uppercase helps the code stand out in the file.
Indent Specifies a method for indenting lines of code: using the authoring application's tab settings, using a specified number of spaces, or using no indentation.
Line Endings Specifies a platform for line ending compatibility.
Include Comments Adds explanatory comments to the HTML code. In ImageReady, this option is required when you plan to update the resulting file using the File > Update HTML command.
Always Quote Attributes Places quotation marks around all tag attributes. Placing quotation marks around attributes is required for compatibility with certain early browsers and for strict HTML compliance. However, always quoting attributes is not recommended. Quotation marks are used when necessary to comply with most browsers, even if this option is deselected.
Always Add Alt Tags Adds the ALT attribute to IMG elements to comply with government Web accessibility standards.
Close All Tags Adds close tags for all HTML elements in the file for XHTML compliance. Include GoLive 5 (or Earlier) Code (ImageReady) Reformats JavaScript code so that rollovers will be fully editable in Adobe GoLive 5.0 and earlier. You do not need to select this option if you plan to edit rollovers in GoLive 6.0.
Note: GoLive does not support the Selected rollover state.
Setting slice output options
You can set the following options in the Slices set:
Generate Table Aligns slices using an HTML table, rather than a Cascading Style Sheet. Empty Cells Specifies how empty slices are converted to table cells. Select GIF, IMG W&H to use a one-pixel GIF with width and height values specified on the IMG tag. Select GIF, TD W&H to use a one-pixel GIF with width and height values specified on the TD tag. Select NoWrap, TD W&H to place a nonstandard NoWrap attribute on the table data and also place width and height values specified on the TD tags.
TD W&H Specifies when to include width and height attributes for table data: Always, Never, or Auto (the recommended setting).
Spacer Cells Specifies when to add one row and one column of empty spacer cells around the generated table: Always, Never, or Auto (the recommended setting). Adding spacer cells is necessary with table layouts in which slice boundaries do not align, to prevent the table from breaking apart in some browsers.
Generate CSS Generates a Cascading Style Sheet, rather than an HTML table.
Referenced Specifies how slice positions are referenced in the HTML file when using CSS:
. By ID to position each slice using styles that are referenced by a unique ID.
. Inline to include style elements in the declaration of the block element <DIV> tag.
. By Class to position each slice using classes that are referenced by a unique ID.
Default Slice Naming Choose elements from the pop-up menus or enter text into the fields to be combined into the default names for all use slices. Elements include document name, the word slice, numbers or letters designating slices or rollover states, slice creation date, punctuation, or none.
Setting image map output options (ImageReady)
You can set the following options in the Image Maps set:
Image Map Type Specifies what type of image map is created:
. Client-Side to include all required code for the image map in the image's HTML file.
. NCSA Server-Side to create a separate .map file in addition to the HTML file, using NCSA
specifications.
. CERN Server-Side to create a separate .map file in addition to the HTML file, using CERN
specifications.
Important: Photoshop and ImageReady cannot generate ser ver-side image maps for images that contain slices.
. Client-Side & NCSA Server-Side to create both a client-side and server-side compatible image map, using NCSA specifications.
. Client-Side & CERN Server-Side to create both a client-side and server-side compatible image map, using CERN specifications.
Note: Contact your Internet ser vice provider to find out whether to use NCSA or CERN
specification for ser ver-side image maps.
Image Map Placement Specifies the location of the image map declaration (the <MAP>
tag) in the HTML file:
. Top to place the image map declaration at the top of the HTML body section.
. Body to place the image map declaration above the <IMG SRC> tag for the associated slice.
. Bottom to place the image map declaration at the bottom of the HTML body section.
Setting background options
You can set the following options in the Background set:
View Document As Select Image if you want the Web page to display an image or a solid color as a background behind the current image. Select Background if you want the Web page to display the optimized image as a tiled background.
Background Image Enter the location of an image file, or click Choose and select an image. The file you specify will be tiled behind the optimized image on the Web page. BG Color Click the Color box, and choose a background color using the color picker, or choose an option from the pop-up menu.
Setting file saving options
You set the following options in the Saving Files set:
File Naming Choose elements from the pop-up menus or enter text into the fields to be combined into the default names for all files. Elements include document name, slice name, rollover state, trigger slice, file creation date, slice number, punctuation, and file extension. Some options are relevant only if the file contains slices or rollover states.
The fields let you change the order and formatting of the filename parts (for example, letting you indicate rollover state by an abbreviation instead of the full word).
File Name Compatibility Select one or multiple options to make the filename compatible with Windows (permits longer filenames), Macintosh, and UNIX operating systems.
Note: Filenames may be truncated after 31 characters.
Copy Background Image When Saving Copies the background image file specified in the Background set into images folder for the Web page.
Put Images In Folder Specifies a folder name where optimized images are saved
(available only with documents containing multiple slices).
Include Copyright Includes title and copyright information with the image. (See "Adding title and copyright information to Web pages" on section 445.)
Adding title and copyright information to Web pages
You can add title and copyright information to a Web page by entering information in the File Info dialog box. Title information displays in the Web browser's title bar. Copyright information is not displayed in a browser; however, it is added to the HTML file as a comment and to the image file as metadata.
To enter information about an image:
1 Choose File > File Info.
2 Enter a title that will appear in the Web browser's title bar:
. (Photoshop) In the General section of the File Info dialog box, enter the desired text in the Caption text box.
. (ImageReady) Enter the desired text in the Caption text box.
3 Enter copyright information:
. (Photoshop) In the General section of the File Info dialog box, enter the desired text in the Copyright Notice text box.
. (ImageReady) Enter the desired text in the Copyright text box.
4 Click OK.
|
Politica de confidentialitate | Termeni si conditii de utilizare |

Vizualizari: 1468
Importanta: ![]()
Termeni si conditii de utilizare | Contact
© SCRIGROUP 2026 . All rights reserved