| CATEGORII DOCUMENTE |
| Asp | Autocad | C | Dot net | Excel | Fox pro | Html | Java |
| Linux | Mathcad | Photoshop | Php | Sql | Visual studio | Windows | Xml |
|
Installing Windows XP |
|
||||||||||||||||||||||||||||||||||||
|
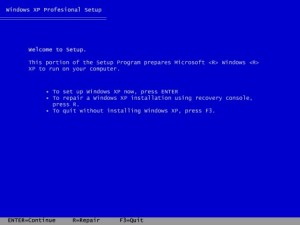
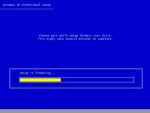
Starting the Setup
After you change the settings in the BIOS Setup, and
reboot your system, Windows XP Setup will automatically start, and check if
your computer meets the minimum system requirements. After this some files
needed for starting Windows Setup will be copied. After all of this, you will
see a screen like the one represented in Figure 1. Here you can chose between
installing Windows XP, and repairing Windows XP, using the installation
recovery console. Even if your computer might have a small problem, we recommend
installing a fresh copy of Windows. After Windows has been installed on your
computer for a long time, it might be possible that it might not work as fast
as it used to, or errors might occur very often. This is because the registry
settings had been modified a lot by installing too much programs. Windows can
also be infected by viruses. Even if you have antivirus software, and your
files had been cleaned, we recommend installing a fresh copy of Windows after
cleaning all your files.
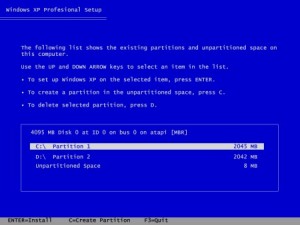
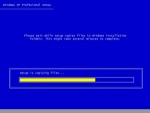
After creating the partitions, you will have to
format them. Formatting a partition means assigning it a certain a file
system. This process will erase all data on the drive. A file system is the
system that instructs how to store and manage files. Windows 95 used the FAT
file system. Than Windows 98 used FAT32, a more powerful and smart file
system. Of course Windows 98 can also run in the FAT file system, but Windows
95 can not run on FAT32, because it's newer system. After FAT32, Windows 2000
and XP came with the new NTFS file system. It manages and stores files easier
and better, plus it supports a lot of new features.
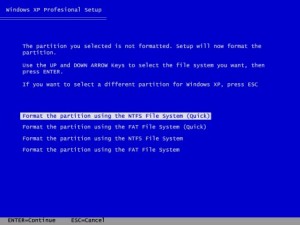
If your drive is already formatted, you will also
have an option for "Leaving the drive intact - No changes". You can select to
format the drive, if you did save all the important information on another drive
on the hard disk, or on other removable media (Floppy, CD, ZIP, etc.).
Selecting format will enable you to install a fresh copy of Windows XP on a
fresh formatted drive. If you do not format the drive, you will install over
other Windows versions you have installed. Installing two operating systems
is not really a good idea.
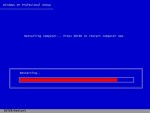
After completing all the operations, your computer
will reboot. After your computer will restart, do not forget to immediately
enter the BIOS Setup and change the device boot order. Usually this is
Floppy, HDD, and CD. This means that first the compute will try to boot from
floppy, than hard disk, and than CD
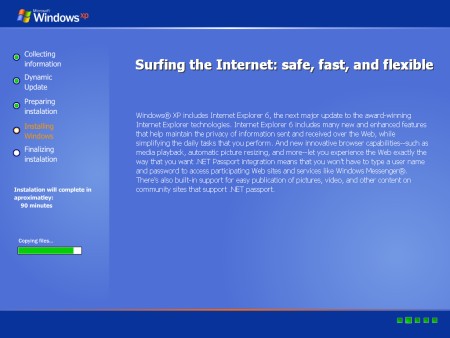
This part of the setup recognizes the hardware
devices that are installed on your system, and installs the appropriate
drivers for them. Just wait until any dialog will appear on the screen.
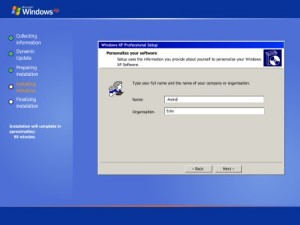
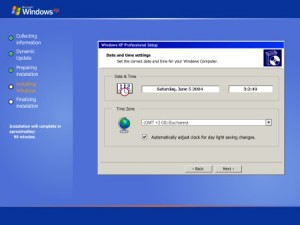
After configuring the Regional and Language options,
you will have to provide setup with your personal information (Fig. 10), in
order to personalize your copy of Windows XP.
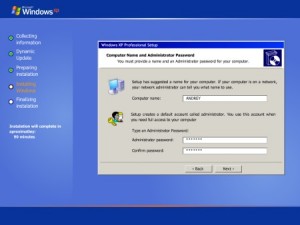
Now you must provide setup with a name for your computer and an administrator password.
If you are on a network, the other users will see
you computer named the way you enter it here. Setup creates a default account
called ADMINISTRATOR. This account can change important settings, on your
computer. So entering a password here would be a very good idea. This will
prevent unauthorized users on the network access your computer and modify
settings or manage files on your computer. You must enter the password two
times, so that setup will be sure you did not mistype it. Do not forget this
password, as it is important if you want to repair your computer or change
some settings using the ADMINISTRATOR account.
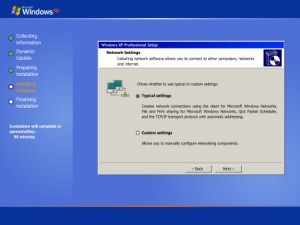
After completing all these steps, you will have to
wait again for setup to detect the network connections or internet
connections on your computer.
You can select Typical settings if you are on a
small network or Custom settings if you are on a larger network and need to
apply more advanced settings. For more information about the network
settings, contact your network administrator. If you are not connected to a
network, you must also select typical settings.
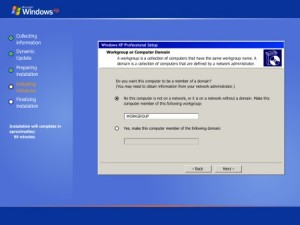
You can assign workgroups depending on the area the
computers are situated in. For instance, if the computers are in building no.
100, you can assign the workgroup name 100, and for the computers in building
325 you can assign the workgroup name 325. Computers in a certain area work
better if they are all in the same workgroup, rather than having all
different workgroups.
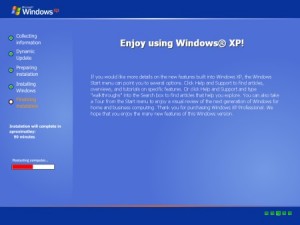
After your system will restart, you will just have o enter some information about who will use the computer, internet settings, and you will be asked if you want to register Windows XP. Then you will be able to see your Windows Desktop (Fig 17).
|
|||||||||||||||||||||||||||||||||||||
|
The Windows Desktop |
|||||||||||||||||||||||||||||||||||||
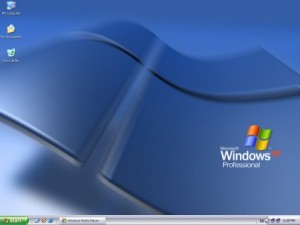
| The Windows Desktop (Fig. 17) is the main screen that you see when you start Windows. |
|
|
|
Fig 17 |
The Windows Desktop is like your personal desktop, where you put your
favorite files and stuff. You can personalize it the way you want, so that
it can fit your needs and represent your style. Some people like their
Windows Desktop to be tidy, while others just leave the Windows default
style. Some people have shortcuts to documents and other paper work on their
desktop, while others have their desktop filled with shortcuts to games. So
you can personalize your Windows desktop to represent yourself and your
style!
Now we will concentrate over the components of the Windows Desktop:
Icons
|
|
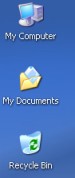
Icons (Fig. 18) are small
pictures that represent files and/or folders on your hard disk. When you
double click an icon with your mouse it will open the file of folder that
it represents. Icons can be dragged and moved around the desktop, so that
you can arrange them the way you want. You can drag icons over other
folders, thus moving them to the selected folder. |
|
|
Fig. 18 |
The My Documents icon represents the My Documents Folder which stores |
our documents.
You can put you pictures, videos, music and other files here.
The Recycle Bean icon represents the Recycle Bean, a system folder that
stores files you want to remove from your computer. Windows stores these
files here, because you might want to restore them. After you delete files
from the Recycle Bean you can not get them back.
Changing folder
icons
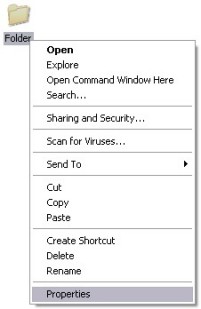
To change a folder icon, you must first right click the folder, and then
select proprieties (Fig. 20). Then, a propriety window will pop up (Fig.
21).
|
|
||
|
Fig 19 |
Fig 20 |
|
|
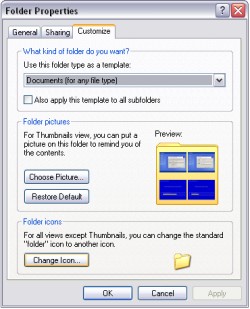
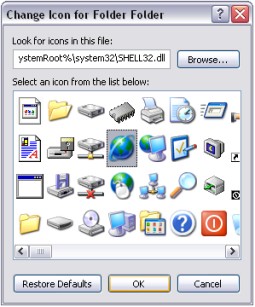
A list of default icons will
appear (Fig 21). You will chose one you like from the list and then click
OK. You can also choose another icon on your disk, by clicking browse, and
giving the path to it. |
|
|
Fig. 21 |
The taskbar
|
|
|
Fig. 22 |
Programs, files, or folders you open,
will appear on the taskbar. For example, on the taskbar represented in fig.
22, Windows Media Player and the "tutorial" folder are opened. Windows can
also be minimized, which means that they are running in background. To
display a window that is running in background, you can just click it from
the taskbar.
Windows is a multitasking operating system, which means that more
applications can be run in the same time. In MS DOS, you could only run one application
at a time.
Multitasking is a really great advantage, because you can easily switch
between applications and transfer data from one application to another. So
the taskbar can also help you to easily switch between applications. If you
want a window to run in background just click minimize. The window will not
be closed, and you can always bring it back on the screen, by clicking it on
the taskbar.
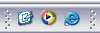
The Quick Launch
Near the Start Button on the taskbar, we can see the Quick Launch (Fig. 23).
It is a small place for applications you use most frequently.
|
The Windows default applications for the Quick launch are: the "Show Desktop" application (it is used to show the Windows Desktop); Windows |
|
|
Fig 23 |
Explorer (Internet Browser). You can always add and remove icons from the Quick Launch. |
The System Tray
|
The System Tray (Fig. 24) is the right place of the taskbar, where you can see the clock, and also see active or inactive connections, or some applications that are running. In the system tray represented in fig. 24, there are 2 active network connections. From the system tray you can configure other options for the connections |
|
|
Fig. 24 |
or applications.
In Windows XP, inactive items can also be hidden (if this feature is
enabled), and you can see them by clicking the round button on the left side
of the system tray.
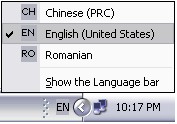
The language bar
The language bar (Fig. 25, 26) is used for switching between the languages that are installed on the system. You can use the hotkeys defined for switching languages, or click on the icon and select a language from the ones available (Fig. 26).
|
|
||
|
Fig. 25 |
Fig. 26 |
You can also use the language bar to
select and manage other language options that are installed on your
computer.
You can add and remove languages available on the language bar from Control
Panel -> Regional and Language Options.
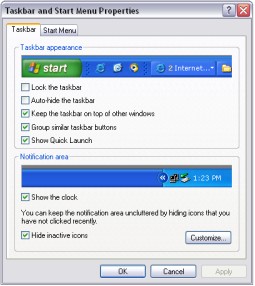
Configuring the taskbar
To configure the Windows taskbar, right click it and select Proprieties. A
window like in Fig 27 will appear. From the taskbar tab you can configure
the following options:
|
. Lock the
taskbar - will delimit the Quick
launch and other bars from the main taskbar; |
|
|
Fig. 27 |
|
. Group similar taskbar buttons - enables the new option in Windows XP. Sometimes
your taskbar might be full of icons. To manage the opened windows better,
this new option groups the similar taskbar icons into a single one. If you
have 10 Internet Explorer windows open, they will all be grouped into a
single taskbar icon. When you want to chose a certain internet explorer
window from the group, you will just click on the main taskbar icon, and
then a list with all the windows in the group will be shown. Just click the
one you want to display!
. Show Quick Launch - It will show or hide the Quick Launch (Fig. 23).
. Show the clock - shows or hides the clock from the right side of
the taskbar.
. Hide inactive
icons - it enables or disables a new feature
made available in Windows XP; hiding the icons from the System Tray (Fig.
25) when they become inactive. For instance, if you have an opened program
that has an icon in the System Tray, the icon will be hidden when the
program is inactive. To display the hidden icons you just have to click the
round button on the left side of the System Tray.
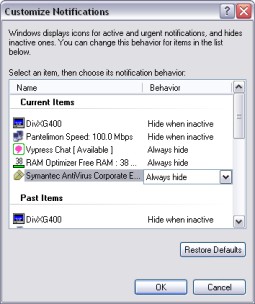
You can also customize the hiding and showing of the icons in the system
tray, but only if the "Hide inactive icons" setting is enabled. When you
click the Customize button, a window like the one represented in Fig. 28
will appear.
|
|
You can choose an item that
is or was in the System Tray, and apply the following options to it: |
|
|
Fig. 28 |
The Start Menu
|
|
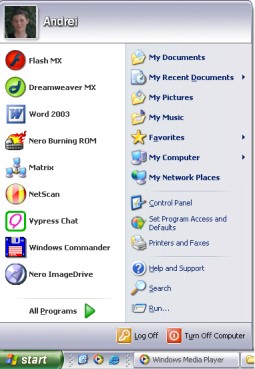
Windows XP has a new and
simplified start menu designed to fit your needs and preferences. The
Windows XP Start Menu has two columns: The first one is for programs you
recently use, and the other is for shortcuts to places on your computer,
like: My Computer, My Documents, My Pictures, etc. |
|
|
Fig. 29 |
The Turn Off and Log Off Buttons
|
|
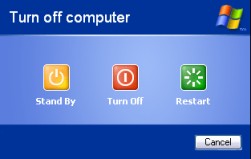
The Turn Off Button on the bottom of the Start Menu will display options for shutting down the computer or other features that are available on the system. The Log Off Button will display options about Logging of or switching users.The Log Off Button will display options about Logging of or switching users. |
|
|
Fig. 30 |
The Run Button
The Run Button on the second column of the Start Menu will display a Window
from which you can type a path to o file or a program on your computer, on
the network or internet. After this the selected file or program will be
automatically opened.
Examples:
. Typing "C:Games" will open the folder Games located on the C: drive;
. Typing "write" will open Word Pad;
. Typing "cmd" or "cmd.exe" will open the Command Prompt or the Windows
Console.
. Typing Computer1 will explore the computer named Computer1 on the
network;
. Typing 192.168.1.145 will explore the computer with IP 192.168.1.145 on
the network;
. Typing https://www.echoproject.net/ will automatically open the
www.echoproject.net web site on the internet. The Search Button
|
|
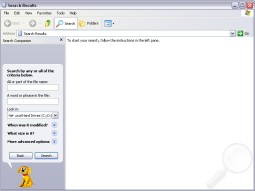
The Search Button on the
Start Menu will open a window (Fig. 31) from where you can search files or
folders on you hard disk(s) or also on the internet. |
|
|
Fig. 31 |
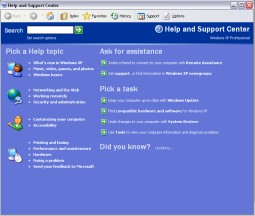
The Help and
|
The Help and Support Center
Button (Fig. 32) on the Start menu opens Windows Help, from where you can
find articles and tips about working with Windows. |
|
|
|
Fig. 31 |
Other buttons on the Start Menu
. Printers and
Faxes button - displays all printers and
faxes installed on the computer and enables configuring these devices.
. Control Panel
button - opens the Control Panel, from
which you can configure and change settings, manage hardware and software
resources on your computer.
. My Computer, My
Documents, My Pictures, My Music, and My Videos Buttons - open the specified folders they represent.
Example: If you click the My Documents button, it will open my Documents.
Customizing the Start Menu
Just right click the taskbar and select proprieties. The same window you seen in Fig. 28 will show up. This time, select the Start Menu Tab, from the top of the page. From here you can configure options, like showing or hiding items on the taskbar, disabling highlighting of newly installed programs, disable listing the most recently used programs list, and also chose the Windows classic start menu layout.
|
Politica de confidentialitate | Termeni si conditii de utilizare |

Vizualizari: 1164
Importanta: ![]()
Termeni si conditii de utilizare | Contact
© SCRIGROUP 2025 . All rights reserved