| CATEGORII DOCUMENTE |
| Asp | Autocad | C | Dot net | Excel | Fox pro | Html | Java |
| Linux | Mathcad | Photoshop | Php | Sql | Visual studio | Windows | Xml |
Once VSTS has created the project, architects, developers, and testers can begin contributing diagrams, code, and tests to the project. No additional settings are required. In other words, work can commence. To further aid teams, Protect Managers may upload any process guidance or other related documents to the portal.
VSTS provides a highly secured environment. As security, even when dealing with trusted developers, is a requirement at many companies nowadays. Financial institutions, government, and any Sarbanes-Oxley-compliant companies will judge a finished product by its security support and the level of security that surrounded its construction. Security is also a good way to protect the team against itself, by locking down privileged operations to only a select few members, all critical information can be contained.
VSTS integrates also with Active Directory, so it is able to map Microsoft Windows users and groups directly to its predefined roles and permissions. A number of build-in groups are available to assist in this.
VSTS allows project managers to create new project groups so that users can be classified in any way needed. These groups can also be assigned whatever permissions required, thus enabling the creation of custom VSTS roles.
Visual Studio 2005 Team System's level of security even allows to the secure the state transitions of work item types. In other words, users can specify which team members can log bugs in and, more importantly, which team members can transition them to fixed or closed.
 Creating Classifications
Projects can have a hierarchy of classifications. These represent generic organization units by
which users can classify their work items. Users are free to add any
classifications or child classifications to build container hierarchy to
Projects can also have iterations, which represent milestones or specific epochs in the project's software development life cycle, as seen in Figure 4-3 Depending on the methodology, VSTS creates some default iterations, such as Iteration 0, Iteration 1, and Iteration 2.
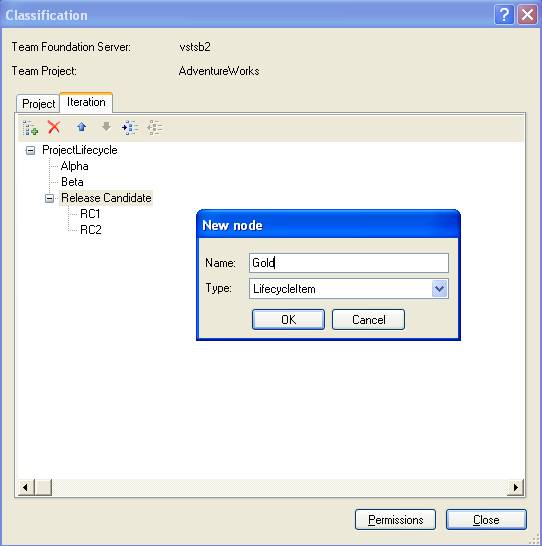
Figure 4-3
Creating iterations for the various phases of the project
For example, the project might go through several phases, such as Alpha, Beta, and then release. To keep the work items, such as tasks and bugs, partitioned for each phase, users could select the respective iteration when creating work items.
Security can be applied to either classifications or iterations providing the ability to lock down by user or VSTS role who has permission within these classifications and iterations.
One of the most powerful features of VSTS is its
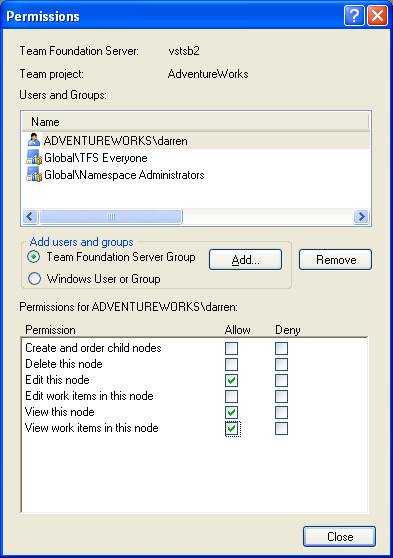
Figure 4-4
Enabling a project's check-in policies
Here are some check-in policies that VSTS
Clean Build
The code must be error free before check-in is allowed.
Static Analysis (click here to view the video for Static Analysis for Unmanaged Code)
The code must pass a static analysis test before check-in is allowed.
Testing Policy
The code must pass one or more tests before check-in is allowed.
Work Items
The code must be associated with one or more work items before check-in.
Notes
One or more notes (such as reviewer's name, issues, status, hours, and so on) must be associated with the code before check-in is allowed.
Custom
Custom check-in policies can be created as well
VSTS relies heavily on WSS for disseminating information to the distributed team. By default, VSTS uploads process guidance documents based on the methodology selected. (See Figure 4-5.) This is just one way that the portal can empower the team-by providing how-to and best-practice documentation for the actual construction of the software.
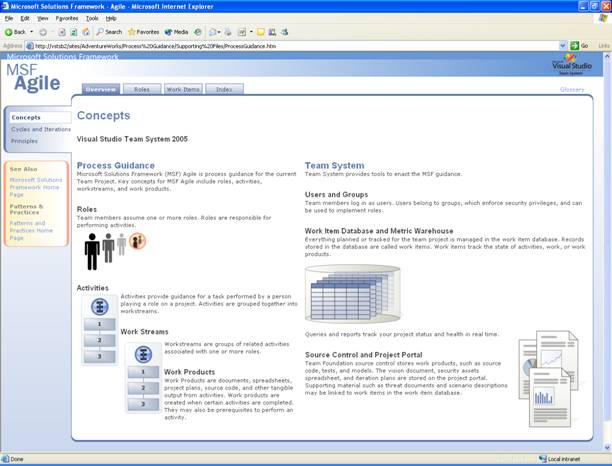
Figure 4-5
Default process guidance documents
Here are just a few examples of other documents which can be uploaded to the project portal:
Business documents
Bids, estimates, accounting spreadsheets, functional specifications, team contact information
Technical documents
Technical specifications, UML diagrams, database designs, graphical representations of current systems, other Microsoft Visio diagrams
Guidance
Best-practice examples, whitepapers, how-to guides
Consider work items to be the currency of VSTS-that is, work items enable the collaboration. These documents represent the communication packets traveling from teammate to teammate. Work items can be tasks, bugs, scenarios, requirements, or any other type defined by the methodology that is being used. Because the team will be looking to the project manager to kick things off, they must be an expert in creating and assigning work items to commence the workflow.
A work item is just a database record that Visual Studio 2005 Team Foundation Server uses to track the assignment and state of work. The MSF for Agile Software Development process defines five work items to assign and track work. These five work-item types are as follows:
Scenario
Defines a single path of user
interaction with the system
Quality of service (QoS) requirement
Operating requirements or constraints, including performance, availability, and maintainability
Task
Work needing to be done
Bug
A certain or potential problem in the system
Risk
Any probable event or condition that can have a potentially negative outcome on the project
Adding ScenariosA scenario records a single path of user interaction through the system. As that person attempts to reach a goal, the scenario records the specific steps that they will take in attempting to reach it. Some scenarios will record a successful path; others will record an unsuccessful one. When writing scenarios, project managers should be as specific as possible. There are an infinite number of possible scenarios for all but the most trivial of systems, so it is important to be discerning in deciding which scenarios to write.
Scenarios begin in the Active state. The business analyst or project manager creates the scenario, provides a descriptive title, and fills in the description field with as much detail as possible about the scenario. (See Figure 4-6.) When the scenario is fully written, the project manager assigns it to the developer team. The scenario remains in the Active state while it is being implemented.
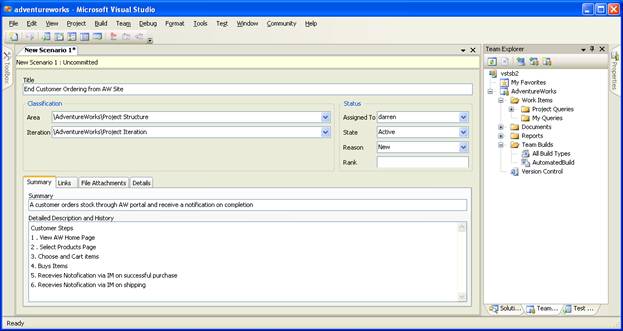
Figure 4-6
Adding a new scenario to VSTS
During the project's life cycle, a scenario can change to any of the following states:
Completed.
A scenario is resolved as completed when the development team completes writing code for the scenario. The lead developer assigns the scenario to a tester.
A scenario is resolved as split when further review indicates that the scenario is too large or needs more granular definition.
Deferred.
A scenario is resolved as deferred if it cannot be implemented in the current iteration. A scenario could be deferred because the team does not have enough time or because blocking issues were discovered.
Removed.
A scenario is resolved as removed if it is no longer deemed necessary to implement.
Closed.
The tester closes a scenario if it passes its tests.
Quality of service requirements document characteristics of the system, such as performance, load, availability, stress, accessibility, serviceability, and maintainability. These requirements usually take the form of constraints on how the system should operate.
The QoS requirements can be created in the quality of service requirements list found in the requirements folder in the document library or by using the new work item menu in Team Explorer. The business analyst or project manager creates the requirement, provides a descriptive title, and fills in the description field with as much detail as possible about the requirement. When the requirement is fully written, the business analyst or project manager assigns it to a lead developer. The requirement remains in the Active state while it is being implemented. The lead developer coordinates efforts with other developers to implement the requirement.
During the project's life cycle, a QoS requirement can change to any of the following states:
Completed.
A quality of service requirement is resolved as completed when the development team completes writing code for the requirement. The lead developer then assigns the requirement to a tester.
A quality of service requirement is resolved as split when further review indicates that the requirement is too large or that it needs more granular definition.
Deferred.
A quality of service requirement is resolved as deferred if it cannot be implemented in the current iteration. A requirement could be deferred because the team does not have enough time or because blocking issues were discovered.
Removed.
A quality of service requirement is resolved as removed if it is no longer deemed necessary to implement.
Closed.
The tester closes a quality of service requirement if it passes its tests. A requirement is also closed if it is deferred, removed, or split into more requirements. The QoS requirement is returned to the Active state, however, if it fails one or more tests.
Probably the most understandable and commonly used of the VSTS work items is the task. A task work item simply communicates the need to do some work. Each role will get tasked to do different things. For example, a developer uses development tasks to assign work derived from scenarios or QoS requirements to component owners. The tester uses test tasks to assign the job of writing and running test cases. A task can also be used to signal regressions or to suggest that exploratory testing be performed. Finally, a task can be used generically to assign work within the project. On the work item form, certain fields are used only in cases when a task relates to a particular role.
A new task work item can be created whenever new work is identified that needs to be done. There are three types of tasks: development, test, and generic. Development tasks identify development work to be done as part of implementing scenarios, quality of service requirements, or architecture. Test tasks identify testing to be completed. Generic tasks can be used to identify work outside of these other two areas.
During the project's life cycle, a task can change to any of the following states:
Completed.
A task is closed as completed when there is no further work to be done.
Deferred.
A task is closed as deferred if it cannot be implemented in the current iteration. A task could be deferred because the team does not have enough time or because blocking issues were discovered.
Obsolete.
A task is closed as obsolete if the work it represents is no longer applicable to completion of the product.
Cut.
A development task or test task is closed as cut if the functionality for that task is removed from the product.
Closed.
A closed task means that no further work is to be done for the current product version. A development task is closed after the code changes have been integrated. A test task is closed when all the tests are complete for that area.
Reactivated.
A development task or test task can be reactivated because of a change in functionality for that area.
Some teams refer to them as "defects." Whatever term is used for them, VSTS bugs are work items that indicate a potential problem exists or has existed in the system. The goal of creating a bug work item is to accurately report bugs in a way that allows the reader to understand the full impact of the problem. The descriptions in the bug work item are to make it easy to trace through the steps used when the bug was encountered, thus allowing it to be easily reproduced. The clarity and understandability of this description often affects the probability that the bug will be fixed.
As bugs are detected in the software product, they are documented as quickly as possible so that developers can resolve them. When a newly discovered bug is entered into Team Explorer, the bug work item is automatically set to an Active state. An Active bug indicates that a problem exists and must be addressed. Bugs can be discovered and documented as a result of a build failure or other causes, such as those discovered by developers, testers, or users.
During the project's life cycle, a bug can change to any of the following states:
Fixed.
A bug is resolved as fixed when the changed code is checked in. Link the bug to the changeset when the fix is checked in.
As Designed.
A bug is resolved as designed if the bug describes an expected condition or behavior of the system.
Deferred.
A bug is resolved as deferred if it will not be fixed in the current iteration. It will be postponed until it can be reevaluated in a future iteration or version of the product.
Duplicate.
A bug is resolved as a duplicate if it describes the same problem as another bug. Include a link to the duplicate bug to make it easier for the author of the bug to confirm the duplication before closing the bug.
Obsolete.
A bug is resolved as obsolete if it is no longer applicable to the product. For example, if the bug describes a problem in a feature area that no longer exists in the product, it is obsolete.
Unable to Reproduce.
A bug is resolved as unable to reproduce if the developer is unable to reproduce the bug on his or her computer.
Closed.
A closed bug means that no further work is to be done for the current product version. A bug is closed after the resolution has been verified. Bugs can be returned to the Active state, however, if the resolution is unacceptable. Bugs can also get returned to an Active state if the fix was incorrect or if a test demonstrates that the bug still exists.
An essential aspect of project management is to identify and manage the inherent risks of a project. A risk is any probable event or condition that can have a potentially negative outcome on the project in the future. A risk work item documents and tracks the technical or organizational risks of a project. When concrete action is required, these risks can translate into tasks to be performed to mitigate the risk. For example, a technical risk can set off an architectural prototyping effort. In this case, the project manager or another team member would create new Task work items, linking them back to the original Risk task item or items. The linking of these work items is important to establish a proper work item lineage for management.
The team should always regard risk identification in a positive way to ensure team members contribute as much information as possible about the risks the team faces. The environment should allow individuals identifying risks to do so without fear of retribution for their honest expression of tentative or controversial views. Teams creating a positive risk management environment will be more successful at identifying and addressing risks earlier than teams operating in a negative risk environment.
A new risk work item can be created whenever a new risk is identified. These new work items should contain a title and description that clearly states the potential adverse outcome. The potential impact should be selected. New risks can be created by any team member and should be assigned to the person who will track the risk until it is closed or reassigned. To create a new risk work item, use the New Work Item menu in Team Explorer. An Active risk indicates there is some potential unrealized event that could affect the project. All risks should be assigned to an owner.
During the project's life cycle, a risk can change to any of the following states:
Mitigated.
A risk can be closed as mitigated when some action has been performed ahead of time to prevent the risk from occurring or to reduce the impact or consequences of its occurring to an acceptable level.
Inactive.
A risk can be closed as inactive when the probability of the risk occurring drops low enough to be negligible.
Transferred.
A risk can be closed as transferred when it can be moved outside the project. The risk has not been eliminated-rather, it is no longer in the scope of the current project. Examples of transferred risk include moving the risk to next release, using external consultants, or purchasing a component instead of building it.
Accepted.
Some risks are such that it is simply not feasible to intervene with effective preventative or corrective measures. The team elects simply to accept the risk in order to proceed.
Avoided
A risk might no longer be valid
because of a change to the project or to the risk itself. The risk might have
failed to materialize, and thus the project can stop tracking it.
Closed
A risk that is closed is no longer a threat to the project. However, a risk that was closed during an iteration might be worth discussing in the iteration retrospective. A risk can, however, reappear and be reactivated. When a risk is reactivated, move the state from Closed to Active.
|
Politica de confidentialitate | Termeni si conditii de utilizare |

Vizualizari: 1053
Importanta: ![]()
Termeni si conditii de utilizare | Contact
© SCRIGROUP 2026 . All rights reserved