| CATEGORII DOCUMENTE |
| Bulgara | Ceha slovaca | Croata | Engleza | Estona | Finlandeza | Franceza |
| Germana | Italiana | Letona | Lituaniana | Maghiara | Olandeza | Poloneza |
| Sarba | Slovena | Spaniola | Suedeza | Turca | Ucraineana |
Creating a Web Page and Web Site
Using Microsoft FrontPage 2002 for
Windows 98/2000/Me/XP
In this tutorial well first create a single web page using Microsoft FrontPage 2002. Then, well create a web site, which consists of multiple, linked web pages. For the single web page you can save your work on a formatted 3 inch diskette. For the web site it would be prudent to save the data on your hard drive. Or, you can save them both on your hard drive.

To load the Front Page 2002 program, Double click the left mouse button quickly on the FrontPage 2002 icon on the main Windows screen, or click-the left button on Start in the lower left corner of the screen, then click left-on Programs, and then click left on Microsoft FrontPage.
![]() You should now be in the Microsoft FrontPage 2002 main screen. If youre in FrontPage 2002, youll see, in the upper left corner of the screen, a title that looks like the one
just to the right.
You should now be in the Microsoft FrontPage 2002 main screen. If youre in FrontPage 2002, youll see, in the upper left corner of the screen, a title that looks like the one
just to the right.
In this tutorial, whenever we indicate that you need to click a mouse button, it will mean to click the left mouse button unless we indicate that you should click the right mouse button. So, always move the cursor over the place we indicate and click left unless we tell you otherwise.
Click-on all of the Titles in the Menu bar (like the one below) and familiarize yourself with what they do. As you click-on each Title, look at the items in the menus that drop down when you click-on each Title.
![]()
Youll notice that the major portion of your screen, below the Menu Bar and Button Bars, is gray. This is because you have not created a new blank web page as yet. In the earlier versions of FrontPage a new page appeared when you opened the program. So that you can see all of the buttons in the button bar do the following to create your first web page.
You can use the Menu Bar method below or the Button Bar method at the top of the next page.

![]()
![]() Click-on
File in the Menu Bar, and when the image at the right appears, click-on New and then on Page or Web
Click-on
File in the Menu Bar, and when the image at the right appears, click-on New and then on Page or Web
![]()
 Or,
you can click-on the Create a new or normal page button in
the button bar below the Menu Bar
(like the image on the right).
Or,
you can click-on the Create a new or normal page button in
the button bar below the Menu Bar
(like the image on the right).
When you have finished this task, slowly move the cursor over the buttons in the button bars (like the one below) and read the text helps that appear. Youll need to pause a few seconds on each button to give the text help time to appear. Notice that the buttons do the same things as many of the drop down menu items.
![]()
 Now,
observe, down the left side of the screen, under Views, there are a number of icon buttons (like the picture at the left). Notice that the Page button seems to be depressed. This indicates that you are
in the Microsoft FrontPage 2002 Editor
view. Well spend a lot of time, in Page View,
creating and editing our first web page. When we have finished creating a single web page, well then create a web site consisting of multiple web pages. Click-on
each of the icon buttons on the left. Start with Folders and continue down until you have clicked-on Tasks at the bottom. Each button shows you a different view of
your web site. Again, the first button, Page, shows you what a single web page looks like. As we create our first web page, youll see
all of the changes here. Folders, shows you your web site in file form. You cant see anything at the moment because
we havent created a web site. Reports will show you the status of all the pages in your web
site as we create them. Navigation will show you, as you create
your web site pages, a little organization
chart. The lines connecting the boxes
(as shown in the Navigation icon
button), will indicate the hyperlinks
between the pages. Hyperlinks show the actual links, once we create them, between the
web pages. Tasks is a little word processor that lets you maintain a list of
things to do, once you begin
creating your web site. Most of these
wont show you much now, but later you will be amazed at the web site you have
created. Well return to these buttons when we begin creating our web
site. Finally, click-on Page one more time. This is where well begin.
Now,
observe, down the left side of the screen, under Views, there are a number of icon buttons (like the picture at the left). Notice that the Page button seems to be depressed. This indicates that you are
in the Microsoft FrontPage 2002 Editor
view. Well spend a lot of time, in Page View,
creating and editing our first web page. When we have finished creating a single web page, well then create a web site consisting of multiple web pages. Click-on
each of the icon buttons on the left. Start with Folders and continue down until you have clicked-on Tasks at the bottom. Each button shows you a different view of
your web site. Again, the first button, Page, shows you what a single web page looks like. As we create our first web page, youll see
all of the changes here. Folders, shows you your web site in file form. You cant see anything at the moment because
we havent created a web site. Reports will show you the status of all the pages in your web
site as we create them. Navigation will show you, as you create
your web site pages, a little organization
chart. The lines connecting the boxes
(as shown in the Navigation icon
button), will indicate the hyperlinks
between the pages. Hyperlinks show the actual links, once we create them, between the
web pages. Tasks is a little word processor that lets you maintain a list of
things to do, once you begin
creating your web site. Most of these
wont show you much now, but later you will be amazed at the web site you have
created. Well return to these buttons when we begin creating our web
site. Finally, click-on Page one more time. This is where well begin.
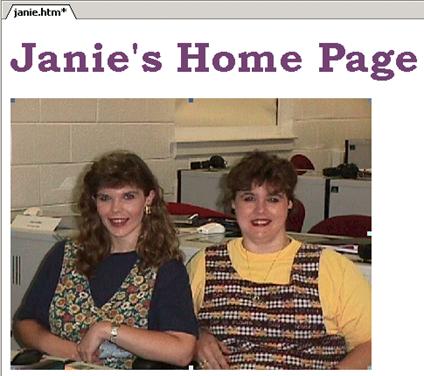
Well start this tutorial by placing a title on our first personal web page. You should be in Page in the View Task bar on the left, and your cursor should be flashing on the left-hand side of the white area. The Page button should look depressed (have a square around it) and at the upper left corner, above the white area, it should indicate: new_page_1.htm (like the picture above right). If it does not, click-on the Page button again, and look for the flashing cursor and new_page_1.htm.
First well enter some text. Type something like: Your first name (s) Home Page (e.g. Janiess Home Page). Then tap the Enter key once. Notice, that when you tapped the Enter key, that the cursor moved down two lines (double spaced). This is just the way the Editor works. If you desire a single space between your text, simply Hold Down the Shift key and, while you are holding down the Shift key, tap the Enter key.
Now click to the left of your name and hold down the left mouse button, and drag across all that you have typed, and release the button. This will highlight your title. It should look something like the picture on the right.
 With the text highlighted, click-on Format in the Menu bar and then click-on Font. A Menu
screen similar to the one below
will appear (weve made some changes youre Font menu will look similar to this one when we finish the font).
With the text highlighted, click-on Format in the Menu bar and then click-on Font. A Menu
screen similar to the one below
will appear (weve made some changes youre Font menu will look similar to this one when we finish the font).


![]()

![]()

Well refer to each numbered item (on the last page) as we proceed below. There are several unique things that occur when you are working in web pages. If you are familiar with word processing, then you know that you can make your font size just about as big as you desire. However, when working in web pages, you are limited in the number of font sizes that you are allowed. In web terminology these are called headers. We are going to snazz-up our title font a bit. First, you will notice that a Sample of how the font currently appears is located in the lower Preview area of the Font menu screen. As we alter the appearance of the font, each change will appear, as we make it, in the Preview area.
First ( 1.), click-on several of the fonts in the Font area (1. Font in the picture on the previous page). Notice that, as you click, the fonts appear in the Preview area below. Click-around until you discover one you like we chose Bookman Old Style.
Second ( 2.), click-on Font style - Bold. Watch the Preview area.
Third ( 3.), click-on one of the Sizes. Notice that, when you do, the Preview changes to that size. Also, notice to the left of the font size there is a 1, 2, 3, [e.g. 4 (14pt)]. In web pages this is the size of the header. Since we are creating our web page in a program called HyperText Markup Language (HTML), you will find that, in a number of word processing functions, we are limited in what we can do on our web page. FrontPage tries to take care of these. In the case of Fonts however, we are still limited to 7 font sizes called headers. In the old days, a few years ago, you would indicate a font size by typing in something like <h7> to do the same thing well do to make our font the largest size. When we finish this web page well click-on the HTML tab at the bottom of the screen to see the programming code that we have created by simply using FrontPage 2002. In our case, move down and choose the largest size: 7 (36 pt).

 Fourth ( 4.), click-on
the down triangle to the right
of Color. A list of colors appears (like on the right).
Click-on More Colors. When you do,
the following Menu screen appears.
Fourth ( 4.), click-on
the down triangle to the right
of Color. A list of colors appears (like on the right).
Click-on More Colors. When you do,
the following Menu screen appears.

When the above More Colors menu screen appears, click-on Custom. The below Color menu screen will now appear.

![]()


Click-on one of the Basic Colors (arrow on the left). Notice that, when you do, a small marker appears in the color pattern (top arrow on the right). Notice that a small triangle appears on the right of the pattern (middle arrow on right). You can click-on the triangle, hold down the left mouse button, and drag the triangle up and down. As you do, you will see changes in the color. Try this. For now choose a favorite dark color. If, you want to use this color again later, click-on Add to Custom Colors. You will see your choice appear in Custom colors on the left. This color will always appear whenever you want it for other text in this web page. When you are satisfied, click-on OK once, again and a third time.
You will notice that when you return to your web page that the area you highlighted is still highlighted (and you wont see your color as you selected it). You will need to point away somewhere in the white area of the page and click the left mouse button. This will remove the highlight and reveal your the color of your text. If you dont like the color, try again.
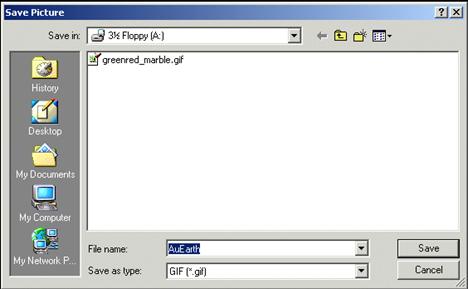
Its wise to save your web page periodically so that you dont loose your hard work. There are several ways to do this. First, click-on File in the Menu Bar and then click-on Save.
The following Save As Menu Screen will appear.


We will be saving this web page on a floppy disk in the A Drive. So, insert a formatted High-Density disk in the A Drive. When the disk is in place, click-on the small triangle to the right of the Save in: box. A drop down menu will appear. Click-on the 3 Floppy (A:). If you dont have a floppy disk, as indicated at the beginning of the tutorial, you can click-on the C Drive and save it on the C Drive, or in one of the folders on the C Drive.
The drive you choose will now appear in the Save in: area. You will need to give your web page a File name under which it will be saved. FrontPage will try to guess one for you. Be careful here. FrontPage will try to use your title for the name of the web page. If it is more than 8 characters long, some older computer systems and servers might not work well with the name.
Also, the name should not have an apostrophe () as this is a reserved Java character and could cause later problems as well. So, create a logical name for your web page like the one above (Janie).
At this point wed normally insert your picture in the web page. If you know how to use a scanner, scan a picture of yourself. If at all possible, scan the picture as a GIF or JPEG file. These will load faster in your page. If you dont know how to do this, have someone who does, scan a photo for you. Or, if you have access to a digital camera, have someone take a digital picture of you. Place your picture directly to the diskette, on which your web page is saved, or transfer the image to the Hard disk where your web page is located.
You need to have all of the parts of the web page in the same place. In order for the page to load correctly, the text, pictures, animations, video files, photos, sounds, etc., all need to be on the A drive (for a small web page) or in a folder on the hard drive. If the web page cant find the various items, you will not be able to see them in your page.
Before you insert your picture, make sure that your cursor is flashing a couple of spaces below the title. Then click-on Insert in the Menu bar and then click-on Picture, and then click-on From File.
![]()


![]()

 The
following Picture menu screen will
appear.
The
following Picture menu screen will
appear.

In the Look in: area of the Picture menu screen, click-on the small triangle and select the disk drive where your photograph is located. It is assumed that the location is the A drive. Again, make sure that all of the items are in a single location (like the A drive or a folder on the C drive) so that the web page can locate them. Next click-on the file name for your photograph in the area below the Look in: area. Then, click-on Insert.
Your web page should look something like the sample below.

 Your picture might be larger or smaller than the one on the right. To size
the picture, point to the picture and
click the left mouse button. This
will activate the picture. You will see small squares at each of the corners and in the middle of the top,
bottom, and side edges.
Your picture might be larger or smaller than the one on the right. To size
the picture, point to the picture and
click the left mouse button. This
will activate the picture. You will see small squares at each of the corners and in the middle of the top,
bottom, and side edges.
Corner
![]()
 If, you move
the mouse over one of the corner squares,
a small two-headed arrow will appear
(see enlarged corner on the right). When this occurs, click and hold down the left mouse button, and drag the corner in or
out to make your photograph larger or smaller. If you click-on one of the top, bottom or
side squares and do this you will get a fat or thin picture. By clicking-on the corners, the picture holds
its normal size ratio or
perspective.
If, you move
the mouse over one of the corner squares,
a small two-headed arrow will appear
(see enlarged corner on the right). When this occurs, click and hold down the left mouse button, and drag the corner in or
out to make your photograph larger or smaller. If you click-on one of the top, bottom or
side squares and do this you will get a fat or thin picture. By clicking-on the corners, the picture holds
its normal size ratio or
perspective.
When you finish, your web page should look similar to the image below.
![]()
 After something this significant, its a good
idea to Save
again. From now on, when you save, you
can simply click-on the small diskette
in the button bar (if you desire). Or, you can click-on File in the Menu bar and
then on Save as you did
previously. Your choice.
After something this significant, its a good
idea to Save
again. From now on, when you save, you
can simply click-on the small diskette
in the button bar (if you desire). Or, you can click-on File in the Menu bar and
then on Save as you did
previously. Your choice.
Text Wrapping
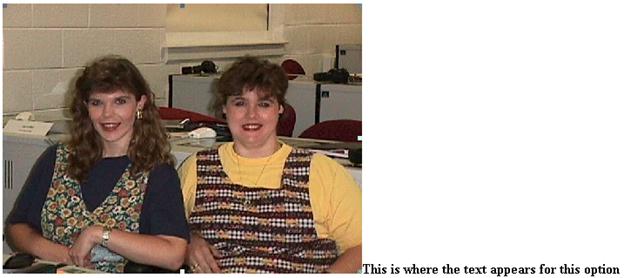
You may want text to wrap around your photograph. And, you may also want your photograph to be somewhere other than on the left side where it defaulted when you inserted it.
If the flashing I-bar cursor is not below your picture, click-below your picture and it should appear. If it doesnt, point with the mouse cursor, to the white area to the right of your photograph and click the left mouse button. Then, tap the Enter key and the cursor I-bar should be just below your photograph. You may have to tap several times
Now type the following: This is where the text appears for this option.
 To observe where the text
appears (around an image), well illustrate each of these appearances on the next few pages. To do this, point in the picture and click
the right
mouse button. Whenever you right-click
on any area, text or object in Windows, a tailored menu will appear for that
area, text or object. When you right-click in your photograph, the
following Menu will appear (as shown on the right).
Click-on Picture Properties.
To observe where the text
appears (around an image), well illustrate each of these appearances on the next few pages. To do this, point in the picture and click
the right
mouse button. Whenever you right-click
on any area, text or object in Windows, a tailored menu will appear for that
area, text or object. When you right-click in your photograph, the
following Menu will appear (as shown on the right).
Click-on Picture Properties.
The following Picture Properties menu screen will appear. Make sure that you are on the Appearance tab at the top of the menu page. Then, click-on the small triangle to the right of Alignment: Texttop.
![]()

![]()
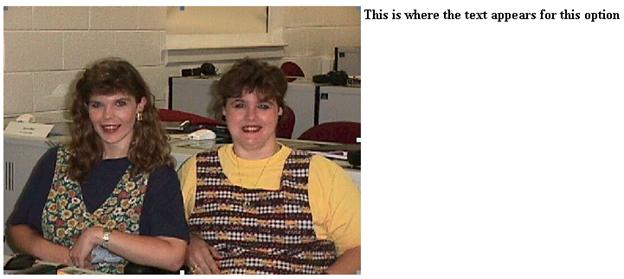
Notice the choices that appear below Default (arrow above). Well now illustrate each of these choices.
Click-on Left, and then click-on OK. You will see a new display similar to the one on the next page. If you desire to duplicate the below illustrations, repeat the above process for each of the choices indicated. If you do not, simply observe look at the images on the next tow pages.
This is the Default.
This is the left
appearance choice.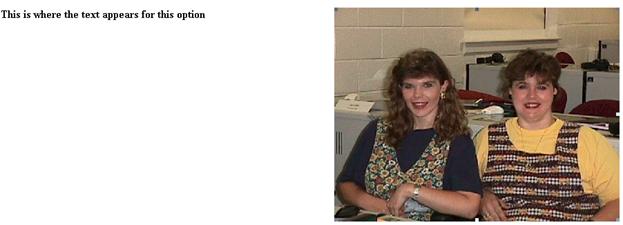
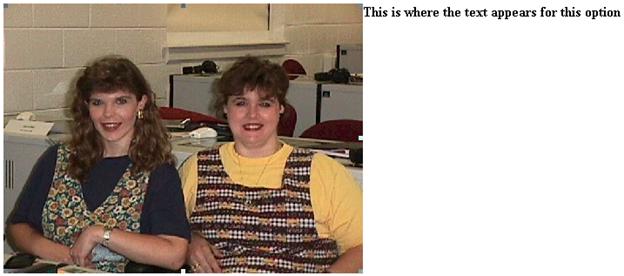
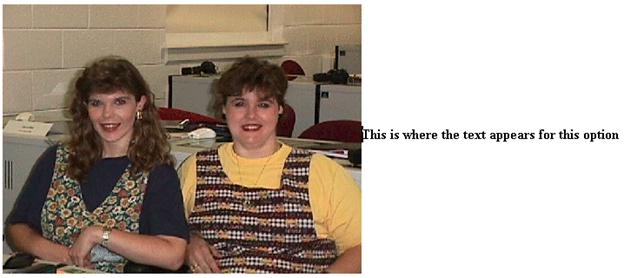
These are the top
and text top appearance choices These are the top
and texttop appearance choices
These are the bottom,
baseline, and absbottom appearance
choices These are the middle, center and absmiddle appearance
choices
 So far we have been working only in the Microsoft Editor (Page View). We have not really seen how the web page will
really look to the world in a browser. In the button
bar, below the Menu bar, there is a button (see below) that will load
our web page in a browser (e.g.
Microsoft Explorer, Netscape).
So far we have been working only in the Microsoft Editor (Page View). We have not really seen how the web page will
really look to the world in a browser. In the button
bar, below the Menu bar, there is a button (see below) that will load
our web page in a browser (e.g.
Microsoft Explorer, Netscape).
![]()
![]()
![]()
 We
want to add a background and an animation from the Web Developers Virtual Library to our web page. To do this well start by clicking-on the Graphics button. This button/link has moved several times. At this time it is in a scroll down list on the right side of the screen it could be
on the left if the design changes again. Move
down until you see the word Graphics. Your screen should look something like the
one to the left. Click-on
Graphics. If your screen does not look just like this,
look around for Graphics. When you see
it, move your cursor over Graphics,
you will see the little pointy hand. Click-on
the word Graphics.
We
want to add a background and an animation from the Web Developers Virtual Library to our web page. To do this well start by clicking-on the Graphics button. This button/link has moved several times. At this time it is in a scroll down list on the right side of the screen it could be
on the left if the design changes again. Move
down until you see the word Graphics. Your screen should look something like the
one to the left. Click-on
Graphics. If your screen does not look just like this,
look around for Graphics. When you see
it, move your cursor over Graphics,
you will see the little pointy hand. Click-on
the word Graphics.


 Use the elevator
bar on the right side of the screen to move down slowly until you see a link to a background web page. The
link is pretty far down the list. It
should look like the one below.
Use the elevator
bar on the right side of the screen to move down slowly until you see a link to a background web page. The
link is pretty far down the list. It
should look like the one below.

![]()

![]()


![]()
 Animation
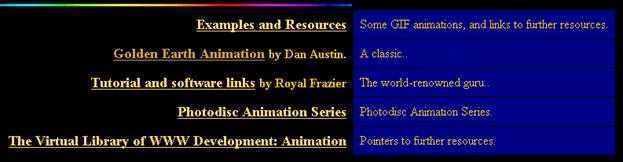
![]() Next well capture a famous animation by Dan Austin. In the upper
left corner of Microsoft Explorer is an arrow that indicates Back
when you move the cursor over it. Click-on
the back arrow two times.
This will take you back to the graphics
page. Run down the page a bit more until you see the image at the top of the next page.
Next well capture a famous animation by Dan Austin. In the upper
left corner of Microsoft Explorer is an arrow that indicates Back
when you move the cursor over it. Click-on
the back arrow two times.
This will take you back to the graphics
page. Run down the page a bit more until you see the image at the top of the next page.
![]()

 You need to be careful here. When
you move the cursor over the rotating earth, youll notice the little pointy
hand. This indicates that there is a web page link associated with the earth.
If you accidentally click-on
the earth and go to another page, click the back arrow to return to this page.
You need to be careful here. When
you move the cursor over the rotating earth, youll notice the little pointy
hand. This indicates that there is a web page link associated with the earth.
If you accidentally click-on
the earth and go to another page, click the back arrow to return to this page.


![]()
 Now were going to go to an entirely new web site. So type-in: https://www.weblust.com in the Address area of Microsoft Explorer or
Netscape. Then tap Enter. You will now proceed
to a marvelous sound site.
Now were going to go to an entirely new web site. So type-in: https://www.weblust.com in the Address area of Microsoft Explorer or
Netscape. Then tap Enter. You will now proceed
to a marvelous sound site.

![]()

 You will want to visit many of
Freds areas. However, well visit the
MIDI FILES to capture a
sound. So click-on the small square to
the left of
You will want to visit many of
Freds areas. However, well visit the
MIDI FILES to capture a
sound. So click-on the small square to
the left of
![]()
![]()
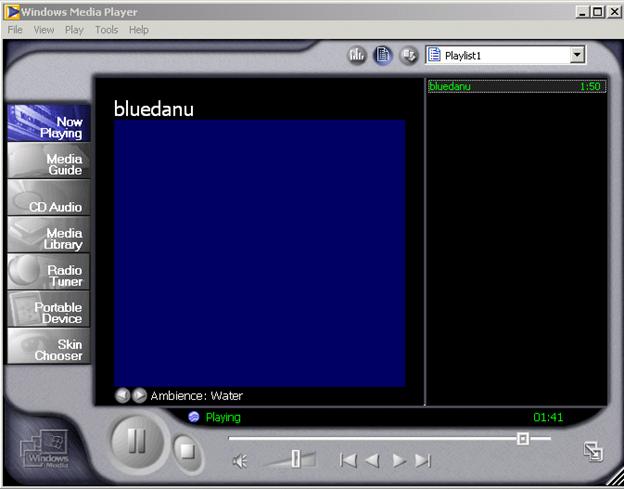
 Well
choose the bluedann.mid for the sound
file. Later, well insert this sound into our web page. When we left
click-on bluedanu.mid a sound player screen will appear. What you see on the
screen will vary in a appearance depending on what player you have installed. Ours
looks like the one at the top of the next page. When the player
has loaded the sound, you will
hear it over your speakers or earphones.
Well
choose the bluedann.mid for the sound
file. Later, well insert this sound into our web page. When we left
click-on bluedanu.mid a sound player screen will appear. What you see on the
screen will vary in a appearance depending on what player you have installed. Ours
looks like the one at the top of the next page. When the player
has loaded the sound, you will
hear it over your speakers or earphones.

 After you have listened to your tune click-on the X in the upper right corner
of the player (see arrow above) to stop
the player and end the tune. Youll have to be careful as you listen to
various tunes. If you keep clicking on tunes and not closing the player you can have a
lot of tunes showing on the Task Bar at the bottom of the screen. So, keep choosing tunes, listening to them,
and closing the player until you find one you like.
After you have listened to your tune click-on the X in the upper right corner
of the player (see arrow above) to stop
the player and end the tune. Youll have to be careful as you listen to
various tunes. If you keep clicking on tunes and not closing the player you can have a
lot of tunes showing on the Task Bar at the bottom of the screen. So, keep choosing tunes, listening to them,
and closing the player until you find one you like.
![]()
![]() Move to and click-on Save Target As
and you will see a normal Save As
screen appear. Save this sound as you did your animation and
background.
Move to and click-on Save Target As
and you will see a normal Save As
screen appear. Save this sound as you did your animation and
background.
![]() Inserting a
Background in your Web Page
Inserting a
Background in your Web Page
![]()
![]()


![]()
 Now you will see:
![]()
 Make sure you are on the A drive. or the folder
where you have saved all of your files.
For the background, click-on the background you chose earlier (see
arrow above). Now click-on Open.
Make sure you are on the A drive. or the folder
where you have saved all of your files.
For the background, click-on the background you chose earlier (see
arrow above). Now click-on Open.
 You will return to the Page Properties screen where we began
this process (under File in the Menu bar).
You will return to the Page Properties screen where we began
this process (under File in the Menu bar).
 Notice
that the background you chose is now
indicated in the Formatting area. Click-on
OK.
Notice
that the background you chose is now
indicated in the Formatting area. Click-on
OK.
![]() Inserting an
animation in a web page
Inserting an
animation in a web page
 Since we previously saved the earth, well
insert the earth in our web page! Sounds
rather awesome.
Since we previously saved the earth, well
insert the earth in our web page! Sounds
rather awesome.

![]() Click-on
Insert in the Menu Bar and then click-on
Picture and then on From File.
Click-on
Insert in the Menu Bar and then click-on
Picture and then on From File.
![]() When
the following Picture menu appears, make sure that you are on your proper
drive (A: or C:, etc.) click-on AuEarth and then click-on Insert. The earth will appear below the text in your
web page!
When
the following Picture menu appears, make sure that you are on your proper
drive (A: or C:, etc.) click-on AuEarth and then click-on Insert. The earth will appear below the text in your
web page!
![]()
![]()
 Save your file and then click-on the Browser button in the
button bar (see image at right) and
you will go back to Microsoft Explorer or Netscape. Now you see your background and the rotating earth.
Save your file and then click-on the Browser button in the
button bar (see image at right) and
you will go back to Microsoft Explorer or Netscape. Now you see your background and the rotating earth.
![]()
![]() Now, with the text high lighted, click-on the Hyperlink button in the button bar.
Now, with the text high lighted, click-on the Hyperlink button in the button bar.
![]()
 The following Insert Hyperlink screen will appear.

![]()
![]() You
can also
hyperlink to an object (like your picture or the rotating earth) the
same way you linked to your text. All you
have to do is to click-on any object and then click-on the hyperlink
button. Then, follow the instructions you just completed above.
You
can also
hyperlink to an object (like your picture or the rotating earth) the
same way you linked to your text. All you
have to do is to click-on any object and then click-on the hyperlink
button. Then, follow the instructions you just completed above.
![]()
![]() The Page
Properties menu screen at the top of
the next page will appear.
The Page
Properties menu screen at the top of
the next page will appear.
 Click-on the Browse button in the
Page Properties menu screen in the Background sound area (see arrow at right).
Click-on the Browse button in the
Page Properties menu screen in the Background sound area (see arrow at right).

 Make sure that you select the drive
on which you web page is saved in
the Look in area. Then click-on
your sound. Finally, click-on
Open.
Make sure that you select the drive
on which you web page is saved in
the Look in area. Then click-on
your sound. Finally, click-on
Open.

![]()

 Notice that your sound is now shown in the Background sound Location area.
![]() Highlight - Visit an awesome place. Click
in front of Visit and awesome place,
hold down the left mouse button and drag
over the text you typed (just
like with the sound), and click-on
the link button again.
Highlight - Visit an awesome place. Click
in front of Visit and awesome place,
hold down the left mouse button and drag
over the text you typed (just
like with the sound), and click-on
the link button again.


![]()
![]() When you see the
When you see the
![]()
 This will take you back to FrontPage 2002 and the Insert Hyperlink menu screen (below). First, click-on the Browsed Pages
button. Next, click-on Lynchburg College
in the list of choices that appears (see arrows
below).
This will take you back to FrontPage 2002 and the Insert Hyperlink menu screen (below). First, click-on the Browsed Pages
button. Next, click-on Lynchburg College
in the list of choices that appears (see arrows
below).

![]()
![]()
![]() First,
go back to FrontPage 2002 again by clicking-on
the FrontPage icon in the Task Bar at the bottom of the screen.
First,
go back to FrontPage 2002 again by clicking-on
the FrontPage icon in the Task Bar at the bottom of the screen.
![]()
![]()
![]() When
you are in FrontPage youll notice at
the bottom of the screen, on the left side, some tabs/buttons. One of them
indicates HTML. Click-on
the HTML tab (see image on right). This will take you
to a screen that shows you the HTML code you have created.
Your screen should look something like the one below.
When
you are in FrontPage youll notice at
the bottom of the screen, on the left side, some tabs/buttons. One of them
indicates HTML. Click-on
the HTML tab (see image on right). This will take you
to a screen that shows you the HTML code you have created.
Your screen should look something like the one below.
![]()

![]()
![]() Congratulations. You have now successfully completed a web
page. Click-on the Normal Button
to move back to the regular/normal view.
Congratulations. You have now successfully completed a web
page. Click-on the Normal Button
to move back to the regular/normal view.
![]() To do this click-on View in the Menu bar, and then carefully go down the
menu, you will see and choice Reveal
Tags appear. Click-on it.
To do this click-on View in the Menu bar, and then carefully go down the
menu, you will see and choice Reveal
Tags appear. Click-on it.
Using Microsoft FrontPage 2002 for
Windows 98/2000/Me/XP
Created:
Starting Microsoft FrontPage 2002
In this tutorial well create a small web site using Microsoft FrontPage 2002. If you have not completed the tutorial: Creating a Web Page Using Microsoft FrontPage Editor 2002 for Windows 98/2000/ Me/XP you should do so prior to attempting this tutorial. The Creating a Web Page Tutorial explains how to create and edit a single web page; this knowledge is pretty essential prior to your attempting the web site tutorial.
In the previous tutorial it explains how to hyperlink or link to other web pages. The really neat thing about this tutorial is that it creates these links automatically for you.
To start the program, Double click on the FrontPage 2002 icon (looks like the one on the right), or click-on Start in the lower left corner of the screen, then click-on Programs, and then on Microsoft FrontPage. You should now be in Microsoft FrontPage 2002.
![]() If you are in FrontPage 2002, you will see,
in the upper left corner of the
monitor screen that you are in
Microsoft FrontPage (it looks similar to the image at the right).
If you are in FrontPage 2002, you will see,
in the upper left corner of the
monitor screen that you are in
Microsoft FrontPage (it looks similar to the image at the right).
Take a few moments to go back to pages 1 and 2 of this tutorial - Creating a Web Page and Web Site Using Microsoft FrontPage 2002 for Windows 95/98 Starting FrontPage 2002.
Review what the screen should look like and re-familiarize yourself with the various buttons on the top and left side of the screen.
If you still have your single web page on the screen, click-on File in the Menu bar, and then click-on Close. If you are prompted to Save your changes click-on Yes.
In the Views button bar along the left side of your screen the Page button should be depressed and the area on the right of the button bar should be gray in color.
![]()
![]()
![]()
 To create
a web site, click-on File in the Menu bar and then click-on New and then on
Page or Web (should look like the
picture on the right).
To create
a web site, click-on File in the Menu bar and then click-on New and then on
Page or Web (should look like the
picture on the right).
Note: If you are a FrontPage 98 or 2000 user, the new Office 2002 graphics displays are very different to from those that you are used to seeing. In every module of Office 2002 there is now a new Task Pane on the right of the screen. Once you get used to using the task pane especially since it has similarities in all of the Office 2002 programs, we think youll really like it. So, for you old FrontPage hands, here we go- with the new graphic features.
After you click-on New Page or Web, the Task Bar on the right will appear on the right side of your screen.

This will take you back to the FrontPage 2002 main screen.
![]() It
will appear that nothing has happened.
However, if you look at the upper left corner of your screen you
will see that the web site c:webtest has been created. Since this is a web site, and in the current Views Bar on the left of the screen
is set on Page, well have to select another button in
the Views Bar to be able to see and work with our web site. Well show you how to do this at the top of the next page.
It
will appear that nothing has happened.
However, if you look at the upper left corner of your screen you
will see that the web site c:webtest has been created. Since this is a web site, and in the current Views Bar on the left of the screen
is set on Page, well have to select another button in
the Views Bar to be able to see and work with our web site. Well show you how to do this at the top of the next page.
![]()
To visually see/confirm that your web site has been created by FrontPage 2002, click-on View in the Menu Bar. In the drop-down menu that appears, click-on Folder List.
![]()


 The
Folder List will now appear on the left side of your screen to the right of the Views Bar.
The
Folder List will now appear on the left side of your screen to the right of the Views Bar.
 The
Folder List (arrow above left) indicates that your new web site is located on the C:
drive in the Folder webtest. Notice also that two new folders have been created by FrontPage private and images. FrontPage 2002 has
also created your initial home page
called index.htm (arrow above left). When we finished the single web page in the
last tutorial, we clicked-on Reveal Tags. In the index.htm
screen you are in the Page (edit)
mode, just like you were when we created the initial single web page.
The
Folder List (arrow above left) indicates that your new web site is located on the C:
drive in the Folder webtest. Notice also that two new folders have been created by FrontPage private and images. FrontPage 2002 has
also created your initial home page
called index.htm (arrow above left). When we finished the single web page in the
last tutorial, we clicked-on Reveal Tags. In the index.htm
screen you are in the Page (edit)
mode, just like you were when we created the initial single web page.
![]()
 To create
our web site well want to be in the
Navigation View. So, click-on
the Navigation button as
indicated by the arrows.
To create
our web site well want to be in the
Navigation View. So, click-on
the Navigation button as
indicated by the arrows.
Earlier, when you clicked OK on the Web Site Templates screen, a little web page and a world globe appeared with an arrow circling the page and the globe. This indicated that your web site was created as you requested. This is now confirmed by the Folder List view (whick shows your created web site) and the image you see below (that appeared when you clicked-on the Navigation button). When this process is complete you will see your initial Home Page of the web site in the center of the screen.
Take a few minutes to look at all of the stuff on the screen. In the center of the screen you will see:
Take note of the words below the Home Page (index.htm), theyre important. Well come back to this in a moment.
If you havent already, youll notice that there is no Save option under File in the Menu Bar. Nor is there a little Save diskette in the button bar. One of the neat things in FrontPage 2002 is that it automatically saves your web site as you make each change. To prove this, click-on File in the Menu Bar and then click-on Exit. FrontPage will close. Now open FrontPage as you did at the beginning of this tutorial. When FrontPage appears, SURPRISE! Your web site appears just like you left it! This is a new feature of FrontPage 2002.
Normally, you would click-on File and then click-on Open. The Open File menu screen (below ) will appear.
![]()
![]() You will need to first click-on the small triangle to the right
of the Look in area, then when the
menu appears below, click-on the C: drive.
You will need to first click-on the small triangle to the right
of the Look in area, then when the
menu appears below, click-on the C: drive.
![]()
![]() Notice that when you click-on the C: drive that you can see
the webtest folder! Click-on the webtest folder
and you will then see the image on
the right.
Notice that when you click-on the C: drive that you can see
the webtest folder! Click-on the webtest folder
and you will then see the image on
the right.
![]()
 Click-on Open,
and when your web site opens, click-on Navigation so we can get started creating our web site.
Click-on Open,
and when your web site opens, click-on Navigation so we can get started creating our web site.
Well create a small personal web site to get you started. You should be in Navigation View.
First, left click-on the Home Page in the middle of the screen. Prior to your click, it will appear as a light yellow icon, when you click-on it, the page will turn blue. This indicates to FrontPage which page you desire to work on. In this case well add, and automatically link, three additional pages below our main home page.
If you accidentally double-clicked on the Home Page icon, this indicates to FrontPage 2002 that you want to edit this page in FrontPage Editor (Page View), so FrontPage loaded your page in the Editor. Well do this a lot after our pages are created. And, its not a big deal anyway. Simply click-on the Navigation button on the left (in the Views area) and youll be back where you want to be.
![]()
 Again, make
sure the Home Page icon is blue. To add
the first page under our home page, you will notice, in the upper left corner of the screen,
a small button (that looks like a sheet of paper) that
indicates New Page (see arrow at right). Click-on this New Page button.
Again, make
sure the Home Page icon is blue. To add
the first page under our home page, you will notice, in the upper left corner of the screen,
a small button (that looks like a sheet of paper) that
indicates New Page (see arrow at right). Click-on this New Page button.

 As soon as you click, your screen will change to reflect that you have just created a New Page 1 below
your Home Page (index.htm).
As soon as you click, your screen will change to reflect that you have just created a New Page 1 below
your Home Page (index.htm).
This is where FrontPage really does its work. When you click, all of the pages you create in FrontPage 2002 will automatically be hyper linked by FrontPage. Your screen should now look like the one at the right. Well come back and name our pages later, after we have created our little web site.
Now well add two more pages under our Home Page (index.htm). Each time, click-on the Home Page (index.htm) to turn it blue, and then click-on the New Page button. Your screen should now look like the one below after you click the New Page button two more times.
Next, well add two pages under New Page 3. The process is similar to what we just did. First, click-on New Page 3, to turn it blue, and then click-on the New Page button. Do this twice. Our web site should now look like the one below.
If you happen to make a mistake, as you are adding new pages, you can simply left click-on the erroneous new page and tap the Delete key, or right click-on the page and then left click on Delete when the menu appears.
![]()
Or, you could always click-on the Undo button at the top of the screen.
 You now have the beginning of a small web
site. Before we attempt to look at
it, we need to do a very important task. Remember the words below the Home Page where we indicated that we
would come back to naming the pages? We
need to tell FrontPage what we want to see on our web pages in our
web site. To do this we first have to follow the instructions below the Home Page (see top of Page 37). They tell us to select Shared Borders in the Format
menu. To do this, click-on Format in the Menu bar
and then click on Shared Borders. The image
to the right shows this.
You now have the beginning of a small web
site. Before we attempt to look at
it, we need to do a very important task. Remember the words below the Home Page where we indicated that we
would come back to naming the pages? We
need to tell FrontPage what we want to see on our web pages in our
web site. To do this we first have to follow the instructions below the Home Page (see top of Page 37). They tell us to select Shared Borders in the Format
menu. To do this, click-on Format in the Menu bar
and then click on Shared Borders. The image
to the right shows this.
![]()
![]()
![]() To make the titles of each web page and the links visible, you will need to click-in
the small circle in front of All Pages, and in the squares to the left of: Top, and Include navigation buttons, and Left,
and Include navigation buttons. Your
Shared Borders screen should
look exactly like the Shared
Borders at the left (see arrows). When it does, click-on OK.
To make the titles of each web page and the links visible, you will need to click-in
the small circle in front of All Pages, and in the squares to the left of: Top, and Include navigation buttons, and Left,
and Include navigation buttons. Your
Shared Borders screen should
look exactly like the Shared
Borders at the left (see arrows). When it does, click-on OK.
1.
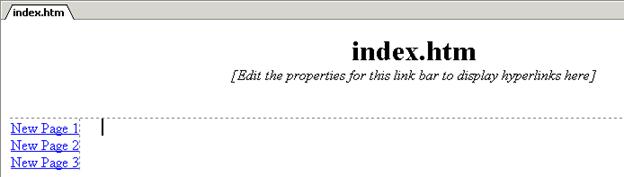 Before we open the web site in a browser, take a few moments to look at the top of the page in the Editor
(Page View). It should look like the view below.
Notice two things. First
1. observe that the title Home Page (index.htm) appears at the top of the page in the Editor (Page View) just as it did when Front Page created it. Second 2. , note the New Page 1, 2 and 3 on the left side of the view below. These are links to pages below the one you are
editing in the Editor. As indicated
earlier, well return to the Navigation View and re-name these pages so that they make
more sense to your web site. Again,
these are the automatic hyperlinks created by FrontPage 2002. Dont
worry about the dashed lines you see.
These are simply to assist you later in the Page View. Youll see that they disappear when you
view your web site in a browser.
Before we open the web site in a browser, take a few moments to look at the top of the page in the Editor
(Page View). It should look like the view below.
Notice two things. First
1. observe that the title Home Page (index.htm) appears at the top of the page in the Editor (Page View) just as it did when Front Page created it. Second 2. , note the New Page 1, 2 and 3 on the left side of the view below. These are links to pages below the one you are
editing in the Editor. As indicated
earlier, well return to the Navigation View and re-name these pages so that they make
more sense to your web site. Again,
these are the automatic hyperlinks created by FrontPage 2002. Dont
worry about the dashed lines you see.
These are simply to assist you later in the Page View. Youll see that they disappear when you
view your web site in a browser.

![]()

Pages Above and at the Same Level
![]()


Now lets go back to the Navigation View FrontPage 2002 and name our web pages. Well be doing the following process frequently, so its good to make sure that you understand the process of moving from one program to another. At the bottom of your screen there is an area which shows/indicates what programs are active. This is called the Task Bar. Since we are using FrontPage 2002, as well as a browser [in our case were using Microsoft Explorer]. Your Task Bar should look similar to the one below.
![]()
![]()
FrontPage 2002 Internet Explorer
![]()

![]()
 Carefully click once lightly on
the title (index.htm) in the Home Page box. The box will turn blue once again. Now click lightly on the title in the Home
Page box (index.htm) one more time and wait
a few moments. The title will now be
highlighted in blue.
Your image should look like the one on the right.
Carefully click once lightly on
the title (index.htm) in the Home Page box. The box will turn blue once again. Now click lightly on the title in the Home
Page box (index.htm) one more time and wait
a few moments. The title will now be
highlighted in blue.
Your image should look like the one on the right.


![]()


Lets
look at what weve accomplished by looking at your web pages in the browser. Well repeat what we did previously. You should be in FrontPage 2002 Navigation view. So, click-on the Navigation
button in the Views bar.
![]()
![]()
![]()

 It does not matter which view you are in
(Page, Navigation, etc.). We were in
Page view when we returned to FrontPage.
It does not matter which view you are in
(Page, Navigation, etc.). We were in
Page view when we returned to FrontPage.
![]() When you are back in FrontPage click-on
Format in the Menu bar and then click-on
Theme.
When you are back in FrontPage click-on
Format in the Menu bar and then click-on
Theme.

![]()
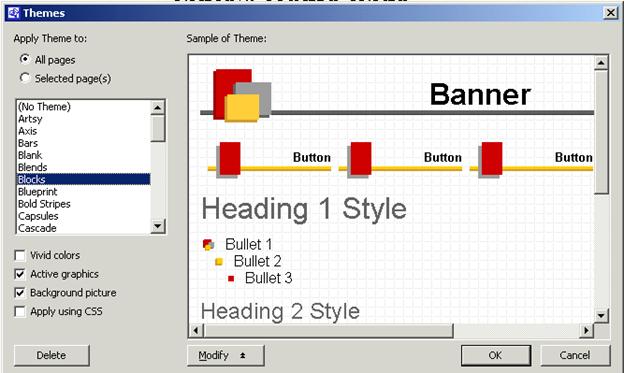
 The Microsoft FrontPage choice screen below
will appear. It indicates that all
of your formatting will be changed to the theme you selected. Click Yes.
The Microsoft FrontPage choice screen below
will appear. It indicates that all
of your formatting will be changed to the theme you selected. Click Yes.

![]()
![]()
![]()
![]()
![]()
You have now learned all of the steps to create a web site, its time to go back to Microsoft Page view and add the things you desire on each web page. This is normally a three-step process. First, since you returned to FrontPage there is no need to click-on the FrontPage 2002 button in the task bar again. Second, double-click on the web page you want to edit in the Navigation view. Third, once you have typed the text, inserted some pictures and graphics, created some links, and whatever else for that page, save the page and then preview it in a browser. Then repeat the cycle as you work on your other pages. This is what you did when as you completed the Creating a Single Web Page tutorial.
 There is another way to move around
between your various web pages in Page view if you dont want to keep going back and forth between
the Navigation and the Page view. When
you are in Page view, move your cursor
slowly over one of the links and pause
on the link. You will notice
that a little text help box appears
that indicates: Use Ctrl+Click to follow
a hyperlink. This means that if you
want edit the page, to which the link connects, you should hold down one of the Ctrl
keys at the bottom of the keyboard
and then, when you move the mouse over a
link you will see the arrow cursor
change to the pointy hand cursor
when you are over the link.
When you see this, if you click
the left mouse button, in a few
moments, you will go to that web page in the Editor. This takes a little skill and patience. So, if you dont link on the first try, try
again.
There is another way to move around
between your various web pages in Page view if you dont want to keep going back and forth between
the Navigation and the Page view. When
you are in Page view, move your cursor
slowly over one of the links and pause
on the link. You will notice
that a little text help box appears
that indicates: Use Ctrl+Click to follow
a hyperlink. This means that if you
want edit the page, to which the link connects, you should hold down one of the Ctrl
keys at the bottom of the keyboard
and then, when you move the mouse over a
link you will see the arrow cursor
change to the pointy hand cursor
when you are over the link.
When you see this, if you click
the left mouse button, in a few
moments, you will go to that web page in the Editor. This takes a little skill and patience. So, if you dont link on the first try, try
again.
![]()
![]()
![]()
 The following Convert Text menu screen will
appear. We suggest that you choose
The following Convert Text menu screen will
appear. We suggest that you choose
|
Politica de confidentialitate | Termeni si conditii de utilizare |

Vizualizari: 1469
Importanta: ![]()
Termeni si conditii de utilizare | Contact
© SCRIGROUP 2025 . All rights reserved