| CATEGORII DOCUMENTE |
| Bulgara | Ceha slovaca | Croata | Engleza | Estona | Finlandeza | Franceza |
| Germana | Italiana | Letona | Lituaniana | Maghiara | Olandeza | Poloneza |
| Sarba | Slovena | Spaniola | Suedeza | Turca | Ucraineana |
How to create Distortion Effects using the Particle Editor
This document highlights the simple way in which to create distortion effects.
Distortion is a cool new effect that is created within the Particle Editor. It allows you create such great things as heat haze, force warps and shockwaves. It works by the RGB being written onto the distort buffer and this is used to manipulate the background image to create a distortion effect.
When considering whether to use distortion effects or not, please note that the effects wont work on minimum spec computers.
The textures used within this document can be found on Distort01.tga. Any future textures made specifically for distortion effects should be added to this .tga. This means there will be less texture swapping when drawing the distortion (as all distortion effects are drawn at the same time) and it also means the textures are more organized.
How to create distortion textures within Photoshop
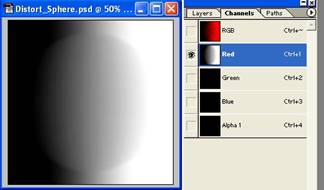
Textures created in Photoshop affect the way the distortion works. This is determined by the RED, GREEN and BLUE values in the texture. Black and White gradients can be created in the RED, GREEN and BLUE channels of the texture and these combine to make a complete texture.
The more RED (value 255) area there is (WHITE within the RED channel) the more the texture will distort to the right.
The less RED (value 0) area there is (BLACK within the RED channel) the more the texture will distort to the left.
When the RED value is 127 there will be no distortion either way.
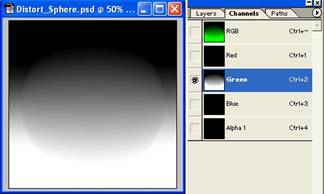
The more GREEN (value 255) area there is (WHITE within the GREEN) channel the more the texture will distort down.
The less GREEN (value 0) area there is (BLACK within the GREEN) channel, the more the texture will distort up.
When the GREEN value is 127 there will be no distortion either way.
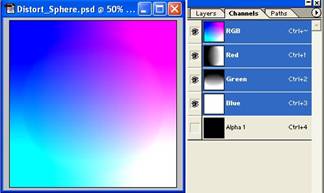
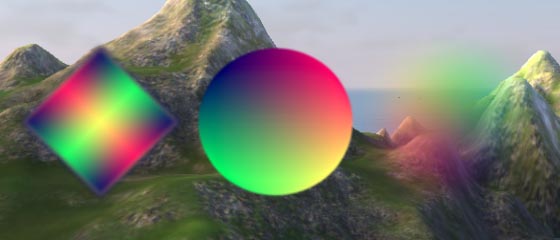
With both the RED and the GREEN channels complete the RGB channel looks like this:
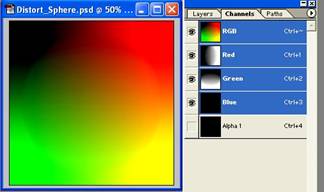
You then add BLUE (value 255) to the BLUE channel. The BLUE in a texture allows you to change the amount of blurring there is within the distortion effect later on in the editor.
Lastly you need to add an Alpha layer and this gives the shape of your texture.
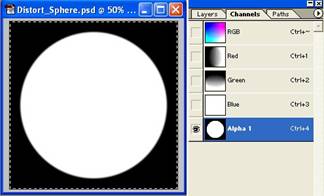
The texture is complete. Save as a .tga and it can now be used in the Particle editor.
Distortion Effects within the Particle Editor
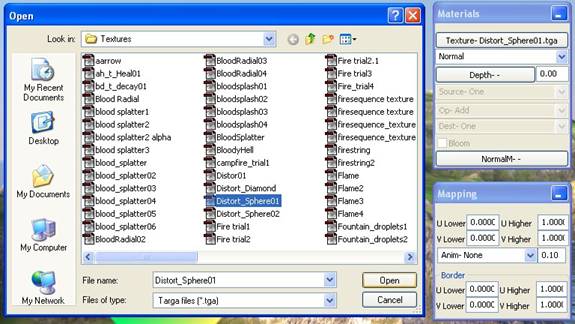
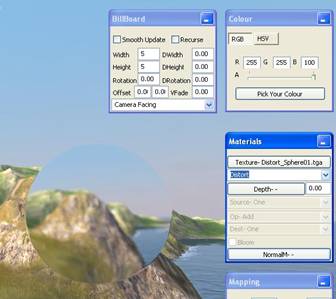
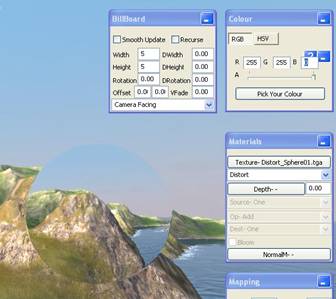
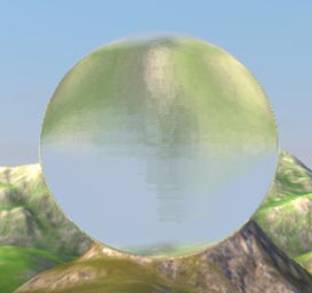
In the Particle editor start a New System (for this example I will use a Billboard). Place the Billboard and then select the texture that you have just made.
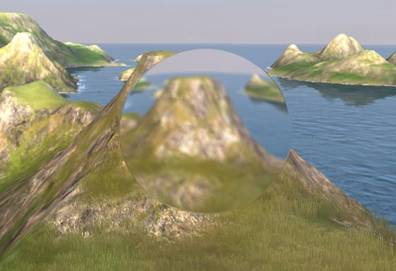
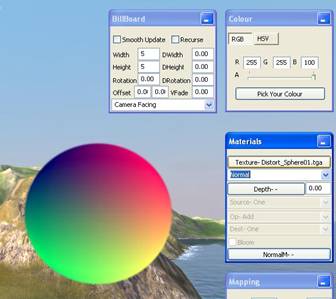
The texture should appear on the landscape like this:
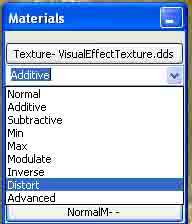
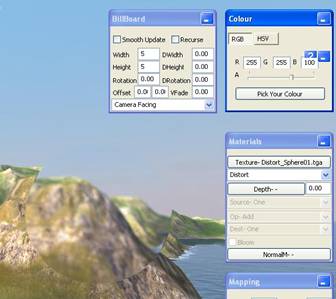
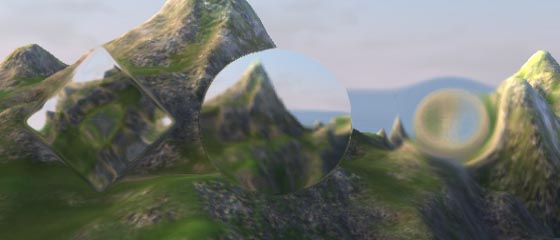
Click on the drop down menu in the Materials window and select Distort.
The Texture will change to this:
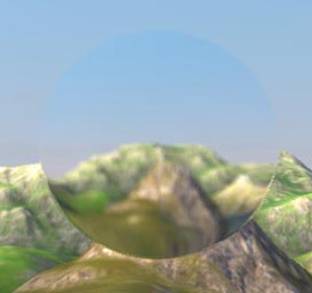
You now have distortion!
Manipulation of the Distortion Texture using different Values
You can now manipulate the look of the effect by changing the RGB and ALPHA values. Here are some examples:
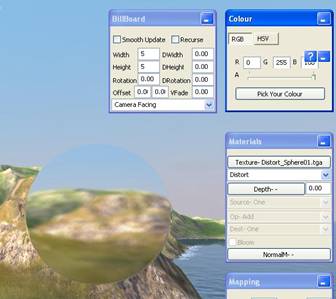
Here the RED Value is down to 0
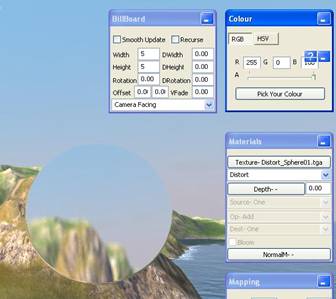
Here the GREEN Value is down to 0
Here the BLUE Value is down to 0. This sharpens the distortion.
Here the BLUE Value is up to 255. This blurs the distortion.

Here the ALPHA value is down by one third
Here the ALPHA value is taken down by two thirds
There is also a quick way of inverting the texture so that you get different Distortion. This is done by changing the UV coordinates within the Mapping window in the particle editor.
Here the UV coordinates are: U Lower: 0 U Higher: 1
V Lower: 0 V Higher: 1
Here the UV coordinates are: U Lower: 1 U Higher: 0
V Lower: 1 V Higher: 0
And there you are. Here are some examples of the existing textures before and after Distort is applied:
As a side note: You dont have to create a Distortion specific texture to do a distortion effect. Simple textures where you manipulate the colour yourself can also be effective, for example, the fire texture is ideal to use for the heat haze above it (just change the blending, and vary the colours).
|
Politica de confidentialitate | Termeni si conditii de utilizare |

Vizualizari: 1515
Importanta: ![]()
Termeni si conditii de utilizare | Contact
© SCRIGROUP 2025 . All rights reserved