| CATEGORII DOCUMENTE |
| Asp | Autocad | C | Dot net | Excel | Fox pro | Html | Java |
| Linux | Mathcad | Photoshop | Php | Sql | Visual studio | Windows | Xml |
Startup and Shutdown
Possibly the most overlooked part of XP is the way people start up and shut down their systems. How much do you think about startup and shutdown? Probably not much. Press a button to start your PC, click on a few buttons to shut it down, and that's it.
In fact, there's a lot you can do to get more productive and to have a little customization fun when using startup and shutdown. You can create boot menus and choose from customized startup options; you can create your own bootscreen; you can perform automated tasks every time you shut down your PC; you can eliminate unnecessary programs and services from starting to increase the speed of your PC. In this chapter, you'll learn all that, plus other ways to master and customize system startup and shutdown.
Edit or create a startup menu that lets you choose which operating system to boot into in multiboot systems, or create a menu that lets you choose different startup options for your single operating system if you have only XP installed.
If you've installed another operating system (in addition to XP) on your system, your PC starts up with a multiboot menu, which allows you to choose which operating system you want to run. The menu stays live for 30 seconds, and a screen countdown tells you how long you have to make a choice from the menu. After the 30 seconds elapse, it boots into your default operating system, which is generally the last operating system you installed.
You can customize that multiboot menu and how your PC starts by editing the boot.ini file, a hidden system file, to control a variety of startup options, including how long to display the menu, which operating system should be the default, whether to use the XP splash screen when XP starts, and similar features. And as you'll see later in this hack, you can also use the file to create a startup menu that will allow you to choose from different versions of your operating system for example, one that you'll use for tracking down startup problems, and another for starting in Safe Mode.
The boot.ini file is a plain text file found in your root C: folder. You might not be able to see it, because it's a system file, and if you can see it, you might not be able to edit it, because it's a read-only file. To make it visible, launch Windows Explorer, choose View >Tools >Folder >Options >View and select the radio button 'Show Hidden Files and Folders.' To make it a file you can edit, right-click on it in Windows Explorer, choose Properties, uncheck the Read-Only box, and click OK.
To edit the file, open it with a text editor such as Notepad. Following is a typical boot.ini file for a PC that has two operating systems installed on it Windows XP Home Edition and Windows Me:
[boot loader]As you can see, there are two sections in the file: [boot loader] and [operating systems]. To customize your menu and startup options, edit the entries in each section. Before editing boot.ini, make a copy of it and save it under a different name (such as boot.ini.old), so that you can revert to it if you cause problems when you edit the file.
Following are details about how to edit the entries in each section:
[boot loader]
This section controls how the boot process works; it specifies the default operating system and how long a user has to make a selection from a boot menu, if a boot menu has been enabled. The timeout value specifies, in seconds, how long to display the menu and wait for a selection before loading the default operating system. If you want a delay of 15 seconds, for example, enter for the value. Use a value of if you want the default operating system to boot immediately. If you want the menu to be displayed indefinitely and stay onscreen until a selection is made, use a value of . The default value specifies which entry in the [operating system] section is the default operating system. (The default value is used even if there is only one operating system in the [operating system] section.) To change the default operating system, edit the setting, in our example, to default=multi(0)disk(0)rdisk(0)partition(2)WINNT.
So, in our example, if you change the menu settings so that the screen appears for 10 seconds before loading the default operating system, and the default operating system is Windows 2000 Professional, the section reads:
[boot loader][operating system]
This section specifies which operating systems are present on the computer, and detailed options for each one. XP uses the Advanced RISC Computing (ARC) path to specify the location of the boot partition. In our example, the ARC path is:
multi(0)disk(0)rdisk(0)partition(1)WINDOWSThe first parameter, which identifies the disk controller, should be . The second parameter, the disk parameter, should also be . The rdisk parameter specifies the disk number on the controller that has the boot partition. The numbers start at . So, if you have three hard disks installed and the second hard disk has the boot partition, the setting is rdisk(1). The partition parameter identifies the partition number of the boot partition. Partitions start with the number . The final section, which in our example is WINDOWS, specifies the path to the folder where the operating system is installed.
To the right of the ARC path in the example is ='Microsoft Windows XP Home Edition' /fastdetect. The words within quotes are what will appear on the boot menu next to the entry. To customize the text on the menu you can change these words to whatever you wish for example, 'My Favorite Operating System.' The /fastdetect switch disables the detection of serial and parallel devices, which allows for faster booting. The detection of these devices isn't normally required in XP, because the functions are performed by plug-and-play drivers, so as a general rule it's a good idea to use the /fastdetect switch. The /fastdetect switch is only one of many switches that can be used in the boot.ini file to customize how the operating system loads. Table 1-1 lists others you can use.
Table 1-1. Switches for boot.ini |
|
|
Switch |
What it does |
| /BASEVIDEO |
Starts XP using the standard VGA driver. It's most useful if you can't boot normally because of a video driver problem. |
| /BOOTLOG |
Logs information about the boot process to the ntbtlogl.txt file in the C:Windows folder. |
| /CRASHDEBUG |
Loads the debugger at boot, but the debugger remains inactive unless a crash occurs. |
| /DEBUG |
Loads the debugger at boot and runs it. |
| /FASTDETECT |
Disables the detection of serial and parallel devices. |
| MAXMEM:n |
Specifies the maximum amount of RAM that XP can use. |
| /NOGUIBOOT |
Does not allow the XP splash screen to load during boot. |
| /NODEBUG |
Stops the debugger from loading. |
| /SAFEBOOT:switch |
Forces XP to boot into the safe mode specified by the switch parameter, which can be minimal, network, or minimal(alternate shell). In minimal safe mode, only the minimum set of drivers necessary to start XP are loaded. In network safe mode, networking drivers are loaded in addition to the minimum set of drivers. In minimal(alternate shell) the minimum set of drivers are loaded and XP boots into the command prompt. |
| /SOS |
Displays the name of each driver as it loads and gives descriptions of what is occurring during the boot process. It also offers other information, including the XP build number, the service pack number, the number of processors on the system, and the amount of installed memory. |
When you've finished editing the boot.ini file, save it. The next time you start your computer, its settings will go into effect.
In our example, if we want the menu to appear for 45 seconds, the default operating system to be Windows 2000, and the XP splash screen to be turned off when we choose to load XP, the boot.ini file should look like this:
[boot loader]Even if you have only one operating system, you can create a boot menu that will let you choose to load your operating system with different parameters. For example, for menu choices, you might have your normal operating system; a mode that lets you trace any startup problems; and Safe Mode. To give yourself the option of operating systems with different parameters, create separate entries for each new operating system choice. For example, for the version of the operating system that traces potential startup problems, you could create this entry:
multi(0)disk(0)rdisk(0)partition(1)WINDOWS='Trace Problems XP Home Edition'This entry creates a startup log and also displays information about the drivers and other operating system information as it loads.
For the version of the operating system that loads in Safe Mode but that still allows networking, you could create this entry:
multi(0)disk(0)rdisk(0)partition(1)WINDOWS='Safe Start XP Home Edition' /The boot.ini file would look like this, assuming that you want the menu to display for 30 seconds and you want normal XP startup to be the default:
[boot loader]
|
You're not stuck with XP's default splash logo on the startup screen use any picture or logo of your choosing.
One of the nice things about XP is how malleable it is. Don't like the way it looks? No problem change it. Take my splash screen, please!
Many people, myself included, would prefer to see a more interesting splash screen (also called the startup screen) than the default gives you on start-up. You can change your splash screen to any of hundreds that have been created, or make one of your own for example, with your picture or company logo on it.
To choose from already created splash screens, go to https://www.themexp.org and click on Boot Screens. You'll find over a thousand of them, organized by categories such as Sports, TV/Movies, and so on. Being a fan of Jack London's The Call of the Wild, I use a picture of huskies for my splash screen. You can see it pictured in Figure 1-2. Nice way to greet the new day, don't you think?

Once you've found the image you want to use as your splash screen, download it. It will be downloaded as a .zip file. I create a general folder for all my boot screen files, called C:Bootscreens, and then for each bootscreen I download I create a new folder in this instance, C:BootscreensWild.
|
Unzip the contents of the .zip file into the folder. There will be one or more files, including ReadMe files. The boot screen itself, however, will be named ntoskrnl.exe. If you have XP Service Pack 1 installed, you may have to use a different file, named ntoskrnlSP1.exe, that may also be in the downloaded .zip file. Check the documentation of the file you download to make sure. If you're not sure if you have Service Pack 1 installed, it's easy to find out. Right-click on My Computer, and choose Properties >General. Your version of the operating system will be displayed. If you have Service Pack 1, it will say so on that screen.
The ntoskrnl.exe file is an executable file that contains the XP bootscreen. During the boot process, XP executes this file, found in C:WindowsSystem32, which in turn displays the bootscreen graphic. So, to change your bootscreen, replace your existing ntoskrnl.exe file with the one you just downloaded. But wait: there's more.
You might think that all you have to do is copy the new ntoskrnl.exe over the existing one and then restart your computer in order for the changes to take effect. That's not quite the case, though. You first have to get around a feature of Windows XP that protects system files from being overwritten. Windows File Protection automatically replaces certain files with the original XP version of the file if they've been replaced, and ntoskrnl.exe is one of those files. However, if you make the change in Safe Mode, Windows File Protection won't kick in and you can safely copy the file.
|
Reboot your PC and press F8 immediately to get into Safe Mode. Now go to the C:WindowsSystem32 folder and find the ntoskrnl.exe file. Copy it to another folder or rename it as a backup so that you can revert to it when you no longer want to use your new bootscreen, or if something goes wrong when you install the new screen. Now copy the new ntoskrnl.exe file into C:WindowsSystem32. (If you have to use the ntoskrnlSP1.exe file, rename it to ntoskrnl.exe first, and then copy it over.)
Reboot your computer again but don't go into Safe Mode this time. Your new splash screen will now appear every time you start your PC. To revert to your old splash screen, repeat the steps, copying your original ntoskrnl.exe file over your new one.
Depending on my mood, I might not want to be greeted by huskies every morning. There are times when I want to be greeted by the normal startup screen, and other times when I want to see Andy Warhol's famous painting of Marilyn Monroe, or Al Pacino from the movie Scarface, all available from https://www.themexp.org. So I've made a startup menu that lets me choose which graphic should be my startup screen.
To create a startup menu, first download all the screens you want to use. Then rename the ntoskrnl.exe or ntoskrnlSP1.exe of each so that the filename describes the screen, for example, ntospacino.exe, ntosmonroe.exe, and ntosspongebob.exe. Copy them each into C:WindowsSystem32. Don't touch the existing ntoskrnl.exe file there; you'll keep that as one of your options. Because you're not changing that file, you don't have to boot into Safe Mode to make any of these changes.
Following the instructions in [Hack #1], create a multiboot screen by editing your boot.ini file. In the [operating systems] section of the boot.ini file, create a new entry for each of the screens from which you want to choose. Copy the existing primary XP entry and append /kernel=newbootscreenfilename.exe to the end of it, where newbootscreenfilename.exe is the filename of the bootscreen you want to use for that entry. Also edit the description so that it describes the bootscreen. For example, if the primary entry is:
multi(0)disk(0)rdisk(0)partition(1)WINDOWS='Microsoft Windows XP Homeyou would create this entry for the Sponge Bob startup screen:
multi(0)disk(0)rdisk(0)partition(1)WINDOWS='Sponge Bob Startup Screen' /Create as many entries as you want in the [boot loader] section. My boot.ini file looks like this:
[operating systems]Whenever you start up XP now, you'll be able to choose from your normal startup screen or any of the others you've put on the menu. If you have a laptop, for example, you might set up a menu that lets you choose a business-like startup screen at work and a more entertaining one at home.
So far this hack has shown you how to use a startup screen that someone else built. But you're not limited to that; you can turn any graphic into a startup screen, using BootXP (downloadable from https://www.bootxp.net). It's shareware and free to try, but it costs $7.95 if you decide to keep using it.
The program will convert graphics from many different formats to a bootscreen graphic, use it as your bootscreen, or build a boot menu for you so that you can choose from multiple bootscreens. That way, you don't have to edit the boot.ini file yourself.
It's a surprisingly simple program to use. Select a graphic that you want to use as a bootscreen, and then click a button to convert it to the 640 x 480-pixel, 16-color bitmap startup screen standard. Preview the graphic, and if it's what you want, tell the program to set it as your bootscreen. The program provides a variety of options, including choosing a different progress bar that alerts you XP is loading, restoring your original startup screen, or randomizing your bootscreen so that it randomly selects one you've created each time you boot. You can also use the program to download already created startup screens from https://www.bootxp.net.
Shorten the time it takes for your desktop to appear when you turn on your PC, and make XP shut down faster as well.
No matter how fast your PC boots, it's not fast enough. Here's a hack to help you get to your desktop more quickly after startup, and to let you walk away faster after shutdown.
The quickest way to speed up boot times is to use the free Microsoft utility BootVis.exe. Although it's intended primarily for developers, anyone can use it to analyze their boot times and see where there are slowdowns. More important, the tool will also automatically make system changes to speed up your boot time, so you don't need to go into a lengthy analysis of where your slowdowns are and how to solve them.
Depending on your system and how it's set up, you may see only a moderately faster startup time, or you may speed up boot time dramatically. I've seen reports of improvements ranging from a little over 3 seconds to more than 35 seconds. The improvements I found on my systems were moderate 7 seconds faster on one, and 10 seconds faster on another. Think of all the things you could accomplish with another 10 seconds in the day!
The BootVis utility traces boot time metrics and then displays the results in a variety of graphs showing total boot time, CPU usage, disk I/O, driver delays, and disk utilization. Download it from https://www.microsoft.com/hwdev/platform/performance/fastboot/BootVis.asp and extract it into its own folder. Go to the folder and double-click on BootVis.exe. To analyze how your system boots, choose Trace >Next Boot. (Choose Trace >Next Boot + Driver Delays if you want to trace delays caused by drivers as well as your normal boot sequences.) Tell the program how many times to reboot and run the test (the more times it runs, the more accurate the results, although the longer the test takes to run). Click OK, and your system will reboot. After you log on after the reboot, you'll see this message:
Please WAIT for Bootvis to launch!Don't do anything yet; the program is working, even though it doesn't appear to be doing anything. After a while, you will see the screen shown in Figure 1-3. Soon after that the results appear, as shown in Figure 1-4.
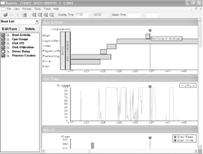
A series of graphs outline boot activity and loading time. The Boot Activity graph, shown in Figure 1-4, is the most important and details all aspects of the boot, including how much time each boot activity takes. Hover your mouse over an activity, such as Driver, and a balloon tip will appear, telling how much time that activity takes to load. To see the total boot time, hover your mouse over the rectangle at the top of a solid black line, and your total boot time will be displayed in a balloon tip, as shown in Figure 1-4.
The pictures and graphs are pretty, but the truth is, you don't really need them, because the utility will automatically make changes to speed up your boot time. To have the utility speed up your boot time, choose Trace >Optimize System and click Reboot Now when a prompt appears. Your system will shut down, reboot, give you the same initial prompt as when it's analyzing your system, but then alert you that it's reorganizing your boot files for faster startup. When the alert goes away, you can use your computer as you would normally. If you want to determine your increase in boot speed, run BootVis again and compare the new boot time to your previous boot time.
There's another way to speed up XP startup: make your system do a boot defragment, which will put all the boot files next to one another on your hard disk. When boot files are in close proximity to one another, your system will start faster.
On most systems, boot defragment should be enabled by default, but it may not be on yours, or it may have been changed inadvertently. To make sure that boot defragment is enabled on your system, run the Registry Editor [Hack #68], and go to:
HKEY_LOCAL_MACHINESOFTWAREMicrosoftDfrgBootOptimizeFunctionEdit the Enable string value to Y if it is not already set to Y. Exit the Registry and reboot. The next time you reboot, you'll do a boot defragment.
|
It's not only startup times that you'd like to speed up; you can also make sure that your system shuts down faster. If shutting down XP takes what seems to be an inordinate amount of time, here are a couple of steps you can take to speed up the shutdown process:
Don't have XP clear your paging file at shutdown
For security reasons, you can have XP clear your paging file (pagefile.sys) of its contents whenever you shut down. Your paging file is used to store temporary files and data, but when your system shuts down, information stays in the file. Some people prefer to have the paging file cleared at shutdown, because sensitive information such as unencrypted passwords sometimes ends up in the file. However, clearing the paging file can slow shutdown times significantly, so if extreme security isn't a high priority, you might not want to clear it. To shut down XP without clearing your paging file, run the Registry Editor and go to:
HKEY_LOCAL_MACHINESYSTEMCurrentControlSetControlSession ManagerMemory ManagementChange the value of ClearPageFileAtShutdown to . Close the Registry and restart your computer. Whenever you turn off XP from now on, the paging file won't be cleared, and you should be able to shut down more quickly.
Turn off unnecessary services
Services take time to shut down, so the fewer you run, the faster you can shut down. For information on how to shut them down, see [Hack #4].
Increase your PC's performance and speed up startup times by shutting off applications and services that you don't need.
One of the best ways to speed up your PC without having to spend money for extra RAM is to stop unnecessary programs and services from running whenever you start your PC. When too many programs and services run automatically every time you start up your system, startup itself takes a long time, and too many programs and services running simultaneously can bog down your CPU and hog your memory.
Some programs, such as antivirus software, should run automatically at startup and always run on your computer. But many other programs, such as instant messenger software, serve no purpose by being run at startup. And while you need a variety of background services running on your PC in order for XP to function, there are many unnecessary services that run on startup. For example, on many systems, the Wireless Zero Configuration Service runs to automatically configure a WiFi (802.11) network card, even though no such card is present in the system.
Stopping programs from running at startup is a particularly daunting task, because there is no single place you can go to stop them all. Some run because they're put in the Startup folder, others because they're part of logon scripts, others because of Registry settings and so on. But with a little bit of perseverance, you should be able to stop them from running.
Start by cleaning out your Startup folder. Find it in C:Documents and
Settings<User Name>Start MenuProgramsStartup, where <User
Name> is your Windows logon name. Delete the shortcuts of any programs
you don't want to run on startup. As with any shortcuts, when you delete them,
you're only deleting the shortcut, not the program itself. (You can also clear
out the startup items by going to Start ![]() Programs
>Startup and right-clicking on items you want to remove.) Next, clean out
your Scheduled Tasks folder. Go to C:WINDOWSTasks,
and delete the shortcuts of any programs that you don't want to run
automatically on a schedule.
Programs
>Startup and right-clicking on items you want to remove.) Next, clean out
your Scheduled Tasks folder. Go to C:WINDOWSTasks,
and delete the shortcuts of any programs that you don't want to run
automatically on a schedule.
|
Taking the previous steps will stop the obvious programs from running at startup, but it won't kill them all. The best tool for disabling hidden programs that run on startup is the System Configuration Utility, shown in Figure 1-5. To run it, type msconfig at a command prompt and press Enter. (If that doesn't work, first do a search for msconfig.exe, and then when you find the file, double-click it.)
To stop a program from running at startup, go to the Startup tab in this utility and uncheck the box next to the program. It can sometimes be difficult to understand what programs are listed on the Startup tab. Some, such as America Online, are clearly labeled. But often, you'll see a phrase or collection of letters, such as fs20. That's the name of the running file-in this case, fs20.exe, which is Free Surfer mk II, an excellent free popup killer [Hack #33]. As you can see from the picture, I've chosen to let this useful tool run on startup.
To get more information about a listing, expand the width of the Command column near the top of the Startup tab. Expand it enough and you'll see the startup command that the program issues, including its location, such as C:Program FilesFree Surferfs20.exe. The directory location should be another hint to help you know the name of the program.
When stopping programs from running at startup, it's best to stop them one at a time rather than in groups. You want to make sure that you're not causing any system problems by stopping them. So stop one and restart your PC. If it runs fine, then stop another and restart. Continue doing this until you've cleared all the programs you don't want to run automatically.
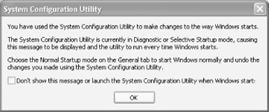
Each time you uncheck a box and restart your PC, you'll get a warning, shown in Figure 1-6, that you've used the System Configuration Utility to disable a program from starting automatically. If you don't want to see that warning, disable it by checking the box in the dialog itself.
After you've used the System Configuration Utility to identify programs that run on startup, you may want to try disabling them from with the programs themselves. So run each program that starts automatically, and see if you can find a setting that allow you to halt it from running on startup.
Even the System Configuration Utility won't necessarily let you identify and kill all programs that run on startup. You may also need to hack the Registry to disable them. To do so, run the Registry Editor [Hack #68] and go to HKEY_CURRENT_USERSoftwareMicrosoftWindowsCurrentVersionRun. The right pane will contain a list of some of the programs that automatically run at startup. The Data field tells you the path and name of the executable so that you can determine what each program is. Right-click on any program you don't want to run, and choose Delete. That will kill any programs that run specific to your logon. To kill programs that run for every user of the system, go to HKEY_LOCAL_MACHINESOFTWAREMicrosoftWindowsCurrentVersionRun and follow the same instructions for deleting other programs you don't want to run at startup.
Constantly running in the background of XP are services-processes that help the operating system run, or that provide support to applications. Many of these services launch automatically at startup. While you need many of them, there are also many that aren't required and that can slow your system down when they run in the background.
You can disable services at startup by using the System Configuration Utility, similar to the way that you halt programs from running at startup, except that you use the Services tab instead of the Startup tab. But the System Configuration Utility doesn't necessarily list every service that launches on startup. A bigger problem is that disabling services is more of shot in the dark than disabling programs. When you disable a program, you can get a sense of what the program does. But when you disable a service through the System Configuration Utility, there's often no way to know what it does.
A better way of disabling services at startup is via the Services Computer Management Console, shown in Figure 1-7. Run it by typing services.msc at the command prompt. The Services Computer Management Console includes a description of all services, so that you can know ahead of time whether a particular service is one you want to turn off. It also lets you pause the service, so that you can test out your machine with the service off to see whether it's needed or not.
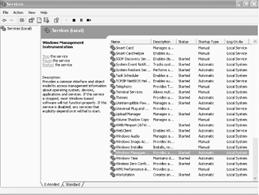
After you run the console, click on the Extended tab. This view will show you a description of each service in the left pane when you highlight the service. The Startup Type column shows you which services launch on startup-any services with 'Automatic' in that column. Click on that column to sort together all the services that automatically launch on startup. Then highlight each of those services and read the descriptions.
When you find a service you want to disable, right-click on it and choose Properties. In the Properties dialog box that appears, choose Manual from the 'Startup type' drop-down list. The service won't start automatically from now on, but you can start it manually via the console. If you want the service disabled so that it can't be run, choose Disabled. To test the effects of turning off the service, turn off any services that you don't want to run by clicking 'Stop the service' in the left pane, or by right-clicking on the service and choosing Stop.
Table 1-2 lists some common services you might want to halt from running at startup.
Table 1-2. Services you might want to turn off |
|
|
Service |
What it does |
|
Portable Media Serial Number |
Retrieves the serial number of a portable music player attached to your PC. |
|
Task Scheduler |
Schedules unattended tasks to be run. If you don't schedule any unattended tasks, turn it off. |
|
Uninterruptible Power Supply |
Manages an Uninterruptible Power Supply (UPS) connected to your PC. |
|
Automatic Updates |
Automatically checks for Windows updates. (You can check manually by going to https://windowsupdate.microsoft.com.) |
|
Telnet (service available on XP Pro only) |
Allows a remote user to log in to your computer and run programs. (This will not be found on all versions of XP Pro.) |
|
Wireless Zero Configuration Service |
Automatically configures a WiFi (802.11) network card. Disable this only if you're not using a WiFi network card. |
If you need to start different programs on startup, depending on what you need to do on your PC, create different startup profiles with this startup utility.
With the hacks covered in this chapter, you can customize how XP starts up. But there's one thing these hacks won't be able to do for you-create different startup profiles. For that, you need downloadable software.
Let's say, for example, you have a laptop that you sometimes run attached to a keyboard, monitor, and an always-on Internet connection, and other times you travel with it, so it is not connected to the Internet. When you use it when you travel, you use it primarily in airplanes, airports, and other places where you typically aren't connected to the Internet. You also run a piece of monitoring software that will send a signal to a call center if your laptop is stolen. You don't need to run that software when you're not on the road.
Ideally, you would have one set of programs that run automatically at home and another set of programs that run when you're on the road. At home, you might want instant messenger software and file sharing software to load at startup; on the road, you don't want that software to load automatically, but you do want your monitoring software to load.
Advanced StartUp Manager-a piece of shareware from Ray's Lab (https://www.rayslab.com), shown in Figure 1-8-lets you create multiple startup profiles so that you can have separate profiles for your laptop at home and the road-or for any other purpose. It's free to try, but it costs $19.95 if you decide to keep it.

In addition to creating a profile for traveling and one for home, you may want to create other profiles. For example, when you want to play games, you'll want to start your system with a minimal number of services and programs running in the background, so you'll create a profile that disables a variety of services, such as the Indexing service, the Task Scheduler, and the Themes service that lets you apply themes to your PC. If you frequently need to troubleshoot your network, you'll want to create a network-troubleshooting profile that automatically starts networking analysis software, such as QCheck. [Hack #57].
To create a profile, add all the programs you want to run on startup, by having them start from the Startup folder, the Registry, or the Win.ini file. Where you want them to start from is up to you. To add a program, just highlight where you want it to run from, choose File >Add Program, and choose the program's executable file. You can add switches, if you want, in the Flags field of the screen you use to add the program. You can also choose whether the program should run for just one specific user or for all users of the machine. To delete a program from the profile, right-click on it and choose Delete.
When you have built a profile with all the programs you want
to run at startup, save it by choosing File ![]() Backup
Configuration as, and then choosing a name for the profile. Create as many
profiles as you want. To load a profile, choose File >Open Backup, and
choose the profile you want to load. After you've loaded a profile, the next
time you start your computer it will load with that startup software. Be aware
that this means you can't choose a profile when you boot your system. You have
to run Advanced StartUp Manager before you exit XP, choose the profile you want
to run next time you start XP, and then exit.
Backup
Configuration as, and then choosing a name for the profile. Create as many
profiles as you want. To load a profile, choose File >Open Backup, and
choose the profile you want to load. After you've loaded a profile, the next
time you start your computer it will load with that startup software. Be aware
that this means you can't choose a profile when you boot your system. You have
to run Advanced StartUp Manager before you exit XP, choose the profile you want
to run next time you start XP, and then exit.
OSL 2000 (https://www.osloader.com) lets you boot from up to 100 separate operating systems (including multiple copies of XP or other versions of Windows), lets you boot from a second hard disk, and offers a variety of other features, such as an automatic boot timer. It's shareware and free to try, but it costs $25 if you decide to continue using it.
For software to customize shutdowns, try Shutdown Now! (https://www.dworld.de). It gives you just about every option you can imagine for shutdown. You can specify applications to launch or documents to load automatically before shutdown, schedule shutdowns, perform actions such as ejecting and loading CDs on shutdown, empty directories on shutdown, and the list goes on. It's shareware and free to try, but if you keep using it you're expected to pay $19.50.
For a free shutdown manager, try Switch Off (https://yasoft.km.ru/eng/switchoff), a simple shutdown utility that runs in your system tray. It lets you schedule shutdowns and perform other tasks on shutdown, such as locking your workstation, and it also lets you do any of them quickly from the system tray. It's not nearly as powerful as Shutdown Now!, but it's free.
A grab bag of ways to customize the way you start up and shut down your system.
There are many small ways that you can control the way you start up and shut down your PC. This grab bag of four hacks shows you the best of them.
Turning off or rebooting XP involves a several-step process: click the Start menu, choose Shut Down, and then select Shut Down or Restart. If you want, however, you can exit or reboot much more quickly, by creating a shortcut that enables one-click shutdowns. You can also use the shortcut to customize the shutdown or reboot-for example, by displaying a specific message or automatically shutting down any programs that are running.
First, create a shortcut on your desktop by right-clicking on the desktop, choosing New, and then choosing Shortcut. The Create Shortcut Wizard appears. In the box asking for the location of the shortcut, type shutdown. After you create the shortcut, double-clicking on it will shut down your PC.
But you can do much more with a shutdown shortcut than merely shut down your PC. You can add any combination of several switches to do extra duty, like this:
shutdown -r -t 01 -c 'Rebooting your PC'Double-clicking on that shortcut will reboot your PC after a one-second delay and display the message 'Rebooting your PC.' The shutdown command includes a variety of switches you can use to customize it. Table 1-3 lists all of them and describes their use.
I use this technique to create two shutdown shortcuts on my desktop-one for turning off my PC, and one for rebooting. Here are the ones I use:
shutdown -s -t 03 -c 'See you later!'
Table 1-3. Switches you can use with shutdown |
|
|
Switch |
What it does |
| -s |
Shuts down the PC. |
| -l |
Logs off the current user. |
| -t nn |
Indicates the duration of delay, in seconds, before performing the action. |
| -c 'messagetext' |
Displays a message in the System Shutdown window. A maximum of 127 characters can be used. The message must be enclosed in quotation marks. |
| -f |
Forces any running applications to shut down. |
| -r |
Reboots the PC. |
When you start your PC, Num Lock, Scroll Lock, and Caps Lock don't automatically toggle on. You can automatically turn each of them on or off whenever your PC starts, for all accounts on the PC. As a practical matter, most people probably want to have only Num Lock automatically turned on, but this Registry hack gives you the power to force any combination of keys on or off. Run the Registry Editor [Hack #68] and go to HKEY_USERS.DefaultControl PanelKeyboard. Find the String value InitialKeyboardIndicators. By default, it is set to , which means that Num Lock, Scroll Lock, and Caps Lock are all turned off. Set it to any of the following values, depending on the combination of keys you want turned on or off:
Turns off Num Lock, Caps Lock, and Scroll Lock
Turns on Caps Lock
Turns on Num Lock
Turns on Caps Lock and Num Lock
Turns on Scroll Lock
Turns on Caps Lock and Scroll Lock
Turns on Num Lock and Scroll Lock
Turns on Caps Lock, Num Lock, and Scroll Lock
Exit the Registry. When you restart, the new setting will take effect.
If you constantly see an error message that you can't get rid of-for example, from a piece of software that didn't uninstall properly and continues to give errors on startup-you can disable it from displaying on startup. Run the Registry Editor and go to HKEY_LOCAL MACHINESYSTEMCurrentControlSetControlWindows. (This key holds a variety of Windows system settings, such as the location of your system directory.) Create a new DWORD called NoPopupsOnBoot and give it a value of . Exit the Registry and reboot for the setting to take effect. To disable it, either delete the DWORD value or give it a value of .
When you shut down Windows, XP gives each process, service or application 20 seconds to close before the operating system turns off the computer. If the process, service, or application doesn't shut down within 20 seconds, a dialog box appears, prompting you to either wait 20 more seconds, immediately end the process, service, or application, or cancel shutdown.
If this dialog box appears frequently, you may be running an application, service, or process that often takes more than 20 seconds to close. To solve the problem, you can increase the amount of time that XP waits to display the dialog box so that the dialog box will no longer appear. To do so, run the Registry Editor and go to HKEY_CURRENT_USERControl PanelDesktop. Look for the String value WaitToKillAppTimeout. Edit the value by entering the amount of time you want XP to wait before displaying the dialog box, in milliseconds. The default is , or 20 seconds. If you want XP to wait 25 seconds, enter the value of . Exit the Registry and reboot.
Make better use of the XP login screen.
If there is more than one user account on your system, or if you've set up XP to require logins, you'll have to log in to XP before you can begin to use it. But you needn't stay with the default XP login rules; you can use a single Registry key to customize how you log in. For example, you can display custom text before login, and you can remind anyone with an account on the PC to change their password a certain number of days prior to the password's expiration.
To control logon options, run the Registry Editor [Hack #68] and go to the HKEY_LOCAL_MACHINESOFTWAREMicrosoftWindows NTCurrentVersionWinlogon subkey, which contains a variety of logon settings (as well as some settings not having to do directly with logons). Following are the most important values you can edit to customize logons.
DontDisplayLastUserName
This setting lets you control how the system logon dialog box is used. If this String value is present and set to , all users will have to enter both their username and password in order to log on. If the value is , the name of the last user to log on will be displayed in the system logon dialog box.
DefaultUserName
This String value contains the name of the last user who logged on. It will be displayed only if the DontDisplayLastUserName value is not present or is set to .
LegalNoticeCaption
This String value, used in concert with the LegalNoticeText value, displays a dialog box prior to logon that contains any text you want to display. (The text doesn't have to be a legal notice, but this value is often used for that purpose.) The box has a title and text. The LegalNoticeCaption value will be the dialog box's title.
LegalNoticeText
This String value, used in concert with LegalNoticeCaption, contains the text that you want to be displayed inside a dialog box displayed prior to logon.
PasswordExpiryWarning
This DWORD value lets you display a warning message to users a certain number of days before their passwords are set to expire. It lets you determine how many days ahead of time the warning should be issued. To edit the value, click on the decimal button and enter the number of days.
ShutdownWithoutLogon
This String value enables or disables a button on the XP logon dialog box that lets the system be shutdown. A value of enables the button (so that it is shown); a value of disables the button (so that it is not shown).
Shell
This String value really doesn't have to do with logons, but it's one you should know about. It determines the shell-the user interface-that will be used by XP. The default is Explorer.exe, but it can be another shell as well-for example, the Program Manager from older Windows versions. Type in the name of the program-for example, Progman.exe for Program Manager, or Taskman.exe for the Task Manager.
AutoRestartShell
This DWORD value doesn't have to do with logons either, but it's another good one to know. It sets whether to automatically restart the Windows shell if the shell crashes. A value of automatically restarts the shell. A value of tells XP not to restart the shell, forcing you to log off and then back on again to restart it.
Now that the Startup and Shutdown are under control, let's move on to the user interface, in Chapter 2.
|
Politica de confidentialitate | Termeni si conditii de utilizare |

Vizualizari: 1524
Importanta: ![]()
Termeni si conditii de utilizare | Contact
© SCRIGROUP 2026 . All rights reserved