| CATEGORII DOCUMENTE |
| Bulgara | Ceha slovaca | Croata | Engleza | Estona | Finlandeza | Franceza |
| Germana | Italiana | Letona | Lituaniana | Maghiara | Olandeza | Poloneza |
| Sarba | Slovena | Spaniola | Suedeza | Turca | Ucraineana |
Dart and Arrow Fletching Techniques
As with the straightening process, a dart can be fletched just like an arrow, and for the same purpose. The fletches help to stabilize the dart in flight. Fletching can be as simple or as elaborate as you wish. It can be as simple as tying two feathers on opposite sides of the dart, or three fletches spaced evenly around the shaft, as with an arrow. It can also be fletched in the Cherokee styles (two feathers are partially stripped and bound on either side of the shaft). Turkey, chicken, crow or even grouse feathers can be used. Do not use feathers from birds of prey, such as eagles, hawks or owls as federal laws protect these.
The two-feather method is easy. Use feathers with about six inches of feather and about an inch of quill at the bottom. If the feathers have a curve, just bend it along the quill about every inch or so and straighten it as you go. A bit of glue at the top of the feather (I just stick it in my mouth to moisten it), then tie the feathers opposite each other towards the cup end of the dart. Shave down the underside of the quill at the fore end so it will lay alongside the dart and lash both down as well. Youre done!
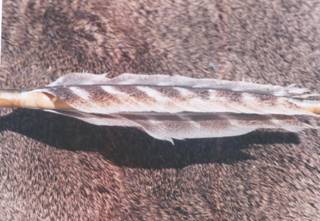
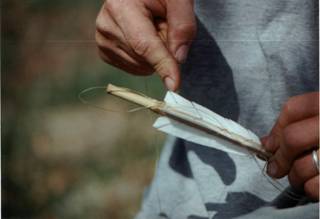
(Above) A simple two feather fletching style.
As stated before, the three fletch method is just like an arrow. Tying down the fletches and gluing under the quills is a good choice. If you are using fletching cement and artificial sinew, this is a snap. Hide glue and sinew can cause problems in moist weather. But try this for and easier method. Use the artificial sinew around the forward end of the fletches. Then continue wrapping around the fletches and straighten them as you go towards the cup end. Finish up by wrapping around the rear ends of the fletching and tie it of with a few half hitches. You can use this method even if you have glued the fletching down beforehand. An important item to remember is to use feathers from the same wing on each dart. Wing feathers are either right or left-handed. It does not matter if each individual dart is from a left or right, but do not mix them on the same dart. The same rule applies to tail feathers. The following illustrations should help to clear this up.
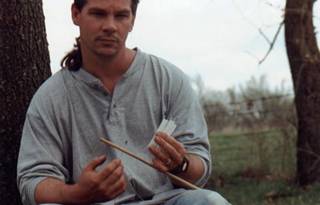
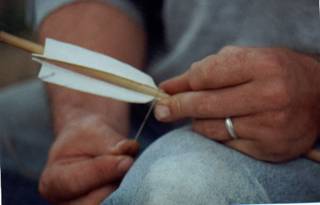
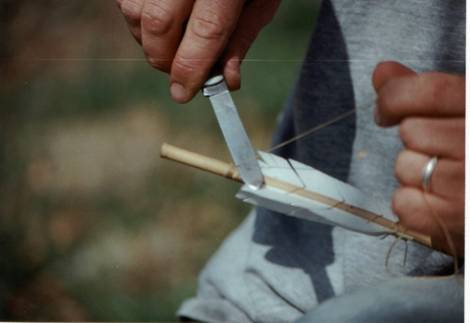
In the picture above I have the materials ready to fletch in the manner mentioned earlier. The fletches are cut from white turkey Flu-Flu feathers. The artificial sinew in my right hand has been split down to make the bindings less bulky. Although you cant see it, the rear end of the dart shaft has been cupped out to fit onto the spur of the atlatl we made earlier.
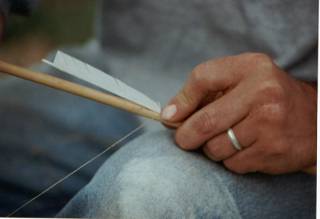
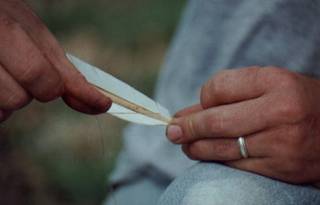
In the photograph below I am starting off the process by wrapping down the first fletch with sinew.
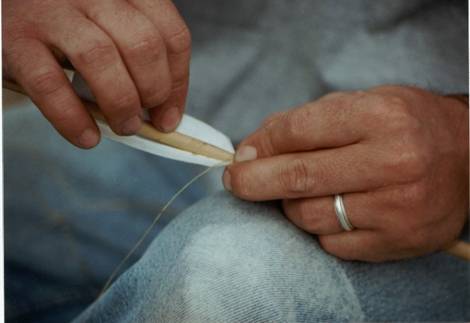
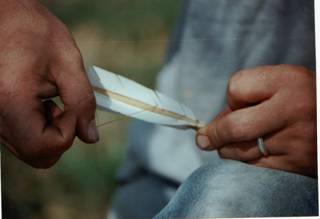
Adding the second fletch and continuing with the wrap (below). This process can be tricky, but stick with it.
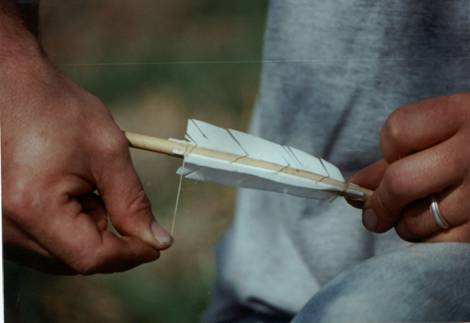
Below I have all three fletches on the shaft and am preparing to wrap them down spirally towards the rear of the dart.
The next three pictures show how the spiral wrapping holds down the fletches. It is important to keep the sinew tight and to straighten the feathers as you continue the wrapping towards the cupped end. I find it helpful to cross my left leg over my right and use both legs as a temporary vise to allow me to keep both hands free.
In the next photos you can see how the process if finished off. Keep wrapping towards the rear. When you have about 6 wraps left, lay a separate strand of sinew in a loop across the wraps. Continue the last half dozen wraps and thread the remaining end through the loop. Pull the free ends of the loop towards the forward end to tuck the wrap under itself.
Cut the extra sinew off and add a touch of fletching cement. This technique has the advantage that if your dart breaks, you can easily remove the fletches to add to another shaft.
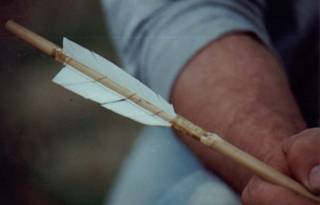
Above is shown the completed fletching. With a little practice, this can be done quickly and requires no additional fletching equipment or time wasted as the glue dries.
You could even forego adding fletching to your darts. Darts without fletching can still be used with accuracy (in the fall of 1998, my friend, Ray hit a gray squirrel in the head at 26 steps with a dart without fletching. He called it the unluckiest squirrel in Missouri! ). Darts that are unfletched should have more weight on the forward end to help stabilize the dart in flight.
If you dont have hide glue and sinew you can substitute with other materials. Nylon twine (Ray calls it backstrap sinew from a 3-D deer) can be untwisted and used to wrap the foreshaft end. Use TITE BOND to hold down the nylon twine instead of hide glue, as it is weather proof.
Artificial sinew and fletching glue (or model glue) can be used for the fletching. Split the artificial sinew down and it will go a long ways.
For target practice, the dart can be used without a detachable foreshaft. With river cane, I glue the hardwood foreshaft into place so I dont get them stuck in the target during practice. You can even make darts out of aluminum arrow shafts, if you are so inclined. In the following illustrations are some different styles of darts.
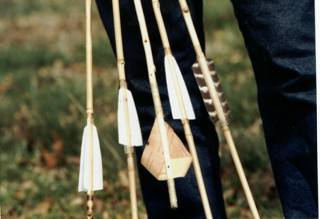
The darts shown above have been glued with fletching cement and tied down with artificial sinew (except for the center dart, which is black diamond willow with fletching made from birch bark. This beautiful dart was presented to me by a good friend from Minnesota, Dale Torma). If you are going to use your darts often, real sinew and hide glue wont hold up.
I normally fletch my cane darts on the second section of node from the rear. I dont like the sound of the feathers rustling when loaded onto the dart. Keep about 2-3 inches shaft behind your fletches.
|
Politica de confidentialitate | Termeni si conditii de utilizare |

Vizualizari: 3137
Importanta: ![]()
Termeni si conditii de utilizare | Contact
© SCRIGROUP 2026 . All rights reserved