| CATEGORII DOCUMENTE |
| Bulgara | Ceha slovaca | Croata | Engleza | Estona | Finlandeza | Franceza |
| Germana | Italiana | Letona | Lituaniana | Maghiara | Olandeza | Poloneza |
| Sarba | Slovena | Spaniola | Suedeza | Turca | Ucraineana |
Introduction.2
Functionalities.2
Text Bank2
2.2 Image Bank.7
2.3 Users..11
2.4 E-mail & Landing Page Templates...16
2.4.1 E-mail Templates16
2.4.2 Landing Page Templates20
2.5 E-mail & Landing Page Archive..20
2.5.1 E-mail Archive20
2.5.2 Landing Page Archive26
2.6 Documents28
2.7 Campaigns.30
2.8 Companies.34
2.9 Settings
3.0 Fragments
1 INTRODUCTION
The Oracle Premium
project aims to create a centralized repository of resources, materials and
results of Oracle mailing campaigns run on Central and Eastern European
countries:
The website interface is available in more than one
language (ideally, all languages natively spoken by its users); the users can
change the language of the interface at any moment by using the provided list
of available languages (which is displayed on each and every page, both for
authenticated and anonymous users).
It is easy (for an administrator) to add a new language. The English language
is provided by the system creator as the reference language and is used by the
system as default language; text strings not found in the language selected by
the user are displayed in the default language;
Each user has a preferred language which is used by the website after the user is authenticated (he/she logs in) and can be easily changed as needed.
Also, because of the international feature, some features are carefully coded to display information (like dates and times, numbers) in the proper format for the currently selected language.
The access to the information is controlled by user/password combinations stored in the database. Password is stored encrypted.
There are (at least)
three levels of access: administrators, Oracle users, agency users.
These are in fact groups of users and privileges are granted to these groups.
The privileges are not hard-coded but stored in the database and they can be
changed by users who have the proper privileges (the right to manage users).
Also, the groups of users are not hard-coded but stored in the database; they
can also be edited by users having the privilege to manage users.
If needed, the feature of assigning privileges to users (which override the
group privileges) can also be implemented.
2. Functionalities:
In this section the functionalities of the Oracle Premium software are detailed.
Text Bank
In the Text Bank you can view, add, edit or remove a text.
For adding a new text, you first have to enter the text bank. To do this, you have to left click on the button text bank, situated in the upper left side of the window. (Fig 0.1)
![]()
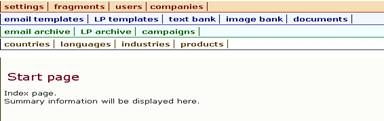
Fig 0.1
This will move you to another window. Here you will find on the left side, a list of categories such as: Country, Language, Product, Partner, Industry and text and also a search bar, which will help you find anything in the text bank section. In the center, you will see a bar with which you can set the number of texts you want to see on a page. The add new text button is situated bellow, and after this button the text that is already uploaded is listed. On the right side of the screen, there are three buttons for every text listed: details, edit and delete.
From this page you can start adding you text.
First left click on the add text button, situated in the upper center of the window. (fig 0.2)
![]()
![]()
fig 0.2
This will open you another window. In this window you write your text, and you can make more selections to customize the text.
First you can select a language in which you want your text to be written in. Left click once on the select language scroll button. A list of languages will be scrolled down. Left click a language to select it. (fig 0.3)
![]()
![]()
fig 0.3
Once you have selected the language, it is time to choose the country.For this, left click on the select country scroll button, situated bellow the select language one. A list of 17 countries will be scrolled down. Left click on the country you want to select it. (fig 0.4)
![]()
![]()
fig 0.4
After this, you can either select a product or a partner and industry for which the text is written. If you choose a product, you cannot choose a partner and industry. If you choose a partner you are obliged to select an industry also. To select one of them, simply left click on the scroll button and then left click on the item you wish to use. Fig. 05
![]()

Once you have selected the language, the country and the product or partner and industry, you need to give your text a title. To do this, you must complete the field Title, situated bellow the button Partner and Industry. Left click in the box, and write the title that best fits your text. (fig 0.6)
![]()

Fig 0.6
Bellow the title field is the text box. Here you will write your text. Left click inside the text box, and start writing. As you can see, the text box has many editing buttons.
You can either choose bold![]() ,
italic
,
italic![]() ,
underlined
,
underlined ![]() or strikethrough
or strikethrough ![]() writing
by left clicking on the buttons of the writing box toolbar.
writing
by left clicking on the buttons of the writing box toolbar.
You can undo![]() ,
or redo
,
or redo![]() anything.
anything.
You can insert or edit
a hyperlink by selecting the word or phrase and than left clicking on the
hyperlink button![]() ,
you can unlink a word/phrase
,
you can unlink a word/phrase ![]() and you can insert/edit an anchor
and you can insert/edit an anchor![]() . You can insert subscript and superscript
. You can insert subscript and superscript![]() ,
unordered or ordered lists
,
unordered or ordered lists![]() and you can change the color of your text by left clicking on the select text
color scroll button
and you can change the color of your text by left clicking on the select text
color scroll button![]() .
Left click on the color you desire to select it.
.
Left click on the color you desire to select it.
You can change the
paragraph format by left clicking on the scroll button paragraph ![]() .
Left click again on the paragraph format you desire to select it.
.
Left click again on the paragraph format you desire to select it.
Further more, you can
select the full screen mode. This will toggle the text box into full screen.
Just left click on the toggle full screen mode button![]() .
You can paste a plain text or a Microsoft Office text by left clicking on the
paste as plain text and paste from word buttons
.
You can paste a plain text or a Microsoft Office text by left clicking on the
paste as plain text and paste from word buttons![]() .
If you want to select everything that youve written, just left click the
select all button
.
If you want to select everything that youve written, just left click the
select all button![]() .
.
You can also resize the text box. To do this, you must left click, hold and drag, on the lower left corner of the text box. (fig 0.6)
![]()
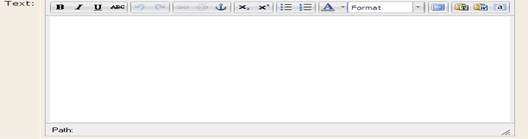
Fig 0.6
You have even more options. You can make your text visible to others by left clicking on the Yes button. If you do not want others to see your text just press the No button. This two buttons are situated bellow the text box. (Fig 0.7)
![]()
![]()
Fig 0.7
If you want to add more information to your text, you can use the remark box. Here you can write any relevant information regarding your text. Just left click in the remark box and start writing. (Fig 0.8)
![]()
![]()
Fig 0.8
To save every change that you have made, and to post your text, left click on the Create button, located in the lower center section of the window. (Fig 0.9)
![]()
![]()
Fig 0.9
If you are not pleased with how the text looks or you want to reset everything, left click on the Reset button, situated near the Create button. (Fig 1)
![]()
![]()
Fig 1
If you do not want to write anymore, and you wish to exit the add new text section just left click the Cancel button. (Fig 1.1)
![]()
![]()
Fig 1.1
You can view a text by left clicking on the Details button situated on the right side of the window aligned with the text you want to view. Fig 1.2
![]()

Fig 1.2
This will redirect you to another window, where you can see the details of the text: language, country, industry, partner, title, text, if it is visible to others, when it was added and when it was last modified, and the remark. Fig 1.3
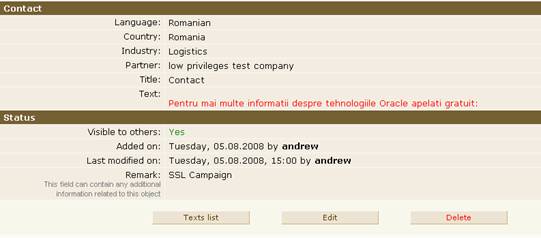
Fig 1.3
If you have administrator rights or you created the text, you can either edit or delete the text. You can edit the text by left clicking on the edit button located on the lower center section of the window. Fig 1.4
![]()
![]()
Fig 1.4
To delete a text, left click on the Delete button, situated near the Edit button. Fig 1.5
![]()
![]()
Fig 1.5
If you want to go back to the text list, you must left click on the Text list button, located near the Edit button. Fig 1.6
![]()
![]()
Fig 1.6
If you want to view the details of the previous or the next text, just left click on the previous or next buttons. Fig 1.7
![]()
![]()
![]()
![]()
Fig 1.7
If you want to edit a text, left click on the on the Edit button situated on the right side of the window aligned with the text you want to edit. Fig 1.8
![]()
Fig 1.8
This will open up a window that looks just like the add new text one. It has the same settings and the same buttons. (see pages 3, 4). You can make changes only if you have administrator rights or you uploaded the text.
2.2 Image Bank
In this section you can view, add, edit or remove pictures.
To enter the Image Bank section, left click on the image bank button in the start page, or in any other page. Fig 1.9
![]()
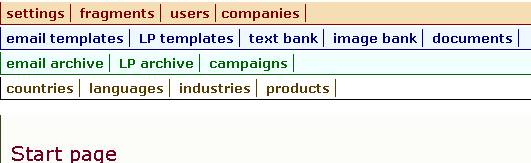
Fig 1.9
This will open the image bank section.
You can choose how many images you want to be shown on a page, by left in the display box and changing the number. Fig 2.0
![]()
![]()
Fig 2.0
To make the change, you must left click on the Display button. Fig 2.1
![]()
![]()
Fig 2.1
On the left side of the window you have a list of categories, and a search bar. You can search for any pictures in the Image bank by left clicking in the search box. There you will write the key words. Afterwards you must left click on the Search button. By left clicking on a category, all the images in that category will be shown. Fig 2.2
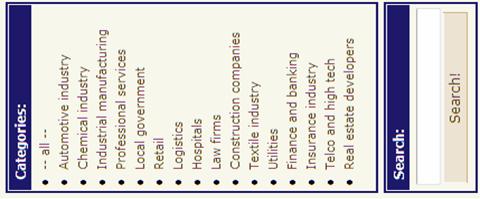
Fig 2.2
To add a new image you must first select one of the categories situated on the left side (fig.2.2). This will move you to another page. Then left click on the Add new image button located in the upper center section of the page. Fig 2.3
![]()
![]()
Fig 2.3
This will open a new window. To add a new image you must left click in the box situated in the upper center section of the window. Then type the URL address of the picture you want to upload, or click on the browse button to select an image from your computer. Fig 2.4
![]()

Fig 2.4
To complete the upload just left click on the Upload button. This will save the picture you desire on the site. If you do not wish to continue, left click on the Cancel button. Fig 2.5
![]()
![]()
![]()
Fig 2.5
After you left click on the upload button, another window opens. Here you will select the industry, the name and the key words, if the picture will be visible or not to others, when it was added and last modified, or you can add a remark.
To select the category left click on the select category scroll button. Then left click on the category you wish for. Fig 2.6
![]()
![]()
Fig 2.6
To change the name of the picture left click on the name text box, and write the name you desire. Fig 2.7
![]()
![]()
Fig 2.7
To add keywords left click on the Keywords text box, and write the words you want your picture to be found by. Fig 2.8
![]()
![]()
Fig 2.8
You can make your picture to be visible or not. Simply left click on the Yes or No button. Fig 2.9
![]()
![]()
Fig 2.9
To add a remark left click in the remark text box, and write the things relevant to your picture. Fig 3.0
![]()
![]()
Fig 3.0
If you have finished editing he details, click the Save button located in the lower center part of the window. Fig 3.1
![]()
![]()
Fig 3.1
If you do not want to save any changes left click on the Reset button. Fig 3.2
![]()
![]()
Fig 3.2
If you want to cancel everything, left click on the Cancel button. Fig 3.3
![]()
![]()
Fig 3.3
From the image bank section you can also see the details of pictures. Simply left click on the details button situated on the left side of the window, next to the picture you want to view or left click on the picture. Fig 3.4
![]()

Fig 3.4
This will open you the Details page. Fig 3.5

Fig 3.5
In this page you can see: the industry, the name of the picture, the keywords after which the picture can be searched for, if it is in high or low resolution, you can download it, if it visible to others or not, when it was added and edited, and if it has any remarks.
If you want to go back to the image list left click on the Image list button. Fig 3.5
![]()
![]()
Fig 3.5
If you want to edit the detail (rename, add/remove remark, and change pictures visibility) simply left click on the Edit button. You can edit the pictures details only if you have administrator rights or if you uploaded the image. Fig 3.6
![]()
![]()
Fig 3.6
To delete a picture left click on the Delete button. You can delete a picture only if you have administrator rights or if you uploaded the image. Fig 3.7
![]()
![]()
Fig 3.7
To view a previous picture or the next picture, simply click on the previous or next buttons. Fig 3.8
![]()
![]()
![]()
![]()
Fig 3.8
You can also edit or delete a picture directly from the image list. Just left click on the Edit or Delete button on the right side of the window. Fig 3.9
![]()
![]()
Fig 3.9
The maximum image size that can be uploaded is 2.0 Mb (2,097,152 bytes). The limitation is imposed by the web servers configuration.
Users
In this section you can add new users and set users priorities or remove user accounts.
To enter the section left click on the users button in the start page. This button is located in the upper left side of the window. Fig 4.0
![]()
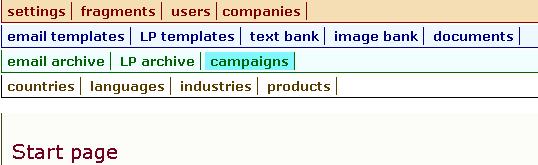
Fig 4.0
A new window will appear. On the left side of this window, you will see a list scroll buttons: language and company, and a search bar. To view the members of one of the companies simply left click on the scroll button and then left click on the company you want. If there is no result, try again and this time complete the language field, by left clicking on the scroll button and then left clicking on the language you desire, and then fill the text box . For finalizing your search, simply left click on the filter button. Fig. 4.1.
![]()
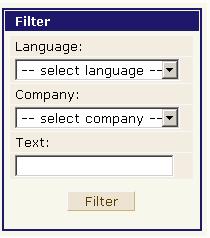
Fig 4.1
In this window you can also set the number of accounts displayed on each page. To do this you must left click in the display text bar, type the number of accounts you wish to view on a page, and then left click on the Display button. Fig 4.3
![]()
![]()
![]()
Fig 4.3
To create a new account left click on the Add new account located upper center of the window. Fig 4.4
![]()
![]()
Fig 4.4
This will move you to another page. In this window you edit the accounts details. First you will enter the name of the person you to create an account for. To do this just left click in the name text box and write the name. fig 4.5
![]()
![]()
Fig 4.5
After this you can complete the Company field. For this, left click in the company scroll button and select the companys name. Fig 4.6
![]()
![]()
Fig 4.6
Then, there are a series of fields you must complete:
![]()
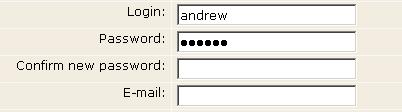
Fig 4.8
To select the language that the user will use, (write articles, reads posts), simply left click on the Select language scroll button. Then left click on the language you wish to use to select it. Fig 4.9
![]()
![]()
Fig 4.9
To enable or disable the account left click on the user status buttons: Enabled/Disabled. This will make the account active. Fig 5.0
![]()
![]()
Fig 5.0
To add more information about the user, or the domain he activates in, you can use the Remark field. Left click in the Remark text box and write the information you want to add. Fig 5.1
![]()
![]()
Fig 5.1
To save the changes youve made and create the account, left click on the Save button. Fig 5.2
![]()
![]()
Fig 5.2
If you wish to start creating the account again, left click on the Reset button. Fig 5.3
![]()
![]()
Fig 5.3
If you want to stop creating the account, left click on the Cancel button. Fig 5.4
![]()
![]()
Fig 5.4
To view the details of an e-mail account left click on the details button located on the left side of the window near the account you wish to view. Fig 5.5
![]()

Fig 5.5
This will send you to another page, where you can see all the details of the account. Fig 5.6
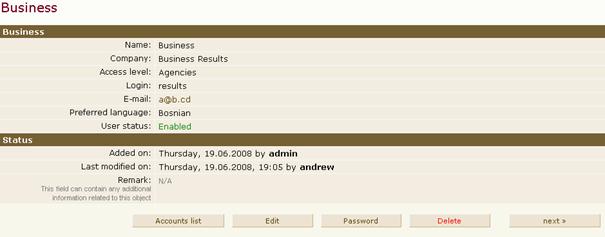
Fig 5.6
If you want to view the details of the previous or of the next account simply left click the Previous or the Next button. Fig 5.7
![]()
![]()
![]()
![]()
Fig 5.7
If you want to edit the details of the account left click on the Edit button. Fig 5.8
![]()
![]()
Fig 5.8
If you want to go back to the accounts list left click on the Accounts List button. Fig 5.9
![]()
![]()
Fig 5.9
If you want to reset the password left click on the Password button. Fig 6.0
![]()
![]()
Fig 6.0
This will open you another window. To set the new password, left click in the Your current password text box and type your current password. Then left click in the New password text box and type the new password you wish to use. Left click in the Confirm new password and retype the new password. Fig 6.1
![]()

Fig 6.1
To save the changes and reset the password left click on the Change Password button. Fig 6.2
![]()
![]()
Fig 6.2
If you wish to restart changing the password and clear all the fields at once left click on the Reset button. Fig 6.3
![]()
![]()
Fig 6.3
If you wish to stop changing the password and go back to the details of the account left click on the Cancel button. Fig 6.4
![]()
![]()
Fig 6.4
You can also edit the accounts details or change the accounts password by left clicking on the Edit or Password buttons located on the left of the window, near the account you wish to change. Fig 6.5
![]()
![]()
Fig 6.5
Only the users from the Oracle Group can create, edit or remove an account.
2.4 E-mail & Landing Page Templates
2.4.1 E-mail Templates
In this section you will find the templates to use for creating an e-mail. To enter simply left click on the E-mail Templates button situated in the start page. Fig. 6.6
![]()
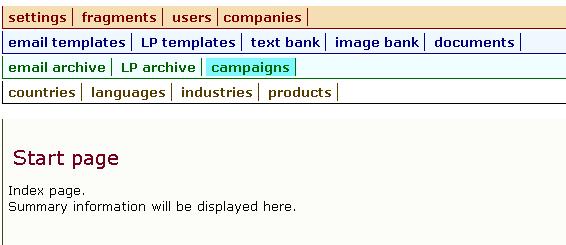
Fig. 6.6
This will send you to another page, where you will see all the available templates to use. Fig.6.7
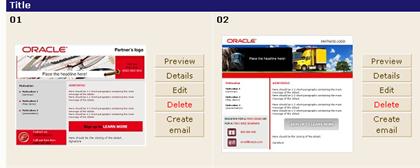
Fig 6.7
From this page, you can see how the template looks by left clicking on the preview button, or see the templates details, edit the template, delete it or create an e-mail.
If you left click on the Details button, you will be sent in another page, where you will find everything you wish to know about it. You can see the industry, the templates components, if it has any errors or not, if it is visible to others or not, when it was added or last modified, and the remark. Fig. 6.8
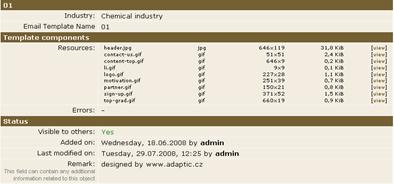
Fig 6.8
From here, you can also go back to the e-mail template list, preview the template, create an e-mail, edit the template, delete it or go to the next templates details. Fig 6.9

Fig 6.9
If you left click on the edit button, both in the details page or in the e-mail template page, another window will open.
Here, you can change the templates industry, name, if it is visible to others or not, and write a remark. Fig 7.0
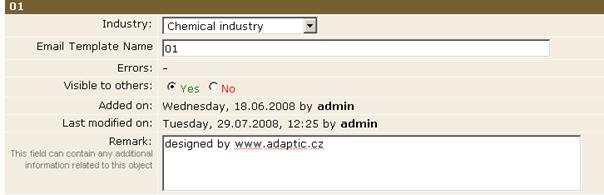
Fig 7.0
In this page, you also have access to the templates source code, and you can rewrite it. Fig 7.1

Fig 7.1
If you have finished your changes and you want to save them, simply left click on the save button. If you do not want to save the changes, but you want to restart making them, left click on the Reset button. If you do not want to continue making changes, and you do not want to save the changes made just left click on the Cancel button. Fig 7.2
![]()
Fig 7.2
After saving or canceling the editing activity you will be automatically sent back to the e-mail template section. From here, you can create an e-mail. Simply left click on the create e-mail button. Fig 7.3
![]()
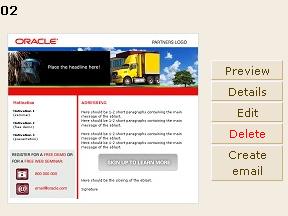
Fig 7.3
This will send you to another window.
In this page, there is some information you need to complete in order to create the e-mail. You must complete the e-mails name, the subject, the start date, the country, the language, the product or the partner and industry, if it is visible to others or not and the remark.
To complete the e-mails name simply left click in the e-mail name text box, and write the words you desire. Fig 7.4
![]()
![]()
Fig 7.4
To say what the e-mail is about, you have to left click in the Subject text box and write down the words you wish. Fig 7.5
![]()
![]()
Fig 7.5
You can select the start date of your e-mailing campaign by left clicking on the scroll down buttons and then selecting the date (Month, Day and Year) you desire. It is the same with the country, language, product or partner and industry. Fig 7.6
![]()
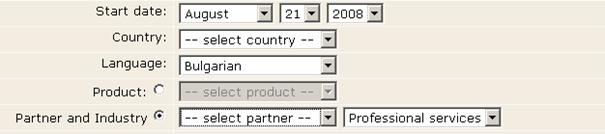
Fig 7.6
You cannot select both Product or Partner and Industry. You must choose one of these fields and complete that one.
To make the e-mail visible to others or not simply left click on the Visible to others yes or no buttons. Fig 7.7
![]()
![]()
Fig 7.7
To complete the remark field, simply left click in the Remark text box and write the information you want. Fig 7.8
![]()

Fig 7.8
You can see the there is also a field called: Friendly URL. This is one of the most important fields in creating an e-mail, because this will be the link used for sending the e-mail. To complete this field, just left click in the Friendly URL text box and write down the link. Fig 7.9
![]()
![]()
Fig 7.9
If you have completed all the fields and you are ready to create the e-mail, simply left click on the button Create in the lower section of the window. Fig 8.0
![]()
![]()
Fig 8.0
If you want to start completing the fields again, simply left click on the button Reset. This will undo every change that you have made. Fig 8.1
![]()
![]()
Fig 8.1
If you decide you do not want to create the e-mail, just left click on the button Cancel. This will send you in the E-mail Templates window. Fig 8.2
![]()
![]()
Fig 8.2
If you will left click on the button Create, you will automatically be sent in the E-mail Archive section.
2.4.2 Landing Page Templates
To access this section you have to left click on the LP Templates button in the Start Page. Fig 8.3
![]()
Fig 8.3
This will open you a page where you will find all the available templates.
The process of creating a Landing Page is the same with the one of creating an e-mail.
See chapter 2.4.1.
2.5 E-mail & Landing Page Archive
2.5.1 E-mail Archive
After you have created an e-mail from the E-mail Templates section, you will be automatically redirected to the e-mail archive section.
On the left side of this window you will see a list of filters. These will help you find the e-mail you desire faster. Simply left click on the scroll buttons of the fields and select the country, the language, the product or the partner and industry, the quarter, and the text you wish the search the e-mail by. To go on with the search, just left click on the Filter button. Fig 8.4
![]()
Fig 8.4
In this window you can choose how many e-mails you wish to see on a page. Left click in the Display text box, and type the number of e-mails you wish to see and the left click on the Display button. Fig 8.5
![]()
![]()
Fig 8.5
Bellow this bar, you will see a Create new e-mail button. If you left click on this button, you will be automatically sent back to the e-mail templates section. Fig 8.6
![]()
![]()
Fig 8.6
After this, you will see the list of emails existing in the e-mail archive.
You can see that every e-mail has on the right side three buttons: Details, Edit and Remove. Fig 8.7
![]()

Fig 8.7
If you will left click on the Details button you will see the information of the e-mail, such as: country, friendly URL, subject, industry, and partner. You will also see there the e-mails components and the e-mails status (if it is visible or not, when it was added on or last modified and the remark). In this page, you will also see the preview of the template you used for creating the e-mail. Fig 8.8
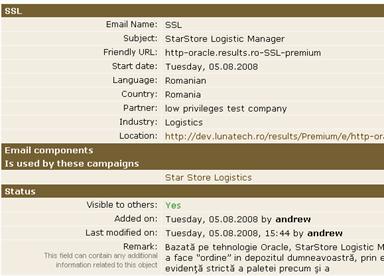
Fig 8.8
In this window you will also find four buttons. The first one is called List of E-mails. If you left click on this button you will be sent back to the E-mail Archive section.
The second button is the Edit Properties button. When left clicking this button you are sent in a new window, where you can edit details such as: name, subject, friendly URL and so on.
After you have finished editing the details, simply left click on the save button. Fig 8.9 and Fig 9.0
![]()
![]()
Fig 8.9
![]()
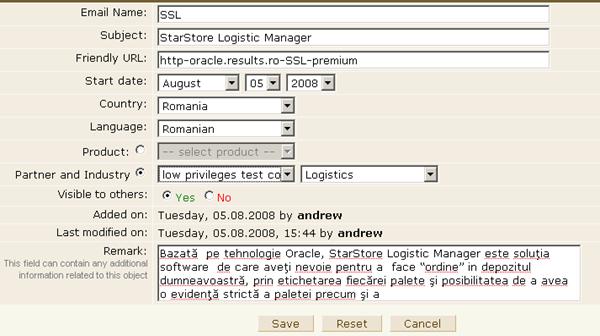
Fig 9.0
For editing the content of the Template: images in the Template, text, and Logos you simply push the Edit content button. Fig 9.1
![]()
![]()
Fig 9.1
This will open you the Template in another window.
You will now see that some parts of the template are editable and some are not. The parts that are editable have two small pictures above them. Fig 9.2 and 9.3
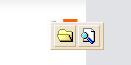
![]()
Fig 9.2 Fig 9.3
For editing images, you have the pictures form Fig 9.2. For editing text, you have the pictures from 9.3.
When editing an image, you first have to upload it. You can upload an image form the image bank or form your computer. If you want to upload the picture from your computer, simply left click on the folder symbol, and then browse for the image you wish to upload. If you want to use an image from the image bank, just left click on the search symbol. Fig 9.4
![]()
Fig 9.4
When you upload an image from your computer, thus left clicking on the folder symbol (Fig 9.4) another window will open. Here you can see the details of the e-mail, the template, and a bar to browse for your picture. Fig 9.5
![]()

Fig 9.5
After you have selected the picture you have to left click on the upload button to upload it. Fig 9.6
![]()
![]()
Fig 9.6
When you click the upload picture, you will be sent to another window. From here, you will resize/crop your image to the required size. You can use the box on the left side of the screen, and pull the margins until it best feats you image, or you can use the number text boxes on the left, and resize the image with the help of the indication above them. Fig 9.7
![]()
![]()

Fig 9.7
After you finished resizing the image, simply left click on the button Crop and the image will be resized and uploaded in the template. Fig 9.8
![]()
![]()
Fig 9.8
If you do not wish to continue, just left click on the button Cancel and you will be sent back to the Editing Content page.
If you wish to use a picture from the Image Bank section, left click on the Search symbol button. Fig 9.9
![]()
This will send you to a new page. On this page, you will have a Search bar. You can search the image by its name or by its keyword by left clicking in the Image name or keyword text box. Fig 10.0
![]()
![]()
Fig 10.0
You can also search for an image in the image bank by its industry. For selecting an industry, simply left click on the Industry scroll button, and pick the one you need. Fig 10.1
![]()
![]()
After you have selected the words or industry simply left click on the search button. This will automatically show you all the images for the words or industry you have searched for. Fig 10.2
![]()
![]()
Fig 10.2
If you wish to change the key words, left click on the Reset button. If you do not wish to continue, just left click on the Cancel button and you will be automatically sent back to the Edit Content page. Fig 10.2
After you have found the image you desire simply left click on the button Use bellow the preview of the image. Fig 10.3
![]()
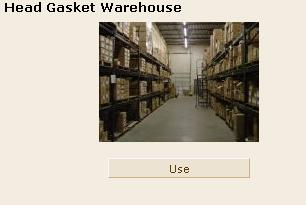
Fig 10.3
This will send you on a new page. From here you can resize the image to the needed size. The process is the same as when you upload an image from your computer. After you have resized the image, simply left click on the button Crop, and the image will be loaded on the Template.
When you upload a text you can either upload it from the Text Bank or write the text directly in the template. To do editing a text you have the pictures from Fig 9.3
If you want to upload a text from the Text Bank, you will left click on the Search symbol button. Fig 10.4
![]()
![]()
Fig 10.4
This will send you on another window. Here you will see a search bar, with the fields you can complete so you can find the text you want faster.
Complete the fields and then left click on the Search button. Fig 10.5
![]()
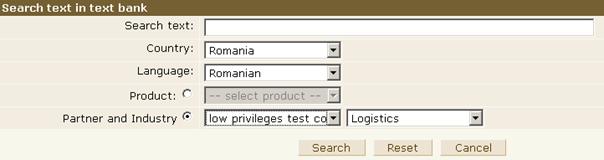
Fig 10.5
If you wish to complete the fields again simply left click on the Reset button. If you wish to cancel the search left click on the Cancel button.
After you have found the desired text, to use it, you have to left click on the Use button. Fig 10.6
![]()
![]()
Fig 10.6
This will take you to another page, where you can edit the text. Editing the text is made in the same way as creating the text. There are the same functionalities and the same buttons.
*See text bank.
After you have finished editing the text simply left click on the Update button. This will upload your text in the template. Fig 10.7
![]()
![]()
Fig 10.7
If you wish to start the editing again, simply left click on the Reset button. If you want to cancel the editing left click on the Cancel button.
If you want to create a new text directly on the template, left click on the text symbol button. Fig 10.8
![]()
![]()
Fig 10.8
This will take you to another window where you will have the same functionalities and the same buttons as in the Text Bank section.
*See Text Bank
For uploading the new text in the template, simply left click on the Update button. See Fig 10.7
If you wish to start editing again, left click on the Reset button. If you wish to cancel editing the text, left click on the Cancel button. See Fig 10.7
After you have finished uploading images and text in the template, simply left click on the End edit button to end the editing of the templates content. Fig 10.9
![]()
![]()
Your e-mail is ready to use.
2.5.2 Landing Page Archive
To access the Landing Page Archive left click on the LP archive button in the start page. Fig 11.0
![]()
Fig 11.0
This will take to another window which looks just like the E-mail Archive page.
If you left click on the Create new LP button, you will automatically sent to the Landing Page Templates window, and start creating a new LP by using the existing templates.
*See Landing Page Templates.
Every Landing Page has on the right side three buttons: Details, Edit properties and Delete. Fig 11.1

Fig 11.1
If you will left click on the edit properties button you will be able to change the details of the Landing Page: name, date, remark, friendly URL.
If you want to delete the Landing Page, simply left click on the Delete button.
When you left click on the Details button you are automatically sent to a new window. In this window you will see the LPs details. On the lower side of the screen you will find four buttons. Fig 11.2
![]()
Fig 11.3
If you will left click on the List of LPs button, you will be sent back to the Landing Page Archive.
When you left click on the Edit properties button you will be able to edit the details of the Landing Page you are working on.
If you left click on the View Pages button a new window will appear. From this new window you can edit the content of the pages that form the Landing Page.
You have there four buttons: page LP, page Form, page Correct and page Thank. Fig 11.3
![]()
Fig 11.3
To scroll between the pages, simply left click on the page you wish to view and edit.
For editing a content of a template left click on the Edit content button on the right side of the screen. Fig 11.4
![]()
![]()
Fig 11.4
The editing of the Landing Page templates content is the same with the editing of the E-mail templates content.
*See E-mail Archive
After you have finished editing the content simply left click on the End edit button. Fig 11.5
![]()
![]()
Fig 11.5
Your Landing Page is ready to use.
2.6 Documents
To enter the Document section left click on the Document button in the Star Page. Fig 11.6
![]()
Fig 11.6
In this section you will upload every other document which is relevant to one or more of your campaigns.
On the left side of the screen you will find a filter. With that filter you will be able to find a lot faster the document you desire. You can select the language in which the document was written or the text that the document contains. To select the language simply left click on the Language scroll bar and select the language you desire. To select the text, just left click in the: Text box and type the words you wish to look for. After that, left click on the Filter button. Fig 11.7
![]()
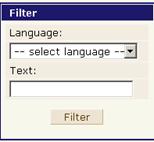
Fig 11.7
To add a new document, simply left click on the Add new document button, situated in the middle of the window. Fig 11.8
![]()
Fig 11.8
This will take you to another page. There you have to select a language for the document by left clicking on the Language scroll button. Fig 11.9
![]()
![]()
Fig 11.9
To upload a document left click on the button browse. After that, search on your computer for the desired document and left click on it. Fig 12.0
![]()
![]()
Fig 12.0
See that the MBMaximum allowed filesize is 2.00 MiB (2,097,152 bytes).
This limitation is imposed by the web server's configuration.
After that, you can type a remark by left clicking in the Remark text box. Fig 12.1
![]()

Fig 12.1
To upload the document simply left click on the Upload button. Fig 12.2
![]()
![]()
Fig 12.2
If you wish to cancel an upload left click on the Cancel button.
On this page, you can also see the documents uploaded. Every document has on the right side of the screen four buttons: Details, Download, Edit and Delete. Fig 12.3

Fig 12.3
If you left click on the Details button, you will be sent on another window, where you can see all the details of the document: Language, Name, Size, when it was added and when it was modified and the remark.
From this page you can go back to the Document section by left clicking on the Documents list button. From here, you can also edit the details of the document, by simply left clicking on the Edit button. You can also delete de document by left clicking on the Delete button.
If you want to download the document you just have to left click on the Download button. Fig 12.4
![]()
![]()
Fig 12.4
From the Document section you can also download, edit or delete a document. Simply left click on the Download, Edit or Delete buttons. Fig 12.5
![]()
Fig 12.5
2.7 Campaigns
To enter in the Campaigns section you only have to left click on the Campaigns button in the Start Page. Fig 12.6
![]()
Fig 12.6
On the left of this window you will find a search box created just as the ones in the E-mail Archive and Landing Page Archive.
On the middle of the screen you will find the Add new campaign button. By left clicking on it you can create a new campaign.
When you left click on the button Add new campaign you will be send in a new window. Here there is some information to be complete: the name of the campaign, the starting date, the language, the country, the product or the partner and industry, if it is visible or not and the remark. Fig 12.7
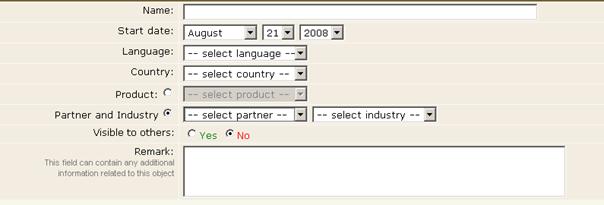
Fig 12.7
After you have finished completing the fields, for creating the campaign you only have to left click on the Create button. Fig 12.8
![]()
![]()
Fig 12.8
If you want to restart completing the information left click on the Reset button. If you want to cancel creating the campaign, just left click on the Cancel button. Fig 12.9
![]()
Fig 12.9
On the lower part of the screen you can find the list of campaigns. You can see that in the right side every campaign has three buttons: Details, Edit and Delete. Fig 13.0

If you left click on the Edit button you will be able to change the information youve written when you have created the campaign. You will change the details of the campaign. For finishing the change, simply left click on the Save button.
If you want to delete a campaign simply left click on the delete button.
If you will left click on the Details button you will be sent in another window. From here, you can edit the details of your campaign.
Most importantly, in this section you can add e-mails, LPs, documents and URLs to your campaign.
For adding an e-mail to your campaign, simply left click on the Add button. Fig 13.1
![]()

Fig 13.1
This will take you to a search window. Here, you have to complete the fields for finding the e-mail you wish to set for this campaign. Fig 13.2
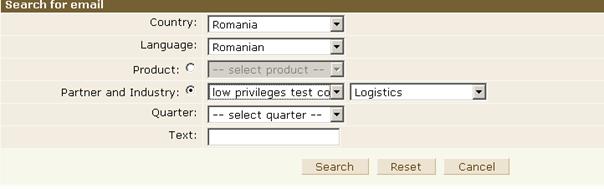
Fig 13.2
After you have finished completing all the fields, simply left click on the search button.
To remove an e-mail from you campaign, simply select the e-mail by checking the box near it and then left clicking on the remove selected button. Fig 13.3
![]()
![]()

Fig 13.3
For adding an LP simply left click on the Add LP button. Fig 13.4
![]()
![]()
Fig 13.4
This will take you into a searching page, the same with the one for adding an e-mail.
To remove an LP from you campaign, simply left click on the button Remove, on the right side of the screen. Fig 13.5
![]()
![]()
Fig 13.5
After that, you can add document that are relevant for your campaign by left clicking on the upload document or select document buttons. Fig 13.6
![]()
Fig 13.6
If you left click on the button Upload document you will be sent into a new window. Here you can upload a document from your computer.
*See Documents section
If you left click on the Select document button, you will be able to upload a document from the Document section. If you cannot find the document you desire, you can use the search bar on the upper part of the screen. Simply select the language and the text contained and left click on the filter button. Fig 13.7
![]()

Fig 13.7
To upload the document you desire simply left click on the add button situated on the right side of the screen, or, left click in the checkbox in the left of the document and than left click on the add selected button. Fig 13.8
![]()
![]()
![]()
![]()
For adding an URL to you campaign simply left click on the Add URL button. Fig 13.9
![]()

Fig 13.9
This will take you to a page where you have to give a name to that URL and write it down so it can be accessed. You can also write a remark so that the people who view you campaign can know what this is about. After you have finished completing the field simply left click on the button create. Fig 14.0
![]()
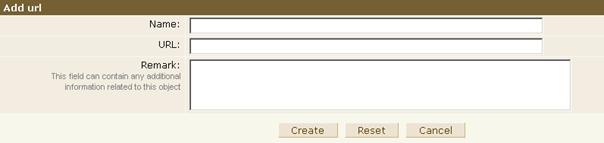
Fig 14.0
Your campaign is finished.
2.8 Companies
To enter this section you should left click on the Companies button in the start page. Fig 14.1
![]()
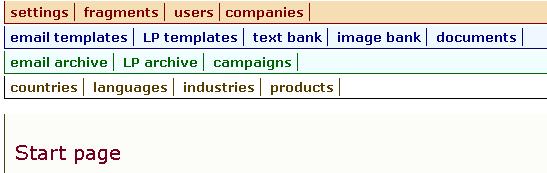
Fig 14.1
From here you can add a company or view other companies.
On the left side of the screen you have a search box, so you can find a company easier. So, if you fill all the fields and left click on the button Filter you should find the company you want to find. Fig 14.2
![]()
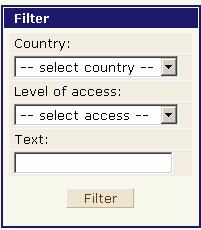
Fig 14.2
To add a company, simply left click on the Add new company button situated in the middle section of the window. Fig 14.3
![]()
![]()
Fig 14.3
This will take you to another window, where you have to fill all the information regarding a company. It is very important to do so, because from here you give the access permission for the users. The users are connected to this section. So, when you create an account, make sure that you know what all the groups access rights are: Oracle, Agencies and Partners. Fig 14.4
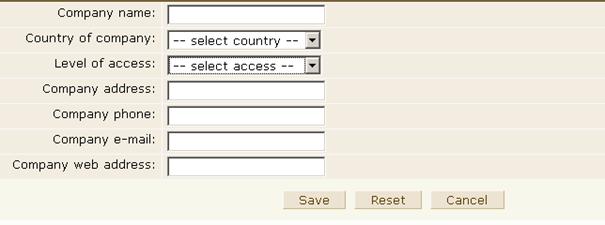
Fig 14.4
To save the changes made and create the company, simply left click on the Save button. This will automatically send you back to the Company section.
If you wish to restart creating a company, simply left click on the Reset button. If you do not wish to continue creating a new company, just left click on the Cancel button.
You can see that in the Companies section, every company has three buttons on their right side: Details, Edit and Delete. Fig 14.5

Fig 14.5
If you left click on the Details button, you will be sent into a new window. Here, you will be able to see all the details of that company. Fig 14.6
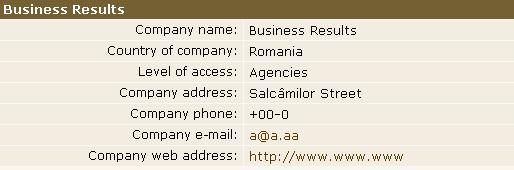
Fig 14.6
|
Politica de confidentialitate | Termeni si conditii de utilizare |

Vizualizari: 1296
Importanta: ![]()
Termeni si conditii de utilizare | Contact
© SCRIGROUP 2025 . All rights reserved