| CATEGORII DOCUMENTE |
| Bulgara | Ceha slovaca | Croata | Engleza | Estona | Finlandeza | Franceza |
| Germana | Italiana | Letona | Lituaniana | Maghiara | Olandeza | Poloneza |
| Sarba | Slovena | Spaniola | Suedeza | Turca | Ucraineana |
RemoteScope Users Guide
Congratulations on your purchase of the RemoteScope network management program. Although this software is simple to install and use, its powerful set of features can save time, money and aggravation for anyone with responsibility for a Windows-based network. We hope you will take the time to read through this manual and discover how to get the maximum benefit from your purchase.
Basically, RemoteScope is a collection of tools that allow the network administrator, sitting at his or her desk, to manage a network of remote PCs and accomplish those tasks that would otherwise require running from one PC to the next. These tasks include the installation of new applications and updates, remote control or monitoring of network workstations, keeping an inventory of software and hardware installed on those systems, and many other functions that will be described in detail throughout the manual.
Formed in September 1990, Micro 2000 Inc was chartered to provide the personal computer industry with professional-quality diagnostic tools, which at that time were available for mainframes but were virtually non-existent for PCs.
As the personal computer evolved into the powerful machines of today and became an indispensable fixture in the corporate world, Micro 2000 has maintained its position of industry leadership through award-winning technical support and by staying consistently on the cutting edge throughout the rapid advances in PC technology.
Meanwhile, our basic philosophy has not changed at all. Whether it is diagnostics, network administration tools or educational and certification courses, our goal has always been to provide our customers with the best state-of-the-art products of their kind available in the world, and always at an affordable price.
Although you may be eager to begin using RemoteScope, we strongly recommend that you read at least this chapter and Chapter 2 (Installation) before installing the software. You may also want to view the first two tutorial videos on the CD that correspond to these two chapters, and the README file which contains up-to-date information on your version. More information on the tutorials and README file can be found later in this chapter.
The RemoteScope program is organized in two modules, called Console and Client. The Console module is the control point, and will be installed on whichever system(s) the network administrator will use to manage the network. There are also Sub-consoles that can be used to simplify administration of large or dispersed networks
The Client module is installed on each of the PCs that will be managed from the Console. The Client is a passive module that normally runs in the background and is not accessed by the user on that system except for instant messaging to the Console. It cannot be turned off, uninstalled or tampered with in any way without the administrators password. Its purpose is to communicate with the Console and to carry out instructions that are issued by the network administrator via the Console module. There is also a version of the Client module called the VIP Client, that allows the user at the Client machine to accept or deny a request from the Console to remote-control, browse or distribute files to the Client system.
The Clients will most commonly be on the same local area network as the Console, but because the two modules communicate using TCP/IP, it is also possible for the Console to contact and manage a Client over a wide area network, a dial-up connection or over the Internet.
There are four basic tasks that RemoteScope is designed to do. These are remote control, file transfer, software deployment and inventory. Most of the features described in this manual are for the purpose of supporting one or more of these basic functions.
Remote Control From the Console, the administrator can take control of a remote machine. A copy of the remote systems desktop display will appear on the Consoles monitor, and keyboard and mouse actions at the console will be carried out at the remote system just as if the administrator was sitting at that computer. There are also modes that allow shared control or passive monitoring of the remote system. These functions are described more completely in Chapter 5.
File Transfer Files can be transferred between the Console and a Client with drag-and-drop simplicity or distributed from the Console to a group of Clients simultaneously. Transfer and Distribution are covered in Chapter 7.
Deployment Considered by many to be the greatest laborsaving feature of RemoteScope, the deployment utility allows new applications or updates to be pushed out and installed on selected PCs across the network, all without leaving the Console workstation. Deployment, also referred to as software distribution, can be done in real-time or in many cases scheduled for a later unattended install. All the ins and outs of deployment will be found in Chapter 8.
Inventory One of the more difficult tasks in a widespread network is keeping track of what is installed and where. RemoteScope maintains a database of all of the hardware and software installed in each system, along with relevant information about each, such as version and install date. This database is maintained on the Console, which allows instant access even in the case of hard drive crash or other failure on a remote system. A complete description of the inventory function appears in Chapter 6.
Other Supporting the primary functions listed above are a variety of other features such as security measures and a very comprehensive reporting utility. Reporting is covered in Chapter 10, while security and a grab-bag of other features appear in Chapter 11.
Problems If you have any questions or difficulties with RemoteScope, there is an index in the back of the manual to help in locating specific features and information.
Very comprehensive on-line Help files can be accessed with the F1 key from any point in the program. In Chapter 12 of the manual you will find a troubleshooting guide and a list of all of the error codes that you may encounter. Information for contacting Micro2000 support is there as well, including details on a feedback feature that simplifies sending an e-mail to our technical support department.
We also recommend that you view the tutorial videos on the CD, which cover all of the major functions of RemoteScope and most of the minor ones.
The RemoteScope CD contains a number of tutorial clips that take the viewer step-by-step through the basic operations of the program. Each of these tutorials covers a specific topic and lasts for only a couple of minutes.
Accessing the CD will normally present the RemoteScope Start-up screen shown here.
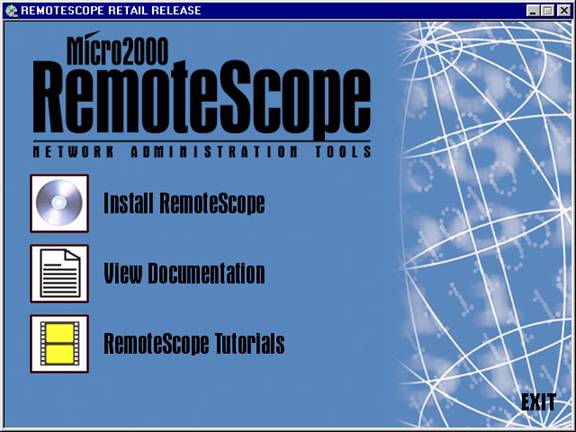
Start-up Screen
To view the tutorials, click on the bottom choice, labeled appropriately enough RemoteScope Tutorials. Then click on the tutorial title of your choice.
Note: If the access screen does not appear, you can still reach the tutorials by opening the folder on the CD labeled screencam and double-clicking on any of the individual lessons. However, in that case the lessons will be listed only by number and not by title.
When you finish one tutorial, it is necessary to close the Lotus ScreenCam program before starting the next one. That is because each tutorial opens a new session of ScreenCam, but ScreenCam allows only one session at a time to be open. To close ScreenCam, click the X in the small Lotus ScreenCam window in the lower right corner of your desktop. Then select the next tutorial or close the Start-up window if you are finished.
ScreenCam window
While you are in the Start-up screen, click on View Documentation and then on View README File. The README file will give you the latest tips on avoiding problems and getting the best use from RemoteScope.
We recommend reading this chapter through entirely before installing RemoteScope. Be aware that the Master Console must be installed first. Installation and activation of the Master Console must be complete before the Sub-Consoles or Client modules can be installed. The Client Is not installed from the CD but from a package created during the Master Console installation.
There are several steps to take before starting the installation of RemoteScope that will help to ensure a smooth, trouble-free install.
1. Determine which system will be the Master Console and which if any will be Sub-consoles.
2. Jot down the IP address range of the systems on the LAN that will use the program. It does not matter if the LAN uses static or dynamic IP addressing, as long as the starting and ending IP addresses of the range are known. These values will be needed to configure the Network Segment (described in Chapter 3) the first time the RemoteScope console is opened. Chapter 3 will also cover accessing Clients outside of the LAN.
3. Make sure that the systems receiving the Console and Sub-console modules have an active Internet connection. A Console must be activated before it can be used, and this is a simple procedure if done on-line during the installation. If Internet access is not available, it will be necessary to contact Micro2000 technical support to activate the program. However, activation is not required if this is a demo CD or Academic version of RemoteScope.
4. Have the PCPK product serial number handy. This is found on the CD case, and will be needed during installation.
5. You will also need to log in at the completion of installation. The default values are:
User Name: Remote Password: Scope
Be aware that the password is case sensitive.
6. See that the systems meet the minimum hardware and software requirements. These are slightly different for the Console and Client, and are listed on the following page.
Pentium-class CPU, 166Mhz (recommended Pentium II 333 MHz MMX or higher)
32MB memory (recommended 64MB or higher)
40MB available on local hard drive
4X CDROM drive
Video card capable of 256 colors, 800 by 600 pixels
10/100 Mbps NIC card
Windows 95B, Windows 98/SE, Windows NT SP3, Windows ME, Windows 2000, Windows XP
Internet Explorer 4.0 SP1 or better.
Internet connection
Pentium-class CPU, 75 MHz or higher
32MB memory (recommended 64M or higher)
2 MB available local hard drive
10/100 mbps NIC card
Windows 95B, Windows 98/SE, Windows NT SP3, Windows ME, Windows 2000, Windows XP
WinZip or WinRAR installed
1. Choose the system that is most convenient as the control point for the managing the network. This can be a desktop workstation rather than a server as long as it meets the minimum requirements listed in the previous section. Some care should be given to the choice though, because switching the Master Console to another system after installation will require reactivation of the Console and re-installation of the Client modules.
2. Close all applications on the system selected as the Console.
3. Insert the RemoteScope CD into the CD-ROM drive. If the system has autoplay capability, the RemoteScope start-up window will appear.
Start-up Screen
4. Click on the CD icon to the left of Install RemoteScope
Note: If the Start-up screen does not appear, use Windows Explorer to find the setup.exe file on the CD and double-click it, or go to the command line and type run D:setup.exe, where D is the drive letter for the CD-ROM drive.

Welcome Screen
5. After the Install Shield Wizard has been prepared you will see the Welcome screen. Click Next.
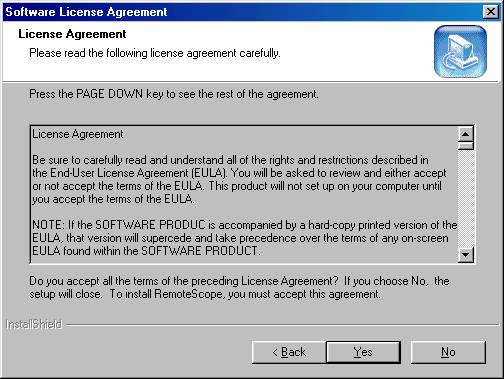
EULA screen
6. Read the End User License Agreement (EULA) and click YES to accept the terms and proceed with the installation. If you do not agree, click NO. RemoteScope will not be installed and you will be directed to exit from the install program. If you wish to study the EULA outside of the installation procedure, a copy of it is available in Appendix A of this manual or in the EULA.TXT file on the CD.

Info screen 1
7. In the Information screen, type in your User Name, Company Name and the PCPK serial number from the RemoteScope CD case. Click Next.
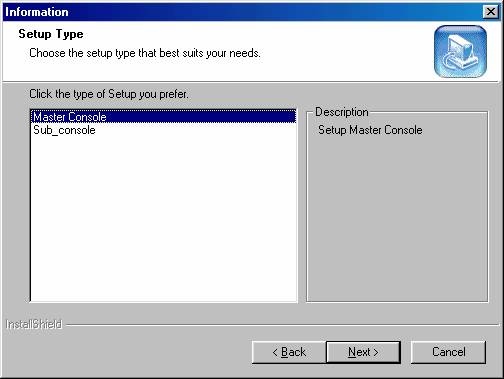
Master-Sub Screen
8. Designate whether this installation is for the Master Console or a Sub-Console. Remember that only one Master Console is allowed in any given network (or sub-net, as long as the IP addresses have no overlap with those of any other Master Console). The Demo and Academic versions allow only one Console, so it must be the Master Console.
9. The default destination path for the RemoteScope program files is C:Program FilesRemoteScope. Normally you will accept the default, but you may also browse to select another path. Click Next. The following screen will create the RemoteScope Program folder. Click Next again.
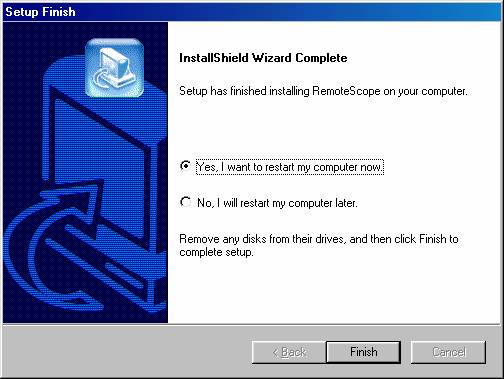
Finish screen
10. The RemoteScope program files will be copied to the destination folder. When complete, the Setup Finish window will appear. Select Yes, I want to restart my computer now, and then click Finish.
11. Installation of the Console is now complete. You will find that a new RemoteScope group has been created in the Windows Program Bar. This group will contain icons for the RemoteScope Console, Uninstall RemoteScope Console, Database Maintenance Utility, On-line Help, and Client Package. The desktop will also have a new shortcut icon to launch the Console.
Before running the RemoteScope Console or installing the Client modules, RemoteScope needs to be activated, as described on the next page.
The RemoteScope Console can be uninstalled in either of two ways. One is the traditional Add/Remove Programs feature in the Windows Control Panel.
For the other method, go to the RemoteScope group of the Windows Program bar and find the last item: Uninstall RemoteScope. This is the recommended method because if any files cannot be removed (for instance because they are open at the time), the Uninstall window will list them and they can then be removed manually.
1. Once the RemoteScope Master Console or Sub-console has been installed, open the RemoteScope group in the Windows program bar and click on RemoteScope Console. The first time you do this, you should see the RemoteScope Activation Wizard screen. Click Next.
Note 1: If you will not be able to complete the activation at this time, for instance because the Internet connection is not active, do not proceed. You will not be able to open the Console for the first time until Activation is complete.
Note 2: If you have a demo or Academic version of RemoteScope, activation is not required and the Activation Wizard will not appear. Proceed directly to the next section of the manual: Logging On.
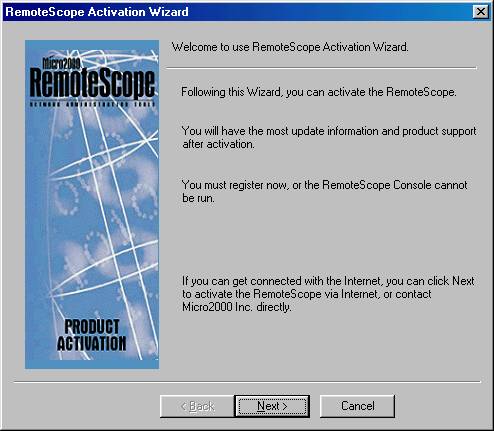
Activation Wizard
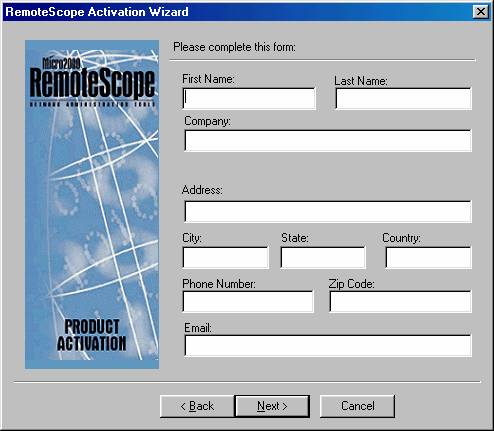
Info Screen 2
2. Fill in the Information screen that appears and click Next again to proceed to the Connect screen.
3. Make sure the Console system has an active Internet connection. Click on the Connect button. This will connect the Console system to Micro 2000s Activation Server, which will validate the information from Step 2 and the number of Client modules included in the license, and will activate the Console.
If this is the Master, it will also validate the number of Client Modules included in the license.
4. If you do not have a usable Internet connection or the activation fails for any reason, contact Micro2000 technical support at (800) 864-8008 to complete the activation.
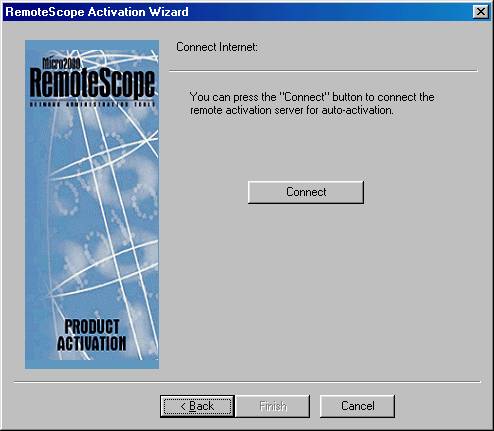
Connect Screen
5. RemoteScope will automatically reconnect to the Activation Server periodically (as described in Console Configuration, Chapter 3) to confirm current activation status and check for updates, so it is important for the Console system to keep a functioning Internet connection. If for any reason the Console is unable to connect, it will continue to try for three consecutive days before showing a prompt that there is an activation problem. At that point you must contact Micro 2000 technical support to re-activate.
6. It is also possible to re-activate at any time as long as the activation has not expired, by using the Re-Activate System command on the Consoles Tool menu.
7. If at any time the Console system is stolen or there is some other reason you need to halt its functionality without un-installing the program, this can be done through the Activation Server. Please let Micro 2000 know of the situation as soon as possible.
Once the Console has been activated by the Activation Server, the Log On window will appear. The default User name is Remote and the password is Scope. This first time you can log in without a user name or password, but on subsequent uses you will need to enter these values, with the S capitalized because login is case-sensitive. Each time you log on with these defaults, you will be prompted to change the default values and should do this at the first opportunity, as described in Chapter 3.
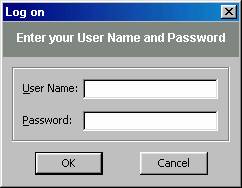
Logon
In a very large or dispersed network it is often not practical for a Console to manage all of the networks PCs at once. The program contains a feature called a Network Segment that allows the Console to see and interact with only the PCs within a certain range of IP addresses at any given time. There can be many network segments, organized into groups called Profiles.
The first time you log into a RemoteScope Console, it will ask you to set the Network Segment. Chapter 3 contains more information about network segments and profiles, but at this time it is necessary to create only one profile with a single network segment. For simplicity, this network segment should contain the entire range of addresses that the Console will be concerned with. It can be edited later if needed
Click OK and the program will take you to the Network Segment tab of the Console Configuration window.

Network Segment tab
Click on the button that says Create. This will bring up the Create a Profile window.
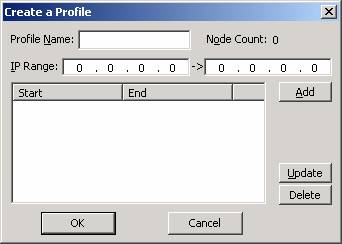
Create a Profile window
Configuring a network segment is just a matter of entering the starting and ending IP addresses of the range. With static IP addressing these would be the highest and lowest IP addresses used by any of the Clients. With dynamic addressing, this network segment will use the same starting and ending addresses as the DHCP server.
In the left-hand IP Range box, enter the 4 octets of the starting IP address of this network segment. In the right-hand box, put the ending IP address. Then click the Add button. The new addresses will be transferred to the lower pane.
Note 1: This first network segment of the Master Console should include the IP addresses of all Clients in its domain. Each Sub-console might connect to all of these or only a portion of them, and its first network segment would need to include only those Clients to which it will connect.
Note 2: Each octet must be between 1 and 255 (253 for the first octet). The ending address of a network segment must have a higher value than the starting address.
Note 3: The first octet must be the same for both the starting and ending IP address, and it is strongly recommended that the second octet is the same as well. This will normally be a concern only for WAN connections and the small handful of Class A domains.
Since there is only one network segment in this first profile, you are done. Click OK to close the Create a Profile window, and click OK again to close the Configuration window.
Installing the Client module takes only a double mouse click, and may be the simplest application installation you will ever see. First though, it must be distributed to the Client system. For security reasons, the module must be installed from the system where it will reside. After that, the Console is able to install software on the Client remotely, or take complete remote control of the Client.
Deploying the Client At the Master Console, in the RemoteScope group of the Windows programs menu, locate and click on the Client Package. The setupclient window will open, showing two files called setup.exe and vipsetup.exe. These are the Client setup and VIP Client setup programs.
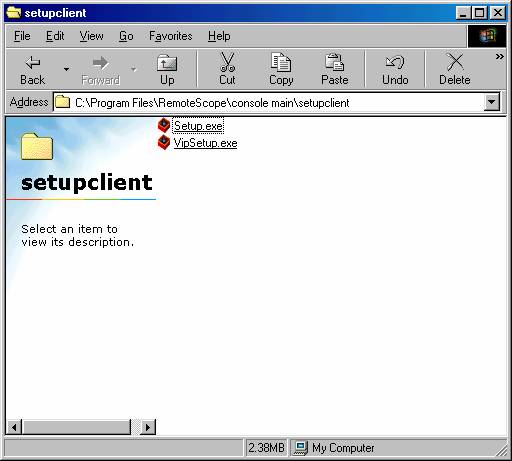
Setupclient window
There are three options for easily distributing these files to the Client nodes.
Option 1 E-mail the file to the user at each of the Client systems.
Option 2 Transfer the file to a server or shared resource that each of the Clients can access.
Option 3 Share the folder at C:Program FilesRemoteScope Console Mainsetupclient.
Option 4 (Not recommended) Transfer the file to a floppy diskette and carry it around to each system.
Note: Any one system will have either the Client module or the VIP Client module, but not both. Normally the VIP module is used for top executives. It requires the user to respond with permission before the Console can remote-control, browse or transfer files to the Client system.
1. Go to the Client system, or have the user do the install for you.
2. Save the setup.exe file from the e-mail message, or download it from the server or shared folder to the local C: drive.
3. Double-click on setup.exe (or vipsetup.exe). The Client module will be instantly installed. A prompt will appear telling you that the installation was successful.
Note: Administrative rights may be required in some cases to successfully install the Client module, for instance on Windows 2000 or other computers using Active Directory services.
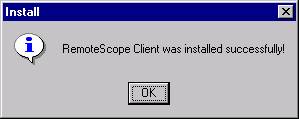
Click OK.
To uninstall a Client module, right-click the Client icon in the system tray and select Uninstall. You will first see the Log On screen shown below. Until you change them, the default user name is Remote and the password is Scope, just as with the Console.
After logging in, you will be able to uninstall the Client. This can also be done in remote control from the Console system, but only one Client at a time. There is no batch method for uninstalling multiple Clients.
Note: A Client module cannot be removed using Add/Remove Programs in the Windows Control Panel. It must be done from the stem tray icon. If the icon has been hidden, it must first be unhidden (as described in Chapter 3) before the Client can be uninstalled.
Also, the Client must be connected to a Console at the time so that the user name and password can be verified.
Now that the RemoteScope Master Console has been installed and activated, and the Client module has been deployed to its new homes around the network, it is time to get familiar with the program.
If you have also installed Sub-consoles, there are some differences in function and appearance between the Master and Subs that will be described at appropriate points in the text.
The main Console window is the basic user interface of RemoteScope, and all of the major functions can be accessed here. This is the window that appears whenever you open the program by clicking on RemoteScope Console in the RemoteScope program group. And after you log in, of course.
This main Console screen will remain open throughout the session, although it may be minimized or hidden behind other windows that open for specific functions.
The interface will be relatively familiar to anyone who has used Windows-based productivity software. Just under the Title bar at the top is a Menu bar with a series of drop-down menus, and right below that is a toolbar with shortcuts to the more common functions. These menus and tools will be discussed throughout the manual in the context of the functions they represent. Across the very bottom is the Status Bar
When the cursor is rested over any toolbar icon or menu item, a brief description of that item will be displayed in the Status Bar.
Display of the Status Bar and Toolbar can be turned on or off from the View Menu.
Most of the window is divided into three panes: left, right and bottom. The left pane is called the Tree View. On the right is the List View, and the bottom pane contains the Console Activity Log.
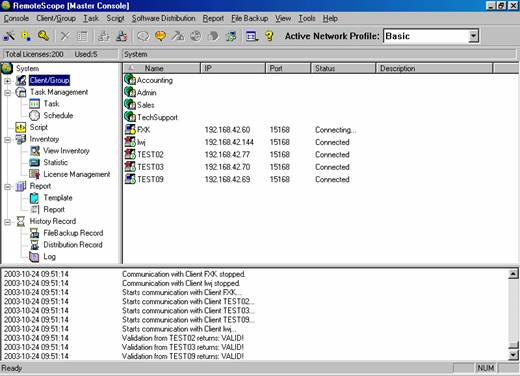
Master Console Main Screen
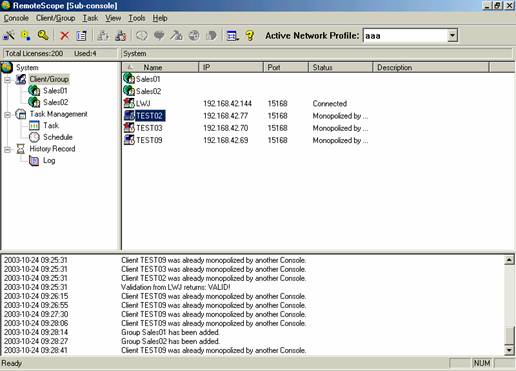
Sub-console Main Screen
As you can see, the Sub-console main screen is almost identical to the Master Console main screen. If you look close you will see that there are fewer selections in the Tree View, and the Software Distribution menu is removed from the menu bar. And the title bar of course says RemoteScope [Sub-console] rather than RemoteScope [Master Console]
The Tree View pane provides a hierarchical display of the Clients and Groups and of the major RemoteScope functions. Any folder (branch) in the tree that has subfolders can be expanded or contracted by clicking on the + or icons to the left of the folder.
 Any of the folders, Clients, Groups or functions can be
selected by clicking on its icon in the tree. The selected item will be highlighted. Most of these choices can also be made from the drop-down menus, but the
Tree View provides a useful overview of most parts of the program and in some
cases, quicker access.
Any of the folders, Clients, Groups or functions can be
selected by clicking on its icon in the tree. The selected item will be highlighted. Most of these choices can also be made from the drop-down menus, but the
Tree View provides a useful overview of most parts of the program and in some
cases, quicker access.
The folders available in the tree are:
System This is the root folder that contains the rest of the tree. It appears at the top of the list.
 Client/Group Expanding this branch will show a list
of all of the Groups and of individual Clients not associated with Groups. Further expanding one of the Group branches
will show the Clients in that particular group. Client/Group selection can also be done from particular items on some of
the menus. Clients and Groups are explored
in Chapter 4.
Client/Group Expanding this branch will show a list
of all of the Groups and of individual Clients not associated with Groups. Further expanding one of the Group branches
will show the Clients in that particular group. Client/Group selection can also be done from particular items on some of
the menus. Clients and Groups are explored
in Chapter 4.
Task Management The Master Console has a feature for creating and scheduling a variety of administrative tasks. The folder does not appear in the Tree View of a Sub-console. The task and schedule functions are also available on the Task Menu, as discussed in Chapter 9.
Script This folder provides access to a list of prepared VB scripts that can be run directly by clicking a script file in the List View. Scripting also applies to the Master Console only, and is covered in Chapter 10.
Inventory This contains shortcuts to hardware and software inventory and the Statistic function, all covered in Chapter 6. The Console Menu and Client/Group Menu provide alternate access to their respective inventories. Because the inventory is maintained at the Master Console only, the Inventory folder will be missing on a Sub-console.
Report Here you will find quick access to existing reports and to templates for creating new reports. This feature also appears only on the Master Console, because reports are based on the Master Consoles inventory database. More on Reports can be found in Chapter 13.
History Record Three types of records of system activity can be accessed through the History folder, including the File Backup Record found in Chapter 14, the Distribution Record, which is part of the Software Distribution feature discussed in Chapter 8, and the three System Logs, covered in Chapter 12. The System Logs are different than the Console Activity Log found in the next section of this chapter. The items in the History folder do not have corresponding menu entries, and can only be accessed through this folder.
Note: You may have observed that Remote Control is not one of the functions available from the Tree View. That is because the Client(s) must be selected first before activating Remote Control. The Remote Control function will be covered in Chapter 5.
This right-hand pane of the window shows information about whatever Client, Group or function has been selected from the menu or from the Tree View. The view will be different for each of those selections, and will be discussed in those appropriate sections of the manual.
In many cases, the presentation in the List View pane can be modified by choices in the View Menu. It is also possible to adjust the amount of the window used by the Tree and List views by dragging the bar separating the two panes.
This is the bottom pane of the Console window. It contains a sequential list of actions done by the Console since the beginning of the current session. This includes Start-up and configuration changes as well as all communications between Console and Clients. Each listing will contain the date, time and a description of the action.
The bar between the Activity Log and the upper panes can be dragged to display more or less of the log. If there are more entries than can be displayed in the pane, a scroll bar will appear along the right side of the pane.
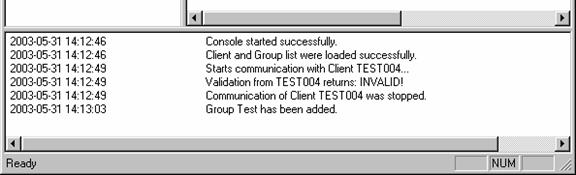
Activity Log Pane
The Console Menu is on the far left of the menu bar in the
Console Main Screen. Selecting Password
from this menu will bring up the Password Manager window, where you can change the User Name and Password for either the
Console or the Client nodes. You can
also open this window with the password icon ![]() on
the Toolbar.
on
the Toolbar.
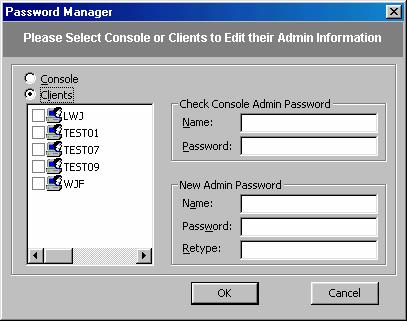
Password Manager screen
To change the Console user name and password, click the Console button in the upper left corner of the window. On the right side of the window, type your existing user name and password in the appropriate blanks. In the lower blanks, type in your new user name and password, then re-type the new password to confirm. Click OK to close the window.
Each Client system can have its own administrator user name and password. These can be different than the Console admin name and password and different from each other.
Click the Clients button, and a list of Clients will appear in the left pane, with a checkbox next to each one. Click in the checkbox to select a Client for a new password.
It is possible to change the admin name and password on multiple Clients simultaneously, as long as the old user name and password was the same on each system. Of course, in this case the new user name and password must be the same on each system also.
If you right-click in the Client pane, a pop-up menu will appear with two items: Select All and Invert Select. Select All will of course select all Clients in the list. If you want to select most of the Clients but not all, this can be done efficiently by first selecting those Clients you dont want, and then choosing Invert Select from the pop-up menu.
Once the Client selection has been made, type in the old admin name and password and then the new in the appropriate boxes. Retype the new password for confirmation, and click OK to close the window.
Selecting Configuration from the Console menu or clicking
the Configure icon ![]() from the Toolbar will bring up the
Configuration window. All of the
configuration choices are presented on one of the three tabs of the
window. The tabs are: General, Log and
Network Segment.
from the Toolbar will bring up the
Configuration window. All of the
configuration choices are presented on one of the three tabs of the
window. The tabs are: General, Log and
Network Segment.
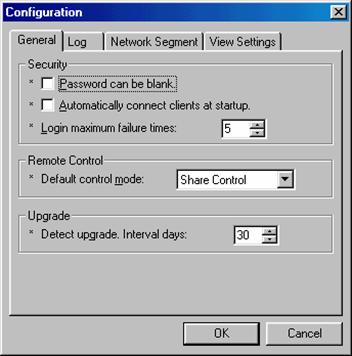
Configuration screen, General tab
This tab contains configuration options for three different functions: Security, Remote Control, and Upgrade Timer.
Security There are two check-boxes for passwords. One allows the password to be blank, which means that anyone can log into the Console without the Admin name and password. By default, it is not checked.
A second checkbox allows connection to all Clients that are online and have been previously added to that Consoles Client list, automatically whenever the Console program is opened. This feature can be very convenient, but care should be taken in an installation with Sub-consoles because only one Console at a time may be connected to any given Client, and the first Console that connects to a Client prevents all others from doing so until it disconnects.
The third item in this pane allows you to set the number of times an incorrect user name or password can be entered before the program locks the logon window. If the logon window locks, it will be necessary to close the Console and re-open it before trying again to log in.
Default Control Mode In the next pane is a pull-down list box labeled Default Control Mode. This sets the mode that the Remote Control feature will first be in whenever a Client is selected for Remote Control. More about this feature will be found in Chapter 5.
Upgrade Timer This sets the interval for the Console to automatically re-activate and check for updates. The range is from 1 to 30 days.

This tab provides for enabling and setting certain parameters for the three System Logs. These are discussed in Chapter 9.
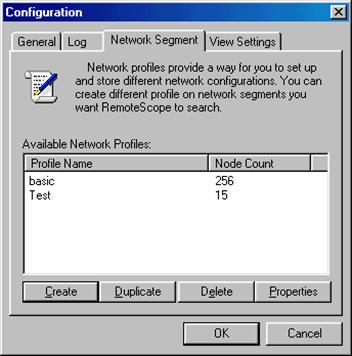
Network Segment Tab
The basics of configuring the Network Segment tab and creating a profile was covered in Chapter 2, but that was just one profile with a single network segment that covered the entire IP range accessed by the Console. In a small LAN, this is usually all that is needed for efficient management of the network.
Some RemoteScope installations involve thousands of networked PCs. Of course it would not be practical to wade through a list of all of these Clients every time you wished to select one or more Clients for an action. In such a situation it is useful to create many profiles, and each profile may have multiple network segments.
Creating and using these more complex profiles is the subject of the following paragraphs.
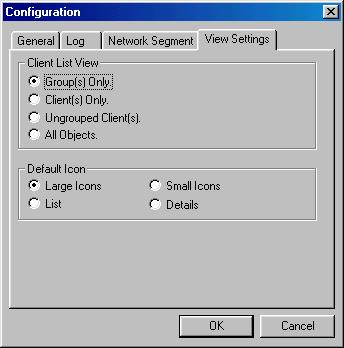
This tab allows you to change the default contents and appearance of the List View that displays when Clients/Groups is highlighted in the Tree View.
Client List View This upper pane has four c heck-boxes:
Group(s) Only will show just the Group icons.
Client(s) Only will display all Clients, but not their Group affiliation.
Ungrouped Clients are Clients that are not assigned to any group.
All Objects will display Group icons and all Clients, grouped or not.
Default Icon The lower pane d etermines the default appearance of the displayed objects. The choices are: Large Icons, Small Icons, List and Details. This also can be amended during the session, using the View pull-down menu.
The selected defaults will change the display as soon as the OK button is clicked. During the session, the display may also be changed at any time from the View pull-down menu or from the View item on the Client/Group pull-down menu, as described in the next chapter, but will revert to the default at each startup.
If multiple profiles are used, only one of them will be active at a time on any particular Console, and the Console will see and interact with only those Clients and Groups whose IP addresses fall within the network segment ranges included in that profile. Some careful thought should be given to the network configuration and how to set up the profiles to maximum advantage. Sometimes but not always, the profiles will correspond to the domains and primary controllers of an NT network.
To create a completely new profile, select the Configure command on the Console menu, and then the Network Segment tab. From here, the procedure is the same as the first profile created after installation. As before, Click the Create button on the Network Segment tab to bring up the Create a Profile window.
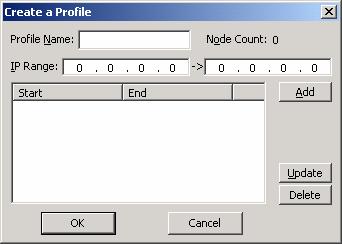
Create a Profile window
Give this profile a name, and enter the Starting and Ending IP addresses of its first network segment. Click Add.
If additional network segment ranges will be included in this profile, add the starting and ending address of each of those ranges in the same way.
When all ranges have been entered, Click OK to return to the Network Segment tab. To add another profile, click the Create button again.
Note: If a great many profiles are being added it may be easier to create them by editing the netsegment.cfg file. The procedure for this is listed in Chapter 11.

To change the IP information of an existing profile, display the Network Segment tab. In the list box labeled Available Network Profiles, double-click on the name of the profile you wish to edit, or highlight it and click the Properties button. Either of these will open the Profile Properties window for that profile.
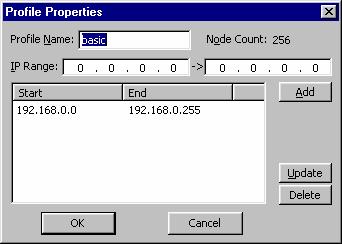
Profile Properties window
To add a new network segment to this profile, enter the Start and End addresses in the IP Range boxes and click Add.
To edit an existing network segment, highlight it in the list box and its Start and End addresses will appear in the IP Range boxes. Make the appropriate corrections in the IP Range boxes. Then click Update.
If you want to add a new network segment that is similar to an existing one, highlight the existing range and then make changes in the IP Range boxes. Click on Add instead of Update and the edited IP range will be added as a new segment, leaving the original one unchanged. This is a useful procedure, because any new segment will always have at least two octets in common with the existing segments. When all of the editing changes are complete, click OK to close the window.
Here are a few rules to keep in mind:
The Master Console and each of the Sub-consoles may all have different profiles, but the Master Consoles profiles collectively should cover all of the IP ranges used by any of the Sub-consoles.
If a network segment uses dynamic addressing, that segment should use the entire IP range addressed by the DHCP or WINS server for that subnet. A network segment that includes only part of a dynamic address range cannot guarantee to connect to any particular Client in that range.
A Client may be included in the network segments of several Consoles, but it may be connected to only one Console at a time.
Two Master Consoles can co-exist on the same LAN, but they will each be able to interact with only their own Clients and Sub-consoles.
On any Console, there can be as many as 99 network segments in all profiles combined.
In the main Console window, there is a pull-down list in the upper right-hand corner of the screen labeled Active Network Profile. To select a particular profile to be active, pull down the list and click on the desired profile. A prompt will ask if you are sure. If you are, click Yes.
The Console will immediately switch to the selected profile, and all Clients in the original profile will be disconnected. It will then be necessary to execute the Connect or Connect All command (covered in the next chapter) to connect to Clients in the new profile.
Normally, the only evidence on a Client system that RemoteScope is running on that system will be the icon in the System tray.
Right-clicking on this icon will open a short pop-up menu, which lists all of the actions that can be done from the Client end. The items on the menu are:
VIP Response
Send Message
Uninstall
View Log
Configure
About Client
Exit
The only items on this list that can be accessed by the local user without the Admin name and password are Send Message and About Client. Messaging is covered in Chapter 11, and About Client presents a screen showing the version number and registered owner.
The choice of VIP Response will be available only on a VIP Client, and is covered in the following section, Configuring the VIP Client.
Selecting any other item on the menu will open the login dialog, which requires the Admin name and password to be entered before proceeding to the selected item.
Note: In some cases the Client icon will be hidden, and the Client must be remotely configured as described in Chapter 4.
Uninstall As you might expect, this allows the Client module to be uninstalled.
View Log The Client has three system logs just like the Console, which are discussed in Chapter 9. This menu item allows the log contents to be viewed from the local system.
Configure The Configure window for a normal Client has three panes.
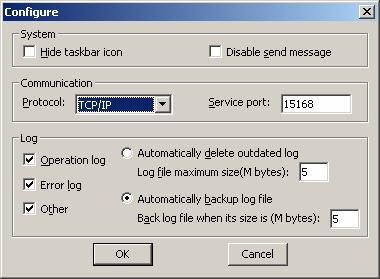
Normal Client Configure
The topmost pane, labeled System, has checkboxes to disable sending messages and to hide the taskbar icon. If the taskbar icon is hidden, the menu cannot be accessed and no further actions can be done from the Client, including of course sending messages. However, messages can still be received and replied to. The icon can be unhidden by using the Remote Configure feature described in Chapter 4.
The next pane, called Communication, has a list for selecting the protocol. At this time the only allowed protocol is TCP/IP A box to the right shows the Service Port. The default port value of 15168 is entered automatically but may be edited if necessary. RemoteScope can use ports between 10000 and 50000.
The lower pane called Log sets the parameters for the three system logs. Again, these will be found in Chapter 9.
Exit This will close the current session of the Client on the local system and remove the icon from the System tray. The Client module will restart the next time this computer is booted up.
On a VIP Client, right-clicking the icon will bring up a menu very similar to the one for a normal Client, with the additional item of VIP Response. All of the other menu features are identical, except for a small difference in Configure.
VIP Configuration
The VIP Configuration window differs from the Configure window of a normal Client because of the absence of the top pane. The Client icon in the taskbar of a VIP Client cannot be hidden, and messaging cannot be disabled.
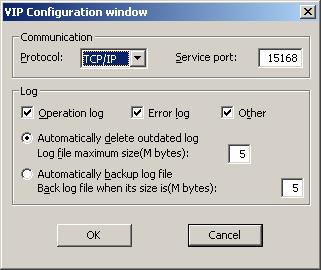
VIP Configuration window
VIP Response
This will first open the VIP Password screen. The VIP password is different than the Admin password. To proceed with this portion of the VIP Client configuration, enter the VIP password and click Logon.
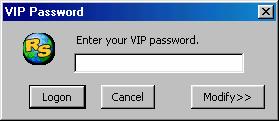
VIP password screen
The default VIP password is VipVip, It is case sensitive, so please notice the capitalization of both Vs. The default password should be changed as soon as possible after installation of the VIP Client. Typically, the VIP password is selected by the VIP user. The password can be changed after entering it, by clicking on Modify rather than Logon, which will add the lower pane to the screen as shown below.
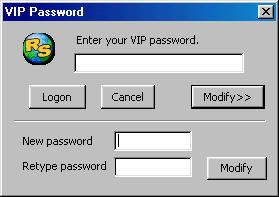
Type in the new password in the appropriate blank, and then in the lower blank re-type the new password to confirm. Click the lower Modify button to close the window. The new VIP password will be in effect the next time VIP Response is executed.
Setting Responses
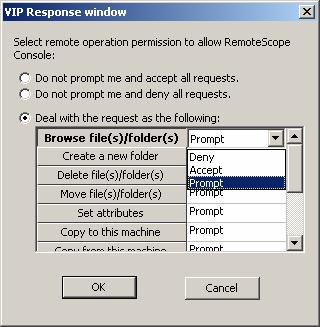
VIP Response Window
The VIP Response window opens after Logon. This window contains a list of all actions that a Console may request to do with this VIP Client, and the VIP user can select how the Client will respond to each action.
The choices are Accept, Deny and Prompt. If Prompt is selected, each time a Console requests that action, a prompt will pop up on the Client screen giving the user a choice to accept or deny the request. There are also global choices to Accept or Deny all requests, without being prompted.
To set the response for any given action, scroll the list box to locate a description of that action on the left-hand side of the box, and then click on the description. Next, double-click on the Response shown to the right of the Action Description. This will open a short menu. Click on Deny, Accept or Prompt.
Find the next action you wish to change the response for, and repeat the procedure. When all actions have the appropriate response, Click OK to close the window. The selected responses will be effective immediately.
The actions for which you can set a response are:
Browse file (s)/ folder (s) This allows the Console to browse any file(s) or folder(s) of the VIP Client. The other file transfer options are all based on this one. If Deny is selected, the response settings for the following five actions will be irrelevant.
Create a new folder A Console is able to create a new folder on the VIP Clients machine.
Move file (s)/ folder (s) File (s) or folder (s) can be moved from one directory to another directory on the VIP Client.
Set attributes File attributes, including renaming of files, Read-Only, Hidden, Archive and System, can be set for files of the VIP Client.
Copy to this machine File (s) can be copied from the Console to the VIP Client.
Copy from this machine File (s) can be copied from the VIP Client to the Console.
Start remote control A Console is able to monitor the VIP Client. Other remote control options are all based on this one. If this one is set to Deny, the response settings for the following four actions will be irrelevant.
Full control this machine Console is able to take full control of the VIP Client.
Share control this machine Console is able to share control of the VIP Client.
Shut down this machine Console is able to shut down the VIP Client remotely.
Restart this machine Console is able to restart the VIP Client remotely.
Before the Console can talk to or control a Client, it must first detect the Client and add it to its Client List. This can be done individually or in batch. With new installations it is usually most convenient to do in batch, and that is the procedure given here (see Chapter 4 for adding Clients singly). Select New Client from the Client/Group menu, and select Manually from the submenu. This will open the New Client window shown below.
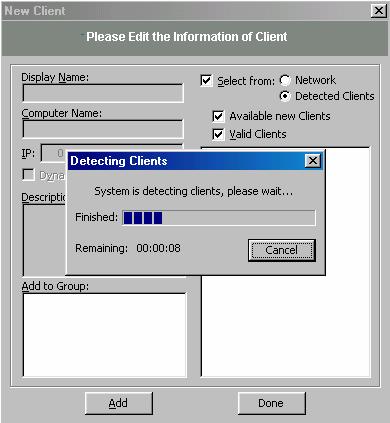
New Client Window
Check the box that says Select From, and then click the Detected Clients button. RemoteScope will scan the network segment and the right-hand box will show a list of all on-line systems that have a Client package installed. To select all Clients on the list, right-click in the Client pane and choose Select All from the pop-up menu. To add most but not all of the listed Clients, highlight the Clients that are not wanted, and choose Invert Select from the right-click menu. At the time Clients are detected they can also be added to Groups, which will be covered in the next chapter.
To restrict the display to only Clients not yet added, check the box labeled Available new Clients. The other box, Valid Clients, is used when a network has multiple Master Consoles, so that only those Clients with the same PCPK are detected.
When Client/Group is highlighted in Tree View, the List View will show icons of groups and individual Client nodes. The appearance of the icons provides a quick visual indication of the status of those Clients It is not necessary to memorize these, because the Status column also provides a short description.

 .
.


![]()


RemoteScope Clients can be managed individually and also in Groups. These Groups are unique to RemoteScope and do not need to correspond to the Windows groups or domains already set up on the network. The reason for creating a Group in RemoteScope is to allow a RemoteScope action to be done on multiple PCs simultaneously.
A Client can belong to more than one Group, and can also still be managed as an individual Client regardless of its group membership. It can also belong to different groups on each Sub-console.
All of the actions that would normally be taken regarding Clients or Groups are conveniently collected on the Client/Group menu on the main Console screen. Several of the items on the menu will apply only to selected Clients or Groups, and will be grayed out unless a Client or Group is selected. Selection can be done using the Tree View and List View panes of the Console main window, as explained in Chapter 3.
Those items that can be done to a specific Client or Group will also appear on a context menu (often called a short-cut menu) that is opened by right-clicking on the Client or Group icon in the List View.
This will open the Group selected in the List View, to show its Client members. If no Group is selected it will be grayed out. You can also open a Group by double-clicking the Groups icon in the List View.
Because this item does not apply to any existing Groups, in
order to access it you must highlight the Client/Group icon on the Tree View
rather than any of the listings in the List View, or by clicking on the New
icon ![]() on
the toolbar and selecting New Group
on
the toolbar and selecting New Group
When New Group is selected, it opens the Group Properties dialog box shown. At this time the left-hand pane of Group Members will be empty, and the right-hand pane of Excluded Members will contain all added Clients.
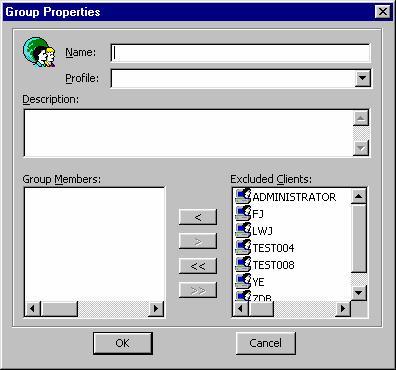
Group Properties dialog box
If you have created multiple profiles, you can select a profile from the list and only the Clients within the range of that profile will be displayed to be added. This prevents the Group from containing Clients from different profiles, which tends to cause confusion because only one profile can be accessed at a time.
In the right-hand pane highlight each Client you want to include in this Group, and click the < button to transfer it to the left pane. If you want to include all Clients in the excluded list, click the << button. Once Clients have been transferred, you can move any of the Group Members back to the excluded list by highlighting them and using the > button, or use >> to remove them all.
Give the new Group a name and a description (optional), and click OK.
Note: Group names, as well as other names throughout RemoteScope, follow the NT naming standard and must be alphanumeric characters. A dash or underscore is permitted, but no other symbols, punctuation or spaces.
Also, avoid using the name Local for a Group, because RemoteScope uses that term for the Master Console system.
As
with New Group, this is only available when the Client/Group icon in the Tree
View is highlighted, or from the New icon ![]() on
the toolbar. It
provides a sub-menu with four options: By Wizard, Manually, Import From, and
Export To.
on
the toolbar. It
provides a sub-menu with four options: By Wizard, Manually, Import From, and
Export To.
By Wizard
Choosing By Wizard from the New Client sub-menu will open the New Client Wizard window, which can take you step-by-step through any of three methods for adding one more new Clients to the Consoles Client list. These are:
Edit Information, Import from a special file, and Detect in the network segment.
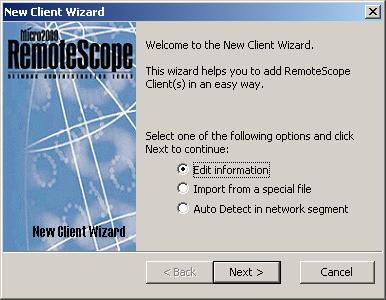
New Client Wizard
Edit information
This is the best choice for adding a single Client, when the information for that Client is known. Choose Edit Information and then click Next. This will bring up the screen to Input Client Information.
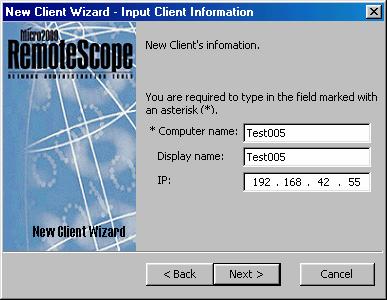
Enter the Computer name and IP address for the Client. You can also enter a Display Name for it. This is a name used only by RemoteScope, which can be different than the computer name used by the network. Click Next again to proceed to the Add to Group(s) screen.
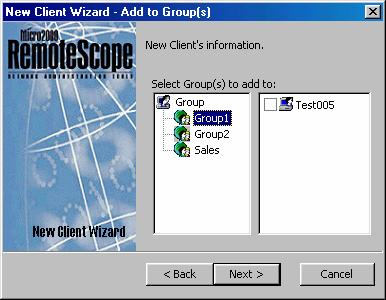
Highlight the Group or Groups for the Client to join and click Next. Note that you can also add this Client to a Group at a later time.
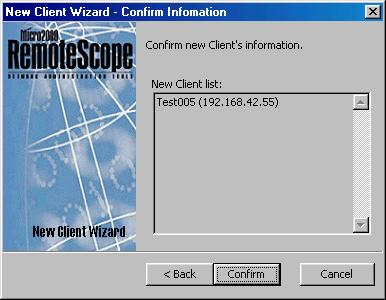
At the Confirm Information screen, double-check the Client data and if it is correct, click Confirm. If not, click Cancel and re-do the New Client procedure.
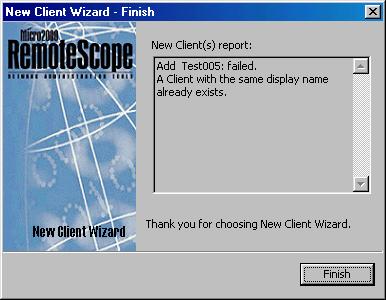
From the New Client (s) report, we can see if the new Client has been added or not. If the wizard failed to add this Client, the specific reason will be shown in the window. Click Finish to complete the New Client process and close the wizard.
|
Politica de confidentialitate | Termeni si conditii de utilizare |

Vizualizari: 2259
Importanta: ![]()
Termeni si conditii de utilizare | Contact
© SCRIGROUP 2025 . All rights reserved