| CATEGORII DOCUMENTE |
| Bulgara | Ceha slovaca | Croata | Engleza | Estona | Finlandeza | Franceza |
| Germana | Italiana | Letona | Lituaniana | Maghiara | Olandeza | Poloneza |
| Sarba | Slovena | Spaniola | Suedeza | Turca | Ucraineana |
Sonic Record Now Burning Instructions
This document can be found in Start > Programs > Sonic > Burning Instructions
Table of Contents
1.1 Different Formats Explained:
2.0 Adding Data to Formatted Discs
2.2 Making Discs Compatible: 4
|
Quick Format |
Full Format |
|
Faster (generally taking less than 60 seconds) |
Depending on the speed of the drive and the size of your media, this can take up to 180 minutes |
|
Can be performed on all CD and DVD write-once discs and on previously formatted rewriteable discs. |
Only available for CD-RW and rewriteable DVD media |
|
Must be initially performed for all write-once media |
Must be initially performed for all CD-RW and rewriteable DVD media |
|
Will not repair disc errors |
Repairs some errors by preventing data from being written on damaged sections of the disc |
Insert a blankrewritable media disc into the recorder drive. (CD-R, CD-RW, DVD+R, DVD+RW)
1. Open My Computer and then Right-Click on the recorder drive.
2. Select Format from the list of options.
3. The Sonic DLA Format window will open after selecting Format.
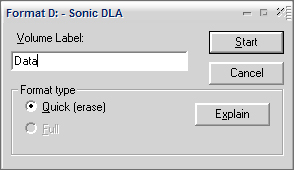
4. In the Format window enter a name for the disc under Volume Label, select the format type, and then click Start to begin the format process.
5. Select Yes to format the media. If a rewritable disc was inserted the disc will be erased and then formatted for DLA.
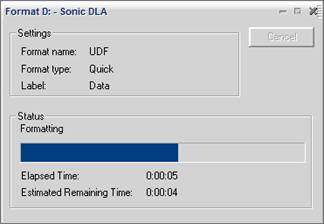
6. The format process will begin.
7. After the Format is complete press OK to continue.
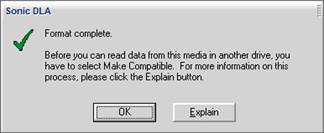
The disc will then be ready to add data to.
2.1 Adding Data:
Once the disc has been formatted files and folders can be sent to the recorder drive using one of the methods mentioned below:
2.2 Making Discs Compatible:
The Make Compatible feature makes discs readable by most optical drives, even those that do not have DLA installed.
Information about Make Compatible:
Make Compatible finalizes write-once DVD discs.
Data cannot be added to the disc once the operation has completed. Do not use this feature unless you are done copying files to the write-once disc.
Make Compatible closes the session on some rewriteable DVD discs.
Data can be added to these rewriteable discs once the operation has completed, but Make Compatible will need to be run again before new data can be shared with someone who does not have DLA installed on their computer.
Make Compatible closes the session on CD-R discs.
Data can be added to a CD-R disc once the operation has completed, but make Compatible will need to be run again before this new data can be shared with someone who does not have DLA installed on their computer. Because each
Make Compatible operation consumes disc space the maximum number of times it can be run on a single CD-R disc is approximately 15 times.
After adding data to the disc by using one of the methods above the disc should usually be completed by using the Make Compatible feature.
Depending on the amount of data on the disc the Make Compatible operation can easily take from one minute to thirty minutes.
|
Politica de confidentialitate | Termeni si conditii de utilizare |

Vizualizari: 1311
Importanta: ![]()
Termeni si conditii de utilizare | Contact
© SCRIGROUP 2025 . All rights reserved